

OBD-II Code U0147: Lost Communication With Gateway 'B'
The Ultimate 2026 Guide to Diagnosing and Fixing U0147
- Test the battery and alternator first; system voltage dropping below 12.0V during cranking causes modules to go offline and triggers U0147.
- Do not immediately replace the $800+ Gateway or BCM; a chafed wire or a failed secondary module like the radio is often the true culprit.
- Measure CAN bus resistance at OBD-II pins 6 and 14 with the battery disconnected; a healthy network reads exactly 60 ohms.
- On 2007-2018 Chrysler, Dodge, and Jeep vehicles, U0147 accompanied by a 'NO BUS' dashboard message strongly indicates a failing Totally Integrated Power Module (TIPM).
What Does U0147 Mean?
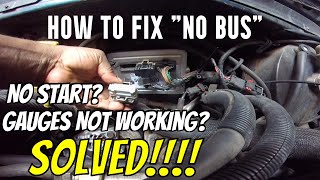
 🎬 See how to fix the 'NO BUS' error on Mopar vehicles. indicating a complete network communication failure." loading="eager" fetchpriority="high" style="max-width:100%;height:auto;border-radius:6px;display:block;box-shadow:0 2px 8px rgba(0,0,0,0.1);" />
U0147 means your car's primary control module lost its connection to a secondary data network hub called 'Gateway B'. Modern vehicles use multiple computer networks (e.g., high-speed for the engine, low-speed for the body). A gateway acts as a router, translating and passing information between these networks. When Gateway 'B' goes offline, entire groups of modules stop communicating, causing widespread electrical failures.
Technical definition: The official SAE/OBD-II definition is "Lost Communication With Gateway 'B'". This diagnostic trouble code (DTC) indicates a fault in the Controller Area Network (CAN) bus, where the communication link between a primary control module and the specific gateway module designated as 'B' is interrupted.
Can I Drive With U0147?
Yes, But With Caution. Yes, but it is strongly discouraged. Driving strictly limits to getting the vehicle to a repair shop immediately. You will likely experience sudden limp mode, complete loss of instrumentation, stalling, or failure of critical safety systems like ABS and airbags. Continuing to drive with unstable voltage damages other sensitive electronic modules, escalating repair costs.
Common Causes

- Low Battery Voltage or Poor Ground Connection (Very Common) — Control modules require stable voltage above 12.0V to function. A weak battery, faulty alternator, or a loose main ground strap causes modules to drop offline intermittently, triggering a flood of communication codes including U0147.
- Damaged, Chafed, or Corroded Wiring Harness (Very Common) — The CAN bus wiring harness rubs against sharp metal edges on the frame or engine block, wearing through the insulation and causing a short circuit. Corrosion in connectors from moisture also blocks the data signal.
- Water Intrusion into a Module or Connector (Common) — Water from clogged sunroof drains or leaking windshield seals enters the cabin, shorting out critical modules like the Body Control Module (BCM) or the Gateway itself. This creates green/white corrosion on the pins and circuit board.
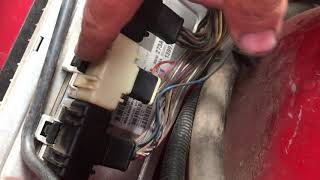
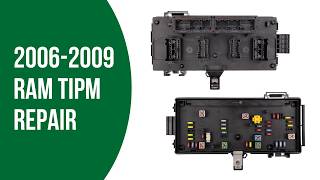
- Faulty Gateway Module (BCM or TIPM) (Common) — The gateway module itself fails internally. This is often the Body Control Module (BCM) or, on Stellantis (Chrysler/Dodge/Jeep) vehicles, the Totally Integrated Power Module (TIPM), which is a highly documented failure point. 🎬 Watch: Full tutorial on TIPM removal, installation, and soft resets.
- Blown Fuse for a Networked Module (Common) — A power surge or short circuit blows a fuse, cutting power to the gateway or another critical module. The rest of the network registers this power loss as a communication failure.
- Faulty Secondary Node (Module) on the Network (Less Common) — Another module on the same data bus (e.g., the radio or ABS module) fails internally and 'screams' garbage data onto the network, preventing all other modules from communicating.
- Aftermarket Device Interference (Rare) — Poorly installed aftermarket remote starters, alarms, or cheap OBD-II plug-in devices introduce electrical noise or create a partial short on the CAN bus wires, disrupting communication.
- Failed Terminating Resistor (Rare) — The CAN bus requires a 120-ohm resistor at each end. If one resistor (built into a module like the ECM) fails, network resistance changes from 60 ohms to 120 ohms, causing signal reflections and data errors.
Symptoms

- Check Engine Light and Multiple Warning Lights — The primary engine control module logs U0147 and illuminates the Check Engine Light. Because the gateway relays data for many systems, you will see a cascade of warning lights for ABS, Traction Control, and Airbags.
- 'NO BUS' or Communication Error Messages — Chrysler, Dodge, and Jeep vehicles display a 'NO BUS' message on the odometer, indicating a complete CAN bus failure. Other makes show messages like 'Service Advancetrac' or 'Check Charging System'.
- No-Crank or No-Start Condition — The engine fails to crank or start. The immobilizer system cannot receive the authorization signal from the key via the gateway, preventing ignition.
- Engine Stalls or Enters 'Limp Mode' — The vehicle suddenly loses power or enters a failsafe 'limp mode' with restricted speed. This protective measure triggers when the engine controller loses communication with critical sensors.
- Erratic or Dead Instrument Cluster — The speedometer, tachometer, and fuel gauge behave erratically, drop to zero, or go completely dead because the cluster is not receiving network data.
- Erratic Body Electrical Behavior — Wipers turn on by themselves, headlights flash, the horn sounds randomly, or power windows stop working. This indicates a major network breakdown, often tied to a failing BCM or TIPM.
- Erratic Transmission Shifting — The transmission shifts harshly or refuses to change gears. This occurs when the Transmission Control Module (TCM) loses communication with the Engine Control Module (ECM).
Diagnostic Flowchart
Tap your situation to follow the diagnostic path that matches what you're seeing on this code.
Common Fixes & Costs
- Replacing a Defective Battery or Cleaning Grounds — Parts: $150-$300, Labor: $0-$100, ~0.5 hr book time (DIY)
- Repairing a Chafed or Broken CAN Bus Wire — Parts: $10-$50, Labor: $250-$1,200+, ~3 hr book time (Intermediate)
- Replacing a Faulty Gateway Module (BCM/TIPM) — Parts: $400-$1,200, Labor: $150-$400, ~2.5 hr book time (Professional)
- Replacing a Faulty Secondary Module (Radio, ABS, etc.) — Parts: $200-$1,500, Labor: $120-$250, ~1.5 hr book time (Intermediate)
Used vs. New Parts: Buying Guide
When a used part is worth it: For vehicles older than 10 years, a used Gateway, BCM, or TIPM from a salvage yard is cost-effective, provided you have access to professional programming.
Donor-vehicle mileage cap: roughly under 100000 miles for the part to have meaningful remaining life.
Donor quality checklist:
- Match the part number EXACTLY. Superseded numbers are rarely interchangeable.
- Obtain the VIN of the donor car to check compatibility.
- Inspect the part for water damage, corrosion, or physical case damage.
Decision logic:
- If The part requires programming → Factor in $150-$300 for a shop to program the used part to your vehicle's VIN.
- If The vehicle is mission-critical → Buy a new or professionally remanufactured module with a long-term warranty.
- If A 'plug-and-play' remanufactured unit is available → This is the best compromise, offering a warranty without needing dealer programming.
Warranty tradeoff: Used parts carry a 30-90 day warranty covering only the part. New OEM or remanufactured parts carry a 1-year or longer warranty.
Worst-case if a used part fails: $400-$800 if the used module is dead on arrival, requiring you to pay diagnostic and installation labor twice.
What Happens If You Wait — Timeline
- 0-1 month: Check Engine Light illuminates with U0147. Symptoms are intermittent. Safety systems like ABS are compromised. (MPG impact: 0-2%% · Added cost: $0)
- 1-3 months: Electrical glitches become frequent: gauges drop to zero, transmission shifts hard, or the engine stalls. Voltage instability stresses other modules. (MPG impact: 2-5%% · Added cost: $50-$150)
- 3-6 months: Constant electrical stress causes permanent damage to an unrelated module on the network, such as the ABS module. (MPG impact: 5-10%% · Added cost: $400 - $1,500)
- 6+ months: The root cause fault destroys the primary gateway module (BCM/TIPM). The vehicle will not start. A simple wire repair becomes a mandatory module replacement. (MPG impact: 10-25%% · Added cost: $1,500 - $3,000)
Cost of Not Fixing It
- Immediate: Unpredictable stalling, no-start conditions, and failure of safety systems like ABS and airbags pose a significant safety risk. (Added cost: 0)
- 1-3 months: Continued driving with unstable system voltage or intermittent shorts causes data corruption or electrical stress on unrelated control modules, permanently damaging them. (Added cost: $500 - $1,500)
- 3+ months: A minor wiring short eventually destroys a major module like the BCM or TIPM. A $100 wiring repair becomes a mandatory module replacement. (Added cost: $1,200 - $3,000)
Diagnosis Steps
- Perform a Full Battery and Charging System Test
Verify the battery is fully charged (above 12.4V at rest) and perform a load test. With the engine running, check alternator output (13.5V-14.5V). Modules require stable voltage above 12.0V to operate. Clean battery terminals and inspect the main ground cables for tightness.
Tools: Multimeter, Battery Load Tester, Wire Brush (Beginner) - Scan All Vehicle Modules for Codes
Use a professional-grade OBD-II scanner to access all modules (PCM, BCM, ABS, TCM). Note which modules log 'U' codes and which are completely unresponsive. A flood of 'U' codes points to a central network problem rather than a single component failure.
Tools: Advanced Bi-Directional Scan Tool (Beginner) - Inspect Fuses and Conduct a Visual Wiring Check
Inspect all fuses related to the Gateway Module, BCM, TIPM, and Radio. Visually trace the wiring harnesses connected to the main modules. Look for chafing against metal parts, melting, or green/white corrosion inside major connectors.
Tools: Flashlight, Fuse Puller, Multimeter (Intermediate) - Test CAN Bus Resistance
Disconnect the negative battery terminal. At the OBD-II port, measure resistance between Pin 6 (CAN High) and Pin 14 (CAN Low). A healthy network reads exactly 60 ohms. A reading of 120 ohms means a terminating resistor is missing. A reading near 0 ohms indicates a short circuit between the wires.
Tools: High-Quality Multimeter (Advanced) - Test CAN Bus Voltage
With the ignition ON, measure the DC voltage at OBD-II Pin 6 and Pin 14 against a chassis ground. A healthy bus shows an average voltage of 2.6V-2.7V on CAN High and 2.3V-2.4V on CAN Low. If both lines show identical voltage, they are shorted together. If one shows 0V, it is shorted to ground.
Tools: High-Quality Multimeter, OBD-II Breakout Box (Advanced) - Isolate the Faulty Module via Disconnection
If bus resistance is incorrect (e.g., shorted to 0 ohms), unplug modules on the network one by one. Re-measure resistance at the OBD-II port after each disconnection. When resistance returns to 60 ohms, the last module unplugged is causing the network crash.
Tools: Wiring Diagram, Multimeter (Advanced) - Analyze CAN Bus Waveform with an Oscilloscope
Connect a dual-channel oscilloscope to Pin 6 and Pin 14. A healthy CAN bus shows a clean, symmetrical, mirror-image square wave. Any distortion, noise, or incorrect voltage levels points directly to the specific type of electrical fault.
Tools: Automotive Oscilloscope, OBD-II Breakout Box (Professional)
When This Code Triggers (Freeze-Frame Conditions)
- Vehicle Speed: 45-65 mph (Steady highway driving, when modules expect constant communication.)
- System Voltage: 9.5-11.5V (During engine crank, a low voltage event causes modules to drop offline.)
- RPM: 0 (Key-On, Engine-Off (KOEO) during initial module self-test and check-in.)
- Time Since Start: 10-20 Minutes (After the vehicle is fully warmed up and running for a period.)
Related Codes
- U0140 — 'Lost Communication With Body Control Module'. The BCM is frequently the main gateway. If U0140 and U0147 appear together, the BCM, its power/ground, or its wiring is the prime suspect.
- U0073 — 'Control Module Communication Bus "A" Off'. Indicates the entire primary CAN bus is down. U0073 suggests a fundamental network failure, like a short circuit in the main bus wiring affecting all modules.
- U0155 — 'Lost Communication With Instrument Panel Cluster (IPC)'. The instrument cluster is the primary display for network data. When the gateway fails, the IPC is one of the first modules to show symptoms.
- U0101 — 'Lost Communication with TCM'. If the gateway fault interrupts the high-speed powertrain network, the TCM loses communication, resulting in limp mode.
How to Talk to a Mechanic About This Code
Say this: "I have a U0147 'Lost Communication with Gateway B' code and a flood of other 'U' codes. I verified the battery and fuses are good. I need a technician experienced with CAN bus diagnostics to perform a network integrity test, including checking bus resistance for shorts or opens. Please do not replace any modules until the wiring harness is thoroughly inspected."
This signals you understand the problem is complex and network-related. It directs the shop away from premature module replacement and toward proper electrical diagnosis.
Avoid saying:
- 'My check engine light is on, can you look at it?'
- 'The car is doing crazy things, just fix it.'
- 'I think I need a new computer, can you give me a price?'
Questions to ask before authorizing the repair:
- What were the results of the CAN bus resistance and voltage tests at the OBD-II port?
- Did you find a short, an open, or a bad module? What specific diagnostic step confirmed the failure?
- If a module needs replacement, does the new one require programming, and is that included in the estimate?
- Can you show me the damaged wiring or the failed component before replacing it?
Where to Take It: Dealer vs Independent vs Chain
- Dealer:
Recommended if the issue requires module programming. Their access to proprietary wiring diagrams is a major advantage for network faults.
Best for: Vehicles under warranty., Complex issues like TIPM on Chrysler or software updates on new Fords., When a module requires dealer-level programming.
Downsides: Highest labor rates ($180-$250/hr)., Often defaults to expensive module replacement instead of targeted wire repair. (Typical cost: +50% vs. baseline) - Independent Shop:
Best overall fit, IF you find a shop with a proven reputation for electrical diagnostics. Ask if they are comfortable diagnosing CAN bus failures.
Best for: Out-of-warranty vehicles., Shops specializing in electrical diagnostics (ASE L1 certification).
Downsides: A general mechanic lacks the advanced tools for network diagnosis., May lack access to the latest manufacturer programming tools. (Typical cost: +0% vs. baseline) - Chain Shop:
AVOID for diagnosing U0147. They are not the right choice for advanced electrical troubleshooting.
Best for: Battery testing and replacement.
Downsides: Technicians are not equipped for complex network diagnostics., High likelihood of incorrect diagnosis and unnecessary parts replacement. (Typical cost: -10% vs. baseline)
When to Walk Away From the Repair
If the total estimated repair cost for the U0147 fault exceeds 50% of your car's current private-party value, seriously consider not fixing it.
- Car worth $5000, fix is $2800: Walk away. The repair cost is over 50% of the vehicle's value.
- Car worth $15000, fix is $2000: Fix it. The repair cost is well under the 50% threshold and restores functionality.
What Scan Tool You Need for This Code

Minimum: A scanner that reads ALL vehicle modules (ABS, SRS, BCM), not just the engine. A basic $20 code reader is useless for this fault.
A cheap code reader only talks to the engine computer. U0147 is a network problem; you must see which modules are online and which report communication faults.
Budget: BlueDriver Pro Scan Tool (~$100) — Reads and clears codes from all modules. This is the absolute minimum for seeing the full scope of the network problem.
Mid-range: Foxwell NT710 / Autel MaxiCOM MK808BT (~$250) — Provides live data streaming from all modules. Allows you to see if a module is powered on and responding, even if it sets codes.
Professional: Autel MaxiSys MS906 Pro (~$1200) — Provides Network Topology Mapping, graphically displaying the CAN bus layout to instantly show which modules are offline (gray) or have codes (orange).
Rent vs buy: A free rental scanner from an auto parts store is insufficient. Invest in a mid-range tool like an Autel MK808, or spend the money on a professional diagnosis.
How to Clear the Code After You Fix It
- Reconnect the battery if disconnected for repair.
- Use a professional OBD-II scan tool to clear the U0147 code from ALL modules.
- For modern Fords, perform a BMS reset by leaving the vehicle undisturbed and locked for 8 hours.
- Perform a complete drive cycle to allow readiness monitors to run self-tests.
Drive cycle (~30 minutes): From a cold start, idle for 2-3 minutes. Drive for 15-20 minutes with a mix of city and highway conditions. Allow the vehicle to cool down completely.
Readiness monitors affected: Comprehensive Component Monitor, Misfire Monitor
Before emissions retest: drive at least 100 miles to fully set monitors.
Watch out for:
- Disconnecting the battery does not reliably clear a U-code and resets all readiness monitors to 'Not Ready', guaranteeing an emissions failure.
- Taking the vehicle for an emissions test immediately after clearing codes results in failure because monitors have not completed.
Will This Fail Emissions / State Inspection?
Yes — this code typically fails an OBD-II emissions inspection.
- California: An illuminated Check Engine Light is an automatic failure. After repairs, a full drive cycle must be completed to set readiness monitors before retesting.
- New York: An active Check Engine Light automatically fails the emissions inspection. Clearing the code just before the test fails the vehicle due to 'Not Ready' monitors.
- Texas: In counties requiring emissions testing, an illuminated Check Engine Light results in an automatic inspection failure.
Most Commonly Affected Vehicles
- Dodge, Ram, Chrysler, Jeep Various (Ram 1500, Grand Caravan, Wrangler) (2007-2018) — Extremely common issue. These vehicles use a Totally Integrated Power Module (TIPM) that acts as a central gateway. TIPM failure causes the classic 'NO BUS' message and widespread electrical gremlins.
- Ford F-150 (2017-2020) — Covered by Ford SSM 48563. The transmission wiring harness improperly routes and chafes on a bellhousing stud, causing shorts that lead to U0147 and shifting problems.
- Chevrolet / GMC Silverado, Sierra, Tahoe (2007-2014) — U0147 is often caused by poor BCM ground connections located in the driver's side kick panel, corroded connectors under the driver's seat, or internal BCM failure.
- Ford Various (F-150, Explorer, Fusion) (2015-2024) — A low battery or improper replacement without resetting the Battery Management System (BMS) causes modules to shut down to conserve power, triggering U-codes.
- Ford F-150 Lightning (2023-2023) — TSB 23-2095 addresses a software issue in the Gateway Module A (GWM) causing communication DTCs. Requires a dealer software update.
- Jeep Wrangler (JL) / Gladiator (JT) (2018-2024) — The smaller auxiliary battery used for the auto start/stop system is a frequent failure point. Its failure causes voltage instability and a cascade of communication codes.
- Volkswagen / Audi Jetta, Golf, A4, Q5 (2010-2018) — Water intrusion from clogged sunroof drains or cowl drains drips directly onto the CAN Gateway or Comfort Control Module, causing catastrophic failure.
- BMW Various (X5, 3-Series, 5-Series) (2008-2024) — U0147 points to a failure of the Junction Box Electronics (JBE) or Front Electronic Module (FEM/BDC), which act as gateways.
Manufacturer-Specific Notes
- Chrysler/Dodge/Jeep/Ram: The 'NO BUS' message on the odometer is the hallmark of a CAN bus failure. The cause is overwhelmingly a faulty Totally Integrated Power Module (TIPM) or a chafed wiring harness near it.
- Ford: Always suspect the Battery Management System (BMS). If the battery dies, the BMS limits module function to save power. The system must 'relearn' the battery state by leaving the vehicle completely undisturbed for 8 continuous hours.
- General Motors (Chevrolet/GMC): On GMT900 trucks (2007-2014), check for corrosion on the large electrical connectors under the driver's seat, which are exposed to moisture from wet boots.
- Volkswagen/Audi: Check for damp carpets in the front footwells. Clogged sunroof drains allow water to drip directly onto the CAN Gateway or Comfort Control Module, causing failure.
Real Owner Stories
2014 Ram 1500 at 90K miles with intermittent stalling
Vehicle intermittently stalled, failed to start, and displayed the 'NO BUS' message alongside U0147. Replacing the battery did not fix it.
What they tried:
- Replaced the battery.
- Visually inspected TIPM connectors for corrosion.
Outcome: The dealer diagnosed and replaced the Totally Integrated Power Module (TIPM) due to a known internal failure.
Lesson: On Chrysler/Dodge/Ram vehicles, intermittent electrical issues accompanied by 'NO BUS' and U0147 strongly point to a failing TIPM.
2008 Dodge Nitro with hesitation and dashboard lights
Vehicle hesitated, entered limp mode, and flashed all dashboard lights. Scanner revealed 13 'U' codes.
What they tried:
- Inspected the TIPM module.
- Inspected under-hood wiring harnesses.
Outcome: The owner discovered the CAN bus wires resting directly against a hot coolant pipe, causing electrical interference. Moving the harness resolved all codes.
Lesson: Physical interference is as bad as a broken wire. Perform a thorough visual inspection of harnesses near hot or vibrating components.
2012 Ford F-150 with 9 simultaneous engine codes
Truck suddenly threw 9 codes at once, including communication faults.
What they tried:
- Checked all fuses.
- Traced wiring harnesses along the frame rail.
Outcome: The owner found a single wire rubbed through its insulation near the splash shield. Repairing this one wire cleared all nine codes.
Lesson: A single wiring fault creates a cascade of seemingly unrelated codes. Trace the circuit shared by all failing components.
How to Prevent This Code From Triggering
- Perform Annual Battery and Charging System Checks (Once per year) — A weak battery causes low voltage conditions (<12.0V), making sensitive electronic modules drop off the network and trigger communication codes.
- Apply Dielectric Grease to Critical Connectors (When servicing connectors) — A non-conductive layer of dielectric grease blocks moisture, preventing the corrosion that creates high resistance and disrupts data signals.
- Inspect and Secure Wiring Harnesses (During oil changes) — Securing loose harnesses with zip ties prevents vibrations from rubbing wires against sharp metal edges, avoiding shorts.
- Keep Water Drains Clear (Twice per year) — Clogged sunroof and cowl drains cause water to overflow into the cabin, dripping directly onto the BCM or gateway module.
Frequently Asked Questions
What is a Gateway Module in a car?
A gateway module acts as a network router and translator for your car. It directs messages between separate data networks (like high-speed engine and low-speed interior buses). This allows all the car's computers to share information and function together.
What are the most common mistakes when diagnosing U0147?
The biggest mistake is immediately replacing an expensive module like the BCM or TIPM without proper diagnosis. The actual cause is usually a simple wiring issue, a bad ground, or a cheaper secondary module crashing the network. Always test the battery, grounds, and CAN bus resistance first.
Can I just reset the U0147 code?
You can clear the code with a scan tool, but it returns immediately upon the next ignition cycle if the hardware fault persists. Clearing the code only resolves the issue in rare cases of a one-time low-voltage event. Do not clear codes before an emissions test, as it resets readiness monitors.
My mechanic wants to replace the whole wiring harness. Is this necessary?
It is sometimes necessary if the harness has widespread damage. Finding a single intermittent short in a complex harness takes hours of diagnostic labor at $150+ per hour. If diagnostic time exceeds 8 hours, replacing the harness becomes cheaper and more reliable than splicing data wires.
Can a weak battery really cause all these problems?
Absolutely. Control modules are sensitive computers requiring stable voltage above 12.0V. During engine cranking, a weak battery's voltage plummets, causing modules to reboot, glitch, or send corrupt data.
What is a terminating resistor and why does it matter?
A 120-ohm terminating resistor sits at each physical end of the CAN bus network to prevent electrical signal reflections that corrupt data. A healthy network utilizes two resistors, resulting in a total measured resistance of 60 ohms. If one fails, communication becomes highly unreliable.
My basic scanner only shows U0147. Why are my ABS and airbag lights on?
Basic scanners only read codes from the engine computer (PCM). The ABS and Airbag modules have their own processors and store their own 'lost communication' codes. You need a professional bi-directional scan tool to read every module and see the full network failure.
Is U0147 an expensive code to fix?
Costs range from $0 for tightening a loose ground wire to $3,000+ for replacing a programmed gateway module and extensive diagnostic labor. A typical wiring repair or used module replacement averages $300 to $800. Proper diagnosis prevents wasting money on unnecessary parts.
Key Takeaways
- Test the battery and alternator first; system voltage dropping below 12.0V during cranking causes modules to go offline and triggers U0147.
- Do not immediately replace the $800+ Gateway or BCM; a chafed wire or a failed secondary module like the radio is often the true culprit.
- Measure CAN bus resistance at OBD-II pins 6 and 14 with the battery disconnected; a healthy network reads exactly 60 ohms.
- On 2007-2018 Chrysler, Dodge, and Jeep vehicles, U0147 accompanied by a 'NO BUS' dashboard message strongly indicates a failing Totally Integrated Power Module (TIPM).
Helpful Videos
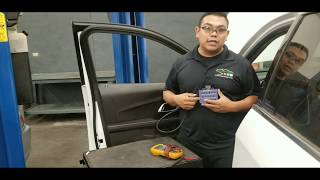
![How To Test CAN BUS With A Multimeter [CAN Bus Resistance Check] Mechanic Mindset](https://img.youtube.com/vi/JPE42HSJxAk/mqdefault.jpg)




The information in this article is provided for general reference and educational purposes only. Vehicle specifications, procedures, and part compatibility can vary by production date, trim level, and region. Always consult your vehicle's factory service manual and verify part numbers before purchasing or performing repairs. Safety-critical components such as airbags, seat belts, and braking systems should be installed by a qualified professional.
- 🎬 Helpful Videos
- What Does U0147 Mean?
- Can I Drive With U0147?
- Common Causes
- Symptoms
- Diagnostic Flowchart
- Common Fixes & Costs
- Used vs. New Parts: Buying Guide
- What Happens If You Wait — Timeline
- Cost of Not Fixing It
- Diagnosis Steps
- When This Code Triggers (Freeze-Frame Conditions)
- Related Codes
- How to Talk to a Mechanic About This Code
- Where to Take It: Dealer vs Independent vs Chain
- When to Walk Away From the Repair
- What Scan Tool You Need for This Code
- How to Clear the Code After You Fix It
- Will This Fail Emissions / State Inspection?
- Most Commonly Affected Vehicles
- Manufacturer-Specific Notes
- Real Owner Stories
- 2014 Ram 1500 at 90K miles with intermittent stalling
- 2008 Dodge Nitro with hesitation and dashboard lights
- 2012 Ford F-150 with 9 simultaneous engine codes
- How to Prevent This Code From Triggering
- Frequently Asked Questions
- What is a Gateway Module in a car?
- What are the most common mistakes when diagnosing U0147?
- Can I just reset the U0147 code?
- My mechanic wants to replace the whole wiring harness. Is this necessary?
- Can a weak battery really cause all these problems?
- What is a terminating resistor and why does it matter?
- My basic scanner only shows U0147. Why are my ABS and airbag lights on?
- Is U0147 an expensive code to fix?
- Key Takeaways
- 🎟️ Get 5% Off