

U0140 on 2003-2014 Volvo XC90: Lost Communication With Central Electronic Module Causes and Fixes
On a 2003-2014 XC90, U0140 almost always points to a failing Central Electronic Module (CEM), often caused by water damage from clogged sunroof drains. The most common fix is to have your original CEM repaired and waterproofed by a specialist, which costs around $200-$400 and avoids expensive dealer reprogramming.
- U0140 on a 2003-2014 XC90 is a strong indicator of a problem with the Central Electronic Module (CEM), not just a random wiring fault.
- The most common cause is water damage from clogged sunroof drains or a leaky cowl. Check for dampness under the carpets near the dashboard.
- Do not immediately buy a new CEM from a dealer. The most reliable and affordable fix is to send your original module to a specialist for repair and waterproofing.
- Symptoms are widespread and electrical, including a no-start condition, dead battery, and multiple warning lights.
- Preventative maintenance includes regularly cleaning your sunroof drains to avoid water ingress.
What's Unique About the 2003-2014 Volvo XC90
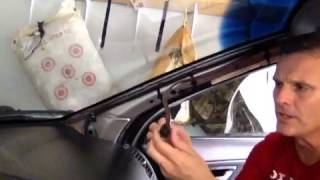
The first-generation Volvo XC90 is notorious for CEM failures, making this a very platform-specific issue. The primary cause is a design vulnerability where water from clogged sunroof drains or a leaky cowl grommet drips directly onto the CEM, which is located under the dashboard, typically above the driver's side footwell. This leads to corrosion and internal failure, triggering a cascade of electrical faults and the U0140 code. Unlike many other vehicles where this code might point to a simple wiring issue, on the XC90, the CEM itself is the most likely culprit. Some repair services note that the 2004 model year CEM, specifically part number 8688513, is particularly prone to failure from overheating 🎬 See how to remove a 1999-2004 CEM, which affects the low-speed CAN network first.
Symptoms You May Notice
- Multiple random warning lights on the dashboard (e.g., ABS, SRS, Brake Failure).
- Instrument cluster gauges stop working or behave erratically.
- Headlights, taillights, or interior lights flickering, staying on, or not working at all.
- Windshield wipers or horn activating on their own or failing to work.
- Power windows, door locks, or power seats become inoperative.
- Sunroof stops working.
- The engine will not crank or start (immobilizer fault).
- A diagnostic scanner cannot communicate with the CEM or any other modules.
- Parasitic battery drain that kills the battery overnight.
- Transmission shifts harshly or a 'clunk' sound is heard.
- Replacing the instrument cluster (DIM) when gauges act up. The DIM is often just displaying the symptoms of a bad CEM.
- Replacing individual components like light switches or wiper motors. The problem is usually the CEM not sending the command, not the component itself.
- Replacing the battery without diagnosing the root cause. A failing CEM can cause a parasitic drain that kills a good battery.
Most Likely Causes
- Central Electronic Module (CEM) Failure due to Water Damage 🔴 High Probability The CEM is located in a vulnerable position under the driver's side dashboard where water from clogged sunroof drains or a leaky windshield cowl seal can drip onto it, causing corrosion and short circuits. The sunroof drain tubes run down the A-pillars and can become clogged with dust and debris over time, causing water to overflow and run down into the footwell.
How to confirm: Visually inspect the CEM and its connectors for any signs of green or white corrosion, rust, or moisture. The area under the carpet may also be damp or show signs of water staining. You can test the sunroof drains by pouring a small amount of water into the sunroof tray and checking if it drains freely onto the ground behind the front wheels.
Typical fix: Remove the original CEM and send it to a specialist for repair, cloning, and waterproofing. This is more cost-effective than buying a new one from a dealer. It is critical to also clean the sunroof drains to prevent a recurrence. 🎬 Watch: How to clear clogged sunroof drains
Est. part cost: $150-$400 for a mail-in repair service. - Internal CEM Component Failure 🟡 Medium Probability Aside from water, these modules can fail from age, heat, and vibration, leading to cracked solder joints or failed microprocessors on the circuit board. Some specific part numbers, like 8688513 found on 2004 models, are known to be prone to overheating and internal failure.
How to confirm: This is a diagnosis of exclusion. If there is no water damage, the power/ground connections are good, and the CAN bus wiring is intact, the module has likely failed internally. A specialist can test the module on a bench.
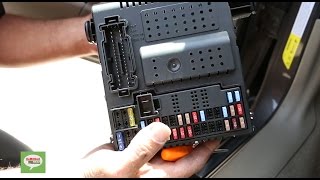
Typical fix: The fix is the same as for water damage: have the original CEM repaired and rebuilt by a specialist service. These services often apply a conformal coating to the board to protect against future moisture 🎬 Watch: 2005-2013 Volvo CEM removal walkthrough and use dielectric grease on the connectors.
Est. part cost: $150-$400 for a repair service. - Poor Power or Ground Connection to CEM ⚪ Low Probability Connectors can become corroded from water intrusion, which is a common issue for this platform. Also, the main CEM connector can become loose, especially if work has been done in the area, such as replacing the cabin air filter.
How to confirm: Using a multimeter, check for stable 12V+ power at the appropriate pins on the CEM connector with the key on. Check for continuity to ground (less than 0.1 ohm) on the ground pins. Visually inspect the connector pins for corrosion or being backed out. For a 2009 model, power pins are B2, B16, B24, C4, C25 and ground pins are B5, D6.
Typical fix: Clean corroded ground points to bare metal or repair the damaged power or ground wire. Clean connector pins with an electronics cleaner and apply dielectric grease.
Est. part cost: $1-$20 for wiring supplies. - Weak Battery or Failing Alternator ⚪ Low Probability
How to confirm: Test the battery voltage with the car off (should be >12.4V). Test the alternator output with the car running (should be 13.7V-14.7V). Low or unstable voltage can cause modules to drop off the network and set communication codes.
Typical fix: Replace the battery or alternator.
Est. part cost: $150-$500
Rare But Worth Checking
- CAN Bus Wiring Fault: While less common than CEM failure on this car, a short or open in the CAN bus wiring harness can also cause a loss of communication. This could be from rodent damage, previous accident repair, or abrasion. Sometimes another faulty module on the network can crash the bus, preventing the CEM from communicating.
Diagnosis Steps
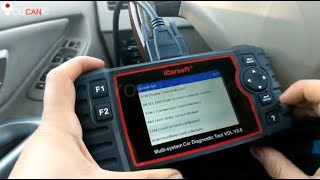
- Perform a full system scan with a Volvo-compatible scanner (like VIDA). Note all 'U' codes and which modules are not communicating.
- Check and charge the battery. Ensure system voltage is above 12.4V with the engine off.
- Locate the CEM under the dashboard on the driver's side, above the pedals. Inspect the surrounding area, under the carpet, and on the CEM's case and connectors for signs of water intrusion.
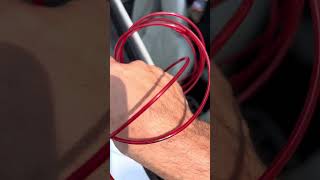
- As a preventative measure, clean the sunroof drains. Use weed trimmer line to snake through the front drain tubes located in the corners of the sunroof opening, which run down the A-pillars. Ensure water drains freely to the ground.
- Disconnect the battery. Unplug the large connectors from the CEM. Inspect the pins in both the module and the connectors for green or white corrosion. Clean any corrosion found with an electronics cleaner and a small brush.
- If no obvious damage is found, use a multimeter to verify good power and ground at the CEM connector. For example, on a 2009 model, check for 12V+ at pins B2, B16, B24, C4, C25 and good ground at pins B5, D6.
- If power and ground are good, the CAN bus wiring must be checked. With the battery disconnected, measure resistance between pins 6 (CAN High) and 14 (CAN Low) of the OBD-II port. The reading should be approximately 60 ohms. A reading of 120 ohms indicates an open circuit or a missing terminating module.
- With the key on, measure voltage at the OBD-II port. CAN High (pin 6) should be ~2.6-3.5V and CAN Low (pin 14) should be ~1.5-2.4V. If voltages are stuck at 2.5V, the network is inactive. If a line is shorted to ground or power, the voltage will be incorrect.
- If all wiring, power, and grounds are confirmed good, the CEM has failed internally and must be sent to a specialist for repair or cloning.
Parts You'll Likely Need
- Central Electronic Module (CEM) Repair Service
(OEM #30786475, 30682982, 30728539, 31394157, 8688513, 30765646)— This is the most common failure point for code U0140 on this vehicle. Repairing the original module is the most cost-effective solution as it avoids the need for expensive dealer programming.
Trusted brands: XeMODeX, Volvo Diagnostic, Module Repair Pro
OEM price range: $1200-$2000 (New from dealer, includes programming)
Aftermarket price range: $200-$450 (For a mail-in repair or cloning service of your original unit)
Related Codes That Often Appear With This One
- U0073 — This code means 'Control Module Communication Bus 'A' Off,' indicating a total network failure. If you see this with U0140, it points to a more severe network-wide problem, often originating from the CEM or main wiring.
- U0155 — 'Lost Communication with Instrument Panel Cluster (IPC)'. The instrument cluster is another module on the network. It often loses communication at the same time as the CEM, or as a direct result of the CEM failing.
- CEM-1A51 to CEM-1A64 — These are Volvo-specific codes for communication loss with various other modules (e.g., TCM, SWM, DDM). They frequently accompany U0140 and confirm the CEM is the source of the network disruption.
- CEM-DF13 to CEM-DF16 — These are Volvo-specific codes indicating a short-circuit to ground or B+ on the high-speed CAN network. They are strong evidence of a network hardware fault and require a tool like VIDA to read.
Technical Service Bulletins (TSBs) & Recalls
- Volvo Technical Journal TJ34241 - Addresses a '12V battery charge fault' message and DTC B129F96 in the CEM, requiring a system reset.
- Volvo Technical Journal TJ31038 - While not directly for U0140, this TSB addresses water ingress and corrosion issues in the CEM on 2005-2006 models, outlining correct harness assembly to prevent problems.
Platform-Specific Known Issues
- A known issue involves the grommet for the wiper motor harness in the plenum not sealing correctly, allowing water to enter and damage the CEM.
- Clogged sunroof drains are a primary cause of water ingress that leads to CEM failure. Regular cleaning of the drains is a key preventative measure.
- The CEM with part number 8688513, common on 2004 models, is known to be highly unreliable due to overheating and should be avoided as a replacement part.
Mechanic-Grade Diagnostic Values
- CAN Bus Network Resistance — expected: ~60 Ω between Pin 6 (CAN-H) and Pin 14 (CAN-L) at the OBD-II port with the battery disconnected.. Failure: A reading of ~120 Ω indicates one of the two terminating resistors (or the wiring to it) has failed. A reading of 0 Ω indicates a short between the CAN lines.
- CAN Bus Voltage (Key On, Engine Off) — expected: CAN High (Pin 6): ~2.6V to 3.5V. CAN Low (Pin 14): ~1.5V to 2.4V. Both lines idle at ~2.5V when no data is being transmitted.. Failure: CAN High voltage being equal to or less than CAN Low voltage. Either line being shorted to 0V (ground) or 12V (B+). Both lines stuck at 2.5V can indicate an inactive module.
- CEM Power and Ground Pins (at module connector) — expected: 12V+ on pins B2, B16, B24, C4, C25. Less than 0.1 Ω resistance to ground on pins B5, D6 (based on 2009 model year data).. Failure: No voltage on power pins or high resistance on ground pins indicates a wiring issue supplying the module, not an internal CEM fault.
- CAN Port Health (at disconnected module) — expected: Resistance between CAN HI and CAN LOW pins on the module itself should be 28k-50k Ω. Resistance from either CAN pin to the module's ground pin should be megaohms (open).. Failure: Low resistance (a short) to ground on either CAN pin often indicates damage from a lightning strike or welding.
Hidden / Shadow Codes Worth Checking
- CEM-DF13 / CEM-DF14: Indicates a short circuit to ground or B+ (battery voltage) on the High-Speed CAN bus wiring. (see via Requires a Volvo-specific scan tool like VIDA. These are manufacturer-specific codes not visible on generic OBD-II readers.)
- CEM-DF15 / CEM-DF16: Similar to the above, these codes also point to short circuits on the High-Speed CAN network, providing strong evidence of a hardware or wiring fault rather than just a module communication timeout. (see via Requires a Volvo-specific scan tool like VIDA.)
Scan Tool Commands That Help
- Volvo VIDA: CEM Reload — This function is used to download software from Volvo's central database to a new or existing CEM. It is required when installing a new module or attempting to fix software corruption on the existing one.
- Volvo VIDA: CAN module recovery method (TJ 27236) — This is a specific recovery procedure used when a module like the CEM becomes unresponsive ('bricked') due to an interruption during a software download, such as a laptop powering off mid-flash.
- Volvo VIDA: Diagnostics > Fault Trace > Erase All — This is the standard procedure within VIDA to clear all stored Diagnostic Trouble Codes from all modules after a repair has been performed.
Wiring & Ground Locations
- CEM Power/Ground Pins — On the multi-pin connectors that plug directly into the Central Electronic Module, located above the driver's side footwell.. Verifying stable power (e.g., pins B2, B16, B24, C4, C25) and solid ground (e.g., pins B5, D6) is the first step before condemning the module. A loss of either will cause a total communication failure.
- A-Pillar Harness / Connectors — The wiring harness that runs up the A-pillar (next to the windshield) on the driver's side.. This area is a common chafe point for wiring and is also where water from clogged sunroof drains can enter, damaging both the harness and the connectors. Wiggling this harness while monitoring CAN resistance can help find intermittent faults.
- OBD-II Port Pins 6 & 14 — The data link connector under the driver's side dashboard.. These are the direct access points for the High-Speed CAN bus. All network-wide voltage and resistance tests can be performed here, giving a quick overview of the entire network's health without having to access individual modules first.
Real Owner Repair Stories
- Volvo Forums user story (2002 Volvo XC70 (P2 Platform, similar CEM architecture)) — CEM would not power up or communicate after a failed software update.
❌ Tried (didn't work) Re-running the software flash in VIDA., Using the 'advanced reset button' in VIDA., Attempting to download full software from Volvo.
✅ What actually fixed it The user found and followed Volvo Technical Journal (TJ) 27236, which details a specific 'CAN module recovery method for failed software download'. This procedure successfully restored communication and function to the 'bricked' CEM. - Volvo Owners Club Forum, advice from an independent mechanic (2005 Volvo XC90) — General advice regarding common failures on this model year.
✅ What actually fixed it The independent mechanic specifically warned that the 2005 model year is prone to CEM failure due to water ingress and advised checking this as a primary cause for electrical issues. - XeMODeX repair forum user story (2003 Volvo XC90) — In hot weather (above 30°C / 86°F), all electronics would shut down while driving, but the engine would continue to run. Indicators and brake lights would stop working.
❌ Tried (didn't work) A Volvo dealer cleaned and reset the CEM, but the problem recurred intermittently.
✅ What actually fixed it The recurring nature of the fault, specifically triggered by heat, pointed to an internal component failure on the CEM circuit board. The final recommended fix was to have the CEM repaired or replaced.
OEM Part Supersession History
8688513→Multiple, including 30786475, 30765646, etc.— Part 8688513 is known for a high rate of internal failure due to overheating.
Heads up: CRITICAL: Although technically listed as compatible for some 2004 models, multiple specialist repair services strongly advise AGAINST using a CEM with part number 8688513 as a replacement donor. Its failure rate is exceptionally high.
Model Year Variations Within This Range
- 2003-2005: These early model years are widely reported as being the most susceptible to the transmission and electrical issues (including CEM water ingress) that can lead to U0140 and other network codes.
- 2007-2014: A facelift occurred in 2007, introducing new engine options like the 3.2L I6. While the fundamental P2 platform and CEM design remained, models from 2009-2014 are generally considered more reliable with fewer of the 'teething' issues from the early years.
Diagnostic Flowchart
Other Known Issues on This Vehicle
Issues unrelated to this code that are worth knowing about as an owner of this generation:
- Automatic Transmission Failure (GM 4T65-E in T6 models) 🔴 High — Very common on 2003-2005 T6 models, often failing before 100,000 miles. A class-action lawsuit was filed regarding this issue.
- AWD Angle Gear / Collar Sleeve Failure 🔴 High — Common across all AWD models. The splines on the collar sleeve connecting the transmission to the angle gear wear out, resulting in loss of AWD. Often occurs between 80,000-150,000 miles.
- Premature Rear Wheel Bearing Failure 🟠 Medium — Frequently reported failure, sometimes at mileage as low as 50,000-70,000 miles. Results in a loud humming or grinding noise from the rear of the vehicle.
- Valve Body Failure in Aisin-Warner Transmissions (V8 and 2.5T models) 🟠 Medium — Common on models from 2006 onwards, causing harsh shifting, shuddering, and violent downshifts, particularly between 60,000 and 100,000 miles. (Ref: A TCM software update was released, but often the valve body requires replacement.)
Used vs. New Parts: Buying Guide for This Vehicle
When a used part is the smart pick: A used CEM from a junkyard is ONLY a smart choice if you are using a 'cloning' or 'data transfer' service. You send your original failed CEM and the donor used CEM to a specialist, who transfers the immobilizer data, VIN, and vehicle configuration from your old module to the used one. This avoids dealer programming.
Donor-vehicle mileage cap: roughly under 150000 miles for the part to have meaningful remaining life.
What to inspect on the donor part:
- CRITICAL: Avoid any used CEM with part number 8688513, regardless of condition.
- Inspect the donor vehicle for signs of water leaks in the driver's footwell or sunroof area.
- Examine the connectors on the used CEM for any hint of white or green corrosion, or rust on the casing.
- Source a part from a post-facelift (2007+) vehicle if possible, as they are generally more reliable.
OEM-only on this vehicle (don't cheap out):
- Central Electronic Module (CEM) - A used part CANNOT be installed directly without cloning/programming. A new part MUST be programmed by a Volvo dealer or specialist with VIDA.
Aftermarket brands forum-validated for this vehicle:
- XeMODeX (Offers repair, cloning, and remanufactured units with software transfer).
- Module Repair Pro (Offers repair services).
- Volvo Diagnostic (Offers remanufactured units with software transfer).
Brands owners have reported issues with on this vehicle:
- No-name, unverified repair services on platforms like eBay without a significant number of positive reviews specific to Volvo CEMs.
Real Owner Stories
Aggregated from forums and TSBs cited above. Mileages and costs reflect what owners reported in those sources.
2004 Volvo XC90
Symptoms: Instrument cluster gauges behaving erratically and headlights flickering or not working at all. The CEM was prone to overheating.
What fixed it: Sent the CEM to a specialist repair service for a rebuild to address internal component failure and cracked solder joints.
Cost: $150-$400
Source hint: Matthews Volvo Site discussion on P2 platform CEM failure and XeMODeX services
2005 Volvo XC90
Symptoms: Multiple random warning lights on the dashboard including ABS and SRS. Found green and white corrosion on the CEM pins after heavy rain.
What fixed it: DIY cleaning of the badly corroded CEM connectors and pins with electronics cleaner, restoring functionality without replacement.
Source hint: Volvo Owners Club Forum thread titled 'DIY cleaning of a badly corroded CEM'
2009 Volvo XC90
Symptoms: Diagnostic scanner cannot communicate with the CEM. Checked power at pins B2, B16, B24, C4, C25 and ground at B5, D6.
What fixed it: Identified internal CEM failure after verifying all power, ground, and CAN bus wiring (60 ohms at OBD-II port) were intact.
Source hint: Article Context Diagnosis Steps and Forum Citations
Related OBD-II Codes
Frequently Asked Questions
My 2004 XC90 is acting up; is there a specific CEM part number I should look out for?
Does Volvo Technical Journal TJ31038 apply to my 2005 XC90?
I have a '12V battery charge fault' message on my dashboard; is there a TSB for this?
Can I use a CEM from a Volvo S60 or V70 to fix my XC90's U0140 code?
How can I check if my sunroof drains are causing the CEM failure?
Is it better to buy a new CEM from a dealer or use a repair service?
Helpful Videos

We Have This Part in Stock




The information in this article is provided for general reference and educational purposes only. Vehicle specifications, procedures, and part compatibility can vary by production date, trim level, and region. Always consult your vehicle's factory service manual and verify part numbers before purchasing or performing repairs. Safety-critical components such as airbags, seat belts, and braking systems should be installed by a qualified professional.
- Volvo XC90:
- 🎬 Helpful Videos
- 🛍️ Shop This Part
- What's Unique About the 2003-2014 Volvo XC90
- Symptoms You May Notice
- Most Likely Causes
- Rare But Worth Checking
- Diagnosis Steps
- Parts You'll Likely Need
- Related Codes That Often Appear With This One
- Technical Service Bulletins (TSBs) & Recalls
- Platform-Specific Known Issues
- Mechanic-Grade Diagnostic Values
- Hidden / Shadow Codes Worth Checking
- Scan Tool Commands That Help
- Wiring & Ground Locations
- Real Owner Repair Stories
- OEM Part Supersession History
- Model Year Variations Within This Range
- Diagnostic Flowchart
- Other Known Issues on This Vehicle
- Used vs. New Parts: Buying Guide for This Vehicle
- Real Owner Stories
- 2004 Volvo XC90
- 2005 Volvo XC90
- 2009 Volvo XC90
- Related OBD-II Codes
- Frequently Asked Questions
- 🎟️ Get 5% Off