

U0100 on 2010-2017 GMC Terrain: Lost Communication with ECM Fixes
On a 2010-2017 GMC Terrain, U0100 most often means there's a wiring problem between the vehicle's modules and the Engine Control Module (ECM). This is frequently caused by chafed wires in the engine harness, corrosion in the X411 underbody connector, or a failed ECM. A failed ECM is a particularly common cause on the 2.4L engine, sometimes due to oil contamination from other engine sensors.
- U0100 on a 2010-2017 Terrain is a critical code indicating the Engine Control Module (ECM) is offline.
- Before suspecting a bad ECM, thoroughly inspect the engine wiring harness for chafing near the back of the engine, a known issue on this vehicle.
- Also inspect the ECM connectors for oil contamination (especially on 2.4L models) and check the X411 connector for corrosion. [5, TSB #PIT5427B]
- Always verify battery voltage and ground connections first, as simple electrical issues can cause this complex code.
- Due to the complexity of network diagnostics, professional service is highly recommended.
What's Unique About the 2010-2017 Gmc TERRAIN

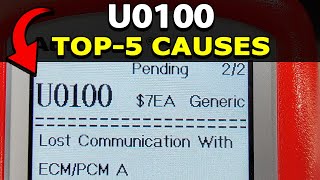
The first-generation GMC Terrain and its sibling, the Chevy Equinox, are known for specific issues that can trigger a U0100 code. 🎬 Watch: Top 5 causes for the U0100 communication code. One well-documented problem is the engine wiring harness chafing against engine components, causing shorts. Additionally, models with the 2.4L Ecotec engine have a higher-than-average rate of ECM failure, sometimes caused by oil wicking up the wiring harness from leaking VVT solenoids or oil pressure sensors and contaminating the ECM's connectors. Another key failure point is the X411 connector located under the rear of the vehicle, which is highly susceptible to corrosion that disrupts network communication.
Diagnostic Flowchart

Tap your situation to follow the diagnostic path that matches what you're seeing on this vehicle.
Symptoms You May Notice
- Engine will not start (no-crank condition)
- Engine starts and then immediately stalls
- Check Engine Light is on
- "Service StabiliTrak" message on the Driver Information Center (DIC)
- "Service Power Steering" message on the DIC
- Transmission defaults to a single gear (limp mode) or won't shift
- Instrument panel gauges fluctuate wildly or are inoperative
- Loss of communication with a scan tool
- Reduced engine power message
- ABS and Traction Control lights illuminated
- Replacing other modules (like the BCM or TCM) before confirming the ECM is the source of the communication loss.
- Replacing the ECM without first checking for oil contamination in the harness, leading to repeat failure of the new part.
- Overlooking a simple bad battery or corroded ground connection, which is the easiest and cheapest fix.
Most Likely Causes

- Chafed or Damaged Engine Wiring Harness 🔴 High Probability A GM service bulletin (PI1004) specifically identifies an issue where the engine harness can rub against the corner of the engine or valve cover, damaging the communication wires (circuits 2500 and 2501). This type of contact damage is a common source of shorts to ground.
How to confirm: Visually inspect the engine wiring harness, particularly around the right rear corner of the engine and any other points of contact with metal brackets or the fuel rail, for signs of rubbing, cuts, or exposed wires.
Typical fix: Repair the damaged section of wire using solder and heat shrink. Re-wrap the harness with protective tape or conduit and reroute it to prevent future contact with engine components.
Est. part cost: $5-$25 - Failed Engine Control Module (ECM) 🔴 High Probability The ECM on the 2.4L Terrain (E39/E39A) is known for failures due to heat, vibration, and internal component breakdown. Oil intrusion from leaking VVT solenoids or oil pressure sensors can also travel up the harness and short out the ECM connectors and internal circuits.
How to confirm: After ruling out all wiring, power, and ground issues, a technician can use a specialized scan tool to confirm the ECM is unresponsive. Check the ECM connectors and the VVT solenoid connectors for any signs of engine oil.
Typical fix: Replace the Engine Control Module. The new module will require programming to the vehicle's VIN. This is a critical step for the vehicle to function correctly.
Est. part cost: $300-$800 - Corroded or Damaged X411 Connector 🟡 Medium Probability GM Technical Service Bulletin PIT5427B points to the X411 connector as a potential source of multiple communication codes, including U0100, due to corrosion or terminal damage. Its location makes it vulnerable to water and road salt. The bulletin states it is located under the rear of the vehicle, behind and to the left of the fuel tank.
How to confirm: Locate and inspect the X411 connector under the vehicle for any green or white corrosion, bent pins, or loose terminals. It may be necessary to remove tape and conduit to inspect the wires leading into the connector.
Typical fix: Clean the connector and terminals. If terminals are damaged, they must be replaced. In severe cases, the connector and a section of the harness may need to be replaced.
Est. part cost: $10-$50 - Poor Battery Voltage or Bad Grounds 🟡 Medium Probability Low system voltage is a very common cause of communication errors between modules. Corroded ground straps are also a common issue on many vehicles, leading to intermittent and difficult-to-diagnose electrical problems.
How to confirm: Test the battery voltage; it should be above 12.4 volts with the engine off. Use a multimeter to check for resistance between the main ground points (engine block to chassis, battery negative to chassis) and the chassis (should be less than 0.1 ohms). A voltage drop test is the preferred method for verifying ground integrity under load.
Typical fix: Recharge or replace the battery. Clean or replace corroded battery terminals and ground straps. Some owners have resolved issues by simply disconnecting the battery for 20-30 minutes to reset all modules.
Est. part cost: $5-$250
Rare But Worth Checking
- Faulty CAN Bus Termination Resistor: The CAN bus network requires a 120-ohm resistor at each end. If one of these fails, it can bring down the entire network. The total resistance across the CAN High (Pin 6) and CAN Low (Pin 14) pins at the OBD-II port should be 60 ohms. A reading of 120 ohms indicates one resistor or the wiring to it has failed.
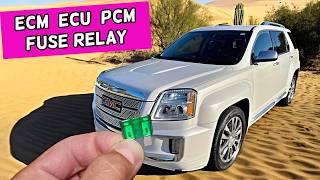
- Faulty ECM Power Relay: An intermittent or failed ECM power relay can cut power to the module, causing a U0100 code. This can sometimes be diagnosed by swapping the ECM relay with an identical one from a non-critical system (like the horn) to see if the problem resolves.
Diagnosis Steps
- Check Battery and Grounds: Ensure the battery has a full charge (at least 12.4V) and that all main battery and chassis ground connections are clean, tight, and free of corrosion. This is the most common and simplest fix.
- Scan for All Codes: Use a professional scan tool to check for codes in all modules, not just the ECM. Note all other 'U' codes, as they can help pinpoint the location of the network failure.
- Attempt to Communicate with ECM: See if the scan tool can establish communication with the ECM. If not, this points toward an ECM power, ground, module fault, or a break in the CAN bus wiring to the ECM.
- Inspect Wiring Harness: Visually inspect the engine wiring harness for chafing, especially near the right rear of the engine as noted in TSB PI1004 and any other points of contact.
- Inspect Connectors: Disconnect and inspect the main ECM connectors for corrosion, moisture, bent pins, or signs of oil intrusion. Crucially, locate and inspect the X411 connector under the rear of the vehicle (behind and left of the fuel tank) for corrosion, as per TSB PIT5427B.
- Check for Oil Contamination: Inspect the electrical connectors at the Camshaft Position Actuator Solenoids (VVT Solenoids) for engine oil. If oil is present, it has likely wicked into the harness and may have reached the ECM.
- Check CAN Bus Resistance: With the battery disconnected, measure the resistance between Pin 6 (CAN High) and Pin 14 (CAN Low) on the OBD-II port. A reading of approximately 60 ohms indicates the termination resistors and main bus wiring are likely intact. A reading of 120 ohms points to an open circuit or a single failed terminating resistor.
- Verify ECM Power and Ground: If wiring seems okay, use a multimeter and wiring diagram to confirm the ECM is receiving proper power and has a solid ground connection at its connector pins. A voltage drop test on the ground circuit should show less than 0.3V.
- Condemn the ECM: If all wiring, power, grounds, and network integrity are confirmed to be good, the ECM itself is the most likely culprit and should be replaced.
Parts You'll Likely Need
- Engine Control Module (ECM)
(OEM #12653998, 12643248, 12637157 (Part numbers vary by year and specific calibration; always verify with VIN))— This module is a common failure point on this platform, especially for the 2.4L engine, leading directly to a U0100 code.
Trusted brands: ACDelco (GM Original Equipment)
OEM price range: $420-$800
Aftermarket price range: $250-$600 - Wiring Harness Repair Supplies — Needed to fix chafed or broken wires in the engine harness or at the X411 connector, a common cause of communication faults.
Related Codes That Often Appear With This One
- U0101 — Lost Communication with Transmission Control Module (TCM). This often appears with U0100 because the same wiring harness damage or X411 connector corrosion can affect communication lines to both modules.
- U0121 — Lost Communication with Anti-Lock Brake System (ABS) Control Module. This is another module on the high-speed CAN bus that can lose communication due to the same underlying wiring or power issues, often related to TSB PIT5427B.
- U0073 — Control Module Communication Bus 'A' Off. This is a general code indicating the entire high-speed communication network is down, often pointing to a major wiring short or a fault in a primary module like the ECM or a critical connector like X411.
Technical Service Bulletins (TSBs) & Recalls
- PIT5427B: Addresses multiple communication DTCs, including U0100, caused by corrosion in the X411 connector under the rear of the vehicle.
- PI1004: Points to the engine wiring harness chafing against the engine or valve cover.
- PIT5171B: Discusses intermittent communication faults on the chassis bus related to wiring near the X411 connector.
Platform-Specific Known Issues
- TSB PI1004 notes that the engine wiring harness is prone to chafing on the right rear corner of the engine or valve cover, causing communication codes like U0100.
- TSB PIT5427B identifies the X411 connector, located under the rear of the vehicle behind the fuel tank, as a common location for corrosion or terminal damage that can cause a U0100 code among many others.
- For 2.4L engines, leaking VVT solenoids or oil pressure sensors can cause oil to migrate up the wiring harness and into the ECM, causing shorts and module failure. This is a widely discussed issue in owner forums.
- A frozen PCV orifice in cold weather can cause crankcase overpressure, leading to blown seals and widespread oil leaks that can damage wiring and sensors.
Mechanic-Grade Diagnostic Values

- CAN Bus Resistance — expected: ~60 Ohms. Failure: A reading of ~120 Ohms indicates an open circuit or a fault with one of the two terminating resistors. A reading near 0 Ohms indicates a short between CAN High and CAN Low wires.
- CAN Bus Voltage (Key On, Engine Off) — expected: CAN High (Pin 6 to ground): ~2.5-3.5V. CAN Low (Pin 14 to ground): ~1.5-2.5V.. Failure: Voltages outside these ranges, or a voltage on one line that mirrors the other, indicates a short to power, short to ground, or short between the two lines.
- ECM Ground Circuit Voltage Drop — expected: < 0.1 Volts (ideal), < 0.3 Volts (acceptable). Failure: A reading greater than 0.3V indicates excessive resistance in the ground circuit, often due to corrosion or a loose connection.
Scan Tool Commands That Help
- GDS2 (GM Dealer Software): Module Health Report / Vehicle Wide DTC Scan — This is the first step to see which modules are not communicating on the network. A module that shows 'Not Equipped' or fails to report is the starting point for the diagnosis.
- GDS2 (GM Dealer Software): Crankshaft Position Variation Learn (CASE Relearn) — This procedure is mandatory after replacing the Engine Control Module (ECM). Failure to perform the CASE relearn will result in a check engine light and potential drivability issues, often with code P0315.
Wiring & Ground Locations

- X411 — Under the rear of the vehicle, located behind and to the left of the fuel tank.. This is a major inline harness connector for the rear of the vehicle. It is highly susceptible to corrosion from road salt and water, which can interrupt CAN bus communication to modules like the ABS, causing a flood of U-codes including U0100. Referenced in TSB PIT5427B.
- G103 / G104 — On the cylinder head. On some 5.3L V8 GM trucks, G103 is on the front of the passenger side cylinder head. On others, a ground strap (G104) is on the left rear corner of the engine. Location varies by engine, but a primary engine-to-harness ground is always on the cylinder head.. These are critical engine ground points. A loose or corroded ground here can cause intermittent communication issues and a dim test light when checking for power at the ECM, indicating a bad ground path.
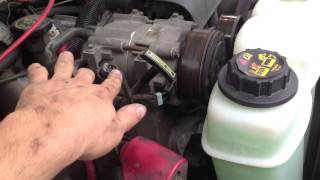
- ECM Ground Bolt (2.4L) — Hidden and hard to access, located between the A/C compressor and the alternator.. This specific ground bolt for the PCM and transmission is often forgotten or left loose after an engine replacement. A loose connection here will directly cause a no-start and no communication with the ECM and TCM.
- DLC (OBD-II Port) — Located to the left of the steering column, under the driver's side dashboard.. This is the primary diagnostic access point. All CAN bus voltage and resistance measurements are taken here to assess the health of the entire network before inspecting individual components.
Real Owner Repair Stories
- YouTube user 'quick automotive diagnostics' (GMC vehicle, likely a Terrain/Equinox platform based on symptoms and fix.) — No start, no communication with PCM and Transmission Control Module after an engine replacement.
❌ Tried (didn't work) Scanning the vehicle, which confirmed no communication with ECM/TCM., Checking for power at the ECM, which revealed a dim test light, suggesting a ground issue.
✅ What actually fixed it A loose ground bolt for the PCM and transmission was found and tightened. The bolt was in a hidden location between the A/C compressor and the alternator and was likely missed during the engine swap. - Forum discussions (general consensus) (2010-2012 GMC Terrain / Chevrolet Equinox with 2.4L engine) — U0100, stalling, no-start, multiple other communication codes.
❌ Tried (didn't work) Replacing the battery., Cleaning main ground straps., Replacing the ECM (in some cases, the new ECM failed shortly after).
✅ What actually fixed it The root cause was oil leaking from the VVT solenoids or oil pressure switch, wicking up the wiring harness, and contaminating the ECM connector pins and internal board. The final fix required replacing the leaking solenoid(s), thoroughly cleaning the harness connectors with electrical cleaner, and replacing the oil-damaged ECM.
OEM Part Supersession History
12633555→12653998— Standard part revision for reliability, performance, or component availability updates.
Heads up: While the parts supersede, programming is always required. An ECM for a 2013+ model (like 12653998) may not be backward compatible with a 2010-2012 vehicle due to wiring or software differences, even if it physically fits. Always verify the correct service number for the specific VIN.
Model Year Variations Within This Range
- 2010-2012: These early models are particularly noted for the issue of oil wicking from camshaft solenoids into the ECM harness, causing ECM failure. The ECM part numbers are also specific to these earlier years.
- 2013-2017: ECM part numbers were updated around 2013 (e.g., to 12653998). While the chafed harness and X411 connector issues persist, the specific ECM hardware and software calibrations changed from the earlier models.
Helpful Videos


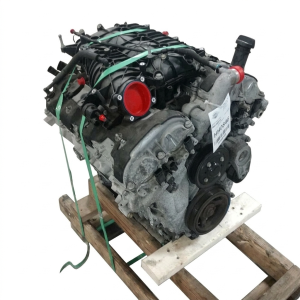
We Have This Part in Stock



The information in this article is provided for general reference and educational purposes only. Vehicle specifications, procedures, and part compatibility can vary by production date, trim level, and region. Always consult your vehicle's factory service manual and verify part numbers before purchasing or performing repairs. Safety-critical components such as airbags, seat belts, and braking systems should be installed by a qualified professional.
- Gmc TERRAIN:
- 🎬 Helpful Videos
- 🛍️ Shop This Part
- What's Unique About the 2010-2017 Gmc TERRAIN
- Diagnostic Flowchart
- Symptoms You May Notice
- Most Likely Causes
- Rare But Worth Checking
- Diagnosis Steps
- Parts You'll Likely Need
- Related Codes That Often Appear With This One
- Technical Service Bulletins (TSBs) & Recalls
- Platform-Specific Known Issues
- Mechanic-Grade Diagnostic Values
- Scan Tool Commands That Help
- Wiring & Ground Locations
- Real Owner Repair Stories
- OEM Part Supersession History
- Model Year Variations Within This Range
- 🎟️ Get 5% Off