

OBD-II Code U0076: Control Module Communication Bus 'D' Off
What U0076 means, why it triggers, and how to fix it
What Does U0076 Mean?

U0076 means your car's control modules have stopped communicating on the 'Bus D' network. This Controller Area Network (CAN bus) acts as a nervous system connecting body and convenience features. When communication stops, these features quit working entirely or behave erratically.
Technical definition: The official SAE/ISO definition is "Control Module Communication Bus 'D' Off." This indicates a total communication failure on the 'D' bus network. This network links various modules, which includes the Body Control Module (BCM), Transmission Control Module (TCM), and Powertrain Control Module (PCM), depending on the vehicle's architecture.
Can I Drive With U0076?
Yes, But With Caution. You can drive the vehicle, as this code primarily affects convenience features rather than the core powertrain. However, continuing to drive risks stranding you due to an inaccurate fuel gauge reading empty, unpredictable electrical failures, or the loss of safety systems like ABS and Traction Control. Ignoring the code complicates future diagnosis by generating dozens of false error codes, increasing diagnostic time and cost.
Common Causes

- Damaged or Chafed Wiring Harness (Very Common) — The communication bus wires rub against metal brackets or engine components, wearing through the insulation and causing a short to ground. This is the most frequent cause, specifically documented in GM TSB #21-NA-186 for Chevrolet vehicles.
- Corroded or Loose Connectors (Common) — Moisture, road salt, and vibration cause connector pins to corrode or loosen, creating a poor connection that severs network communication. This frequently occurs on exposed sensor pigtails, such as NOx sensors on diesel trucks.
- Power Supply Issues (Battery, Grounds, or Fuses) (Common) — Control modules require a stable voltage above 12.4V to communicate. A weak battery, blown module fuse, or a corroded ground wire introduces electrical noise or drops voltage below the operating threshold, shutting down the network.
- Aftermarket Component Interference (Common) — Improperly installed aftermarket parts, such as remote starters, alarms, or LED headlights, introduce electrical noise or voltage irregularities onto the CAN bus, disrupting communication and triggering the code.
- Faulty Control Module (Less Common) — A single computer module on the network fails internally. If its internal transceiver breaks or shorts out, it stops communicating and brings down the entire network. This includes major modules like the BCM or smaller ones like an ABS module.
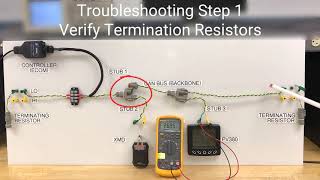
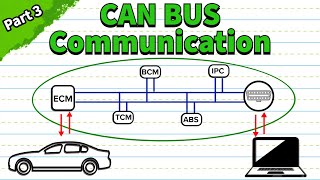
- Failed Termination Resistor (Rare) — A CAN bus network requires a 120-Ohm resistor at each end, creating a total network resistance of 60 Ohms. 🎬 Watch: A pro guide to CAN bus diagnostic tools and tips. If one resistor fails, network resistance jumps to 120 Ohms, causing communication to stop.
- Software Glitch (Rare) — An interrupted software update or a manufacturer software bug causes a module to stop communicating correctly. A dealer reprogram or software update (re-flash) resolves this.
Symptoms

- Multiple Unrelated Warning Lights — A 'Christmas tree' effect occurs on your dashboard, where multiple unrelated warning lights (ABS, Traction Control, Airbag) illuminate simultaneously because their respective modules lost communication.
- Malfunctioning Body and Convenience Features — Power windows, door locks, sunroof, interior dome lights, exterior lighting, or the climate control panel stop working, work intermittently, or become completely unresponsive.
- Inaccurate Fuel Gauge — The fuel gauge reads empty or becomes erratic, even if the tank is full. This is the primary symptom for the GM TSB #21-NA-186 issue on Chevrolet Malibus.
- Check Engine Light or Service Message — The Check Engine Light illuminates, accompanied by specific dashboard messages like "Service Body Control System" or "Service Exhaust System." 🎬 See this breakdown of CAN bus properties and troubleshooting steps.
Common Fixes & Costs
- Repairing Chafed Wiring Harness — Parts: $10-$30, Labor: $150-$350, ~1.5 hr book time (Intermediate)
- Cleaning or Repairing Corroded Connectors — Parts: $10-$50, Labor: $75-$200, ~1 hr book time (DIY)
- Replacing a Faulty Control Module (BCM, PCM, or TIPM) — Parts: $400-$1200, Labor: $200-$500, ~2.0 hr book time (Professional)
Used vs. New Parts: Buying Guide
When a used part is worth it: Buying a used control module is only advisable for vehicles over 10 years old where a new module is cost-prohibitive, AND you have a specialist who can clone your old module's data.
Donor-vehicle mileage cap: roughly under 100000 miles for the part to have meaningful remaining life.
Donor quality checklist:
- Match the part number exactly; visual similarity guarantees nothing.
- Verify the donor vehicle's VIN to ensure compatibility.
- Avoid modules from flood-damaged or heavy-collision vehicles.
Decision logic:
- If The vehicle is less than 10 years old and a daily driver → Buy a new or professionally remanufactured module. The reliability and warranty justify the cost.
- If The issue is a known software bug → Do not replace the module. Pay a dealer to re-flash your existing module with updated software.
- If You are a DIYer without professional programming tools → Buy new from a source offering pre-programming services, or have a shop handle the entire job.
Warranty tradeoff: Used salvage parts typically offer a 30-day warranty covering only the part. New OEM or remanufactured modules carry a 1-year warranty covering the part and sometimes labor.
Worst-case if a used part fails: $800 (Cost of buying a second module and paying for labor twice if the used module is incompatible or fails).
Cost of Not Fixing It
- Immediate: Loss of convenience features like power windows and locks. An inaccurate fuel gauge strands you on the side of the road. (Added cost: $150 (Cost of a tow truck if stranded due to an empty fuel tank that read full).)
- 1-3 Months: Increased diagnostic complexity. The initial fault causes other modules to log dozens of false communication codes, making it harder for a technician to find the original problem. (Added cost: $300 (Extra diagnostic labor time to sift through false codes).)
- 3+ Months: Cascading electronic failure. A module with an internal short eventually damages the transceivers of other healthy modules on the same network. (Added cost: $1000 (Cost to replace a secondary module damaged by the prolonged short circuit).)
Diagnosis Steps

- Check for Other Codes
Use a professional OBD-II scanner to read all stored codes from all modules. U0076 rarely appears alone; accompanying codes (like U0100, U0101, U18A2) pinpoint which specific system or module is failing.
Tools: Professional OBD-II Scanner (Beginner) - Check Fuses and Battery Voltage
Test the battery to ensure it holds above 12.4 volts with the engine off. Check all vehicle fuses related to control modules (BCM, ECM, TCM). A weak battery or blown fuse instantly causes network communication faults.
Tools: Multimeter, Fuse Puller (Beginner) - Perform a Thorough Visual Inspection
Inspect the wiring harnesses connected to the main control modules. Look for chafing, frayed wires, or corrosion, specifically where the harness passes near metal brackets, the engine block, or through the firewall.
Tools: Flashlight, Inspection Mirror (Beginner) - Inspect Module Connectors
Disconnect the connectors at accessible modules on the suspect bus. Look for bent, broken, or green/white corroded pins. Clean any corrosion with electrical contact cleaner and apply dielectric grease before reconnecting.
Tools: Socket Set, Electrical Contact Cleaner, Dielectric Grease (Intermediate) - Test CAN Bus Resistance
With the battery disconnected, measure the resistance between the CAN High and CAN Low pins at the OBD-II port (pins 6 and 14). A healthy network reads 60 Ohms. 🎬 Watch: This quick tip for testing CAN bus resistance. A reading of 120 Ohms indicates a missing termination resistor or broken wire; 0 Ohms indicates a short.
Tools: Multimeter (Advanced) - Isolate the Faulty Module or Wiring
If the resistance test fails, isolate the fault by disconnecting one module at a time and re-testing the resistance. When the reading returns to normal 60 Ohms, the last module you unplugged (or its wiring) is the source of the short.
Tools: Multimeter, Socket Set, Wiring Diagram (Advanced) - Advanced: Check CAN Voltage and Ground
With the key on, check DC voltage. CAN High should be ~2.6V and CAN Low ~2.4V. A voltage stuck at 0V indicates a short to ground. With the battery disconnected, measure resistance from each CAN pin to chassis ground; it should read 'OL' (open loop).
Tools: Multimeter (Advanced) - Advanced: Analyze Waveform
Connect an oscilloscope to the CAN lines. A healthy bus shows a clean, mirrored square wave pattern. A flat line indicates no communication, while a noisy or distorted pattern points to aftermarket interference or a failing module transceiver.
Tools: Automotive Oscilloscope, Wiring Diagram (Professional)
When This Code Triggers (Freeze-Frame Conditions)
- Engine Coolant Temp: 175-210°F (80-99°C) (The fault appears after the engine is fully warmed up and running for several minutes.)
- Engine RPM: 1500-2500 RPM (The code logs during steady-state cruising, not necessarily during hard acceleration.)
- Vehicle Speed: 45-65 mph (72-105 kph) (Consistent highway speed is the most common condition for the fault to register.)
- Battery Voltage: 13.2-14.5V (The code sets when the charging system is active; low voltage during cranking sets different codes.)
How to Clear the Code After You Fix It
- Ensure the initial repair (e.g., fixing a chafed wire) is complete and sealed.
- Reconnect the battery if it was disconnected.
- Use a quality OBD-II scan tool to manually clear all Diagnostic Trouble Codes (DTCs) from all modules.
- Perform a complete drive cycle to allow the vehicle's readiness monitors to run their self-tests.
Drive cycle (~20 minutes): A generic drive cycle includes: a cold start, 3 minutes of idling, 10 minutes of steady highway driving at 55 mph, a coast-down period without braking, and 5 minutes of stop-and-go city driving.
Readiness monitors affected: Catalyst Monitor, EVAP System Monitor, O2 Sensor Monitor
Before emissions retest: drive at least 50 miles to fully set monitors.
Watch out for:
- Disconnecting the battery clears the Check Engine Light but resets all readiness monitors to 'incomplete', guaranteeing an emissions test failure.
- Clearing the code leaves a 'Permanent DTC' (PDTC) on 2010+ vehicles that only the ECU can remove after confirming the repair over several drive cycles.
- If the root cause remains unfixed, U0076 reappears immediately upon starting the vehicle.
Will This Fail Emissions / State Inspection?
Yes — this code typically fails an OBD-II emissions inspection.
- California: An illuminated Check Engine Light from code U0076 is an automatic failure. After repair, only one readiness monitor is allowed to be 'incomplete' before re-testing.
- New York: The NYS DMV inspection includes an OBD-II scan. U0076 causes an automatic failure. You must complete a drive cycle to set readiness monitors before passing.
- Texas: In emissions-testing counties, an active U0076 code and illuminated Check Engine Light fails the OBD portion of the inspection immediately.
Helpful Videos


The information in this article is provided for general reference and educational purposes only. Vehicle specifications, procedures, and part compatibility can vary by production date, trim level, and region. Always consult your vehicle's factory service manual and verify part numbers before purchasing or performing repairs. Safety-critical components such as airbags, seat belts, and braking systems should be installed by a qualified professional.
- 🎬 Helpful Videos
- What Does U0076 Mean?
- Can I Drive With U0076?
- Common Causes
- Symptoms
- Common Fixes & Costs
- Used vs. New Parts: Buying Guide
- Cost of Not Fixing It
- Diagnosis Steps
- When This Code Triggers (Freeze-Frame Conditions)
- How to Clear the Code After You Fix It
- Will This Fail Emissions / State Inspection?
- 🎟️ Get 5% Off