

U0075 on 2016 Cadillac CT6: Causes and Fixes for Active Safety System Faults
On a 2016 Cadillac CT6, code U0075 indicates a communication failure on the Object Detection Bus, which disables advanced safety features. The problem is often a wiring issue, such as a harness damaged by a sun visor screw (TSB PIC6379A), or a faulty Active Safety Control Module. It can also be falsely triggered by the technician's diagnostic tool itself, as noted in TSB PIT5441C.
- U0075 on a 2016 CT6 means a communication failure with the advanced safety systems, disabling features like collision alert and park assist.
- A known GM issue means the diagnostic tool itself can cause this code; this should be ruled out before starting repairs.
- The most common vehicle faults are damaged wiring in exposed areas or a failed Active Safety Control Module.
- This is not a simple DIY fix. Diagnosis is complex, and replacing modules requires special programming and calibration.
- Driving is possible, but do so with extra caution as critical safety features will be offline.
What's Unique About the 2016-2016 Cadillac CT6
For the 2016 CT6 and similar GM vehicles, U0075 has unique and well-documented quirks. GM Technical Service Bulletin PIT5441C warns technicians that the diagnostic scan tool itself (the Multiple Diagnostic Interface, or MDI) or its cable can cause this code to appear falsely. This is because the Object Detection Bus uses specific pins on the diagnostic port (pins 3 and 11) that some older or faulty cables have trouble reading, leading to a misdiagnosis of a vehicle fault when the issue is actually with the tool. Additionally, TSB PIC6379A points to a specific CT6 issue where a driver's sun visor mounting screw can pierce the headliner harness, 🎬 See how to access the headliner and sunroof area safely. shorting the Object Bus circuits and causing U0075.
Diagnostic Flowchart
Tap your situation to follow the diagnostic path that matches what you're seeing on this vehicle.
Symptoms You May Notice
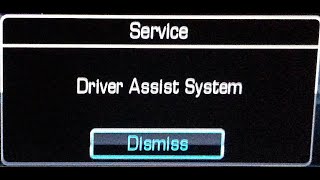
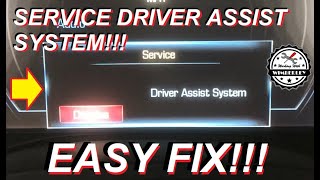
- "Service Active Safety System", "Service Drivers Assist& 🎬 Watch: How to fix common driver assist haptic seat issues.quot; or "Object Detection System Message" on the driver information center.
- Advanced driver-assistance features like Adaptive Cruise Control, Super Cruise, Forward Collision Alert, and Lane Keep Assist are disabled or unavailable.
- Blind-spot monitoring and Rear Cross Traffic Alert may not function.
- The backup camera or surround-view system may be black or show a warning symbol.
- "Adaptive, and/or Super Cruise Temporarily Unavailable" message when trying to activate the systems.
- Replacing the Body Control Module (BCM). The BCM is usually just reporting the communication fault it sees on the network; it is rarely the cause of a U0075 code. The BCM is located under the dash on the far left side.
Most Likely Causes
- Faulty Diagnostic Scan Tool or Cable 🔴 High Probability TSB PIT5441C specifically calls this out. The Object Detection Bus communicates on DLC pins 3 and 11, and some diagnostic tools/cables can't read this bus properly, inducing a false code.
How to confirm: A technician would test their diagnostic tool (MDI) and cable on a known-good vehicle. If the code also appears on the good vehicle, the tool is the problem. GM provides a specific self-test adapter, EL-47955-1, for this purpose.
Typical fix: Use a different, known-good diagnostic interface before attempting any repairs on the vehicle.
Est. part cost: $0 - Wiring Harness Damage or Corrosion 🟡 Medium Probability On the CT6 specifically, TSB PIC6379A identifies that the driver's sun visor mounting screw can pierce the headliner harness, shorting the Object Bus wires. On related platforms, harnesses are known to chafe against bumper frame rails or have issues at major body connectors (e.g., X203 A-pillar, JX300 under-seat).
How to confirm: Visually inspect the harness under the driver's sun visor mount first. Then inspect harnesses in the front bumper area and under the carpet near the driver's seat. A multimeter would be used to check for continuity and resistance on the CAN bus wires (pins 3 and 11 at the DLC).
Typical fix: Repair the damaged section of the wiring harness and protect it from future damage. This may involve soldering wires, using heat-shrink tubing, and re-routing the harness away from the screw.
Est. part cost: $20-$100 - Failed Active Safety Control Module (ASCM) 🟡 Medium Probability This module (GM designation K124) is the central computer for the safety systems. Like any electronic component, it can fail internally over time due to heat, vibration, or internal component degradation.
How to confirm: After confirming wiring and other modules are good, diagnosis would point to the module. A professional would use a high-end scan tool to try and communicate directly with the module. If it's unresponsive despite having good power, ground, and network connections, it has failed. The ASCM is located in the trunk/rear compartment, often behind a trim panel.
Typical fix: Replace the Active Safety Control Module. This part requires programming and calibration by a dealer or qualified shop after installation.
Est. part cost: $400-$800 - Failed Sensor Module (e.g., Radar, Camera) ⚪ Low Probability A single failed module on the network, such as a side blind zone alert sensor or the front camera, can sometimes short the entire data bus, preventing all modules on that network from communicating and setting a U0075.
How to confirm: The diagnostic process involves disconnecting modules from the Object Detection Bus one by one to see if communication is restored to the other modules. If disconnecting a specific sensor allows the network to come back online, that sensor is the fault.
Typical fix: Replace the faulty sensor module. This often requires bumper removal or other trim removal and subsequent calibration of the new part.
Est. part cost: $200-$600
Rare But Worth Checking
- Poor Battery Voltage or Ground Connection: GM vehicles are notoriously sensitive to low voltage. A weak battery or a corroded ground strap can cause random, intermittent communication codes across various modules. Always test the battery and check major ground connections before starting complex network diagnostics.
- Software Anomaly: In some cases, a module's firmware can become corrupted, causing it to stop communicating. GM has issued service updates for the Active Safety Control Module on the CT6 to improve system performance, which involves reprogramming.
Diagnosis Steps
- If you are a professional technician, first validate that your diagnostic tool (MDI) and cable are not inducing the fault, per TSB PIT5441C. Use the EL-47955-1 loopback adapter or test on a known-good vehicle.
- Scan all vehicle modules and document all present fault codes.
- Check the vehicle's battery state of charge and health. A weak battery can cause network communication errors.
- Perform a visual inspection of the wiring harness at the driver's sun visor mounting point for damage from the screw, as per TSB PIC6379A.
- Perform a visual inspection of other known chafe points, such as wiring harnesses connected to sensors in the front/rear bumpers.
- Using a multimeter, check for 60 ohms of resistance across pins 3 and 11 of the Data Link Connector (DLC). This confirms the integrity of the two 120-ohm terminating resistors in the Object Detection Bus.
- If resistance is incorrect (e.g., 120 ohms or open), begin disconnecting modules on the bus (e.g., side object sensors, front camera) one at a time and re-checking resistance to isolate the faulty component or wiring section.
- If wiring and resistance are correct, check for proper power and ground at the Active Safety Control Module (K124) connector, located in the rear of the vehicle.
- If all of the above are confirmed good, the fault likely lies within the Active Safety Control Module itself. 🎬 Watch: A technician's deep dive into diagnosing CT6 communication faults.
Parts You'll Likely Need
- Active Safety Control Module — If wiring is intact, the central module (K124) that controls the safety network may have failed. This part requires professional programming.
Trusted brands: ACDelco
OEM price range: $400-$800
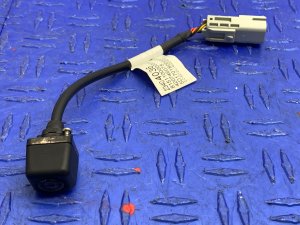
Aftermarket price range: $300-$600 - Front Park Assist Camera
(OEM #23507082 (replaces 23326969))— If a single module shorts the bus, the front camera is a possibility. Replacement requires programming.
Trusted brands: GM Genuine
OEM price range: $150-$230 - Night Vision Camera
(OEM #23283519 (replaces 23197086))— For vehicles equipped with Night Vision, this camera is also on the Object Detection Bus and could be a point of failure. Requires programming.
Trusted brands: GM Genuine
OEM price range: $1000-$1500 - Wiring Harness Pigtail / Connector — Often, the fix is not a module but a simple repair to a corroded connector or broken wire, especially in the headliner or bumper areas.
Trusted brands: ACDelco, Dorman
OEM price range: $40-$120
Aftermarket price range: $20-$60
Related Codes That Often Appear With This One
- U026A, U026B, U026C, U0265, U0268, U0269 — These are specific codes for loss of communication with individual radar and camera modules. U0075 is a general code indicating the entire bus they communicate on is down, so they often appear together. TSB PIT5441C lists these as related codes that can also be falsely induced by the scan tool.
Technical Service Bulletins (TSBs) & Recalls
- PIT5441C: Provides diagnostic steps for Object Detection System messages and warns that codes like U0075 can be falsely set by the technician's diagnostic equipment (MDI) due to an issue reading DLC pins 3 and 11.
- PIC6379A: Preliminary information bulletin identifying a condition on 2019-2020 CT6 models where the driver's sun visor screw can damage the headliner harness, causing a U0075. This is a known issue on earlier models as well.
Platform-Specific Known Issues
- TSB PIT5441C documents that a faulty diagnostic tool (MDI) or cable can induce a false U0075 code when scanning the vehicle. This should be ruled out first in a professional setting.
- TSB PIC6379A (and its successor PIE0534) documents a specific issue where the driver's sun visor mounting screw can pierce the headliner harness, shorting the Object Bus wires and causing this code.
Mechanic-Grade Diagnostic Values
- CAN Bus Terminating Resistance — expected: ~60 Ohms. Failure: A reading of ~120 Ohms indicates one of the two terminating resistors is offline due to an open circuit or unplugged module. A reading near 0 Ohms indicates a direct short between the CAN High and CAN Low wires.
- CAN High Voltage to Ground — expected: ~2.5V (bus idle) to ~3.5V (bus active). Failure: Voltage significantly below 2.5V or stuck high suggests a short to ground, short to low, or a faulty module transceiver.
- CAN Low Voltage to Ground — expected: ~2.5V (bus idle) to ~1.5V (bus active). Failure: Voltage significantly above 2.5V or stuck low suggests a short to power, short to high, or a faulty module transceiver.
Scan Tool Commands That Help
- GM GDS2: Module Communication Status / Data Bus Display — This is a primary diagnostic step. The tool can list all modules currently communicating on a specific network (like the Object Detection Bus). If a module is missing from the list, it confirms it is offline and helps isolate the fault.
- GM GDS2 / Techline Connect: Reprogram Active Safety Control Module (K124) — Used after module replacement or when a GM service bulletin advises a software update to fix known bugs, such as false activations or communication glitches.
- GM GDS2: Clear All DTCs — After a repair is performed, this command is used to clear fault codes from all modules simultaneously. This is critical for verifying the fix, as some communication codes will not clear until the entire network is reset.
Wiring & Ground Locations
- K124 — Active Safety Control Module, located in the rear of the vehicle, typically in the trunk compartment behind a trim panel.. This is the master control module for the Object Detection Bus. Loss of power, ground, or an internal failure of this module is a primary cause for U0075.
- JX300 — A large inline harness connector. On similar GM platforms like the Acadia, it is located on the floor near the driver's seat or at the base of the B-pillar.. This connector is a known point of failure for communication circuits going to the rear of the vehicle, including the low-speed CAN line for the K124 ASCM. An open or corroded pin in this connector can isolate the module.
- G305 / G3xx Grounds — Ground points located in the rear passenger or trunk area. G305 on some GM models is under the vehicle near the left B-pillar. G302 is under the rear of the center console.. The K124 Active Safety Control Module and other rear-mounted modules rely on a solid chassis ground. Corrosion or looseness at these G3xx-series ground points can cause intermittent communication failures and set U-codes.
Real Owner Repair Stories
- KOEO YouTube Channel (2016 Cadillac CT6) — Dead radio, black infotainment screen, no communication with the Radio or Human Machine Interface (HMI) modules.
❌ Tried (didn't work) Checking fuses., Verifying power and ground at the module connectors, which initially seemed okay.
✅ What actually fixed it The HMI module had failed, taking down part of the infotainment CAN bus. The fix required replacing the HMI module with a used unit, programming the used radio to the vehicle to remove 'theft lock', and then programming the used HMI module to restore correct screen resolution and full functionality. A damaged connector pin on the HMI was also discovered and reseated.
"I Checked Everything" — The Actual Cause
- The most notable instance for U0075 on this platform is when all vehicle wiring and modules are perfectly fine, but the code is being induced by the technician's own diagnostic equipment. As documented in TSB PIT5441C, a faulty MDI scan tool or its specific cable can fail to communicate on the Object Detection Bus (pins 3 and 11), causing the tool to report a U0075 that does not actually exist on the vehicle. A technician could spend hours searching for a wiring fault that isn't there, when the root cause is the tool in their hands.
OEM Part Supersession History
23326969→23507082— Part has been updated or replaced by a newer version.23197086→23283519— Part has been updated or replaced by a newer version.
Helpful Videos
We Have This Part in Stock




The information in this article is provided for general reference and educational purposes only. Vehicle specifications, procedures, and part compatibility can vary by production date, trim level, and region. Always consult your vehicle's factory service manual and verify part numbers before purchasing or performing repairs. Safety-critical components such as airbags, seat belts, and braking systems should be installed by a qualified professional.
- Cadillac CT6:
- 🎬 Helpful Videos
- 🛍️ Shop This Part
- What's Unique About the 2016-2016 Cadillac CT6
- Diagnostic Flowchart
- Symptoms You May Notice
- Most Likely Causes
- Rare But Worth Checking
- Diagnosis Steps
- Parts You'll Likely Need
- Related Codes That Often Appear With This One
- Technical Service Bulletins (TSBs) & Recalls
- Platform-Specific Known Issues
- Mechanic-Grade Diagnostic Values
- Scan Tool Commands That Help
- Wiring & Ground Locations
- Real Owner Repair Stories
- "I Checked Everything" — The Actual Cause
- OEM Part Supersession History
- 🎟️ Get 5% Off