

U0029 on 2015-2020 GMC Yukon: Communication Bus Fault Causes and Fixes
On a 2015-2020 GMC Yukon, code U0029 is most often caused by a pinched wire harness under the driver's side dashboard (per TSB #PIT5288G) or a failed module on the fiber-optic MOST network, commonly the CD player or HMI module. The fix involves either repairing the damaged wires or isolating and replacing the faulty module, which requires programming.
- U0029 on a 2015-2020 Yukon points to a fault on the infotainment communication network (MOST bus).
- Before suspecting expensive modules, thoroughly inspect the wire harness under the driver's side dash for a common pinched-wire condition.
- Symptoms are not just cosmetic; this fault can drain the battery if left unresolved.
- Proper diagnosis requires professional tools to isolate the specific point of failure in the network ring.
- If a module like the HMI or radio is replaced, it must be programmed to the vehicle to function correctly.
What's Unique About the 2015-2020 Gmc YUKON
The 2015-2020 GM truck and SUV platform (K2XX), including the Yukon, is known for a specific manufacturing flaw where a wiring harness can be pinched by a metal bracket under the driver's side of the instrument panel. This issue is so common that GM issued Technical Service Bulletin #PIT5288G to guide technicians directly to this spot. While any module on the MOST network can fail, this pinched harness is a highly probable and platform-specific cause for code U0029 and associated symptoms like a blank screen and dead battery.
Diagnostic Flowchart
Tap your situation to follow the diagnostic path that matches what you're seeing on this vehicle.
Symptoms You May Notice
- Blank or black center touchscreen display.
- No audio from the radio, including chimes and turn signal clicks.
- Radio, steering wheel, or HVAC controls are inoperative.
- Flickering or erratic instrument cluster display.
- Intermittent 'Communication Error' messages.
- Dead battery after the vehicle sits for a period. [TSB #PIT5288G]
- System stuck on a logo screen or reboots randomly.
- Popping or cracking noises from speakers before failure.
- Backup camera fails to display.
- Replacing the radio or HMI module without first checking for the pinched wire harness, which is a much cheaper and very common cause documented in a TSB.
- Replacing the battery, assuming the electrical issues are due to a weak battery, when in fact the U0029 fault is what's causing the parasitic drain that kills the battery. [TSB #PIT5288G]
- Replacing the infotainment screen (display) when the HMI module is the actual point of failure causing the black screen.
Most Likely Causes
- Pinched Instrument Panel Wire Harness 🔴 High Probability A known manufacturing/assembly issue where the dash harness is pinched between a metal mounting bracket and the body on the left side of the instrument panel. This is explicitly documented in GM Technical Service Bulletin #PIT5288G.
How to confirm: Visually inspect the wiring harness located on the driver's side of the dashboard, near the A-pillar and dash mounting bracket. Check if the harness is caught, flattened, or if wires are exposed. The harness should be able to move freely. The damage may not be immediately obvious without pulling the harness away from the bracket.
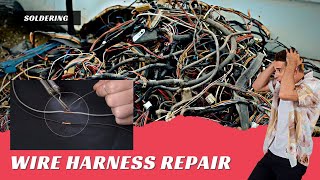
Typical fix: Loosen the bracket bolts, free the harness, open the loom, and repair any chafed or broken wires using solder and heat shrink or appropriate connectors. 🎬 See how to properly solder and shrink-wrap damaged harness wires. Reroute the harness to prevent future pinching and wrap with anti-abrasion tape.
Est. part cost: $5-$25 for wiring repair supplies. - Failed Module on MOST Network 🟡 Medium Probability The MOST network is a fiber-optic 'ring,' meaning one failing module can disrupt the entire chain. Forum discussions and technician reports frequently point to the CD player/media player as a very common failure point that breaks the ring, followed by the HMI module.
How to confirm: A technician uses a MOST bypass loop tool (GM tool EL-51578 or equivalent). They disconnect each module in the ring (CD player, HMI, Amplifier, etc.) one by one and install the loop in its place. When the faulty module is bypassed, the rest of the system (e.g., screen, audio) begins working again, confirming the point of failure.
Typical fix: Replace the identified faulty module. The new module (especially the HMI or radio) will require SPS (Service Programming System) programming by a dealer or a properly equipped independent shop to work with the vehicle's VIN.
Est. part cost: $150-$800 depending on the module (e.g., CD player vs. HMI module). - Corroded or Loose Connector at a Module ⚪ Low Probability Connectors for modules located under seats (amplifier) or in the dash (Serial Data Gateway Module) can become loose or suffer from corrosion due to moisture or vibration. TSB #PIT5586G points to issues with terminals at the Serial Data Gateway Module (SDGM) as a cause for a host of communication codes, including U0029.
How to confirm: Individually disconnect, inspect, and reseat the fiber-optic and electrical connectors for the HMI module, radio, CD player, and amplifier. Check for bent pins, corrosion, or signs of water intrusion. A GM engineering bulletin also advises checking for backed-out terminals or bent pins at the SDGM connectors.
Typical fix: Clean the connector pins with an electrical contact cleaner or replace the connector and damaged terminals if corrosion is severe.
Est. part cost: $10-$50 for cleaners or connector pigtails.
Rare But Worth Checking
- Software Glitch / Logic Lock:
Diagnosis Steps
- Perform a full vehicle scan to confirm U0029 and identify all other communication-related DTCs in various modules. Note which modules are and are not communicating.
- Begin with a visual inspection. Carefully examine the wire harness on the driver's side of the instrument panel for the known pinched condition between the dash bracket and the body, as described in TSB #PIT5288G. Pull the harness to ensure it moves freely.
- If the harness is pinched, repair the damaged wires and clear codes. Test system functionality.
- If the harness is not the issue, the next step is to isolate modules on the fiber-optic MOST bus. This requires a MOST bypass loop tool (GM EL-51578).
- Access the modules on the communication ring. The order is typically Radio -> CD Player -> HMI Module -> Amplifier (if equipped) -> Instrument Panel Cluster -> back to Radio.
- Bypass one module at a time using the loop tool. A common first module to bypass is the CD player, as it is a frequent failure point. After bypassing each module, cycle the ignition and check if infotainment functions are restored (e.g., display turns on, audio works).
- When the system starts working, the module that is currently bypassed is the faulty one.
- If all modules are bypassed and the issue persists, the fault lies in the fiber-optic wiring between the modules, requiring visual inspection for breaks or sharp bends.
- Check for loose or corroded terminals at the Serial Data Gateway Module (SDGM) connectors as a final step, per TSB #PIT5586G.
Parts You'll Likely Need
- Human Machine Interface (HMI) Module
(OEM #84037763 (Example for 2016-2017, verify by VIN))— This module is the 'brain' of the infotainment system and a common failure point causing a black screen and U0029. Replacement is required if it is identified as the faulty module via the bypass test.
Trusted brands: ACDelco
OEM price range: $300-$600
Aftermarket price range: $250-$450 (remanufactured) - CD Player / Radio Tuner Module
(OEM #13592804 (Example for 2015 Radio/XM Receiver, verify by VIN))— As another key component in the MOST ring, the CD player or radio tuner can fail internally and bring down the entire network. It is often the first part technicians bypass during diagnosis.
Trusted brands: ACDelco
OEM price range: $150-$350
Aftermarket price range: $100-$250 (used/remanufactured)
Related Codes That Often Appear With This One
- U0028 — U0028 (Vehicle Communication Bus A Off) indicates a more severe break in the MOST ring, while U0029 indicates a performance issue. They often appear together, with different modules reporting one or the other depending on their position in the ring.
- B1011 — This code relates to an ECU hardware problem and can be logged in multiple modules when network communication is unstable, as noted in TSB #PIT5586G.
- U0140 — Loss of Communication with Body Control Module (BCM). This can occur if the network instability caused by U0029 prevents the BCM from communicating reliably with other modules. [TSB #PIT5586G]
- U0155 — Loss of Communication with Instrument Panel Cluster (IPC). The IPC is a key module on the MOST communication bus, and this code is common when the network goes down.
- U0184 — Loss of Communication With Radio. This code is often set in other modules when the radio itself fails or when another module brings down the MOST bus, preventing communication with the radio. [TSB #PIT5586G]
Technical Service Bulletins (TSBs) & Recalls
- PIT5288G: Pinched dash harness causing dead battery and various communication DTCs including U0029.
- PIT5586G: Wide range of communication DTCs, including U0029, related to inoperative controls, possibly caused by SDGM connector or software issues.
- PI1149A: Diagnostic guide for intermittent blank screens and MOST bus faults, referencing codes U0028/U0029.
Platform-Specific Known Issues
- Technical Service Bulletin PIT5288G specifically calls out a pinched wire harness on the left side of the instrument panel as a cause for this code and related symptoms like a dead battery and inoperative controls.
- Technical Service Bulletin PIT5586G lists U0029 among a large group of communication codes that can appear when HVAC and audio controls become inoperative, pointing to potential issues with the Serial Data Gateway Module (SDGM) connectors or software.
- Technical Service Bulletin PI1149A provides a diagnostic aid for blank screens and MOST bus issues, confirming that U0028/U0029 indicate a bus down condition and recommends using the EL-51578 bypass tool for diagnosis.
Mechanic-Grade Diagnostic Values
- GDS2 Scan Tool Data: 'Number of MOST Communication Breaks' — expected: A stable number that does not increment.. Failure: The number rapidly and continuously increases, indicating a performance issue on the bus.
- GDS2 Scan Tool Data: 'Surrogate MOST Master Node Upstream Position' — expected: 0. Failure: A value greater than 0 (e.g., '2') indicates which module is downstream from the communication failure. This data point helps pinpoint the faulty module or wiring section.
- Visual check of fiber-optic signal — expected: A visible red light at the output of a functioning module's fiber-optic port when the system is active.. Failure: No red light coming from a module's output port indicates that module is not transmitting, either due to internal failure or because it's not receiving a signal from the previous module in the ring.
Scan Tool Commands That Help
- GDS2 (or equivalent high-end scan tool): Module Data Display (specifically for the Radio module) — Used to view live MOST bus status parameters like 'Number of MOST Communication Breaks' and 'Surrogate MOST Master Node Upstream Position' to diagnose the network's health and locate the area of the fault.
- GDS2 (or equivalent high-end scan tool): Data Bus Diagnostic Tool — This tool, often integrated with GDS2, can actively poll the data bus to determine which modules are communicating and which are not, helping to quickly identify a non-responsive module on the MOST ring.
- GM SPS (Service Programming System): Module Programming/Setup — Required after replacing the HMI, Radio, or sometimes the Instrument Panel Cluster to configure the new module to the vehicle's VIN and specific options. Failure to program will result in a non-functional component.
Wiring & Ground Locations
- Serial Data Gateway Module (SDGM / K56) — Located under the driver's side of the dashboard, often near the Body Control Module (BCM). It typically has a black and a gray connector.. The SDGM is a central hub for multiple communication networks. TSB #PIT5586G and other engineering bulletins point to checking for backed-out terminals or poor connections at this module as a potential cause for various communication codes, including U0029.
- G201 — In the upper left corner of the instrument panel, near the A-pillar.. A poor ground connection for instrument panel components can cause erratic behavior and communication faults. The Instrument Panel Cluster (IPC) is a node on the MOST bus, and its stability relies on a solid ground.
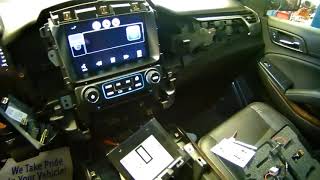
- HMI Module — Located behind the main infotainment display screen. The screen itself must be removed to access it.. This is a primary communication module on the MOST ring. Knowing its location is essential for performing a bypass loop test or for replacement.
- Radio Module (Tuner) — On many models, this is a separate silver box located behind the glove box or integrated with the CD player assembly.. The radio is the master module of the MOST bus. A failure here or in its wiring will bring down the entire infotainment system.
Real Owner Repair Stories
- iATN (International Automotive Technicians Network) forum post (2015 Chevrolet Silverado 1500) — MyLink display was dark/black, radio would not play, and control buttons were non-functional.
❌ Tried (didn't work) Initial thought was to check powers and grounds, but this was deferred because multiple components (HMI and Radio) failed simultaneously, pointing to a network issue.
✅ What actually fixed it The technician scanned the vehicle and found U0028 in the radio and U0029 in the HMI module. Using GDS2 scan data, they determined the fault was located before the HMI module in the ring, pointing to the CD player. They were unable to communicate with the CD player. After removing the CD player and installing a fiber-optic bypass loop in its place, the display and radio immediately began working correctly. The root cause was an internal failure of the CD player module. - YouTube video from channel 'Idlewild Garage' (2015 Chevrolet Suburban) — Navigation and phone functions worked, but the radio audio and radio controls were inoperative. DTC U0029 was present.
❌ Tried (didn't work) Initially suspected the radio module itself since radio functions were the primary complaint.
✅ What actually fixed it The technician used GDS2 to observe that the 'Number of MOST Communication Breaks' was increasing rapidly. This indicated an intermittent fault but didn't specify the location. By systematically bypassing modules with a fiber-optic loop, the fault was isolated. When the CD player was bypassed with the loop tool, the communication break count stabilized at a fixed number, and normal operation was restored. The fix was to replace the faulty CD player.
OEM Part Supersession History
23212442, 23415899, 84037763→84156701, 84331776, 84546904, 84852089 (among others)— Part revisions to improve reliability and address hardware or software issues.
Heads up: It is critical to order an HMI module based on the vehicle's VIN and RPO codes (e.g., IO5 for standard infotainment, IO6 for navigation). A module from a vehicle with different options may not function correctly even if it physically fits.
Model Year Variations Within This Range
- 2015: Early 2015 models were equipped with a 6-speed automatic transmission, while mid-year 2015.5 models received the 8-speed automatic. This doesn't directly affect the U0029 code but is a key identifier for the vehicle build.
- 2015-2020: The infotainment systems were identified by RPO codes, typically found on a sticker in the glove box. The main systems were IO5 (8-inch screen with MyLink/IntelliLink) and IO6 (same as IO5 but with added factory navigation). Part compatibility for the HMI module is dependent on which system the vehicle was built with.
- 2018-2020: For the 2018 model year, the Yukon Denali received a new 10-speed automatic transmission and a revised front grille design. While the MOST bus architecture remained similar, HMI module part numbers may differ from earlier years.
Helpful Videos
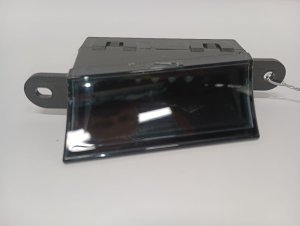
We Have This Part in Stock



The information in this article is provided for general reference and educational purposes only. Vehicle specifications, procedures, and part compatibility can vary by production date, trim level, and region. Always consult your vehicle's factory service manual and verify part numbers before purchasing or performing repairs. Safety-critical components such as airbags, seat belts, and braking systems should be installed by a qualified professional.
- Gmc YUKON:
- 🎬 Helpful Videos
- 🛍️ Shop This Part
- What's Unique About the 2015-2020 Gmc YUKON
- Diagnostic Flowchart
- Symptoms You May Notice
- Most Likely Causes
- Rare But Worth Checking
- Diagnosis Steps
- Parts You'll Likely Need
- Related Codes That Often Appear With This One
- Technical Service Bulletins (TSBs) & Recalls
- Platform-Specific Known Issues
- Mechanic-Grade Diagnostic Values
- Scan Tool Commands That Help
- Wiring & Ground Locations
- Real Owner Repair Stories
- OEM Part Supersession History
- Model Year Variations Within This Range
- 🎟️ Get 5% Off