

U0029 on 2015-2019 GMC Sierra 2500: Network Communication Fault Causes & Fixes
Code U0029 on a 2015-2019 GMC Sierra 2500 indicates a network communication failure, often due to a pinched wire harness behind the left side of the dashboard, as documented in GM Technical Service Bulletin #PIT5288H. The fix is to access, repair, and reroute the damaged wires. This is a well-known issue affecting many GM trucks and SUVs from this era.
- U0029 on a 2015-2019 Sierra 2500 is a serious network communication error.
- The most likely cause is a pinched wiring harness behind the driver's side of the dashboard, as per GM TSB #PIT5288H.
- Symptoms are widespread and include a blank infotainment screen, no audio, and inoperative climate controls.
- Always inspect the dash harness for damage before considering the expensive replacement of control modules like the radio or HMI.
- Diagnosis can be complex and may require professional tools to properly identify the point of failure on the network.
What's Unique About the 2015-2019 Gmc SIERRA 2500
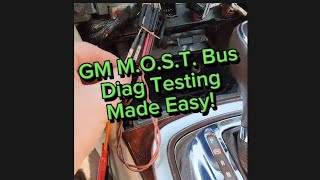
On this generation of GMC Sierra (and its K2XX platform mates), the U0029 code is strongly linked to a specific, documented manufacturing or design flaw. General Motors issued TSB #PIT5288H which identifies 🎬 Watch: Diagnosing blank displays and MOST bus network codes a common problem where the main dash wiring harness gets pinched between a steel mounting bracket and the body on the driver's side, near the A-pillar. This specific physical vulnerability is the leading cause of this network code, far more so than random module failures. Another service bulletin also notes that the body harness can rub against the park brake bracket, causing similar electrical issues.
Diagnostic Flowchart
Tap your situation to follow the diagnostic path that matches what you're seeing on this vehicle.
Symptoms You May Notice
- Blank or inoperative infotainment/touch screen.
- No audio from the radio.
- HVAC (climate) controls are inoperative. [Bulletin #PIT5586E]
- Instrument panel cluster goes blank or displays error messages.
- Steering wheel controls do not work.
- Dead battery due to modules not shutting down properly. [Bulletin #PIT5288H, 18]
- Multiple other communication DTCs stored.
- "Audio Off" message on the instrument cluster.
- "No Fob Detect" message on the DIC.
- Service Stabilitrak message.
- Replacing the radio or HMI module without first thoroughly inspecting the wiring harness. The pinched harness is a much more frequent cause than module failure and should be checked first to avoid unnecessary expense.
Most Likely Causes
- Pinched Dash Wiring Harness 🔴 High Probability A known issue documented in GM TSB #PIT5288H where the harness is pinched between the left instrument panel mounting bracket and the body during assembly. The pinch point is typically located behind the driver's side knee bolster/fuse panel cover, where the harness passes the steel dash support.
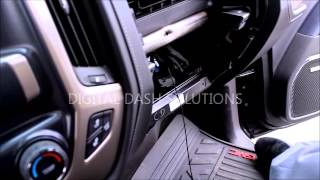
How to confirm: Visually inspect the wiring harness located behind the driver's side of the dashboard, near the A-pillar mounting bracket. It may be necessary to remove the driver's knee bolster and side dash panel. Check if the harness is trapped, flattened, or if wires are exposed. The TSB notes that it can be difficult to see, and a key test is to check if the harness can be moved freely away from the bracket.
Typical fix: Loosen the instrument panel bracket bolts, free the harness, open the loom to inspect for damaged wires (especially the MOST bus fiber optic lines), and repair any broken or chafed wires. Reroute the harness to prevent future pinching. Some owners use a zip tie to secure the harness away from the sharp bracket edge after repair.
Est. part cost: $5-$25 for wiring repair supplies (tape, terminals, wire). - Low Battery Voltage or Failing Battery 🟡 Medium Probability Modern trucks have a high electrical demand. Low voltage can cause control modules to drop off the communication network, leading to performance codes like U0029. This should be the first check before attempting more complex diagnostics.
How to confirm: Test the battery with a digital multimeter or a dedicated battery tester. A healthy, resting battery should be at approximately 12.6 volts. Check the alternator output when the engine is running (should be ~13.7-14.7 volts).
Typical fix: Recharge or replace the battery. Ensure battery terminals are clean and tight.
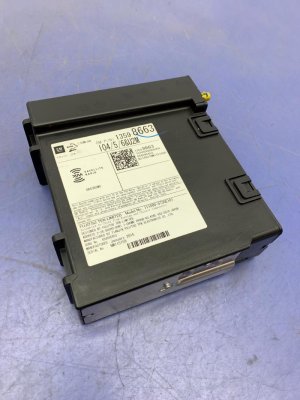
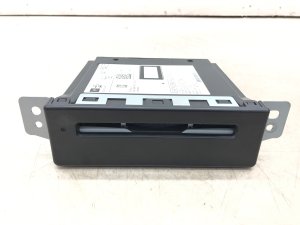
Est. part cost: $150-$350 for a new battery. - Failed Control Module (HMI, Radio, CD Player) ⚪ Low Probability Modules on the MOST bus network, such as the CD player, HMI module, or radio, can fail internally, causing them to stop communicating and break the network 'ring'. The CD player is a known point of failure.
How to confirm: This requires an advanced scan tool to see which modules are not communicating. A technician can use a special MOST bus jumper tool (like the EL-51578) to systematically eliminate modules from the network ring. For example, unplugging the CD player and using a bypass loop can quickly determine if it's the faulty component.
Typical fix: Replace the faulty module. This often requires programming by the dealer or a qualified shop.
Est. part cost: $200-$1000+ depending on the specific module.
Rare But Worth Checking
- Failed CD Player / Media Disc Player: The CD player is a node in the MOST bus fiber optic ring. Several owner and technician accounts confirm that an internal failure of the CD player can bring down the entire network, causing U0029. Bypassing it with a fiber optic loop is a common diagnostic step.
- Corroded Connectors or Other Wiring Damage: While the pinched harness is the most common wiring issue, water intrusion or damage from aftermarket installations can also cause shorts or opens in the communication wiring at other locations, such as the connectors on the back of the radio or HMI module.
- Faulty Serial Data Gateway Module (SDGM): A separate GM bulletin mentions that an internal error in the SDGM or loose terminals at its connectors can cause it to stop communicating on all CAN channels, which can set a host of 'U' codes, including U0029. This may require reprogramming or connector repair.
Diagnosis Steps
- Check the battery's state of charge and overall health. A weak battery can cause numerous communication codes. Charge and re-test if necessary.
- Scan for all Diagnostic Trouble Codes (DTCs) in all modules. Note all communication 'U' codes, especially U0028 and U0029.
- Crucial Step: Remove the driver's side knee bolster and left-side dash panel to gain access to the main wiring harness. Carefully inspect the harness where it passes the large, steel instrument panel mounting bracket near the A-pillar. Check for pinching, chafing, or crushed wires as described in TSB #PIT5288H.
- If no pinched harness is found, inspect other major harness connectors for corrosion or damage, particularly at the BCM, radio, and HMI module.
- If you have an advanced scan tool, check the MOST bus data to see which modules are present on the network and if there are communication breaks.
- For advanced diagnosis, use a MOST bus fiber optic bypass loop (GM tool EL-51578 or equivalent) to systematically eliminate modules from the network ring. A common starting point is to bypass the CD player, as it's a known failure point. If bypassing a module restores communication, that module is the fault.
- If a specific module is identified as the fault, verify its power and ground connections before condemning the module.
- Once the faulty wire or component is repaired/replaced, clear all DTCs and perform several ignition cycles to ensure the fault does not return.
Parts You'll Likely Need
- Wiring Repair Supplies — To fix the common issue of a pinched or chafed wire in the dash harness.
Trusted brands: 3M, Tesa
OEM price range: $5-$25
Aftermarket price range: $5-$25 - Human Machine Interface (HMI) Module
(OEM #Varies by VIN/options (e.g., 84506380))— If the module itself has failed, it will need to be replaced to restore communication. This is a less common cause than wiring issues and requires programming.
Trusted brands: ACDelco
OEM price range: $400-$800
Aftermarket price range: $250-$500 (Remanufactured) - MOST Bus Fiber Optic Bypass Loop
(OEM #EL-51578)— A diagnostic tool used to bypass individual modules (like the CD player or amplifier) on the fiber optic ring to isolate the source of the network failure.
Trusted brands: Kent-Moore, Aftermarket
OEM price range: $50-$100
Aftermarket price range: $10-$30 - Radio Control Module — The radio acts as a gateway and master for the MOST bus. An internal failure can bring down the entire network.
Trusted brands: ACDelco
Related Codes That Often Appear With This One
- U0028 — This code for 'Vehicle Communication Bus A' is almost always set alongside U0029. They both point to a general fault on the same MOST communication network.
- U0140 — Lost Communication With Body Control Module (BCM). The BCM is a central hub, and if the main bus has a problem, communication with the BCM is often lost. [Bulletin #PIT5405A, #PIT5586E]
- U0155 — Lost Communication With Instrument Panel Cluster (IPC) Control Module. The IPC is a key node on the network, and its failure to communicate is a common symptom. [Bulletin #PIT5586E]
- U0184 — Lost Communication With Radio. The radio is often the master module for the MOST bus, and this code is a direct indicator of a network problem. [Bulletin #PIT5586E]
Technical Service Bulletins (TSBs) & Recalls
- PIT5288H: RKE / Passive Entry & Start / SWC / Touch Screen Inoperative / No Audio / DTC B3101, U0028, U0029. Points to a pinched dash harness between the left I/P mounting bracket and the body.
- PIT5586E: Intermittent Loss Of Communication With Various Modules. Lists U0029 as a possible code when HVAC controls are inoperative due to a communication loss with the Serial Data Gateway Module (SDGM).
- PIT5405A: Radio And Or HVAC Controls Go Blank With Multiple DTCs. Lists U0029 as a possible code in this scenario, pointing to a general network fault. [NHTSA ID: 10058982]
- PI1149A: Intermittent Radio Blank Display With or Without Audio and MOST BUS Diagnostic Aid. Mentions U0029 as a key code when the MOST bus is down and recommends using tool EL-51578 to bypass modules for diagnosis.
Platform-Specific Known Issues
- TSB #PIT5288H: Documents a widespread issue where the dash harness is pinched by a left-side mounting bracket, causing shorts in the communication wires and leading to codes like U0029.
- TSB #PIT5405A & #PIT5586E: Both bulletins list U0029 as one of many codes that can appear when network communication fails, causing symptoms like a blank HVAC panel or inoperative controls.
- Owner Experience: A user on YouTube with a 2015 Chevrolet Silverado (platform mate) experienced a blank screen with codes U0028/U0029. The fault was an internally failed CD player. Bypassing the CD player with a fiber optic loop restored all radio and screen functions.
- Technician Diagnosis: A technician on the iATN network diagnosed a 2015 Silverado with U0028/U0029 and a dark screen. By analyzing scan tool data that pointed to a communication failure before the HMI module, they identified the CD player as the faulty node in the MOST ring. Bypassing it fixed the issue.
Mechanic-Grade Diagnostic Values
- MOST Bus Wake-Up Signal (MOST Control Circuit) — expected: The circuit should show a constant 12V B+. The radio (master module) pulls this voltage to ground (0V) for approximately 300-400 milliseconds to wake up other modules on the network.. Failure: If the ring is incomplete or a module is not responding, the radio will repeat the wake-up signal (pull-down to 0V) every 2.5 seconds. An open or high resistance in this circuit can prevent modules from waking up.
Scan Tool Commands That Help
- GDS2 (Global Diagnostic System 2): Radio Data Display — Use this function to view live data from the Radio module, which is the MOST bus master. Key PIDs to monitor are 'Number of MOST Communication Breaks' and the status of each node (Radio, CD, HMI, Amplifier, IPC). A rapidly increasing number of breaks indicates an active fault.
- GDS2 (Global Diagnostic System 2): Data Bus Diagnostic Tool — This tool, launched from GDS2, can actively poll modules on the data bus to determine which ones are communicating. This helps identify a module that is offline and breaking the MOST ring.
- GDS2 (Global Diagnostic System 2): Module Information / ID Information — To check the 'Surrogate MOST Master Node Upstream Position' in the radio data. This number can help pinpoint where the communication break is occurring in the ring topology. For example, if the upstream position is 2, the fault is likely with the second module upstream from the radio (e.g., the CD player).
Wiring & Ground Locations
- G201 — In the upper left corner of the instrument panel, near the driver's side A-pillar. The dash must be disassembled to access it.. This is a primary instrument panel ground. A poor connection at G201 can cause issues with multiple dash-mounted modules on the MOST bus, including the Instrument Panel Cluster (IPC) and potentially contributing to the pinched harness issue nearby.
- G103 — Located at the left rear of the engine compartment on the cowl, above the brake booster.. This ground serves the BCM, IPC, and Radio. A fault at this location can cause widespread communication issues across multiple modules, mimicking a bus failure.
- Radio Connector (X1) — The main connector on the back of the silver radio module, typically located behind the HVAC controls or glove box.. This connector contains the fiber optic MOST bus wires, the MOST wake-up signal wire, power, and ground. It is the starting and ending point of the MOST ring. All diagnostic signals originate here.
Real Owner Repair Stories
- iATN (International Automotive Technicians Network) Case Study (2015 Chevrolet Silverado 1500 LT) — MyLink display was blank and the radio was not functioning.
❌ Tried (didn't work) Initial checks without scan tool data.
✅ What actually fixed it The technician found U0028 in the radio and U0029 in the HMI module. Scan data showed the MOST ring had integrity but a communication failure was occurring before node 3 (HMI). Communication with the CD player (node 2) could not be established. The technician removed the CD player and installed a fiber optic bypass loop. The display and radio immediately began working correctly. The failure was an internal fault in the CD player. - YouTube channel 'Idlewild Garage' (2015 Chevrolet Suburban) — DTC U0029 was set, and the 'Number of MOST Communication Breaks' on the scan tool was increasing rapidly.
❌ Tried (didn't work) Initial diagnosis was difficult because all modules were showing as present on the bus despite the rapidly increasing communication breaks.
✅ What actually fixed it The technician used the GM special tool EL-51578 (MOST Bus Diagnostic Tool Kit) to bypass the CD player with a fiber optic loop. After installing the jumper and starting the vehicle, the 'Number of MOST Communication Breaks' stopped increasing. This confirmed the CD player had an internal fault that was flooding the network with errors. Replacing the CD player resolved the issue.
OEM Part Supersession History
Varies (e.g., 23212442, 23415899)→Varies (e.g., 84028492, 84156701, 84506380)— GM frequently updates HMI modules to fix bugs, improve performance, and address hardware vulnerabilities. Newer part numbers represent the latest stable versions.
Heads up: Part numbers are not the primary way to ensure compatibility. A replacement HMI must be for the correct model year range (e.g., 2016-2019) and option level (IO5 for non-navigation, IO6 for navigation). Using a 2018 module in a 2015 truck will not work without special programming, as the hardware and software generations are different (HMI 2.5 vs 2.0).
Model Year Variations Within This Range
- 2015: These trucks use the HMI 2.0 module. This version is known to be slower and lacks Apple CarPlay/Android Auto capability.
- 2016-2019: These trucks use the upgraded HMI 2.5 module. This version has a faster processor, more memory, and supports Apple CarPlay/Android Auto. The hardware is different from the 2.0 module, and they are not directly interchangeable without additional components and programming.
Helpful Videos
We Have This Part in Stock




The information in this article is provided for general reference and educational purposes only. Vehicle specifications, procedures, and part compatibility can vary by production date, trim level, and region. Always consult your vehicle's factory service manual and verify part numbers before purchasing or performing repairs. Safety-critical components such as airbags, seat belts, and braking systems should be installed by a qualified professional.
- Gmc SIERRA 2500:
- 🎬 Helpful Videos
- 🛍️ Shop This Part
- What's Unique About the 2015-2019 Gmc SIERRA 2500
- Diagnostic Flowchart
- Symptoms You May Notice
- Most Likely Causes
- Rare But Worth Checking
- Diagnosis Steps
- Parts You'll Likely Need
- Related Codes That Often Appear With This One
- Technical Service Bulletins (TSBs) & Recalls
- Platform-Specific Known Issues
- Mechanic-Grade Diagnostic Values
- Scan Tool Commands That Help
- Wiring & Ground Locations
- Real Owner Repair Stories
- OEM Part Supersession History
- Model Year Variations Within This Range
- 🎟️ Get 5% Off