

U0029 on 2015-2020 Chevrolet Tahoe: Causes and Fixes for Communication Bus 'A' Performance
On a 2015-2020 Tahoe, code U0029 is most often caused by a pinched or damaged wiring harness behind the left side of the instrument panel, near the parking brake pedal. This specific issue is documented in GM Technical Service Bulletin #PIT5288H. Inspecting and repairing this harness is the most common and likely fix for a host of seemingly unrelated electrical issues.
- Code U0029 on a 2015-2020 Tahoe indicates a serious communication network problem.
- The most probable cause is a pinched wiring harness behind the driver's side of the dashboard, as identified in a GM service bulletin.
- Other likely causes include a faulty Serial Data Gateway Module (SDGM) or a failed module on the network, like the CD player.
- Symptoms are widespread and can include a dead battery, blank radio screen, and inoperative climate controls.
- Diagnosis is complex and best left to a professional, but a visual inspection for the pinched harness is a worthwhile first step for an advanced DIYer.
What's Unique About the 2015-2020 Chevrolet TAHOE
The 2015-2020 Tahoe and its K2XX platform mates are known for a specific wiring vulnerability. General Motors issued TSB #PIT5288H, which details how the main dash harness can get pinched between a metal I/P (Instrument Panel) mounting bracket and the body. This pinch point is located on the driver's side, sometimes visible by removing the I/P fuse block cover, but best inspected from underneath the dash, near the parking brake pedal assembly. This specific, documented flaw is a primary cause for code U0029 and the associated communication failures on this vehicle.
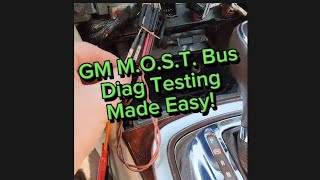
🎬 Watch: A professional diagnostic walkthrough for the U0029 MOST bus fault.Diagnostic Flowchart
Tap your situation to follow the diagnostic path that matches what you're seeing on this vehicle.
Symptoms You May Notice
- Inoperative HVAC (climate) controls. [TSB #PIT5586G]
- No audible feedback (clicking sound) from turn signals. [TSB #PIT5586G]
- Dead battery. [TSB #PIT5288H]
- Radio or infotainment touch screen is blank or inoperative.
- Steering wheel controls do not work.
- Multiple warning messages on the driver information center (e.g., 'Service Suspension System', 'Service Stabilitrak').
- Instrument panel gauges may fluctuate or be inoperative.
- Remote Keyless Entry (RKE) or Passive Entry system inoperative.
- "No Fob Detect" message on the DIC.
- Rear wiper or rear power windows inoperative.
- Replacing the battery without checking for a parasitic drain caused by a communication module that fails to shut down. [TSB #PIT5288H]
- Replacing the radio or HMI module without first confirming it is the specific point of failure on the network bus using a bypass loop.
- Replacing modules when the actual fault is the pinched wiring harness under the dash.
Most Likely Causes
- Pinched or Damaged Wiring Harness 🔴 High Probability A well-documented issue in TSB #PIT5288H where the dash harness gets pinched between the left instrument panel mounting bracket and the body, causing shorts or open circuits in the communication wires. The location is under the dash, near the parking brake pedal assembly.
How to confirm: Visually inspect the wiring harness on the left side of the dashboard, specifically around the metal mounting bracket near the parking brake pedal. This requires removing lower dash panels. Check if the harness is caught, flattened, or has visible wire damage. The harness should be able to move freely.
Typical fix: Loosen the bolts for the left I/P mounting bracket to free the trapped harness. Open the loom, inspect, and repair any chafed, broken, or shorted wires. Reroute the harness to prevent it from being pinched again.
Est. part cost: $5-$25 for wire repair supplies (Tesa tape, connectors, wire). - Faulty Serial Data Gateway Module (SDGM) 🟡 Medium Probability TSB #20-NA-212 (which supersedes PIT5586G) indicates the SDGM can suffer from internal microcontroller errors that cause it to stop communicating, or have poor pin connections at its X1 and X2 connectors.
How to confirm: A technician would first attempt to reprogram the SDGM with the latest software. If the issue persists, they would inspect the X1 and X2 connectors for bent, loose, spread, or corroded terminals. A temporary fix of pulling the SDGM power fuse to reset it can sometimes restore function, pointing to the module itself.
Typical fix: The first step is reprogramming the module per TSB #20-NA-212. If that fails or if connector issues are found, the terminals or connector must be repaired. In some cases, the SDGM itself requires replacement and subsequent programming.
Est. part cost: $150-$300 for a new SDGM, plus programming costs. - Faulty Control Module on MOST Bus ⚪ Low Probability Any module on the MOST fiber optic ring (e.g., CD player, HMI module, Amplifier) can fail internally and disrupt the entire network. The CD player, in particular, is cited in owner forums and diagnostic case studies as a common point of failure that brings down the bus.
How to confirm: This requires a process of elimination using a MOST bus fiber optic bypass loop jumper (like the EL-51578 tool). A technician bypasses one module at a time. When the faulty module is bypassed, the rest of the ring is completed, and other functions (like the radio and display) will be restored.
Typical fix: Replace the single faulty module that is bringing down the network. The replacement module will likely require programming to the vehicle. In the case of a faulty CD player, some owners simply bypass it permanently if they don't use it.
Est. part cost: $200-$800 depending on the specific module (e.g., CD player vs. HMI module).
Rare But Worth Checking
- Corrosion in Underhood Fuse Block: Water intrusion into the underhood fuse block can cause corrosion on the connectors beneath it, leading to a short between CAN bus lines and a total loss of communication.
- Poor Ground Connection: A loose or corroded main ground cable (GND) can cause a variety of bizarre electrical issues, including communication faults. Specifically, ground G218 for the BCM can be compromised by the dash insulator mat being trapped underneath it.
Diagnosis Steps
- Scan for all DTCs in all modules. Note which modules are not communicating and which ones are setting codes like U0028 and U0029.
- Perform a thorough visual inspection of the wiring harness behind the left side of the instrument panel, looking for the pinched harness described in TSB #PIT5288H. This is under the dash near the parking brake pedal.
- If no pinched harness is found, inspect the X1 and X2 connectors at the Serial Data Gateway Module (SDGM) for any bent, backed-out, or corroded pins, as per TSB #20-NA-212.
- Check for good power and ground connections at the main battery and underhood fuse block. Inspect ground G218 under the driver's side dash for looseness or for the dash insulator mat being trapped under the eyelet. Ensure battery voltage is stable.
- If symptoms align with TSB #20-NA-212, attempt to reprogram the SDGM using a Techline Connect terminal.
- If the issue persists, use a MOST bus bypass tool (fiber optic loop) to systematically isolate each module on the ring (Radio, CD Player, HMI, Amplifier, IPC). Start by bypassing the CD player, as it is a common failure point. 🎬 Watch: A simple guide to testing the GM M.O.S.T. bus network. When the faulty module is bypassed, communication should be restored to the other modules.
- Once the faulty module is identified, inspect its power and ground connections before condemning it. If connections are good, replace the module and perform any necessary programming.
Parts You'll Likely Need
- Wire Repair Supplies — Needed to fix the commonly found pinched and damaged wiring harness behind the dashboard.
Trusted brands: 3M, Tesa
OEM price range: $10-$30
Aftermarket price range: $5-$20 - Serial Data Gateway Module (SDGM)
(OEM #13599318 (supersedes 13509768, 13524297, 13524298, 13599317), 13542838)— This module can fail internally or suffer from connection issues, causing a total network shutdown as described in TSB #20-NA-212.
Trusted brands: ACDelco (GM Genuine)
OEM price range: $150-$300
Aftermarket price range: $100-$250 - CD Player / Media Disc Player
(OEM #13594480 or 13594481 (Option Code TG5))— An internal failure in the CD player can bring down the entire MOST bus network, making it a surprising but documented cause of this code.
Trusted brands: ACDelco (GM Genuine)
OEM price range: $250-$400
Aftermarket price range: $150-$250 (Remanufactured)
Related Codes That Often Appear With This One
- U0028 — This code is for 'Vehicle Communication Bus A', and often appears with U0029 as they both relate to the same MOST bus network performance. U0028 may be set by the radio, while U0029 is set by the HMI module.
- U0140 — Lost Communication With Body Control Module (BCM). This often sets when the main communication bus goes down, preventing the BCM from talking to other modules. [TSB #PIT5586G]
- U0151 — Lost Communication With Restraints Control Module. This is another common consequential code when the network fails, mentioned specifically in TSB #PIT5288H.
- U0155 — Lost Communication With Instrument Panel Cluster (IPC) Control Module. This code is common when the IPC gauges go dead or the display is blank. [TSB #PIT5586G]
Technical Service Bulletins (TSBs) & Recalls
- PIT5288H: Notes a pinched wire harness in the left instrument panel causing a wide array of communication DTCs including U0029.
- 20-NA-212: Addresses SDGM failures, recommending reprogramming or inspection of connector terminals.
- PIT5586G: Older TSB, now superseded by 20-NA-212, that listed many communication codes (including U0029) related to SDGM logic locks.
Platform-Specific Known Issues
- TSB #PIT5288H: Pinched Dash Harness: Documents a high likelihood of the dash harness being pinched between the left instrument panel mounting bracket and the body, near the parking brake pedal. This causes a multitude of electrical failures and sets codes U0028 and U0029. The fix involves freeing and repairing the damaged wires.
- TSB #20-NA-212: Faulty SDGM: Points to either an internal software error in the Serial Data Gateway Module (SDGM) requiring a reprogram, or poor terminal connections at the SDGM's X1/X2 connectors. This TSB supersedes older ones like #PIT5586G for this issue.
Mechanic-Grade Diagnostic Values
- MOST Bus Wake-Up Signal (Electronic Control Line) — expected: The bus rests at 12V. To wake the network, the master module (Radio) pulls the voltage to 0V for 100 milliseconds.. Failure: An open or high resistance in this circuit can prevent modules from waking up, while a short to ground or voltage would be a normal operating state and less likely to cause this specific code.
- High-Speed CAN Bus Resistance (at DLC) — expected: Approximately 60 Ω between Pin 6 (CAN-H) and Pin 14 (CAN-L) with the battery disconnected.. Failure: A reading of 120 Ω indicates one of the two terminating resistors is missing or the bus is open. A reading significantly lower than 60 Ω (e.g., near 0 Ω) indicates a short between the CAN lines.
- Module Power Circuit Load Test — expected: When load testing a power feed to a module, use a test light bulb that draws about 10% of the circuit's fuse rating (e.g., a 2-amp bulb for a 20-amp fused circuit). The bulb should light brightly, and voltage should remain steady.. Failure: A dim light or significant voltage drop under load indicates high resistance in the power feed or a poor ground connection.
Hidden / Shadow Codes Worth Checking
- Surrogate MOST Master Node Upstream Position: This is not a DTC, but a live data parameter in the Radio module. It displays a node number (e.g., 1, 2, 3, 4) indicating which module is upstream (counting backward in the ring) from the point of a communication failure. This is critical for pinpointing the faulty module. (see via GM GDS2 or equivalent professional scan tool, in the Radio live data list.)
- Number of MOST Communication Breaks: A live data parameter in the Radio module that increments when the master module sends a wake-up signal and does not receive it back from all modules. If this number is zero but a U0029 code is present, it suggests a performance issue within a module rather than a complete break in the wiring ring. (see via GM GDS2 or equivalent professional scan tool, in the Radio live data list.)
Scan Tool Commands That Help
- GDS2 (GM): Data Bus Diagnostic Tool — To actively query all modules on a selected data bus and get a list of which modules are communicating and which are not. This helps to quickly identify offline modules.
- GDS2 (GM): View Radio Live Data — To check the 'Surrogate MOST Master Node Upstream Position' and 'Number of MOST Communication Breaks' PIDs. This data helps determine the location and type of fault on the MOST bus ring.
- EL-51578 MOST Bus Diagnostic Tool Kit: Module Bypass Jumper — This is a physical tool used with a scan tool. When a module is suspected of being faulty, this jumper is used to bypass it in the MOST ring. If communication is restored to other modules and the U0028/U0029 code goes into history, the bypassed module is confirmed as the fault.
Wiring & Ground Locations
- G218 — Under the driver's side of the instrument panel/dash.. This is a primary ground for the Body Control Module (BCM). TSB PIT5405C notes that the dash insulator mat can get trapped between the ground eyelet and the body, causing a poor connection and a wide range of electrical faults, including communication issues.
- G103 — On the cowl in the left rear of the engine compartment, above the brake booster.. This ground serves multiple critical modules involved in communication, including the BCM, Instrument Panel Cluster (IPC), Radio, and the Data Link Connector (DLC) itself. A fault here can cause widespread network failure.
- Frame Grounds (unspecified) — Behind both front wheels, on the frame.. A forum user noted these grounds are in a terrible location and are subject to corrosion from tire splash, which can lead to intermittent electrical problems.
- MOST Bus Ring Order — Infotainment system components in the dash and vehicle.. The signal flows in a specific order: Radio (Node 1) -> CD Player (Node 2) -> HMI Module (Node 3) -> Instrument Cluster (IPC) (Node 4) -> back to Radio. Knowing this order is essential when using the 'Surrogate MOST Master Node Upstream Position' data to find the fault location.
Real Owner Repair Stories
- iATN (International Automotive Technicians Network) Case Study (2015 Chevrolet Silverado (K2XX Platform)) — MyLink display was dark, radio would not play, control buttons were non-functional. Codes U0028 in Radio and U0029 in HMI were present.
❌ Tried (didn't work) Initial thought was to check powers and grounds, but the presence of multiple module failures pointed to a network issue.
✅ What actually fixed it The technician checked scan data and found the 'Surrogate MOST Master Node Upstream Position' was '2'. Counting backward from the last module (IPC=4, HMI=3), this pointed to the CD player (Node 2) as the fault. The tech removed the CD player and installed a MOST bypass jumper. The radio and screen immediately began working correctly, confirming an internal failure in the CD player. - YouTube video by 'No Nonsense Know How' (2015 Chevrolet Silverado (K2XX Platform)) — Blank screen (but backup camera worked), no radio, no sound. Codes U0028 and U0029 were present.
❌ Tried (didn't work) Replacement screen was already installed but did not fix the issue.
✅ What actually fixed it The technician identified the CD player as a likely cause for bringing the MOST bus down. He removed the CD player and bridged the MOST bus wires (green and gray) with a jumper. The network came back up, and the radio began to function. The permanent fix was to leave the CD player bypassed. - YouTube video by 'Idlewild Garage' (2015 Chevrolet Suburban) — Code U0029, MOST network communication interrupted.
✅ What actually fixed it The technician used a MOST bus bypass jumper to sequentially eliminate modules from the network ring. When the CD player was bypassed with the jumper, the 'Number of MOST Communication Breaks' on the scan tool stopped increasing. This isolated the fault to an internal failure of the CD player. - Reddit post in r/Justrolledintotheshop (GM Truck (likely K2XX platform)) — Unspecified electrical issues leading to a diagnosis of a bad wiring harness.
❌ Tried (didn't work) Another shop quoted a complete dash and chassis harness replacement for 20 hours of labor.
✅ What actually fixed it The actual problem was a pinched harness, consistent with TSB PIT5288H. The fix was a 45-minute cut-and-solder repair of the damaged wires, saving thousands of dollars.
"I Checked Everything" — The Actual Cause
- In the context of network diagnosis, a 'smoke test clean' equivalent is when visual wiring inspection reveals no damage. In one case study, because code U0029 was set (indicating a performance fault where the ring was still intact) instead of a hard fault for a broken ring, the technician correctly suspected an internal module failure rather than a wiring break. The fault was indeed an internal failure of the CD player, which could not be found with a simple visual inspection of the harness.
Model Year Variations Within This Range
- 2015: A mid-year production change occurred for 2015 Tahoe/Suburban/Yukon models. Vehicles built later in the year are designated with RPO code 'AVF' (found on the glove box sticker). Infotainment modules, like the HMI or CD player, must be compatible with this change.
- 2015: Early 2015 models were equipped with a 6-speed automatic transmission. Mid-year '2015.5' models received the new 8-speed automatic transmission.
- 2018: The front grille design was updated, and the 10-speed automatic transmission was introduced on some models.
Helpful Videos
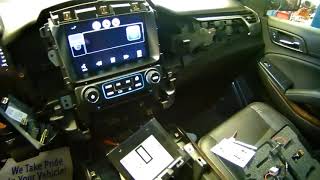
We Have This Part in Stock



The information in this article is provided for general reference and educational purposes only. Vehicle specifications, procedures, and part compatibility can vary by production date, trim level, and region. Always consult your vehicle's factory service manual and verify part numbers before purchasing or performing repairs. Safety-critical components such as airbags, seat belts, and braking systems should be installed by a qualified professional.
- Chevrolet TAHOE:
- 🎬 Helpful Videos
- 🛍️ Shop This Part
- What's Unique About the 2015-2020 Chevrolet TAHOE
- Diagnostic Flowchart
- Symptoms You May Notice
- Most Likely Causes
- Rare But Worth Checking
- Diagnosis Steps
- Parts You'll Likely Need
- Related Codes That Often Appear With This One
- Technical Service Bulletins (TSBs) & Recalls
- Platform-Specific Known Issues
- Mechanic-Grade Diagnostic Values
- Hidden / Shadow Codes Worth Checking
- Scan Tool Commands That Help
- Wiring & Ground Locations
- Real Owner Repair Stories
- "I Checked Everything" — The Actual Cause
- Model Year Variations Within This Range
- 🎟️ Get 5% Off