

U0029 on 2015-2020 Cadillac Escalade ESV: Communication Bus Fault Causes and Fixes
Code U0029 on a 2015-2020 Escalade indicates a communication network failure. It is frequently caused by a pinched wire harness behind the instrument panel, a known issue covered by GM Technical Service Bulletin #PIT5288H. The fix involves inspecting and repairing the damaged wires, which is the most common cause before suspecting a faulty module.
- U0029 on a 2015-2020 Escalade is a serious network communication error that should be addressed immediately.
- The most probable cause is a pinched wiring harness behind the driver's side dashboard, as documented in GM TSB #PIT5288H.
- Always inspect this specific wiring location before spending money on replacement modules.
- If wiring is not the cause, the fault is likely a failed module on the MOST infotainment network, such as the HMI module or CD player.
- Diagnosis requires careful inspection and may require professional tools like a scan tool and fiber optic bypass loops.
What's Unique About the 2015-2020 Cadillac ESCALADE ESV
The 2015-2020 Escalade and its GM K2XX sister platforms are known for a specific wiring vulnerability that triggers the U0029 code. A factory Technical Service Bulletin (TSB #PIT5288H) points directly to the main dash wiring harness getting pinched and damaged by a metal bracket behind the driver's side instrument panel. This specific, documented pattern failure is the most common culprit for this code on these vehicles, making it a crucial first point of inspection before suspecting any module failures.
Diagnostic Flowchart
Tap your situation to follow the diagnostic path that matches what you're seeing on this vehicle.
Symptoms You May Notice
- Blank radio or infotainment screen.
- No audio from the stereo system.
- "Service StabiliTrak" message on the Driver Information Center (DIC).
- Steering wheel controls are inoperative.
- Dead battery or no-crank condition.
- Flickering or erratic instrument cluster gauges.
- Various warning lights illuminated on the dashboard.
- Passive entry or Remote Keyless Entry (RKE) system not working.
- Rear power windows or rear wiper inoperative.
- Reduced power steering assist.
- Replacing the radio or HMI module without first inspecting the wiring harness at the known chafe point described in TSB #PIT5288H.
- Replacing modules without first performing a full battery and charging system test, including voltage drop tests on ground cables.
Most Likely Causes
- Pinched/Chafed Wiring Harness at Left Instrument Panel Bracket 🔴 High Probability This is a well-documented pattern failure identified in GM Technical Service Bulletin #PIT5288H. The dash harness can be pinched between a metal mounting bracket and the body during assembly or service. This issue is common across the entire K2XX platform.
How to confirm: Visually inspect the wiring harness under the driver's side dashboard, near the parking brake pedal and I/P fuse block. The TSB shows images of the harness being crushed at both the upper and lower portions of the large metal I/P mounting bracket. The harness should be able to move freely away from the bracket-to-body interface.
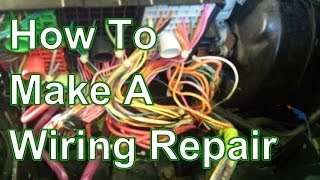
Typical fix: Loosen the mounting bracket bolts, free the harness, open the conduit, and repair any broken or shorted wires. 🎬 Watch: Professional tips for repairing a damaged automotive wiring harness. Wires should be properly spliced and insulated using approved methods (e.g., GM bulletin 10-00-89-005). The harness must be rerouted to prevent future damage.
Est. part cost: $5-$50 for wiring repair supplies (tape, splices, etc.) - Faulty Control Module on MOST Bus 🟡 Medium Probability The MOST network used for infotainment is a fiber-optic ring. If any module in the ring fails internally (e.g., Radio, CD Player/Media Disc Player, HMI Module, Amplifier, Instrument Panel Cluster), it can break communication for the entire network. The CD player is a frequently cited point of failure in technician forums.
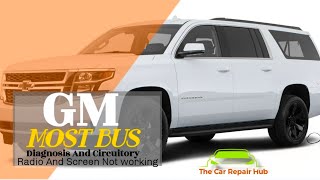
How to confirm: A professional scan tool is needed to see which modules are not communicating. A common diagnostic technique is to use a MOST bus fiber optic bypass loop (special tool EL-51578) to systematically isolate each module on the ring 🎬 Watch: A deep dive into MOST bus circuitry and testing. until communication is restored. When the faulty module is bypassed, the U0029 code will typically change from 'current' to 'history'.
Typical fix: Replace the faulty module. The most common failures are the CD player or the Human Machine Interface (HMI) module. Replacement often requires programming by a dealer or qualified shop to match the vehicle's VIN and options.
Est. part cost: $200-$1500 depending on the specific module. For example, a pre-programmed HMI module can cost between $500 and $1200. - Poor Battery Voltage or Ground Connections ⚪ Low Probability Modern vehicles are highly sensitive to voltage. A weak battery or a loose/corroded ground strap can cause unpredictable behavior in various electronic modules, leading to communication errors. TSB PIT5405C specifically points to a poor BCM ground at location G218, where a dash insulator mat can get trapped under the ground eyelet.
How to confirm: Test the battery's state of charge and health using a GR8 tester. Perform a loaded voltage drop test on the main battery ground and engine ground straps; the drop should not exceed 200 mV while cranking. Inspect ground G218 under the driver's dash to ensure the dash insulator mat is not interfering with the connection.
Typical fix: Replace the battery if it fails a load test. Clean or replace corroded ground straps and ensure all connections are secure. At G218, cut away the insulator mat from the ground stud and retighten the nut.
Est. part cost: $20-$300
Rare But Worth Checking
- Faulty Serial Data Gateway Module (SDGM):
Diagnosis Steps
- Connect a professional scan tool and check for DTCs in ALL modules. Note all communication codes, paying attention to which are 'current' vs. 'history'.
- Check battery voltage and perform a load test with a tool like a GM-specified GR8 tester. Ensure the battery is healthy before proceeding.
- Inspect all major power and ground connections for tightness and corrosion. Perform a voltage drop test on the battery cables while cranking the engine; the reading should not exceed 200mV.
- Inspect BCM ground G218 under the driver's dash. Per TSB #PIT5405C, ensure the dash insulator mat is not trapped under the ground terminal and cut it away if necessary.
- Following TSB #PIT5288H, remove the lower driver's side dash panels and I/P fuse block cover to gain access to the main wiring harness.
- Carefully inspect the harness where it passes the large metal instrument panel mounting bracket. Check for any signs of pinching, chafing, or crushed wires. The harness should move freely.
- If damage is found, disconnect the battery, repair the affected wires using approved splicing techniques, and re-route the harness to prevent it from being pinched again.
- If no wiring damage is found, the issue is likely on the MOST bus. Using a scan tool, check the status of the MOST ring in the radio data display.
- If the MOST ring is down, use a fiber optic bypass loop (special tool EL-51578 or equivalent) to bypass one module at a time (CD player, HMI, Amplifier, Instrument Cluster) to identify which one is causing the ring to break. The radio is the master and cannot be bypassed with this tool.
- When the faulty module is bypassed, communication should be restored to the other modules and the U0029 code should go into history. This identifies the failed part.
- Once the faulty module is identified, replace it. Note that the replacement module will likely require programming to the vehicle.
Parts You'll Likely Need
- Wiring Repair Supplies — The most common cause is a damaged wiring harness that needs to be repaired, not replaced.
Trusted brands: 3M
OEM price range: $10-$50
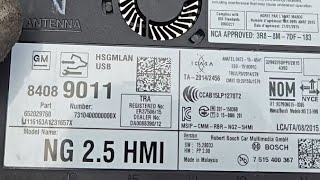
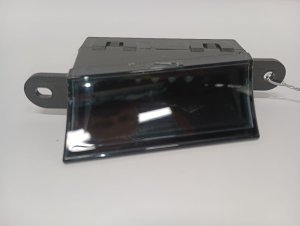
Aftermarket price range: $5-$30 - Human Machine Interface (HMI) Module — This module is a common failure point on the MOST bus, causing blank screens and communication codes. There are different versions based on year and navigation options. 🎬 See this walkthrough on HMI module location and removal.
Trusted brands: ACDelco (OEM)
OEM price range: $500-$1500
Aftermarket price range: $400-$1200 (often pre-programmed) - CD Player / Media Disc Player — Known to fail internally, bringing down the entire MOST bus network. It is often diagnosed by bypassing it with a fiber optic loop.
Trusted brands: ACDelco (OEM)
OEM price range: $200-$500
Aftermarket price range: $100-$300 (used)
Related Codes That Often Appear With This One
- U0028 — U0028 (Vehicle Communication Bus A) and U0029 often appear together. U0028 indicates a general fault or ring break, while U0029 can indicate a performance issue where the ring is intact but a module is not responding correctly.
- U0151 — Lost Communication With Restraints Control Module. This code is specifically listed in TSB #PIT5288H as a potential companion code when the pinched harness affects multiple communication circuits.
- U0126 — Lost Communication With Steering Angle Sensor Module. This is another module on the communication network that can be affected by the main harness issue, as noted in Bulletin #PIT5288H.
- B3101 — Keyless Entry Data Link Circuit. This code is specifically mentioned in TSB #PIT5288H as a related DTC caused by the pinched harness.
Technical Service Bulletins (TSBs) & Recalls
- PIT5288H: Details symptoms like a dead battery, blank screen, and various communication codes (including U0029) caused by a pinched wire harness at the left instrument panel bracket. Provides instructions for repair.
- PIT5405C: Lists U0029 as one of many potential codes set due to issues like a poor BCM ground (G218), a shorted starter cable, or high resistance in battery cables, causing a wide range of electrical problems.
- PI1149A: Provides diagnostic aids for intermittent blank radio displays and MOST bus issues, explaining how to use DTCs U0028/U0029 and the bypass tool EL-51578 to isolate the root cause.
Platform-Specific Known Issues
- A pinched wiring harness behind the left side of the instrument panel is a highly common, documented issue for this vehicle generation, as outlined in TSB #PIT5288H.
- The dash insulator mat interfering with the BCM ground at G218 is another documented issue that can cause various electrical faults, including communication codes like U0029 (TSB #PIT5405C).
Mechanic-Grade Diagnostic Values
- High-Speed CAN Bus Resistance — expected: Approximately 60 Ω. Failure: A reading of 120 Ω indicates an open in the circuit or a missing terminating resistor. A reading significantly lower than 60 Ω indicates a short between the CAN High and Low lines.
- CAN Bus Voltage (Key-On, Engine-Off) — expected: CAN High: ~2.7V, CAN Low: ~2.3V. Both should total ~5V.. Failure: Voltages that are stuck high or low, or do not mirror each other, indicate a short to power or ground.
- GDS2 Radio Data PID: 'Number of MOST Communication Breaks' — expected: 0. Failure: A rapidly incrementing number indicates a constant performance issue on the MOST bus, consistent with a U0029 code.
- GDS2 Radio Data PID: 'Surrogate MOST Master Node Upstream Position' — expected: Varies, but a non-zero value is key.. Failure: If the value is '2', it means the break is happening before node 3 in the ring. This allows a technician to identify the faulty module by its position in the network sequence without physically testing every component first.
Hidden / Shadow Codes Worth Checking
- U0028 and U0029 with specific module data: While not a single 'shadow code', the combination of DTCs and data PIDs in GDS2 provides a much deeper diagnosis. A U0028 (Bus A Off) in the Radio module combined with a U0029 (Bus A Performance) in the HMI module, along with the 'Surrogate MOST Master Node Upstream Position' data, points directly to a MOST bus ring integrity issue where one module is failing but not causing a complete ring break. (see via GM GDS2 (Global Diagnostic System 2) scan tool, by viewing DTCs in all modules and navigating to the Radio data display.)
Scan Tool Commands That Help
- GDS2: Vehicle DTC Information — This is the initial step to poll all modules on all networks and see which are reporting codes and which are not communicating.
- GDS2: Data Bus Diagnostic Tool — This is a specific function within GDS2 used to actively test which modules are present and responding on a specific data bus, helping to isolate a non-communicating module.
- GDS2: Radio > Data Display > MOST bus data — To view critical PIDs like 'Number of MOST Communication Breaks' and 'Surrogate MOST Master Node Upstream Position' to diagnose the location of a fault on the fiber optic ring.
- GDS2: Module Setup / Programming — After replacing a network module like the HMI, it must be programmed to the vehicle's VIN and configuration to function and disable the anti-theft feature.
Wiring & Ground Locations
- G218 — Under the driver's side dash, near the kick panel area.. This is a primary ground for the Body Control Module (BCM). TSB PIT5405C notes that the dash insulator mat can get trapped under the ground eyelet, causing a poor connection and leading to various electrical faults, including communication codes.
- I/P Dash Mounting Bracket — Behind the driver's side lower dash panel, near the parking brake pedal.. This is the specific chafe point identified in TSB PIT5288H where the main dash harness can be pinched against the body, damaging communication wires and causing U0029 among other codes.
- G103 — On the cowl in the engine compartment, typically above the brake booster.. This ground point serves multiple critical modules involved in communication, including the BCM, Instrument Panel Cluster (IPC), and the Radio. A fault here could cause widespread network issues.
- MOST Bus Ring Order — Fiber optic circuit connecting infotainment modules.. The signal flows in a specific order, typically: Radio -> CD Player -> HMI Module -> Instrument Cluster -> back to Radio. Knowing this order is essential when using a bypass loop to find the faulty module. The fault is located at the module *before* the first non-communicating module in the ring.
Real Owner Repair Stories
- iATN (International Automotive Technicians Network) Forum Post (2015 Chevrolet Silverado (K2XX Platform sister)) — MyLink display is dark, radio inoperative, no audio. Codes U0028 in radio and U0029 in HMI were current.
❌ Tried (didn't work) Initial thought was a wiring issue, but the presence of U0029 (performance) instead of just U0028 (ring break) suggested the ring was intact.
✅ What actually fixed it The technician used a GDS2 scan tool and observed the 'Surrogate MOST Master Node Upstream Position' was '2'. Knowing the ring order (1:Radio, 2:CD, 3:HMI, 4:IPC), this indicated the fault was at the CD player (the module before node 3). The technician could not communicate with the CD player. They removed the CD player and jumped the fiber optic connector with a bypass loop. The radio and display immediately began working correctly. The final fix was replacing the internally failed CD player. - YouTube video by 'ADAN CARS' (2015 Chevrolet Silverado) — Blank screen, no radio, no sound, but backup camera works. Codes U0028 and U0029 present.
❌ Tried (didn't work) Replacing the screen did not fix the issue.
✅ What actually fixed it The technician identified that the MOST bus was down. Suspecting a faulty device on the network, they started by eliminating the CD player. They removed the CD player and bridged the MOST bus fiber optic connector (green and gray wires). This restored the network, and the radio and screen began working. The customer opted to eliminate the CD player permanently.
OEM Part Supersession History
HMI 2.0 Module (IO5/IO6)→HMI 2.5 Module (IO5/IO6)— Hardware update to support Apple CarPlay and Android Auto functionality.
Heads up: HMI 2.0 modules are for 2014-2015 vehicles and do not support CarPlay/Android Auto. HMI 2.5 modules are for 2016+ vehicles. While you can upgrade an older vehicle to HMI 2.5, you cannot use an HMI 2.0 module in a 2016+ vehicle expecting full functionality.2015 HMI Module→2015.5 HMI Module— Mid-year hardware change.
Heads up: A 2015 vehicle with RPO code 'VV4' (in-vehicle WiFi) is considered a '2015.5' model and requires a different HMI module than an early 2015 build without that RPO code. Using the wrong module will result in functionality or programming issues.IO5 HMI Module (Non-Navigation)→IO6 HMI Module (Navigation)— Customer-paid upgrade.
Heads up: Upgrading from a non-nav (IO5) to a navigation (IO6) unit is possible but is not a direct swap. It requires the IO6 HMI module, VIN programming, and the addition of a GPS antenna (either a standalone antenna or a splitter for the OnStar antenna). Simply installing an IO6 module without programming and a GPS signal source will not enable navigation.
Model Year Variations Within This Range
- 2015 vs 2016+: The Human Machine Interface (HMI) module hardware changed. 2015 models use the HMI 2.0 system. 2016 and newer models use the HMI 2.5 system, which is faster and supports Apple CarPlay/Android Auto. The modules are not directly interchangeable without specific upgrade kits and programming.
- 2015 only: There was a mid-year production split. Vehicles built later in the model year, identifiable by having RPO code VV4 (in-vehicle WiFi), are considered '2015.5' and use a different HMI module than early 2015 models. This is a critical detail when sourcing a replacement part.
Helpful Videos
We Have This Part in Stock





The information in this article is provided for general reference and educational purposes only. Vehicle specifications, procedures, and part compatibility can vary by production date, trim level, and region. Always consult your vehicle's factory service manual and verify part numbers before purchasing or performing repairs. Safety-critical components such as airbags, seat belts, and braking systems should be installed by a qualified professional.
- Cadillac ESCALADE ESV:
- 🎬 Helpful Videos
- 🛍️ Shop This Part
- What's Unique About the 2015-2020 Cadillac ESCALADE ESV
- Diagnostic Flowchart
- Symptoms You May Notice
- Most Likely Causes
- Rare But Worth Checking
- Diagnosis Steps
- Parts You'll Likely Need
- Related Codes That Often Appear With This One
- Technical Service Bulletins (TSBs) & Recalls
- Platform-Specific Known Issues
- Mechanic-Grade Diagnostic Values
- Hidden / Shadow Codes Worth Checking
- Scan Tool Commands That Help
- Wiring & Ground Locations
- Real Owner Repair Stories
- OEM Part Supersession History
- Model Year Variations Within This Range
- 🎟️ Get 5% Off