

U0028 on 2013-2018 GMC Terrain: Infotainment Network Fault Causes and Fixes
On a 2013-2018 GMC Terrain and its platform-mate, the Chevrolet Equinox, code U0028 almost always means a communication failure on the infotainment (MOST) network. This typically results in a blank screen, no audio, and potential battery drain. The most likely culprit is a pinched or chafed wire harness behind the driver's side of the dashboard, a known issue covered by GM Technical Service Bulletin PIT5288B.
- U0028 on a 2013-2018 Terrain indicates a communication failure on the infotainment (MOST) network, usually causing a blank screen and no sound.
- Before suspecting costly parts, ALWAYS inspect the wiring harness under the driver's side dashboard for pinching or damage, as this is a very common, documented problem.
- Symptoms can include a dead battery, as the communication fault may prevent modules from entering their low-power 'sleep' mode.
- Diagnosing a faulty module requires a special 'bypass loop' tool; this is not a simple DIY diagnosis without the right equipment.
- Replacing the HMI or Radio module requires programming to your vehicle's VIN, which must be done by a dealer or a properly equipped shop.
What's Unique About the 2013-2018 Gmc TERRAIN
The 2013-2018 GMC Terrain and its platform-mate, the Chevrolet Equinox, are highly susceptible to a specific wiring issue documented by General Motors. A main wiring harness can get pinched by a sharp metal instrument panel bracket on the driver's side of the dash, near the OBD-II port. This known chafe point, detailed in TSB #PIT5288B, is so common that inspecting this specific location is the primary diagnostic step before suspecting more expensive module failures. This single issue can cause U0028 and a host of other seemingly unrelated electrical problems.
Diagnostic Flowchart
Tap your situation to follow the diagnostic path that matches what you're seeing on this vehicle.
Generation note: This range covers the end of the first generation (2013-2017) and the start of the second generation (2018). The pinched wire harness issue cited in TSB PIT5288B is well-documented for the platform starting in 2014, which includes the majority of this year range and also affects other GM vehicles from the same era. The second-generation 2018 model uses a different infotainment system but can still suffer MOST bus failures.
Symptoms You May Notice
- Blank radio or infotainment screen (may be intermittent at first, then permanent)
- No audio from the stereo system, including chimes and turn signal clicks
- A dead battery or parasitic drain, often occurring overnight
- Steering wheel audio controls not working
- Loss of navigation functions
- Intermittent no-start condition or other seemingly unrelated electrical faults
- Radio or display randomly reboots or changes channels on its own before failing completely
- Bluetooth connection issues or inability to pair devices
- Replacing the infotainment screen when the fault is actually in the radio tuner, HMI module, or wiring. The screen is often just a display and not the source of the communication failure.
- Replacing the HMI or Radio module without first inspecting the wiring harness for the chafing issue described in TSB PIT5288B. This can lead to expensive, unnecessary parts replacement.
Most Likely Causes
- Pinched or Damaged Dash Wiring Harness 🔴 High Probability A GM Technical Service Bulletin (#PIT5288B) specifically identifies a location where the main dash harness is pinched by a sharp metal instrument panel mounting bracket to the left of the steering column. The harness can be chafed, crushed, or have wires shorted to each other or to ground. This is a widely recognized manufacturing/design flaw.
How to confirm: Remove the driver's side lower dash/kick panel and the dash side panel. Visually inspect the main wiring harness where it passes the metal dash support bracket near the A-pillar. The harness should move freely; if it is trapped or shows signs of chafing, crushing, or bare wires, this is the likely cause. The TSB shows a picture of the exact location.
Typical fix: Disconnect the battery. Loosen the instrument panel bracket bolts to free the harness. Carefully open the harness loom and repair any damaged wires by splicing, soldering, and insulating them with heat shrink tubing. Wrap the repaired section with anti-abrasion tape (e.g., Tesa tape) and reroute the harness to prevent it from being pinched again before tightening the bracket.
Est. part cost: $10-$50 - Failed Module on MOST Network (e.g., Radio, HMI, CD Player) 🟡 Medium Probability The infotainment system is a network ring; if any single module fails internally, it breaks the entire ring and communication stops for all modules in the chain. The Human Machine Interface (HMI) module and the Radio/Tuner are common failure points.
How to confirm: This requires a special MOST bypass loop tool (like the GM essential tool EL-51578). A technician will disconnect the harness from each module on the network (HMI, Radio, CD Player, Amplifier) and connect the loop in its place, one by one. When the faulty module is bypassed, the rest of the system will start working again (e.g., the screen may light up even if the radio is bypassed), identifying the failed component.
Typical fix: Replace the identified faulty module. The Radio and Human Machine Interface (HMI) modules are common culprits. Note that replacement often requires programming by a dealer or qualified shop with access to GM's SPS (Service Programming System).
Est. part cost: $250-$700 - Poor Power or Ground to an Infotainment Module ⚪ Low Probability Electrical systems on modern vehicles are sensitive to voltage. A corroded or loose ground connection (a known issue on the Equinox/Terrain platform) or a loose power wire can cause a module to drop off the network intermittently, mimicking a module failure.
How to confirm: Once a suspect module is identified, use a multimeter to check for stable battery voltage and a clean, low-resistance ground connection at its electrical connector. Load testing the circuit may be necessary to identify a weak connection.
Typical fix: Clean and tighten the faulty ground connection (common ground points are on the engine block and chassis) or repair the power supply circuit.
Est. part cost: $5-$25
Rare But Worth Checking
- Failed CD/Media Player:
Diagnosis Steps
- Perform a full vehicle scan with a professional-grade scan tool to confirm the presence of U0028 and see which other modules are logging communication faults. Note any accompanying codes like U0029, U0184, etc.
- Check the vehicle's battery to ensure it is fully charged and providing stable voltage (above 12.4V). Low voltage can cause network glitches. A weak battery can cause intermittent communication faults even if it can still start the engine.
- As per TSB #PIT5288B, the first physical check should be the wiring harness. Remove the driver's side lower instrument panel trim and the dash end cap to gain access.
- Carefully inspect the area where the main harness passes the left instrument panel mounting bracket for any signs of being pinched, chafed, or crushed. The harness should not be trapped.
- If damage is found, disconnect the battery, free the harness, and repair the wires using appropriate splicing techniques. Protect the harness with anti-abrasion tape before re-securing it away from the pinch point.
- If the wiring harness is intact, the next step is to diagnose the MOST bus ring to find a faulty module. This requires a MOST bypass loop tool (GM tool EL-51578 or equivalent).
- Start by bypassing the most accessible modules first. One by one, disconnect a module and install the bypass loop. After each bypass, cycle the ignition to see if infotainment function returns (e.g., screen powers on). When the system function returns, the module currently being bypassed is the one that has failed.
- Once the faulty module is identified, use a multimeter to confirm it has proper power and ground at its connector before condemning it.
- After replacement, the new module (especially HMI or Radio) will likely require VIN-specific programming by a dealership or a properly equipped independent shop to restore full functionality.
Parts You'll Likely Need
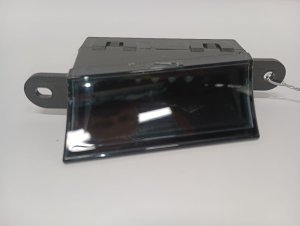
- Human Machine Interface (HMI) Module
(OEM #23493425, 84156699 (part numbers vary by year and options, always verify with VIN))— This module is the 'brain' of the infotainment system and a common failure point on the MOST network. - Radio/Tuner Module
(OEM #84667778, 84405620 (part numbers vary by year and options, always verify with VIN))— The radio is the master module of the MOST bus. Its internal failure will bring down the entire network, causing a U0028 code. - MOST Bus Bypass Loop
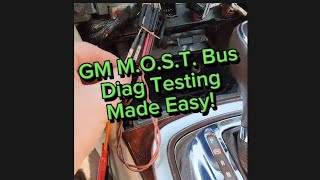
(OEM #Part of kit EL-51578)— This is an essential diagnostic tool for isolating the failed module on the 🎬 Watch: A simple guide to testing the GM MOST bus MOST ring. It can also be used to permanently bypass a non-essential, failed module like a CD player. - CD/Media Player — As a node on the MOST ring, an internal failure of the CD player will break the communication loop and is a documented cause of code U0028.
Related Codes That Often Appear With This One
- U0029 — This is also a MOST bus communication code and is frequently set alongside U0028. They are often mentioned together in the same service bulletins. U0028 often indicates a complete ring break, while U0029 can mean the ring has integrity but a specific module is failing to communicate properly.
- U0151 — Loss of communication with the airbag module. This code is mentioned in TSB #PIT5288B as potentially appearing with U0028 when the dash harness is pinched, affecting multiple systems.
- U0184 — Loss of Communication with Radio. This is a very specific code that can accompany U0028, as the radio is a primary node on the MOST bus and can be the source of the fault.
- B3101 — Keyless Entry System code. This is another code mentioned in TSB #PIT5288B that can be caused by the same pinched harness issue.
Technical Service Bulletins (TSBs) & Recalls
- PIT5288B: The primary TSB for this issue. It describes various electrical concerns (including a dead battery) caused by the dash harness being pinched between the left I/P dash mounting bracket and the body. It lists U0028 and U0029 as potential DTCs and provides a photo for locating the pinch point.
- PIC6073E: This is a more general diagnostic aid bulletin that was superseded by PI1149A. It directs technicians to use the EL-51578 MOST Bus Diagnostic Tool Kit to diagnose U0028 codes by bypassing modules on the ring.
- PI1149A: Supersedes PIC6073E. Provides diagnostic aid for intermittent blank radio displays and MOST bus issues, specifically mentioning the use of the EL-51578 bypass tool for diagnosing U0028/U0029.
Platform-Specific Known Issues
- A well-documented issue covered by TSB #PIT5288B involves the main instrument panel wire harness getting pinched or chafed by a metal support bracket on the driver's side, leading to U0028 and other communication codes. This is the most common cause for this specific vehicle and its platform-mate, the Chevrolet Equinox.
Mechanic-Grade Diagnostic Values
- Module Power Supply Voltage — expected: 12.0–14.5 V (Key On). Failure: Voltage below 12.0V can cause modules to drop off the network.
- Center Stack Wake-Up Signal Voltage — expected: Approx. 5.0 V (asleep), < 1.5 V (awake). Failure: A signal that is stuck high or low can prevent modules from waking up or going to sleep, causing communication issues or battery drain.
Hidden / Shadow Codes Worth Checking
- U0029: While often seen with U0028, U0029 provides more specific diagnostic value. U0028 indicates a general bus-off state (a ring break), whereas U0029 can indicate the ring has integrity but a specific module is not communicating correctly. Seeing U0029 with 'Number of MOST Communication Breaks = 0' in scan data points strongly to an internal module fault rather than a wiring break. (see via GM GDS2 Scan Tool, viewing live data from the Radio (A11) and HMI (K74) modules.)
Scan Tool Commands That Help
- GDS2 (GM Dealer Scan Tool): Radio Data Display > MOST Data — When U0028 is present, this function allows a technician to view parameters like 'Number of MOST Communication Breaks' and 'Surrogate MOST Master Node Upstream Position'. A non-zero value for breaks indicates a wiring issue, while the 'Upstream Position' can help identify which module is located just before the communication break in the ring.
- GDS2 (GM Dealer Scan Tool): Data Bus Diagnostic Tool — This function, available within GDS2, actively polls all modules on the selected bus to see which ones respond. It's a fast way to identify a non-communicating module that is breaking the MOST ring and causing the U0028 code.
Wiring & Ground Locations
- G218 — On the driver's side A-pillar, located behind the kick panel.. This is a major ground point for interior electronics. A loose or corroded G218 ground is a known issue on this platform and can cause intermittent power loss to infotainment modules, leading to network communication faults like U0028.
- MOST Bus Wires — Within the main dash harness, connecting the Radio, CD Player, HMI Module, and Instrument Panel Cluster.. These are the specific data-carrying wires for the infotainment network. On some GM models, they are a twisted pair, often Gray and White/Green. A break or short in these wires, especially at the known chafe point detailed in TSB PIT5288B, is the primary cause of U0028.
- G302 — Located under the center console at the rear, below the rear fuse block.. This point specifically grounds the radio amplifier. A fault at this ground could cause the amplifier to drop off the MOST network, breaking the ring and setting code U0028.
- Radio Connector (2018+ IOR) — At the back of the radio module.. For the second-generation Terrain (2018+), pin 3 (Black wire) and pin 6 (Black wire) are grounds. Pin 1 (Red/Yellow) and Pin 2 (Red/Yellow) are battery positive voltage. Verifying power and ground here is a key step before replacing the radio module.
Real Owner Repair Stories
- YouTube user 'noonespecial' via Go-Parts article (2015 Chevrolet Silverado (sister platform)) — Blank screen, no radio, no sound. Backup camera still worked. Codes U0028 and U0029 were present.
❌ Tried (didn't work) Replacing the infotainment screen
✅ What actually fixed it The CD/disc player module had failed. A technician removed the CD player and installed a MOST bypass loop on its connector, which restored all other infotainment functions. - YouTube user 'Car Repair' via video (2019 Chevrolet Suburban (sister platform)) — MyLink display is dark, radio not functional, control buttons inoperative. Codes U0028 and U0029 present.
❌ Tried (didn't work) Bypassing the CD player with a MOST loop did not fix the issue.
✅ What actually fixed it The Human Machine Interface (HMI) module was bypassed with a MOST loop, and radio audio immediately started working. The technician then removed the HMI module and found visible corrosion and damaged resistors on the circuit board, confirming it as the failed component.
OEM Part Supersession History
84156699→84296480— Part revision or update by the manufacturer.
Heads up: While many HMI part numbers exist, it is critical to match the part number or a valid superseded number to the vehicle's VIN and options. Using an incorrect HMI module, even if it physically fits, can result in function loss or programming failures.
Model Year Variations Within This Range
- 2013-2017: These first-generation models use a MOST bus architecture for the infotainment system, making them susceptible to the ring-break issues and the pinched harness problem described in TSB PIT5288B. The network is typically a wired electrical bus, not fiber optic.
- 2018: The 2018 model year marked a complete redesign. It uses a new generation of the GMC infotainment system with a different user interface and system architecture. While still potentially using a MOST bus (some GM platforms from this era used fiber optics), the specific modules, connectors, and software are different from the previous generation. The known pinched-harness issue from TSB PIT5288B is less likely to apply in the same way.
Helpful Videos
We Have This Part in Stock





The information in this article is provided for general reference and educational purposes only. Vehicle specifications, procedures, and part compatibility can vary by production date, trim level, and region. Always consult your vehicle's factory service manual and verify part numbers before purchasing or performing repairs. Safety-critical components such as airbags, seat belts, and braking systems should be installed by a qualified professional.
- Gmc TERRAIN:
- 🎬 Helpful Videos
- 🛍️ Shop This Part
- What's Unique About the 2013-2018 Gmc TERRAIN
- Diagnostic Flowchart
- Symptoms You May Notice
- Most Likely Causes
- Rare But Worth Checking
- Diagnosis Steps
- Parts You'll Likely Need
- Related Codes That Often Appear With This One
- Technical Service Bulletins (TSBs) & Recalls
- Platform-Specific Known Issues
- Mechanic-Grade Diagnostic Values
- Hidden / Shadow Codes Worth Checking
- Scan Tool Commands That Help
- Wiring & Ground Locations
- Real Owner Repair Stories
- OEM Part Supersession History
- Model Year Variations Within This Range
- 🎟️ Get 5% Off