

OBD-II Code P3013: Hybrid Battery Block 13 Weak
What P3013 means, why it triggers, and how to fix it
- P3013 indicates 'Block 13' in your Toyota or Lexus hybrid battery is failing, usually due to degraded cells or corroded copper bus bars.
- Always test your 12V auxiliary battery first; a voltage drop below 12.6V triggers false hybrid system codes.
- Expect a 10-20% drop in fuel economy and sluggish acceleration as the gas engine overcompensates for the weak battery.
- Repair costs range from $30 for DIY bus bar cleaning to $2,500+ for a full battery pack replacement.
What Does P3013 Mean?

P3013 is a Toyota and Lexus code indicating the high-voltage (HV) hybrid battery's 'Block 13' is weak. It shows lower voltage or higher internal resistance than other blocks. A hybrid battery contains individual modules (e.g., 28 in a Prius) grouped into blocks for the Battery ECU to monitor.
Technical definition: Toyota defines P3013 as 'Battery Block 13 Becomes Weak'. The Battery Management System (BMS) continuously monitors block voltage and internal resistance. If Block 13's voltage drops >0.3V below others under load, or shows abnormal resistance, the ECU stores the code and triggers dashboard warnings.
Can I Drive With P3013?
Yes, But With Caution. You can drive, but expect reduced power and a 10-20% drop in MPG. The gasoline engine runs constantly to compensate for the weak battery. While safe for short distances (under 50 miles), continued driving strains the inverter and remaining battery cells. This accelerates failure, potentially adding $1,000-$3,000 for an inverter replacement. Address the issue immediately to prevent cascading damage.
Common Causes

- Failed NiMH cells in Block 13 (Very Common) — Age, heat, and thousands of charge cycles degrade nickel-metal hydride (NiMH) cells, causing a permanent voltage imbalance the computer detects.
- Corroded battery bus bars (Common) — Copper plates connecting the modules corrode from electrolyte vapor and humidity. This creates high electrical resistance, mimicking a weak block even if the cells are healthy.
- Loose terminal nuts (Common) — Nuts securing the bus bars loosen from vibration. Poor connections cause erratic voltage readings. Proper torque for Gen 2/3 Prius nuts is exactly 48 in-lbs.
- Failing 12V auxiliary battery (Less Common) — Hybrid monitoring computers require stable 12V power. A weak 12V battery causes computer malfunctions and triggers false P3013 codes.
- Clogged hybrid battery cooling fan (Less Common) — Dust or pet hair clogs the cooling fan, causing the battery to overheat. Heat dramatically accelerates cell degradation and premature block failure.
- Damaged voltage sensing harness (Rare) — The wiring reading individual module voltages corrodes, causing shorts or incorrect readings at the Battery ECU.
- Defective Battery ECU (Rare) — The computer monitoring the battery fails internally, sending false weak block signals despite a healthy battery pack.
Symptoms

- Check Engine and Hybrid Warning Lights — The dashboard illuminates with a 'Check Hybrid System' message, a red triangle icon, and the Check Engine light.
- Rapidly fluctuating battery charge (SOC) — The dashboard battery gauge drops to purple (1-2 bars) and quickly shoots to green, indicating severe pack instability.
- Reduced power and sluggish acceleration — The electric motor fails to provide normal assistance during acceleration, making the vehicle feel heavy and slow.
- Decreased fuel economy (MPG) — The gas engine runs longer and more frequently—even at stops—to compensate for the weak hybrid battery.
- Cooling fan runs constantly — The rear-seat battery fan runs at high speed attempting to cool the overheating, failing battery block.
Diagnostic Flowchart

Tap your situation to follow the diagnostic path that matches what you're seeing on this code.
Common Fixes & Costs
- Clean or Replace Corroded Bus Bars and Nuts — Parts: $30-$90, Labor: $200-$600, ~2.5 hr book time (Intermediate)
- Replace Failing Battery Module(s) — Parts: $40-$90 per module, Labor: $400-$800, ~4 hr book time (Advanced)
- Replace with Reconditioned Hybrid Battery Pack — Parts: $1,200-$2,500, Labor: $0-$300 (Often included in part cost by mobile installers), ~2 hr book time (Professional)
- Replace with New OEM Hybrid Battery Pack — Parts: $2,100-$5,000+, Labor: $500-$1,000, ~2 hr book time (Professional)
- Professional Battery Balancing and Reconditioning — Parts: $500-$1,200 (Total Service Cost), Labor: $0 (Included in service cost), ~5 hr book time (Professional)
Used vs. New Parts: Buying Guide
When a used part is worth it: A reconditioned hybrid battery pack makes sense for older, high-mileage vehicles where a new OEM pack costs more than the car's value. It is a budget-conscious choice if you plan to sell the car in 1-3 years.
Donor-vehicle mileage cap: roughly under 100000 miles for the part to have meaningful remaining life.
Donor quality checklist:
- Look for reputable reconditioning companies offering a 1-3 year warranty.
- Verify the reconditioning process includes replacing all bus bars with new nickel-plated ones.
- Ensure the pack is fully balanced, not just a single swapped module.
Decision logic:
- If Vehicle is newer or you plan to keep it for 5+ years → Buy a new OEM or high-quality new aftermarket pack. The higher initial cost is offset by an 8-10 year lifespan and better warranty.
- If Vehicle is over 10 years old and your budget is tight → A reconditioned pack from a reputable supplier with a solid warranty is an acceptable risk. Expect 3-5 years of life.
- If You are a DIYer considering replacing a single module → This is a short-term 'band-aid' fix. The other original modules are likely near failure. Only do this if you accept the high probability of the code returning.
Warranty tradeoff: Reconditioned parts typically offer a 12-36 month warranty, sometimes with mobile installation. New OEM parts from a dealer usually have a 12-month warranty, while some new aftermarket packs offer warranties up to 8 years.
Worst-case if a used part fails: 500-1000. If a cheap, poorly reconditioned pack fails, you pay labor to replace it again, plus the cost of another battery.
What Happens If You Wait — Timeline
- 0-1 month: Check Engine Light appears. The battery cooling fan runs constantly. The gasoline engine runs more often. Car is driveable. (MPG impact: 5-10%% · Added cost: $25-75 in wasted fuel.)
- 1-3 months: Sluggish acceleration becomes pronounced. The battery state-of-charge display fluctuates wildly. Constant cycling wears out the other 27 modules. (MPG impact: 10-20%% · Added cost: $100-300 in wasted fuel and accelerated wear on other modules.)
- 3-6 months: The 'whack-a-mole' effect begins; other weak blocks fail and set new codes. The inverter strains to manage the severe voltage imbalance. (MPG impact: 15-25%% · Added cost: $500-1500. Probability of needing a full pack replacement increases significantly.)
- 6+ months: Complete pack failure strands the vehicle. Extreme voltage instability permanently damages the hybrid inverter. (MPG impact: 20-30%+% · Added cost: $2000-4000+. Requires a new battery pack and a new inverter.)
Cost of Not Fixing It
- 0-1 Month: Noticeable drop in fuel economy (10-20% MPG loss) and sluggish acceleration. The gasoline engine runs constantly, increasing wear. (Added cost: 50-150)
- 1-6 Months: Increased strain on remaining healthy battery cells causes them to degrade faster (the 'whack-a-mole' effect). The inverter overheats managing the voltage imbalance. (Added cost: 500-2000)
- 6+ Months: Catastrophic battery pack failure strands the vehicle. Severe voltage instability destroys the hybrid inverter, turning a $1,500 battery repair into a $4,000+ multi-component replacement. (Added cost: 2000-4000+)
Diagnosis Steps
- Scan for All Trouble Codes
Use an OBD-II scanner with hybrid software (Dr. Prius, Techstream) to confirm P3013. Note context codes like P0A80 or P3000.
Tools: OBD-II Scanner with hybrid software (Beginner) - Test the 12V Auxiliary Battery
A failing 12V battery causes false hybrid codes. A healthy battery reads ~12.6V at rest and >13.5V in READY mode.
Tools: Multimeter (Beginner) - Analyze Live Block Voltages
Using Dr. Prius, view live voltages (Vb01-Vb14) in READY mode under load (hold brake + press accelerator). Block 13 dropping >0.3V below the average confirms an imbalance.
Tools: Diagnostic app (Dr. Prius) and OBD2 adapter (Intermediate) - Analyze Internal Resistance
View internal resistance in Dr. Prius. Healthy Gen 2/3 Prius blocks read below 25-30 mΩ. Block 13 reading >40 mΩ indicates a failing module.
Tools: Diagnostic app (Dr. Prius) and OBD2 adapter (Advanced) - Inspect Cooling Fan and Intake
Check the rear passenger vent for pet hair or debris. Listen for fan operation. A clogged fan is a primary root cause of module failure.
Tools: Flashlight (Beginner) - Inspect Bus Bars and Wiring
WARNING: HIGH VOLTAGE. Visually inspect copper bus bars around Block 13 for green/white corrosion. Check sensing wires for damage.
Tools: Insulated gloves (Class 0), basic socket set (Advanced) - Verify Bus Bar Nut Torque
WARNING: HIGH VOLTAGE. Use an inch-pound torque wrench to ensure 8mm terminal nuts are tightened to exactly 48 in-lbs (5.4 Nm).
Tools: Inch-pound torque wrench, 8mm deep socket, insulated gloves (Advanced) - Perform Module Swap Diagnosis
WARNING: HIGH VOLTAGE. Swap a Block 13 module with a known-good block (e.g., Block 10). If the code changes to P3010, the module is bad. If it remains P3013, suspect wiring.
Tools: Insulated gloves, insulated tools (Advanced) - Load Test Individual Modules
WARNING: HIGH VOLTAGE. Connect a 12V 55W headlight bulb to removed modules for 2 minutes. Weak modules drop significantly more voltage than healthy ones.
Tools: Multimeter, 12V headlight bulb with wires, timer (Advanced)
When This Code Triggers (Freeze-Frame Conditions)
- Engine Coolant Temp: 175-205°F (The engine is at full operating temperature.)
- Hybrid Battery State of Charge (SOC): 40-60% (The code sets when the battery is in its normal operating range and discharging.)
- Vehicle Speed: 20-50 mph (During steady-state driving or moderate acceleration where the system expects a predictable voltage drop.)
- Engine Load: 25-70% (Moderate demand on the hybrid system causes a voltage drop that exposes the weak block.)
Related Codes
- P0A80 — Means 'Replace Hybrid Battery Pack'. This general code almost always triggers alongside P3013. P3013 identifies the specific problem (Block 13), while P0A80 is the ECU's overall assessment.
- P3000 — Means 'Battery Control System Malfunction'. It acts as a master code indicating the main hybrid computer received a fault signal from the Battery ECU.
- P0A7F — Means 'Hybrid Battery Pack Deterioration'. Indicates overall capacity has degraded significantly. Often appears with a specific P30xx block code.
- P3011 - P3024 — Identical in meaning to P3013 but point to different battery blocks. Seeing multiple codes in this range suggests widespread battery failure requiring full pack replacement.
Climate & Environmental Factors
- High Humidity: Moisture combined with electrolyte vapor dramatically accelerates copper bus bar corrosion. This increases resistance, causing a voltage drop the ECU interprets as a weak block.
- High Ambient Temperature: Sustained high temperatures accelerate the chemical degradation of NiMH cells, permanently reducing capacity. It also forces the cooling fan to run constantly, leading to premature fan failure.
- Cold Ambient Temperature: Cold temporarily increases internal resistance and reduces power output. While it makes a weak block's symptoms more noticeable, it does not cause permanent damage like high heat.
- Altitude: Thinner air reduces the efficiency of the air-cooled battery fan, leading to higher average battery temperatures and long-term degradation.
How to Talk to a Mechanic About This Code
Say this: "I have a P3013 code. Before quoting a full battery replacement, please test the 12V auxiliary battery, check for bus bar corrosion, and analyze the live block voltages and internal resistance to pinpoint the failure."
This directs the mechanic to investigate the cheapest and most common failures first, rather than defaulting to a $3,000 battery pack replacement.
Avoid saying:
- 'My hybrid system light is on, can you just fix it?'
- 'The car says replace battery, so I guess I need a new one.'
- 'Just do whatever you think is best.'
Questions to ask before authorizing the repair:
- Did you test the 12V battery and what were its voltage readings?
- Can you show me the live data for the block voltage deviation and internal resistance?
- Did you physically inspect the bus bars for corrosion?
- What is the warranty on the recommended repair?
- Will you clean the hybrid battery cooling fan as part of the service?
Where to Take It: Dealer vs Independent vs Chain
- Dealer:
Recommended only if the vehicle is under warranty. For out-of-warranty vehicles, an independent specialist is a better value.
Best for: Vehicles still under the hybrid system warranty (typically 8yr/100k or 10yr/150k miles)., Complex cases where the Battery ECU or wiring harness is suspected., Owners who prioritize an OEM warranty on a new battery pack.
Downsides: Highest cost, often 30-50% more than specialists., Very likely to recommend a full $3,000+ battery pack replacement even when a cheaper repair is possible. (Typical cost: +50% vs. baseline) - Independent Shop:
Best fit for most owners of out-of-warranty vehicles. Seek out a well-reviewed hybrid repair shop for the most repair options.
Best for: Out-of-warranty vehicles where cost is a major factor., Accessing repair options like individual module replacement, bus bar cleaning, or reconditioned battery packs., Owners seeking a longer warranty on a reconditioned pack.
Downsides: Quality varies dramatically. You MUST vet the shop to ensure they are a dedicated 'hybrid specialist'. (Typical cost: +0% vs. baseline) - Chain Shop:
AVOID for diagnosis or repair of the P3013 code. Do not let them work on the high-voltage system.
Best for: Testing or replacing the 12V auxiliary battery.
Downsides: Technicians lack specific training and equipment for high-voltage hybrid systems., High risk of misdiagnosis., Will not offer module-level or reconditioning repairs. (Typical cost: -10% vs. baseline)
When to Walk Away From the Repair
If the estimated repair cost exceeds 40-50% of the car's private-party value, seriously consider selling the car as-is instead of repairing it.
- Car worth $4500, fix is $2200: Borderline. A reconditioned battery gives you a few more years, but the repair is half the car's value. Consider selling as-is for $1000-$1500.
- Car worth $8000, fix is $900: Fix it. The repair cost for a bus bar cleaning or single module replacement is well below the threshold and restores full function.
- Car worth $3000, fix is $2000: Walk away. The repair cost is too high relative to the car's value. You are unlikely to recoup the repair cost upon resale.
What Scan Tool You Need for This Code

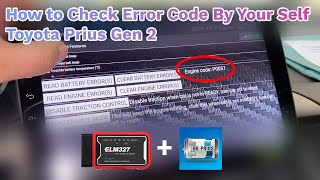
Minimum: An OBD-II adapter and smartphone app (Dr. Prius/Hybrid Assistant) that reads Toyota-specific PIDs for individual battery block voltages and internal resistance.
A basic $20 code reader only shows the P3013 code. It cannot display the live hybrid battery data required to determine if the cause is a bad module, corrosion, or wiring.
Budget: Veepeak OBDCheck BLE or Carista EVO + Dr. Prius App (~$30) — Allows you to view live data for all battery blocks, check voltages under load, see internal resistance, and run a full battery health check.
Mid-range: Autel MaxiCheck MX808 / Foxwell NT510 Elite (~$250) — Dedicated handheld scanners that read Toyota-specific live data without a phone app. Offers robust all-system diagnostics.
Professional: Autel MaxiSys Ultra EV / Toyota Techstream (~$1500-6000+) — Provides full dealer-level diagnostics, bidirectional controls, and advanced battery pack analysis. Overkill for most DIYers.
Rent vs buy: Rental scanners from auto parts stores are insufficient for this code. Buying a sub-$30 compatible OBD-II adapter is the most cost-effective option for diagnosis.
How to Clear the Code After You Fix It
- Reconnect the 12V battery if it was disconnected for the repair.
- Use an OBD-II scan tool to clear the Diagnostic Trouble Codes (DTCs) from the ECU's memory.
- Perform a full drive cycle to allow the vehicle's readiness monitors to run and confirm the fix.
Drive cycle (~30 minutes): A Toyota-specific drive cycle involves: a cold start, 5 minutes of idling, 15-20 minutes of mixed city driving with varied speeds and stops, followed by 5 minutes of steady highway speed (55-65 mph). The vehicle must cool down to ambient temperature to complete the cycle.
Readiness monitors affected: Hybrid/EV Battery, Catalyst (CAT), Evaporative System (EVAP)
Before emissions retest: drive at least 100 miles to fully set monitors.
Watch out for:
- Disconnecting the 12V battery clears the code but resets all readiness monitors to 'Not Ready', causing an automatic emissions test failure.
- The code returns almost immediately if the underlying physical fault (bad module, corrosion) is not properly repaired.
Will This Fail Emissions / State Inspection?
Yes — this code typically fails an OBD-II emissions inspection.
- California: An illuminated Check Engine Light is an automatic failure. All readiness monitors must be 'Ready', requiring a full drive cycle after repairs before re-testing.
- New York: A P3013 code and associated Check Engine Light causes an automatic failure of the OBD-II emissions test.
- Texas: In the 17 counties requiring emissions testing, an active P3013 code fails the OBD-II test. The Check Engine Light must be off and readiness monitors set to pass.
Most Commonly Affected Vehicles
- Toyota Prius (Gen 2) (2004-2009) — Extremely common due to age and high susceptibility to bus bar corrosion. The voltage sensing harness is available as a separate part (P/N 89890-47092).
- Toyota Prius (Gen 3) (2010-2015) — Toyota does not sell the voltage sensing harness separately from the main battery assembly for this generation, making harness failures expensive.
- Toyota Camry Hybrid (2007-2011) — Uses 34 battery modules instead of the Prius's 28. Suffers from identical cell and bus bar failures.
- Lexus CT200h (2011-2017) — Uses the Gen 3 Prius powertrain. The sensing harness is not sold as a separate part.
- Lexus RX450h (2010-2015) — Uses a similar battery monitoring system. Forum discussions indicate the code can persist even after cell balancing, suggesting ECU complexities.
- Toyota Highlander Hybrid (2006-2013) — Experiences age-related battery cell failures that trigger block-specific codes.
- Toyota Prius V (2012-2017) — Shares the Gen 3 Prius hybrid system and non-serviceable voltage sensing harness.
- Lexus ES300h (2013-2018) — Utilizes a powertrain similar to the Camry Hybrid and experiences identical age-related failures.
Manufacturer-Specific Notes
- Toyota / Lexus: This code is almost exclusively used by Toyota/Lexus. For Gen 3 Prius (2010-2015) and Lexus CT200h, the voltage sensing harness is not sold separately, complicating repairs.
- Toyota / Lexus: Toyota extended the hybrid battery warranty to 10 years/150,000 miles for 2020+ models. This does NOT apply to the 2004-2015 vehicles most affected by P3013.
- Honda / Ford / GM: These brands use different code series (P14xx, P0Axx, P0Bxx) to identify hybrid battery failures.
- Volkswagen / Audi: P3013 means 'Turbocharger wastegate regulating valve B - short to positive'. It is unrelated to hybrid systems.
- Nissan: On some models, P3013 means 'Right Front Fog Lamp Short to Ground'.
Real Owner Stories
2007 Camry Hybrid with 160k miles - The 'Easy Fix'
Check VSC System and all warning lights appeared, initially with P0A80, then P3013. The battery cooling fan ran constantly.
What they tried:
- Disassembled the battery pack and found minor corrosion on the copper bus bars.
- Tested module voltages at rest and found them very close (7.69V to 7.90V), suggesting no dead modules.
Outcome: The owner cleaned the copper bus bars and nuts, reassembled the pack, and the code cleared permanently.
Lesson: Don't assume P3013 means a costly module replacement. Often, the cause is high resistance from corroded bus bars, which is a cheap DIY fix.
2005 Prius with a new battery pack - A Misdiagnosis Story
A month after installing a non-OEM battery pack, the car threw codes P3000 and P3011 (Block 1 weak).
What they tried:
- After installing a new module in Block 1, the car threw P3013 (Block 13 weak), even though live data showed the imbalance was still at Block 1.
- Swapped modules between Block 3 and Block 5. The code remained P3013, proving the module was not the issue.
- Replaced the Battery ECU and voltage sensing harness, but P3013 persisted.
Outcome: The evidence pointed strongly to a fault in the Battery ECU's ability to correctly identify the weak block's location, or a subtle wiring issue.
Lesson: If a block-specific code doesn't match live data, suspect the monitoring system. Swapping modules is a critical diagnostic step. If the code stays in the original location, the problem is wiring or the ECU.
2008 Prius at 160k miles - The DIY Corrosion Fix
The 'Red Triangle of Death' appeared 50 miles after purchasing the car, with code P3013.
What they tried:
- Disassembled the pack to inspect modules and connections.
- While cleaning bus bars, a corroded terminal nut seized and snapped the battery module post.
Outcome: The owner sourced a replacement module for the broken post, cleaned all other bus bars, and torqued nuts to exactly 48 in-lbs. The repair was successful.
Lesson: DIY bus bar cleaning is effective, but corroded nuts easily break module posts. Use hand tools, apply steady pressure, and have a spare module ready.
How to Prevent This Code From Triggering
- Clean the hybrid battery cooling fan and filter. (Inspect every 10,000-20,000 miles; clean or replace as needed.) — Heat kills NiMH batteries. A clogged fan traps heat, accelerating cell degradation. This is critical if you have pets that shed.
- Drive the car regularly. (At least one 30-minute drive per week.) — Letting a hybrid sit allows battery modules to self-discharge unevenly, creating an imbalance. Regular use keeps the pack balanced.
- Avoid aggressive acceleration and braking. (Daily habit.) — Smooth driving reduces electrical load. High current generates internal heat, degrading battery cells. Coasting to stops is better than hard braking.
- Minimize exposure to extreme ambient heat. (Daily habit.) — Parking in shade reduces the battery's starting temperature. A hot battery reaches damaging temperature levels faster while driving.
- Perform periodic battery health checks. (Annually after the car is 5+ years old.) — Using Dr. Prius to check block voltages reveals developing problems like corrosion before they trigger a warning light, allowing proactive repairs.
Frequently Asked Questions
Is it safe to drive my car with code P3013?
Yes, for short distances under 50 miles. However, performance and MPG drop significantly as the gas engine overcompensates. Repair it immediately to prevent costly damage to the inverter and remaining battery cells.
Can I just clear the code and keep driving?
No, clearing the code is only a temporary fix. The physical battery fault remains, and warning lights return within a few drive cycles. The code stays active until the weak block is repaired.
What is a common misdiagnosis for P3013?
Mechanics often condemn the entire $2,500 battery pack immediately. Always test the 12V auxiliary battery first, as low voltage causes false codes. Next, check for easily cleanable corrosion on the copper bus bars.
How do I find the physical location of Block 13?
On a Gen 2 Prius (2004-2009), blocks are numbered 1-14 starting from the end furthest from the battery ECU. On a Gen 3 Prius (2010-2015), numbering starts closest to the ECU. Block 13 is the 13th pair of modules in that sequence.
Why did the code come back after I replaced the module in Block 13?
The fault likely lies in the voltage sensing wiring, corroded bus bars, or loose terminal nuts rather than the module itself. Alternatively, the replacement module was weak, or the pack wasn't properly balanced after installation.
Do I have to replace the whole battery pack for just one bad block?
Not always. If caught early, cleaning corroded bus bars or replacing a single failed module fixes the issue. However, if the pack is over 10 years old, replacing the entire unit prevents a 'whack-a-mole' scenario of continuous module failures.
What is battery 'balancing' and why is it important?
Balancing ensures all modules in the pack have the exact same state of charge and capacity. Replacing a single module without balancing causes uneven charging, leading to rapid failure of other older modules. Professionals use specialized chargers to cycle and match every module.
What is a battery 'bus bar' and why does it corrode?
A bus bar is a flat copper or nickel-plated connector linking battery modules. Electrolyte vapor escaping from aging NiMH cells mixes with humidity to create a corrosive chemical reaction. This forms a green or white powder that blocks electrical current.
Can I replace a bad battery module myself?
Only if you have high-voltage safety training and Class 0 insulated gloves. Hybrid batteries contain over 200V, which is lethal if mishandled. Disassembly requires specialized tools and strict adherence to safety protocols.
Key Takeaways
- P3013 indicates 'Block 13' in your Toyota or Lexus hybrid battery is failing, usually due to degraded cells or corroded copper bus bars.
- Always test your 12V auxiliary battery first; a voltage drop below 12.6V triggers false hybrid system codes.
- Expect a 10-20% drop in fuel economy and sluggish acceleration as the gas engine overcompensates for the weak battery.
- Repair costs range from $30 for DIY bus bar cleaning to $2,500+ for a full battery pack replacement.
Helpful Videos


The information in this article is provided for general reference and educational purposes only. Vehicle specifications, procedures, and part compatibility can vary by production date, trim level, and region. Always consult your vehicle's factory service manual and verify part numbers before purchasing or performing repairs. Safety-critical components such as airbags, seat belts, and braking systems should be installed by a qualified professional.
- 🎬 Helpful Videos
- What Does P3013 Mean?
- Can I Drive With P3013?
- Common Causes
- Symptoms
- Diagnostic Flowchart
- Common Fixes & Costs
- Used vs. New Parts: Buying Guide
- What Happens If You Wait — Timeline
- Cost of Not Fixing It
- Diagnosis Steps
- When This Code Triggers (Freeze-Frame Conditions)
- Related Codes
- Climate & Environmental Factors
- How to Talk to a Mechanic About This Code
- Where to Take It: Dealer vs Independent vs Chain
- When to Walk Away From the Repair
- What Scan Tool You Need for This Code
- How to Clear the Code After You Fix It
- Will This Fail Emissions / State Inspection?
- Most Commonly Affected Vehicles
- Manufacturer-Specific Notes
- Real Owner Stories
- 2007 Camry Hybrid with 160k miles - The 'Easy Fix'
- 2005 Prius with a new battery pack - A Misdiagnosis Story
- 2008 Prius at 160k miles - The DIY Corrosion Fix
- How to Prevent This Code From Triggering
- Frequently Asked Questions
- Is it safe to drive my car with code P3013?
- Can I just clear the code and keep driving?
- What is a common misdiagnosis for P3013?
- How do I find the physical location of Block 13?
- Why did the code come back after I replaced the module in Block 13?
- Do I have to replace the whole battery pack for just one bad block?
- What is battery 'balancing' and why is it important?
- What is a battery 'bus bar' and why does it corrode?
- Can I replace a bad battery module myself?
- Key Takeaways
- 🎟️ Get 5% Off