

OBD-II Code P2629: Oxygen Sensor Pumping Current Trim Circuit/Open (Bank 2, Sensor 1)
The Ultimate Guide: What P2629 means, why it triggers, and how to fix it for good.
- Code P2629 indicates a broken electrical circuit in the Bank 2, Sensor 1 upstream oxygen sensor, forcing the engine to run rich.
- Replacing the faulty oxygen sensor resolves the issue in over 80% of cases, costing between $150 and $450 at a repair shop.
- Driving more than 100 miles with this active code dumps unburnt fuel into the exhaust, risking a $1,500+ catalytic converter replacement.
- Before buying parts, swap the Bank 1 and Bank 2 sensors; if the code changes to P2626, the sensor is definitively dead.
What Does P2629 Mean?
P2629 means your car's Powertrain Control Module (PCM) detects an open circuit or electrical current problem with the upstream oxygen sensor (air-fuel ratio sensor) on engine Bank 2. This sensor measures exhaust oxygen to regulate fuel. When this code triggers, the voltage signal deviates by over 10% from the standard, causing the engine to run inefficiently in a rich condition.
Technical definition: The official SAE/ISO definition is "O2 Sensor Pumping Current Trim Circuit/Open Bank 2 Sensor 1". This indicates the PCM detects a break, high resistance, or out-of-range reading in the electrical circuit responsible for the sensor's pumping current, preventing accurate air-fuel mixture measurement.
Can I Drive With P2629?
Yes, But With Caution. You can drive for a short period, but extended distances are strongly discouraged. Your vehicle suffers poor fuel economy and runs rough. Continuing to drive for more than 100 miles causes unburnt fuel to overheat and destroy the catalytic converter, turning a $200 repair into a $1,500 to $3,000 replacement. Get the issue diagnosed and repaired immediately.
Common Causes
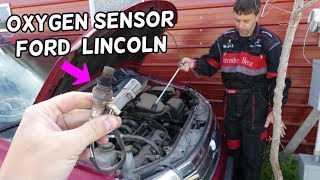
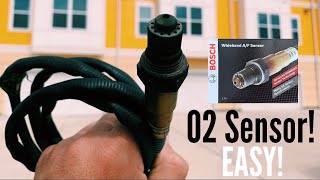
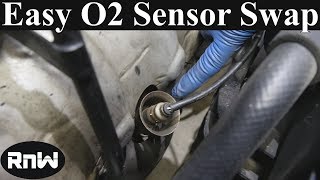
- Faulty Bank 2, Sensor 1 Oxygen (A/F) Sensor (Very Common) — The sensor itself is the most frequent culprit. 🎬 See how to locate and replace your O2 sensor. Sensors wear out, get contaminated by engine byproducts, or suffer internal heater circuit failures, causing them to stop working entirely.
- Damaged Wiring or Connectors (Common) — The wiring harness or electrical connector for the O2 sensor sustains damage from exhaust heat, road debris, or corrosion. This creates an 'open' or high resistance in the circuit, blocking the signal.
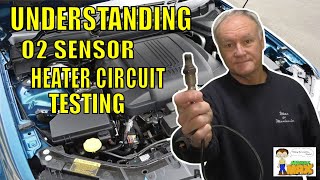
- Blown Heater Circuit Fuse (Less Common) — The oxygen sensor heater circuit relies on a dedicated fuse (often 15 Amp). A blown fuse interrupts power to the sensor and triggers this code immediately. Always check this before buying parts. 🎬 Watch: How to test oxygen sensor heater circuits.
- Exhaust Leak (Less Common) — A leak in the exhaust manifold or pipes near the sensor introduces outside oxygen into the exhaust stream. This skews readings, and the computer interprets the erratic signal as a circuit fault.
- Engine Vacuum Leak (Less Common) — A vacuum leak from a cracked hose introduces unmetered air into the engine. The PCM compensates by adding fuel, leading to soot buildup that insulates the O2 sensor and causes faulty readings.
- PCM Software Needs an Update (Less Common) — The vehicle's computer software sometimes misinterprets a normal sensor signal. Manufacturers release software updates (firmware flashes) via Technical Service Bulletins (TSBs) to fix these known bugs.
- Faulty Powertrain Control Module (PCM) (Rare) — A failed driver circuit or internal processing error within the PCM stops it from reading the O2 sensor, even if the sensor and wiring are perfect.
Symptoms
- Check Engine Light is On — The light illuminates immediately and stays on as long as the fault is active.
- Worse Gas Mileage — The engine defaults to a rich fuel mixture (too much fuel), causing a 10% to 20% drop in fuel economy.
- Rough Idle or Engine Hesitation — An incorrect air-fuel mixture makes the engine idle roughly, hesitate, or feel sluggish, especially before fully warming up.
- Black Smoke or Gas Smell from Exhaust — Unburnt fuel exits the tailpipe as black smoke or a strong raw gasoline odor.
- Failed Emissions Test — The vehicle automatically fails an OBD-II emissions inspection due to the active code and disabled readiness monitors.
Diagnostic Flowchart
Tap your situation to follow the diagnostic path that matches what you're seeing on this code.
Common Fixes & Costs
- Replace Bank 2, Sensor 1 Oxygen Sensor — Parts: $50 - $250, Labor: $100 - $200, ~1 hr book time (DIY)
- Repair Damaged Wiring or Connector — Parts: $10 - $50, Labor: $130 - $260, ~1.5 hr book time (Intermediate)
- Repair Exhaust or Vacuum Leaks — Parts: $20 - $200, Labor: $150 - $350, ~2.5 hr book time (Intermediate)
- Update Powertrain Control Module (PCM) Software — Parts: $0, Labor: $150 - $250, ~1 hr book time (Professional)
- Replace Powertrain Control Module (PCM) — Parts: $600 - $1200, Labor: $200 - $300, ~2 hr book time (Professional)
DIY vs Professional
- Replace Bank 2, Sensor 1 Oxygen Sensor — Beginner:
Tools: O2 sensor socket, ratchet, penetrating oil, torque wrench, anti-seize compound. - Repair Damaged Wiring or Connector — Beginner:
Tools: Multimeter, wire strippers, crimpers, heat shrink tubing, replacement pigtail/connector. - Repair Exhaust or Vacuum Leaks — Beginner:
Tools: Socket set, new gaskets, torque wrench, smoke machine. - Update Powertrain Control Module (PCM) Software — Beginner:
Tools: Vehicle-specific diagnostic and programming tool. - Replace Powertrain Control Module (PCM) — Beginner:
Tools: Socket set, vehicle-specific programming tools.
Used vs. New Parts: Buying Guide
When a used part is worth it: Never buy a used oxygen sensor. They are wear items with a 50k-100k mile lifespan. The minimal savings aren't worth doing the job twice.
Donor-vehicle mileage cap: roughly under 10000 miles for the part to have meaningful remaining life.
Donor quality checklist:
- Only buy 'used' if it is a verified new, open-box return.
- Avoid salvage yard sensors entirely.
- Ensure exact part number match.
Decision logic:
- If The part is an oxygen sensor. → Buy new OEM or premium aftermarket (Bosch/Denso/NTK).
- If The cost of a new OEM sensor is over $200. → Buy a premium aftermarket sensor.
Warranty tradeoff: Used: None. Aftermarket: 1-year. OEM: 12-month/12,000-mile.
Worst-case if a used part fails: $200 - $450. A failed cheap sensor means paying for the part and labor all over again.
What Happens If You Wait — Timeline
- 0-2 weeks: PCM logs the open circuit. Engine defaults to open-loop fuel maps. No major drivability issues yet. (MPG impact: 0-5%% · Added cost: $0)
- 2 weeks - 3 months: Fuel economy drops noticeably as the engine runs rich. Rough idle and raw fuel smell develop. (MPG impact: 5-15%% · Added cost: $30 - $90 in wasted fuel.)
- 3-8 months: Constant rich mixture overheats the catalytic converter substrate, reducing efficiency and causing hesitation. (MPG impact: 10-20%% · Added cost: $500 - $1500 (risk of needing catalytic converter replacement increases significantly).)
- 8+ months: Catalytic converter melts internally, severely restricting exhaust flow. Vehicle loses power and fails emissions. (MPG impact: 20-40%% · Added cost: $1500 - $3000+ (catalytic converter replacement is almost certain, potential damage to downstream O2 sensor as well).)
Cost of Not Fixing It
- 0-1 Month: Noticeable 10-20% decrease in fuel economy and rough idling. (Added cost: $30 - $90 in wasted fuel.)
- 1-6 Months: Continuous rich fuel mixture overheats and fouls the catalytic converter. (Added cost: $1200 - $2500 if the catalytic converter requires replacement.)
- 6+ Months: Catalytic converter substrate melts, restricting exhaust flow and causing severe power loss. (Added cost: $1500 - $3500+ for catalytic converter and potential engine repairs.)
Diagnosis Steps
- Read Codes and Review Freeze Frame Data
Use an OBD-II scanner to confirm P2629. Analyze freeze frame data to see engine parameters at the exact moment the fault occurred. Note any other codes, as they provide critical diagnostic clues.
Tools: OBD-II Scanner (Beginner) - Visually Inspect the Sensor and Wiring
Locate the Bank 2, Sensor 1 O2 sensor (upstream, on the side without cylinder #1). Inspect the sensor, connector, and wiring harness for frayed wires, melted insulation, or corrosion.
Tools: Flashlight, Inspection Mirror (Beginner) - Check for Technical Service Bulletins (TSBs)
Search online for TSBs related to P2629 for your specific vehicle. Manufacturers often issue bulletins detailing known software bugs that require a simple PCM update.
Tools: Internet Access (Beginner) - Swap Sensors Between Banks (If Applicable)
For V-type engines, swap the Bank 1, Sensor 1 with the Bank 2, Sensor 1. Clear codes and drive. If the code changes to P2626, the sensor is faulty. If P2629 returns, the problem is wiring or the PCM.
Tools: O2 Sensor Socket, Ratchet (Intermediate) - Test the Sensor's Heater Circuit Resistance
Disconnect the O2 sensor. Using a multimeter set to Ohms (Ω), measure resistance between the two heater circuit pins. A healthy circuit reads 2-30 Ohms. 'OL' (infinite) means the internal heater is broken.
Tools: Multimeter (Intermediate) - Check for Exhaust and Vacuum Leaks
With the engine running, listen for ticking noises indicating an exhaust leak near the manifold. Use a smoke machine to find cracked hoses causing vacuum leaks.
Tools: Mechanic's Stethoscope, Smoke Machine (Intermediate) - [PRO TIP] Check Live Data PIDs
Monitor live data for Bank 2, Sensor 1. At idle, Lambda should be near 1.0. Sensor current should hover near 0 mA. An unchanging or maxed-out value confirms a dead circuit.
Tools: Advanced OBD-II Scanner (Advanced) - [PRO TIP] Perform a Pumping Current and Reference Voltage Test
Back-probe the sensor connector with a multimeter. With key on/engine off, check for a 2.6V-3.3V reference voltage from the PCM. 0V indicates a wiring short or faulty PCM driver.
Tools: Multimeter, Back-probe Pins (Advanced) - [PRO TIP] Analyze Sensor Waveform with an Oscilloscope
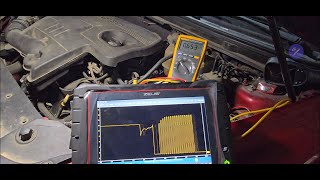
Connect an oscilloscope to the signal wire. A healthy sensor produces a steady voltage that drops sharply (lean) and rises quickly (rich) when snapping the throttle. A flat line indicates failure.
Tools: Oscilloscope (Advanced)
When This Code Triggers (Freeze-Frame Conditions)
- Engine Coolant Temp: 180-210°F (The fault logs when the engine is fully warmed up and operating in closed-loop fuel control.)
- Engine RPM: 1500-2500 RPM (Occurs during steady-state cruising or light acceleration.)
- Engine Load: 25-60% (Sets under moderate, stable engine load where the PCM expects a consistent sensor signal.)
- O2 Sensor Voltage (B2S1): 0V (Freeze frame data shows a flatline or zero voltage reading for Bank 2 Sensor 1, confirming the open circuit.)
Related Codes
- P2626 — Identical fault for Bank 1, Sensor 1. If both appear, suspect a systemic issue like a shared blown fuse or wiring harness damage rather than two simultaneously failed sensors.
- P2197 — Means 'O2 Sensor Signal Stuck Lean'. The open circuit from P2629 prevents a valid signal, which the PCM interprets as a constant lean condition. Fixing P2629 resolves P2197.
- P0151 — Means 'O2 Circuit Low Voltage'. An open circuit provides no voltage path, resulting in a zero reading. Diagnosing the open circuit (P2629) fixes the low voltage symptom (P0151).
- P064E — Points directly to the PCM processor. If you definitively rule out the sensor and wiring, P064E confirms the fault lies within the PCM's internal circuitry.
Climate & Environmental Factors
- Cold Weather: Extreme cold stresses O2 sensor heater elements, which must reach 600°F rapidly. Marginal heaters fail during cold starts, triggering the fault.
- High Humidity / Road Salt: Moisture and road salt penetrate wiring connectors over time. This corrodes the pins, creating the high resistance that triggers P2629.
- High Altitude: Altitude does not directly cause P2629. However, the thinner air exacerbates pre-existing vacuum leaks, pushing fuel trims out of bounds faster.
How to Talk to a Mechanic About This Code
Say this: "I have a P2629 code. Please test the Bank 2, Sensor 1 oxygen sensor, its wiring harness, and the heater fuse before replacing any parts."
Shows you understand the diagnostic process, preventing the shop from blindly firing the 'parts cannon' at a simple blown fuse.
Avoid saying:
- 'My check engine light is on, can you just fix it?'
- 'Just replace the oxygen sensor.' (You will pay for the sensor even if a broken wire was the real culprit).
- 'Just do whatever you think is best.'
Questions to ask before authorizing the repair:
- Can you show me the multimeter readings proving the sensor is dead?
- Is this repair essential for safety, or can it wait?
- Could you provide a written estimate that breaks down the cost of parts, labor, and any diagnostic fees?
- What is the parts and labor warranty?
Where to Take It: Dealer vs Independent vs Chain
- Dealer:
Best for: Vehicles under the 8-year/80k-mile Federal Emissions Warranty., Known manufacturer-specific issues covered by a TSB., Complex electrical issues requiring factory-specific diagnostic tools.
Downsides: Labor rates are significantly higher than independent shops., More inclined to replace entire assemblies rather than performing targeted repairs. (Typical cost: +20% vs. baseline) - Independent Shop:
Best fit. P2629 is a standard electrical fault that any ASE-certified shop can diagnose accurately for less than a dealer.
Best for: Out-of-warranty vehicles where cost is a primary concern., Common and well-documented issues like oxygen sensor failures., Getting a second opinion on a dealership's diagnosis.
Downsides: Quality and expertise vary widely; choose a shop with ASE-certified technicians., May lack access to the latest manufacturer-specific software for brand-new models. (Typical cost: +0% vs. baseline) - Chain Shop:
Avoid for diagnosis. They will likely read the code and blindly sell you a sensor without checking the wiring.
Best for: Getting the trouble code read for free., Simple part replacements if the diagnosis is already confirmed.
Downsides: Technicians lack in-depth diagnostic training for complex electrical faults., High pressure to upsell unnecessary services. (Typical cost: -10% vs. baseline)
When to Walk Away From the Repair
If repair costs exceed 50% of the vehicle's private-party value, consider selling.
- Car worth $4000, fix is $2200: Walk away. The repair cost is over 50% of the car's value.
- Car worth $12000, fix is $500: Fix it. The repair cost is well below the 50% threshold and is a worthwhile investment in the vehicle's reliability.
- Car worth $2500, fix is $1500: Walk away. The repair cost is 60% of the car's value, making it a poor financial decision.
What Scan Tool You Need for This Code
Minimum: Must display live data. A $20 code reader cannot show O2 sensor voltage, leaving you guessing.
A basic code reader only gives you the P2629 code. It cannot show live voltage or current from the oxygen sensor, which is crucial for determining if the sensor is truly dead or if the problem is in the wiring.
Budget: BlueDriver Pro (~$100) — Connects via Bluetooth and graphs live O2 sensor data to confirm if it's flatlining.
Mid-range: Innova 5610 (~$330) — Handheld unit with bidirectional control to test circuits directly.
Professional: Autel MaxiCOM MK808S (~$500) — OE-level diagnostics for tracking down complex PCM or wiring faults.
Rent vs buy: Parts stores read codes for free but won't diagnose. Buy a live-data scanner if you plan to DIY.
How to Clear the Code After You Fix It
- Use an OBD-II scanner to erase P2629.
- Perform a complete drive cycle to reset readiness monitors.
Drive cycle (~30 minutes): Start cold and idle for 3 minutes. Drive mixed city/highway, including 5 minutes of steady cruising at 55 mph. Coast down without braking.
Readiness monitors affected: Oxygen Sensor Monitor, Catalyst Monitor, Oxygen Sensor Heater Monitor
Before emissions retest: drive at least 50-100 miles to fully set monitors.
Watch out for:
- Clearing the code immediately fails an emissions test due to 'Not Ready' monitors.
- If the open circuit remains, the code returns instantly.
Will This Fail Emissions / State Inspection?
Yes — this code typically fails an OBD-II emissions inspection.
- California: Active P2629 is an automatic failure. All monitors must read 'Ready' after repair, requiring 50-100 miles of driving.
- New York: Automatic failure for the illuminated Check Engine Light. 2001+ vehicles can pass with exactly one monitor 'Not Ready' after clearing.
- Texas: Automatic failure in the 17 emissions-testing counties. Safety-only counties will pass the inspection, but the vehicle still runs rich.
Most Commonly Affected Vehicles
- Ford F-150 (2015-2020) — TSB 17-2124 for the 3.5L GTDI engine states P2629 requires replacing the Bank 2, Sensor 1 heated oxygen sensor (HO2S).
- Ford Explorer (2015-2017) — Covered under TSB 17-2124 for the 3.5L GTDI engine. The fix is replacing the faulty Bank 2 Sensor 1 HO2S.
- Mercedes-Benz E-Class, CLS-Class, S-Class (2011-2014) — A TSB for M278/M157 engines links P2629 to a damaged heating element. The fix requires replacing both upstream sensors and updating the ECU software.
- Honda Accord, CR-V, Odyssey (2005-2015) — Frequently reported on Honda V6 models, almost always caused by a failed Air/Fuel ratio sensor.
- BMW M3 (E90, E92), Z4, 328i (2008-2013) — Accessing the Bank 2 sensor requires removing multiple underbody panels. Mechanics strongly recommend replacing both upstream sensors simultaneously to save future labor.
- Toyota RAV4, Camry, Sienna (2007-2017) — Typically points to a failure of the Air/Fuel Ratio sensor on Bank 2. It is a very common failure item but generally easy to replace.
- Hyundai Sonata, Santa Fe (2011-2018) — Frequently caused by a faulty upstream O2 sensor. Diagnosis involves a visual inspection of the sensor and wiring before replacement.
Manufacturer-Specific Notes
- Ford: TSB 17-2124 for 2015-2017 3.5L GTDI engines states P2629 requires replacing the Bank 2, Sensor 1 heated oxygen sensor.
- Mercedes-Benz: A TSB for M278/M157 engines links P2629 to a damaged heating element. The fix requires replacing both upstream sensors and updating the ECU software.
- BMW: Accessing the Bank 2 sensor on E90/E92 M3s requires removing multiple underbody panels. Mechanics strongly recommend replacing both upstream sensors simultaneously to save future labor.
- Porsche: On Cayenne Turbos, accessing Bank 2 Sensor 1 requires removing the front wheel, fender liner, and sometimes loosening the exhaust manifold.
- General: Oxygen sensors fall under the Federal Emissions Warranty (8 years/80,000 miles). Check with a dealer before paying out of pocket if your vehicle qualifies.
Real Owner Stories
2011 Ford F-150 5.0L
Check engine light came on with no other noticeable symptoms. Code read P2629.
What they tried:
- Owner purchased a new Bosch oxygen sensor from an auto parts store for about $57 after a coupon.
Outcome: Owner replaced the Bank 2, Sensor 1 O2 sensor with a $57 Bosch unit. Access required tweaking a heat shield, but the code cleared permanently.
Lesson: For a straightforward P2629 with no other symptoms, the sensor itself is the most likely failure point.
2011 BMW E92 M3 at 50k miles
'Increased Emissions' warning and Service Engine Soon light appeared shortly after purchasing the vehicle. Code reader showed P2629.
What they tried:
- The owner first tried swapping the pre-cat O2 sensors between Bank 1 and Bank 2 to see if the fault code would move to the other bank.
Outcome: Owner swapped pre-cat O2 sensors between banks. The fault did not immediately return, suggesting a loose connection was fixed during the swap.
Lesson: Swapping sensors between banks is a free, definitive way to isolate a bad sensor from a wiring issue.
2013 Ford Expedition EL XLT
P2629 code appeared intermittently at first, then became more frequent. It was accompanied by P2197 (Stuck Lean) and later P064E (Internal Control Module O2 Sensor Processor Performance).
What they tried:
- Replaced the Bank 2, Sensor 1 HO2S, which did not solve the issue.
- Performed detailed wiring checks (Pinpoint Test DZ) which showed sensor reference voltage was low (2.23V instead of 2.4-2.6V), pointing to a PCM issue.
- Replaced the PCM with a used unit, which fixed the P2629 but introduced a new, unrelated code (P0024).
- Finally, re-installed the original PCM and had it reflashed with the latest firmware.
Outcome: Owner replaced the sensor and PCM to no avail. Reflashing the original PCM with updated firmware finally resolved the code.
Lesson: If a new sensor and wiring tests fail, check for TSBs. A PCM software update often fixes phantom circuit codes.
How to Prevent This Code From Triggering
- Use Top-Tier certified gasoline. (Every fill-up) — Contains detergents that prevent carbon deposits, ensuring complete combustion and protecting the O2 sensor from soot.
- Replace engine air filter at recommended intervals. (Per manufacturer schedule (typically 15k-30k miles)) — A clogged filter restricts air, causing a rich condition that coats the sensor in carbon.
- Perform regular engine maintenance (spark plugs, oil changes). (Per manufacturer schedule) — Worn plugs cause misfires that dump raw fuel into the exhaust. Fresh oil prevents blow-by contamination.
- Address engine misfires and oil/coolant leaks immediately. (As needed) — Coolant leaks instantly 'poison' O2 sensors. Fix the root leak before installing a new sensor.
- Include occasional highway driving in your routine. (Weekly or bi-weekly) — Sustained highway speeds heat the exhaust enough to burn off accumulated carbon from the sensor tip.
Frequently Asked Questions
What is 'Bank 2, Sensor 1'?
Bank 2 is the engine side without cylinder #1 (usually the driver's side on US V6/V8 engines). Sensor 1 is the 'upstream' sensor located before the catalytic converter.
Can I replace the oxygen sensor myself?
Yes, replacing an O2 sensor is a common DIY repair requiring a specialized socket. Sensors frequently seize from rust, so apply penetrating fluid and work on a warm exhaust to prevent stripping threads.
What happens if I ignore code P2629?
Your engine runs inefficiently, slashing fuel economy. Ignoring it forces a rich fuel mixture that overheats and permanently destroys the catalytic converter, a repair costing over $1,500.
Is an Air-Fuel Ratio Sensor the same as an Oxygen Sensor?
An Air-Fuel (A/F) ratio sensor is a modern, wideband oxygen sensor used upstream (Sensor 1) for precise measurements. Older narrowband sensors are used downstream (Sensor 2). For P2629, the terms are interchangeable.
My mechanic replaced the sensor, but the code came back. What now?
If a new sensor fails to clear the code, the circuit is still open. You must test the wiring harness for breaks, check the 15A heater fuse, and verify the PCM is sending the correct reference voltage.
What is the most common misdiagnosis for P2629?
The most common mistake is replacing the sensor without testing the circuit. A blown fuse or severed wire triggers the exact same code. Always verify power and ground at the connector first.
Can a vacuum leak cause P2629?
Yes. A severe vacuum leak causes a lean condition, forcing the PCM to dump excess fuel. This rich environment coats the O2 sensor in soot, insulating it and eventually triggering a circuit code.
How much does it cost to fix P2629?
A DIY sensor replacement costs $50-$250 for parts. A shop charges $150-$450 for the same job. Wiring repairs or PCM updates typically cost $150-$300 in labor and diagnostics.
Key Takeaways
- Code P2629 indicates a broken electrical circuit in the Bank 2, Sensor 1 upstream oxygen sensor, forcing the engine to run rich.
- Replacing the faulty oxygen sensor resolves the issue in over 80% of cases, costing between $150 and $450 at a repair shop.
- Driving more than 100 miles with this active code dumps unburnt fuel into the exhaust, risking a $1,500+ catalytic converter replacement.
- Before buying parts, swap the Bank 1 and Bank 2 sensors; if the code changes to P2626, the sensor is definitively dead.
Helpful Videos


The information in this article is provided for general reference and educational purposes only. Vehicle specifications, procedures, and part compatibility can vary by production date, trim level, and region. Always consult your vehicle's factory service manual and verify part numbers before purchasing or performing repairs. Safety-critical components such as airbags, seat belts, and braking systems should be installed by a qualified professional.
- 🎬 Helpful Videos
- What Does P2629 Mean?
- Can I Drive With P2629?
- Common Causes
- Symptoms
- Diagnostic Flowchart
- Common Fixes & Costs
- DIY vs Professional
- Used vs. New Parts: Buying Guide
- What Happens If You Wait — Timeline
- Cost of Not Fixing It
- Diagnosis Steps
- When This Code Triggers (Freeze-Frame Conditions)
- Related Codes
- Climate & Environmental Factors
- How to Talk to a Mechanic About This Code
- Where to Take It: Dealer vs Independent vs Chain
- When to Walk Away From the Repair
- What Scan Tool You Need for This Code
- How to Clear the Code After You Fix It
- Will This Fail Emissions / State Inspection?
- Most Commonly Affected Vehicles
- Manufacturer-Specific Notes
- Real Owner Stories
- 2011 Ford F-150 5.0L
- 2011 BMW E92 M3 at 50k miles
- 2013 Ford Expedition EL XLT
- How to Prevent This Code From Triggering
- Frequently Asked Questions
- What is 'Bank 2, Sensor 1'?
- Can I replace the oxygen sensor myself?
- What happens if I ignore code P2629?
- Is an Air-Fuel Ratio Sensor the same as an Oxygen Sensor?
- My mechanic replaced the sensor, but the code came back. What now?
- What is the most common misdiagnosis for P2629?
- Can a vacuum leak cause P2629?
- How much does it cost to fix P2629?
- Key Takeaways
- 🎟️ Get 5% Off