

OBD-II Code P2589: Turbocharger Boost Control Position Sensor 'B' Circuit High
The Ultimate 2026 Guide to Diagnosing and Fixing P2589
- P2589 indicates a 'Circuit High' condition, meaning the turbo position sensor's signal wire is shorted to a 5V or 12V power source, or the sensor has failed internally.
- Inspect the wiring harness near the hot exhaust components first; a $20 wiring repair often resolves this code without needing an $800 actuator.
- Stop driving immediately to prevent the engine from running rich and destroying your Diesel Particulate Filter (DPF), a secondary failure that costs $2,000 to $5,000 to fix.
- Always disconnect the actuator arm and move the turbo vanes by hand; installing a new actuator on a soot-clogged, sticking turbo guarantees the new part will burn out within months.
What Does P2589 Mean?
P2589 means your car's Powertrain Control Module (PCM) is reading a voltage signal from the 'B' turbocharger boost control position sensor that is too high. This sensor tells the computer the exact position of the turbo's internal vanes, controlling boost pressure. When this signal shorts high, the PCM loses turbo control, forcing the engine into limp mode to prevent damage.
Technical definition: The SAE/OBD-II definition is 'Turbocharger Boost Control Position Sensor 'B' Circuit High'. The PCM detects the voltage in the sensor's electrical circuit is above the maximum expected range (typically >4.8V). This is almost always caused by the sensor's signal wire shorting directly to a 5V or 12V power source.
Can I Drive With P2589?
No — Do Not Drive. Driving is not recommended. Your vehicle enters a reduced power 'limp mode.' Continuing to drive causes severe damage. An uncontrolled turbo causes over-boost (risking internal engine damage) or under-boost, which rapidly clogs the Diesel Particulate Filter (DPF). Replacing a DPF costs $2,000-$5,000, turning a sensor issue into a catastrophic repair bill.
Common Causes
- Damaged Wiring or Connectors (Very Common) — The wiring harness to the sensor is exposed to intense heat and vibration. Wires melt, chafe, or break insulation, causing the signal wire to short against a power wire. Water intrusion in the connector also creates a path for voltage to cross.
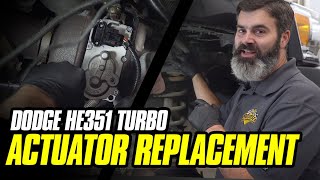
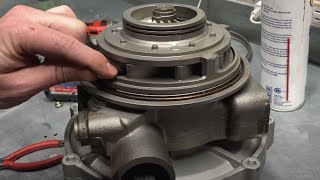
- Faulty Turbocharger Actuator / Position Sensor (Very Common) — The sensor itself, often integrated into the electronic turbo actuator assembly, fails internally. This is a frequent cause on modern diesel trucks from Ram, Ford, and GM. 🎬 Watch: Step-by-step Cummins 6.7L turbo actuator replacement guide.
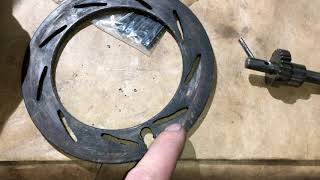
- Sticking or Clogged Turbocharger Vanes (VGT) (Common) — This is a root cause. Soot and carbon build up inside the variable geometry turbocharger (VGT), preventing the vanes from moving. The actuator motor works harder, overheats, and burns out the internal electronics, leading to P2589.
- Oil Contamination of Actuator Electronics (Common) — On specific engines, particularly the 6.7L Cummins, engine oil leaks past a failing internal turbo seal and saturates the electronic actuator. This oil shorts out the internal circuit board.
- Incorrectly Installed/Calibrated Actuator (Less Common) — After replacing a turbocharger actuator, vehicles like the GM Duramax and Ram Cummins require a specific 'learn' procedure using a scan tool. Skipping this step leaves the PCM unable to recognize the actuator's position.
- PCM Software/Calibration Issue (Less Common) — The PCM's software sometimes has overly sensitive parameters for monitoring the sensor. Manufacturers issue Technical Service Bulletins (TSBs) with software updates to correct this false trigger.
Symptoms
- Check Engine Light On — An illuminated Malfunction Indicator Lamp (MIL) on your dashboard is the immediate symptom.
- Reduced Engine Power / Limp Mode — The PCM commands a severe power reduction to protect the engine. Acceleration feels flat, sluggish, and unresponsive because the turbo is disabled.
- Decreased Fuel Economy — With the turbo disabled, combustion efficiency drops, forcing the engine to consume significantly more fuel to maintain speed.
- Exhaust Brake Inoperative (Diesel Trucks) — On diesel trucks like the Ram Cummins, the VGT actuator creates backpressure for the exhaust brake. A P2589 fault disables this function entirely.
- Unusual Noises from Turbo (also visible on scanner) — Abnormal whistling or hissing sounds occur if the vanes are stuck in an awkward position.
Diagnostic Flowchart
Tap your situation to follow the diagnostic path that matches what you're seeing on this code.
Common Fixes & Costs
- Repair Damaged Wiring or Connector — Parts: $10 - $50, Labor: $150 - $400, ~1.5 hr book time (Intermediate)
- Replace the Turbocharger Actuator/Position Sensor
— Parts: $300 - $900, Labor: $200 - $500, ~2.5 hr book time
(Intermediate)
Ram 6.7L Cummins: OEM Holset/Mopar: 68445522AA, R8481772AA (2013-2018); 5601240NX (2019+) (Alt: Alliant Power (AP63587), BD Diesel (1047310))
GM 6.6L Duramax: OEM ACDelco/GM: 12643471, 12635324 (Sensor only, 2006-2016) (Alt: Garrett (763527-0712), Dorman (904-235))
Ford 6.7L Power Stroke: OEM Ford/Motorcraft: FC3Z-6F089-A (2015-2019); LC3Z-6B018-A (2020+) (Alt: Garrett, Walker Products) - Replace the Entire Turbocharger Assembly — Parts: $2,000 - $4,500, Labor: $800 - $2,000, ~7 hr book time (Professional)
- Reprogram the Powertrain Control Module (PCM) — Parts: $0, Labor: $120 - $250, ~1 hr book time (Professional)
Used vs. New Parts: Buying Guide
When a used part is worth it: A remanufactured turbo actuator is viable when the vehicle has high mileage (>120k miles) and the part is sourced from a reputable rebuilder. It makes sense for older models where new OEM parts are disproportionately expensive.
Donor-vehicle mileage cap: roughly under 80000 miles for the part to have meaningful remaining life.
Donor quality checklist:
- Verify the part number matches exactly.
- Look for a warranty (reputable sellers offer 90 days to 1 year).
- Avoid parts with visible corrosion, cracks, or signs of oil contamination.
Decision logic:
- If A manufacturer warranty extension for the actuator applies to your VIN. → Use a new OEM part installed by a dealer to ensure coverage.
- If The vehicle is less than 8 years old and under 100k miles. → Buy a new OEM or high-quality aftermarket part for maximum longevity.
- If The vehicle is older, has high mileage, and the root cause (stuck vanes) is fixed. → A remanufactured actuator from a trusted brand is a cost-effective choice.
Warranty tradeoff: Used parts offer a 30-90 day warranty. Remanufactured parts come with a 1-year warranty. New OEM parts carry a 1-2 year warranty but require dealer diagnosis for coverage.
Worst-case if a used part fails: $400 - $800 if a used part fails prematurely, due to repeated labor and diagnostic fees.
What Happens If You Wait — Timeline
- 0-1 month: Check Engine Light illuminates and vehicle enters 'limp mode' with 70-80% power reduction. Exhaust brake is disabled. (MPG impact: 10-15%% · Added cost: $0-50 in wasted fuel)
- 1-3 months: The engine runs rich due to low boost. Soot rapidly accumulates in the Diesel Particulate Filter (DPF), forcing frequent active regenerations. (MPG impact: 15-25%% · Added cost: $2,000 - $5,000 (Risk of permanent DPF damage requiring replacement).)
- 3-6 months: If the actuator fails in a high-boost position, severe engine stress occurs, causing head gasket failure or piston damage due to excessive cylinder pressures. (MPG impact: N/A (Severe performance issues)% · Added cost: $5,000 - $15,000+ (Risk of catastrophic internal engine damage).)
Cost of Not Fixing It
- Immediate (0-1 month): Vehicle enters 'limp mode' with severely reduced power. Fuel economy drops by 10-25%. Exhaust brake function is disabled. (Added cost: Negligible, besides increased fuel consumption.)
- Short Term (1-3 months): The engine runs rich, rapidly clogging the Diesel Particulate Filter (DPF) with soot, leading to permanent DPF damage. (Added cost: $2,000 - $5,000 for DPF replacement.)
- Long Term (3+ months): Continued operation with stuck vanes destroys the turbocharger bearings, requiring a full turbo replacement. (Added cost: $4,500 - $15,000+ for turbocharger and engine repair.)
Diagnosis Steps
- Read Code, Freeze Frame, and TSBs
Use an OBD-II scanner to confirm P2589. Analyze freeze-frame data for engine conditions. Search for manufacturer Technical Service Bulletins (TSBs) for known software updates before touching any hardware.
Tools: OBD-II Scanner, Internet Access (Beginner) - Test for Short to Voltage (Pro Tip)
Disconnect the actuator harness connector. Turn the ignition 'On' (engine off). Place a multimeter's black probe on chassis ground and the red probe on the signal wire pin in the harness connector. A reading above 0.5V (often 5V or 12V) confirms a short to power in the wiring. A healthy circuit reads 0V.
Tools: Digital Multimeter, Wiring Diagram (Intermediate) - Visually Inspect and Wiggle Test Harness
Inspect the wiring harness for melting or chafing near hot exhaust components. While monitoring the signal wire's voltage with your multimeter, wiggle the harness from the connector back to the PCM. A voltage spike pinpoints the exact location of an intermittent short.
Tools: Flashlight, Digital Multimeter (Intermediate) - Test Actuator Arm Movement
With the engine off and cool, disconnect the actuator linkage and move the turbo arm by hand. It must move smoothly without binding. If it feels stiff or gritty, the turbo vanes are clogged with soot—the root cause of the actuator failure.
Tools: Basic Hand Tools (Intermediate) - Bi-Directional Scan Tool Testing
Use a bi-directional scanner to command the actuator from 0% to 100%. Watch its physical movement and monitor the 'Turbocharger Vane Position Sensor Percentage' PID. If the actuator fails to move or the data is stuck at 100% regardless of the command, the actuator is faulty.
Tools: Bi-Directional Scan Tool (Advanced) - Check Reference Voltage and Ground
At the harness connector (key on), verify the sensor receives a steady 5V reference voltage and has a solid ground (less than 0.1V).
Tools: Digital Multimeter (Advanced) - Test Sensor/Actuator Resistance
With the component disconnected, measure resistance between the signal, power, and ground pins on the actuator itself. Near-zero resistance between signal and power indicates an internal short, confirming the part must be replaced.
Tools: Digital Multimeter, Service Manual (Advanced)
When This Code Triggers (Freeze-Frame Conditions)
- Engine Coolant Temp: 180-205°F (The engine is fully warmed up and has been running for several minutes.)
- Engine RPM: 1500-2500 RPM (The fault sets during steady-state cruising or light to moderate acceleration, not typically at idle or full throttle.)
- Engine Load: 30-60% (The engine is under a moderate load, such as maintaining speed on a highway or climbing a slight incline.)
- Vehicle Speed: 40-65 mph (The code triggers at highway speeds when the turbo is actively managing boost.)
Related Codes
- P2588 — This is the opposite code, 'Circuit Low'. It indicates an open circuit, a short to ground, or a sensor not receiving power. Diagnosis involves checking for a missing 5V reference.
- P2563 — This is 'Circuit Range/Performance', common on Duramax engines. It indicates the sensor's reported position is not where the PCM expects it to be, caused by a failing sensor or stuck vanes.
- P003A — This is 'Position Exceeded Learning Limit', a mechanical fault. It means the actuator is trying to move the vanes but cannot reach the target position due to soot buildup.
- P0299 — This means 'Underboost Condition'. P2589 is a root cause for P0299. If the actuator fails in a 'low boost' position, it triggers the underboost code.
Climate & Environmental Factors
- Humidity and Road Salt: Moisture penetrates the actuator's weather seals over time, leading to internal corrosion of the circuit board and causing electrical shorts.
- Cold Climates / Short Trips: Frequent short trips prevent the exhaust from reaching full temperature, promoting soot buildup. This causes the vanes to stick, straining the actuator motor until it burns out.
How to Talk to a Mechanic About This Code
Say this: "I have a P2589 code, which I know is for the turbo actuator sensor circuit high. I'd like to book a diagnostic appointment. Please start by testing the wiring harness for a short-to-voltage and physically checking if the turbo vane actuator arm is moving freely before quoting a part replacement."
This signals you understand the common causes and prevents a shop from immediately quoting an expensive actuator replacement without proper diagnosis.
Avoid saying:
- 'My truck is in limp mode, can you fix it?'
- 'My check engine light is on, I think it's the turbo.'
- 'Just replace the turbo sensor.'
Questions to ask before authorizing the repair:
- Did you find voltage on the signal wire, indicating a wiring short?
- Was the actuator arm on the turbo moving smoothly by hand, or was it sticking?
- If I need a new actuator, does my vehicle require a calibration procedure with a scan tool after installation?
- What is the warranty on the parts and the labor for this repair?
Where to Take It: Dealer vs Independent vs Chain
- Dealer:
Recommended if your vehicle is under warranty or requires a specific calibration procedure that independent shops cannot perform.
Best for: Vehicles under powertrain or emissions warranty., Vehicles with a known TSB for a software update., Newer (2013+) trucks that require proprietary scan tools for actuator calibration.
Downsides: Highest labor rates, often 1.5-2x an independent shop., Defaults to replacing an entire turbo assembly when only an actuator or cleaning is needed. (Typical cost: +50% vs. baseline) - Independent Shop:
Best fit for out-of-warranty repairs. A trusted diesel specialist offers more repair options (e.g., wiring repair, turbo cleaning) than a dealer.
Best for: Out-of-warranty diesel trucks where cost is a major factor., Diagnosing wiring issues and mechanical faults like stuck vanes., Shops that specialize in diesel and turbo repair.
Downsides: Quality varies greatly; ensure the shop is a reputable diesel specialist., Lacks the latest OEM calibration software for brand new models. (Typical cost: +0% vs. baseline) - Chain Shop:
AVOID. The complexity of the VGT system and the need for specific diagnostic procedures are beyond the scope of chain repair shops.
Best for: Basic services like oil changes and tire rotations.
Downsides: Technicians lack specialized knowledge for complex diesel turbo diagnostics., Lacks necessary bi-directional scan tools or calibration software., High risk of misdiagnosis. (Typical cost: -10% vs. baseline)
When to Walk Away From the Repair
If the estimated repair cost exceeds 40-50% of the truck's current private-party value, seriously consider selling it as-is or trading it in.
- Car worth $30000, fix is $1500: Fix it. The repair cost is only 5% of the vehicle's value and is a common maintenance item.
- Car worth $15000, fix is $6500: Borderline. The repair is ~43% of the truck's value. Get a second opinion to confirm a full turbo replacement is truly necessary.
- Car worth $8000, fix is $6500: Walk away. The repair cost is over 80% of the vehicle's value. It is not economically sensible to invest this much into an older truck.
What Scan Tool You Need for This Code
Minimum: A bi-directional scan tool capable of commanding the turbo actuator and performing the VGT calibration/relearn procedure for your specific vehicle.
A basic $50 code reader cannot perform the critical diagnostic step of commanding the actuator to test its function, nor can it run the mandatory calibration procedure required after replacing the actuator.
Budget: None Recommended (~$0) — Scanners in this price range lack essential bi-directional control. For some Ram trucks, the AlfaOBD app ($50) paired with an OBDLink MX+ ($120) is the most budget-friendly option.
Mid-range: XTOOL D7 (~$380) — Provides full bi-directional control to command the actuator. Includes the special 'VGT Actuator Installation and Calibration' function needed for Cummins and Duramax trucks.
Professional: Autel MaxiCOM MK808BT / MK900BT (~$500-800) — Offers robust, dealer-level bi-directional controls, live data graphing, and comprehensive coverage for VGT actuator calibration procedures across a wide range of manufacturers.
Rent vs buy: Buy: Auto parts store loaner tools are basic readers and are NOT sufficient for this job. If you own a modern diesel truck, buying a mid-range bi-directional scanner is a wise investment that pays for itself over one use.
How to Clear the Code After You Fix It
- Ensure all connectors are securely fastened.
- Use a compatible OBD-II scan tool to erase the diagnostic trouble codes from the PCM's memory.
- Perform the specific turbo actuator calibration or relearn procedure if a new actuator was installed.
Drive cycle (~20 minutes): Idle for 3 minutes. Drive in mixed conditions for 15-20 minutes, including steady-state cruising between 45-60 mph. Allow the vehicle to cool down completely and repeat if readiness monitors have not set.
Readiness monitors affected: Comprehensive Component Monitor, Catalyst Monitor, Exhaust Gas Sensor Monitor
Before emissions retest: drive at least 50 miles to fully set monitors.
Watch out for:
- Disconnecting the battery clears the code but resets all emissions readiness monitors, guaranteeing an immediate test failure.
- Forgetting to perform the mandatory actuator calibration causes the code to return immediately.
Will This Fail Emissions / State Inspection?
Yes — this code typically fails an OBD-II emissions inspection.
- California: An active P2589 code is an automatic failure. All OBD readiness monitors must be in a 'Ready' state to pass the smog check.
- New York: An illuminated Check Engine Light and the presence of this fault code results in an immediate inspection failure.
- Texas: In the 17 counties requiring emissions testing, a vehicle with P2589 fails the OBD portion of the annual safety inspection.
Most Commonly Affected Vehicles
- Dodge / Ram 2500 / 3500 (2007-2024) — Extremely common on the 6.7L Cummins. Failure is often due to soot buildup in the VGT or an internal oil seal leak. Models from 2013-2018 require a calibration kit if using an OEM-style replacement.
- Chevrolet / GMC Silverado / Sierra 2500HD / 3500HD (2006-2024) — Common on LLY, LBZ, LMM, and LML Duramax engines (2006-2016), where the sensor is a separate, cheaper component. On L5P (2017+) engines, the actuator requires a specific 'Vane Position Learn' procedure.
- Ford F-250 / F-350 Super Duty (2011-2023) — Common on the 6.7L Power Stroke. On 2020+ models, the actuator is made of brittle plastic that easily cracks. Some codes are fixed with a PCM software update per a TSB.
- Mercedes-Benz Sprinter, E320, ML320 (2006-2018) — Common failure on CDI diesel engines. Dealers require a full turbo replacement, but actuator rebuild services are a popular, cheaper alternative.
- Volkswagen / Audi Jetta, Golf, Passat, A3, A4 (2009-2015) — Common on 2.0L TDI engines. The electronic actuator fails due to heat and vibration. The actuator is often not sold separately by the dealer.
Manufacturer-Specific Notes
- Dodge / Ram (Cummins): Actuator failure is frequently a symptom of soot buildup inside the turbo. Replacing the actuator without cleaning the turbo causes premature failure. FCA has issued warranty extensions (Campaign X99/X93) for this part on certain models up to 15 years/150,000 miles.
- GM (Duramax): On 2006-2016 engines, the vane position sensor is available as a separate part, allowing for a cheaper repair. On 2017+ engines, replacing the actuator requires a mandatory 'Turbocharger Vane Position Learn' procedure.
- Mercedes-Benz: The manufacturer does not sell the electronic actuator separately from the turbocharger assembly, making dealer repairs cost $4000+. Third-party actuator rebuild services are a viable and affordable solution.
- Ford (Power Stroke): For the 6.7L engine, the plastic actuator housing on 2020+ models becomes brittle and damages easily. Ford has issued multiple TSBs for PCM recalibrations to fix erroneous boost codes.
Real Owner Stories
2015 Ram 2500 6.7L Cummins at 130K miles
Check engine light came on with P2589 and P003A (VGT Learning Limit Exceeded). Truck entered limp mode. Exhaust brake failed.
What they tried:
- Replaced the turbo actuator with an aftermarket unit.
- During replacement, manually moved the turbo vane linkage and found it stiff and gritty.
Outcome: Replacing the actuator solved the P2589 electrical code, but the P003A mechanical code returned. The new actuator burned out within a month. The root cause was a soot-clogged turbo requiring replacement.
Lesson: P2589 is often a symptom of a mechanical problem. If you have codes like P003A, the turbo vanes are sticking. Replacing the actuator without fixing the turbo leads to repeat failure.
2011 GMC Sierra 3500HD LML Duramax at 185K miles
P2589 code and limp mode. Mechanic quoted $1,200 to replace the entire turbo actuator assembly.
What they tried:
- Owner researched and found the vane position sensor was available as a separate part for the LML engine.
- Purchased the ACDelco sensor (GM Part #12643471) for $300.
- Replaced only the sensor without removing the entire turbo or actuator.
Outcome: Replacing the sensor cleared the code and restored full power. Total cost was under $350 and took 2 hours of DIY labor.
Lesson: On 2006-2016 Duramax engines, always check if you can replace just the vane position sensor before paying for a whole new actuator assembly.
2012 Ford F-250 6.7L Power Stroke at 70K miles
P2589 code appeared intermittently. Occasional hesitation under acceleration.
What they tried:
- Visual inspection revealed the turbo actuator wiring harness resting against a hot exhaust manifold pipe.
- The insulation was melted, exposing the copper signal wire, which shorted to a 12V power wire during engine vibration.
Outcome: The damaged section was cut out and new wires spliced in. The repaired section was wrapped in high-temperature loom. The code never returned.
Lesson: A 'Circuit High' code is frequently a wiring problem. Perform a meticulous visual inspection near heat sources before buying an $800 actuator.
How to Prevent This Code From Triggering
- Use the exhaust brake regularly (especially on Ram Cummins) (Daily, during deceleration) — Activating the exhaust brake forces the turbo vanes through their full range of motion, scrubbing away soot and preventing them from sticking.
- Perform a 'spirited drive' or 'Italian tune-up' (Once a month) — Sustained periods of high EGTs and RPMs burn off accumulated soot from the turbo vanes and DPF, counteracting the effects of frequent short trips.
- Inspect and protect the actuator wiring harness (During every oil change) — Ensure the harness is secured away from exhaust manifolds. Add a protective heat-resistant sleeve to prevent melting and chafing.
Frequently Asked Questions
What is the 'B' sensor in P2589?
In OBD-II terminology, 'B' refers to a specific circuit identifier. It is the designation for the primary turbo position sensor circuit on a vehicle with a single turbo.
Can I just replace the sensor, or do I need the whole actuator?
On 2006-2016 GM Duramax trucks, the sensor is sold separately. On most other vehicles, like Ram Cummins and Ford Power Stroke, the sensor is integrated into the actuator and serviced as a single unit.
What are the most common misdiagnosis mistakes for P2589?
The biggest mistake is replacing the actuator without checking for soot-clogged turbo vanes, which causes the new part to burn out. The second mistake is failing to test the wiring harness for a short to power.
Can a bad ground cause a P2589 'Circuit High' code?
No. A bad ground connection causes a 'Circuit Low' (P2588) or 'Circuit Open' fault. A 'Circuit High' code is almost always caused by the signal wire shorting to a power source.
My mechanic says the actuator needs to be calibrated. What does that mean?
On many modern trucks, the turbo actuator is not plug-and-play. After installation, you must run a 'Turbocharger Vane Position Learn' procedure with a dealership-level scan tool. This teaches the PCM the new actuator's precise electronic start and stop points.
Will P2589 clear itself if the problem is fixed?
For a hard fault like a failed sensor, the code remains active until manually cleared with an OBD-II scanner. Intermittent wiring faults occasionally clear after several successful drive cycles.
Why is the repair so expensive for diesel trucks?
Variable geometry turbochargers are large, complex, and built to handle extreme heat. The parts are expensive, and the turbo is often in a difficult-to-access location, leading to high labor costs.
Key Takeaways
- P2589 indicates a 'Circuit High' condition, meaning the turbo position sensor's signal wire is shorted to a 5V or 12V power source, or the sensor has failed internally.
- Inspect the wiring harness near the hot exhaust components first; a $20 wiring repair often resolves this code without needing an $800 actuator.
- Stop driving immediately to prevent the engine from running rich and destroying your Diesel Particulate Filter (DPF), a secondary failure that costs $2,000 to $5,000 to fix.
- Always disconnect the actuator arm and move the turbo vanes by hand; installing a new actuator on a soot-clogged, sticking turbo guarantees the new part will burn out within months.
Helpful Videos





The information in this article is provided for general reference and educational purposes only. Vehicle specifications, procedures, and part compatibility can vary by production date, trim level, and region. Always consult your vehicle's factory service manual and verify part numbers before purchasing or performing repairs. Safety-critical components such as airbags, seat belts, and braking systems should be installed by a qualified professional.
- 🎬 Helpful Videos
- What Does P2589 Mean?
- Can I Drive With P2589?
- Common Causes
- Symptoms
- Diagnostic Flowchart
- Common Fixes & Costs
- Used vs. New Parts: Buying Guide
- What Happens If You Wait — Timeline
- Cost of Not Fixing It
- Diagnosis Steps
- When This Code Triggers (Freeze-Frame Conditions)
- Related Codes
- Climate & Environmental Factors
- How to Talk to a Mechanic About This Code
- Where to Take It: Dealer vs Independent vs Chain
- When to Walk Away From the Repair
- What Scan Tool You Need for This Code
- How to Clear the Code After You Fix It
- Will This Fail Emissions / State Inspection?
- Most Commonly Affected Vehicles
- Manufacturer-Specific Notes
- Real Owner Stories
- 2015 Ram 2500 6.7L Cummins at 130K miles
- 2011 GMC Sierra 3500HD LML Duramax at 185K miles
- 2012 Ford F-250 6.7L Power Stroke at 70K miles
- How to Prevent This Code From Triggering
- Frequently Asked Questions
- What is the 'B' sensor in P2589?
- Can I just replace the sensor, or do I need the whole actuator?
- What are the most common misdiagnosis mistakes for P2589?
- Can a bad ground cause a P2589 'Circuit High' code?
- My mechanic says the actuator needs to be calibrated. What does that mean?
- Will P2589 clear itself if the problem is fixed?
- Why is the repair so expensive for diesel trucks?
- Key Takeaways
- 🎟️ Get 5% Off