

OBD-II Code P2564: Turbocharger Boost Control Position Sensor 'A' Circuit Low
The Ultimate Guide to P2564: What it means, why it triggers, and how to fix it for good.
- Code P2564 points directly to a failed turbocharger electronic actuator or damaged wiring in 80% of cases, not a failed turbocharger.
- Expect an immediate 40-50% loss of engine power as the vehicle enters 'limp mode' to protect the engine from improper boost levels.
- Dealerships often quote $2,500+ for a full turbo replacement, but the actuator is available as a separate $150-$450 part on most modern vehicles.
- Replacing the actuator requires a mandatory electronic calibration using a $150+ bi-directional scan tool; skipping this guarantees the code returns.
- Driving with P2564 for more than a few weeks causes excessive soot buildup, leading to $1,200+ in secondary damage to the DPF or catalytic converter.
What Does P2564 Mean?

Your car's Powertrain Control Module (PCM) is receiving a voltage signal from the turbocharger's position sensor that is below the specified range. This sensor tells the computer the exact position of the wastegate or variable vanes, which control turbo speed and boost output. Because the signal is too low, the computer cannot accurately control the turbo, resulting in an immediate and significant loss of engine power.
Technical definition: The SAE/OBD-II definition is "Turbocharger Boost Control Position Sensor 'A' Circuit Low". This means the PCM detects the voltage in the control or signal circuit for the boost control position sensor is below the normal threshold (typically under 0.16 or 0.2 volts). This indicates a short to ground, an open circuit, or an internally failed sensor.
Can I Drive With P2564?
Yes, But With Caution. You can drive, but your vehicle will have noticeably less power, poor fuel economy, and will enter a 'limp mode' to protect the engine. Driving for an extended period causes inefficient combustion, stressing the turbocharger and leading to expensive damage to the catalytic converter or Diesel Particulate Filter (DPF), adding $800-$2500 to your repair bill.
Common Causes

- Faulty Turbocharger Boost Control Actuator/Sensor (Very Common) — The position sensor is integrated into the electronic actuator assembly. This entire unit is the most frequent point of failure. Internal electronics, the potentiometer, or the motor fail from constant heat and vibration, causing the low voltage signal.
- Damaged or Corroded Wiring/Connectors (Common) — Located in the harsh environment of the engine bay, the wiring harness to the actuator is highly susceptible to damage. Wires chafe or short to ground, and connector pins corrode, causing a severe voltage drop or complete signal loss.
- Sticking or Seized Turbocharger Vanes/Wastegate (Less Common) — The mechanical parts inside the turbo (vanes or wastegate) get stuck due to heavy carbon buildup. If the actuator arm cannot move through its full range, the sensor cannot report the expected change in position, triggering a circuit fault.
- Vacuum System Failures (Hoses, Diaphragms, Solenoids) (Less Common) — On vacuum-actuated systems (like older VW TDIs), 🎬 Watch: Step-by-step VNT actuator replacement on a VW TDI. a cracked vacuum line, a rusted actuator diaphragm, or a failed boost control solenoid prevents the actuator from moving. This causes the sensor to report a static, incorrect position.
- Failing Powertrain Control Module (PCM) (Very Rare) — The vehicle's main computer fails internally, preventing it from processing the sensor's signal. This is only considered after exhaustively ruling out the actuator, wiring, and mechanical binding.
Symptoms

- Reduced Engine Power / Limp Mode — The vehicle feels sluggish and hesitates because the turbo provides zero boost. The engine enters a protective 'limp mode,' severely limiting RPM and speed.
- Poor Fuel Economy — The engine runs inefficiently on a default fuel map, causing a noticeable 10-15% increase in fuel consumption.
- Unusual Noises from Engine Bay — You hear hissing from a vacuum leak or abnormal rattling from the turbocharger area as the actuator struggles to operate.
- Check Engine Light On (also visible on scanner) — The Malfunction Indicator Lamp (MIL) illuminates immediately upon detecting the low voltage.
- Excessive Smoke from Exhaust — Improper air-fuel mixtures from incorrect boost levels lead to heavy black smoke during acceleration, particularly on diesel engines.
Diagnostic Flowchart

Tap your situation to follow the diagnostic path that matches what you're seeing on this code.
Common Fixes & Costs
- Replace Turbocharger Boost Control Actuator/Sensor — Parts: $150-$450, Labor: $200-$500, ~2.2 hr book time (Intermediate)
- Repair Damaged Wiring or Connector — Parts: $20-$100, Labor: $150-$300, ~1.5 hr book time (Intermediate)
- Clean or Free Sticking Turbocharger Vanes/Wastegate — Parts: $20-$50, Labor: $400-$800, ~4.5 hr book time (Professional)
- Replace Vacuum Lines or Boost Control Solenoid — Parts: $50-$150, Labor: $75-$150, ~0.8 hr book time (Beginner)
- Replace Entire Turbocharger Assembly — Parts: $900-$3000, Labor: $600-$1200, ~5.5 hr book time (Professional)
Used vs. New Parts: Buying Guide
When a used part is worth it: A used actuator from a low-mileage vehicle (under 50K miles) is a cost-effective option for older vehicles where a new OEM part is prohibitively expensive.
Donor-vehicle mileage cap: roughly under 50000 miles for the part to have meaningful remaining life.
Donor quality checklist:
- Verify the donor vehicle was not scrapped due to engine or turbo-related failure.
- Match the part number exactly. Actuators are physically identical but have different internal software.
- Avoid parts from flood-damaged or rust-belt vehicles to prevent hidden corrosion.
Decision logic:
- If Vehicle is less than 5 years old OR the part is under $200 new → Buy new. The risk of a used part failing isn't worth the minimal savings.
- If Vehicle is over 10 years old AND budget is the primary concern → A tested, used part from a reputable salvage yard with a warranty is acceptable.
- If The part is a known high-failure item for your specific model → Favor a new OEM or high-quality aftermarket part, as a used part is prone to the exact same failure.
Warranty tradeoff: Used parts typically offer a 30-90 day warranty. New aftermarket parts offer a 1-year to limited lifetime warranty. New OEM parts carry a 1-2 year warranty.
Worst-case if a used part fails: 300-600 if a used part fails after installation, accounting for repeat labor costs and a replacement part.
What Happens If You Wait — Timeline
- 0-2 weeks: Code P2564 is set, and the Check Engine Light is on. The vehicle enters 'limp mode' with a significant loss of power. (MPG impact: 0-5%% · Added cost: $0)
- 2 weeks - 3 months: Limp mode becomes persistent. A noticeable drop in fuel economy occurs as the engine runs on a default, inefficient fuel map. (MPG impact: 5-15%% · Added cost: $50-200 in wasted fuel)
- 3-8 months: Uncontrolled boost leads to inefficient combustion. Soot production dramatically increases, overloading the Diesel Particulate Filter (DPF) or overheating the catalytic converter. (MPG impact: 10-20%% · Added cost: $1200-2800 (for DPF regeneration or catalytic converter replacement))
- 8+ months: Catastrophic failure of the DPF or catalytic converter. Constant strain on the turbocharger destroys the bearings, requiring a full turbocharger replacement. (MPG impact: 15-25%% · Added cost: $2500-5000+)
Cost of Not Fixing It
- 0-1 month: Noticeable 10-15% drop in fuel economy and poor acceleration. Vehicle enters 'limp mode' unpredictably. (Added cost: 50-150 in wasted fuel)
- 1-6 months: Increased soot production clogs the Diesel Particulate Filter (DPF) or overheats the catalytic converter substrate. (Added cost: 1200-2800)
- 6+ months: Catastrophic failure of the catalytic converter or DPF. Prolonged improper boost destroys turbocharger bearings, requiring total replacement. (Added cost: 2500-5000+)
Diagnosis Steps
- Scan for Codes and Review Freeze Frame Data
Use an OBD-II scanner to confirm P2564 is active. Document related codes (P2565, P0299, P003A) for context. Record the freeze frame data to see the exact engine parameters when the fault triggered.
Tools: OBD-II Scanner (Beginner) - Perform a Visual Inspection & Harness Wiggle Test
Inspect the turbo actuator, connector, and wiring harness for burnt wires, corrosion, or moisture. With the key on and a scan tool monitoring sensor voltage, gently wiggle the harness. If the voltage jumps or drops out, you have located an intermittent short or open circuit.
Tools: Flashlight, Scan Tool or Multimeter (Beginner) - Check for Mechanical Binding
With the engine off, disconnect the actuator arm from the turbocharger's wastegate/vane lever. Move the lever on the turbo side by hand. It must move smoothly without binding. If it is seized, the turbo requires cleaning or replacement.
Tools: Basic Hand Tools (Intermediate) - Command the Actuator with a Scan Tool
Using a bi-directional scan tool, command the actuator to sweep from 0% to 100%. Watch the live data PID for the sensor's voltage. If the actuator makes noise but doesn't move, or the voltage stays flat, the unit has failed.
Tools: Advanced Scan Tool (Advanced) - PRO TIP: Analyze Sensor Voltage with a Multimeter
Back-probe the sensor's three wires with the key on. Verify a stable 5-volt reference and a good ground (less than 0.1V). A signal wire voltage near zero (below 0.2V) confirms the 'Circuit Low' condition, pointing to a short to ground or internal sensor failure.
Tools: Multimeter, Back-probe Kit (Advanced) - PRO TIP: Use a Scope to Verify Signal Integrity
Connect an oscilloscope to the signal wire and ground. Command the actuator to move. You must see a clean, smooth voltage sweep (e.g., 0.5V to 4.5V). Dropouts or a flat line indicate a faulty sensor or wiring.
Tools: Oscilloscope, Advanced Scan Tool (Professional) - Perform Actuator Re-learn/Calibration
CRITICAL STEP: After replacing the actuator, you must perform a calibration procedure using a manufacturer-specific scan tool (FORScan, VCDS, HDS). This teaches the PCM the new sensor's end-stops. Skipping this guarantees the P2564 code returns.
Tools: Advanced Scan Tool (Advanced)
When This Code Triggers (Freeze-Frame Conditions)
- Engine Coolant Temp: 180-205°F (Fully warmed up)
- RPM: 1800-2800 (During acceleration or steady cruise)
- Engine Load: 40-70% (Under moderate to heavy load, when boost is commanded)
- Vehicle Speed: 40-65 mph (Highway or arterial road driving)
Related Codes
- P2565 — Circuit High. Points to the same component but indicates a short to a voltage source rather than a short to ground.
- P0299 — Underboost. The mechanical result of the P2564 electrical fault. The PCM defaults the wastegate open, preventing the turbo from building boost.
- P003A — Learning Limit Exceeded. The PCM tried to adapt to the actuator's position but reached its maximum limit due to the erroneous sensor reading.
- P0234 — Overboost. Occurs if the actuator fails in a closed position, risking severe engine damage from excessive cylinder pressure.
Climate & Environmental Factors
- Cold Weather: Low ambient temperatures exacerbate underlying mechanical binding, making symptoms like engine hesitation more pronounced on a cold start.
- High Humidity / Road Salt: Moisture and road salt cause rapid corrosion on the actuator's electrical connector pins, leading directly to the 'Circuit Low' voltage fault.
How to Talk to a Mechanic About This Code
Say this: "I have a P2564 code and a significant loss of power. I'd like to schedule a diagnostic. Based on my research, the issue is likely the turbo actuator, its wiring, or a seized VGT mechanism. Please confirm if the actuator is available separately from the turbo and if you have the tools to perform the post-repair calibration."
This signals you are an informed customer. It directs the technician to the most common failures, questions the costly 'full turbo replacement' upsell, and confirms they can complete the entire job, including the critical final calibration step.
Avoid saying:
- 'My car is making a weird noise and feels slow.'
- 'The check engine light is on, can you just fix it?'
- 'A guy online said I need a new turbo.'
Questions to ask before authorizing the repair:
- Did you test the actuator's movement and the turbo vane lever for mechanical binding before condemning the actuator?
- Is the actuator available as a separate part, or are you quoting a full turbo assembly?
- Does the quoted labor cost include the electronic calibration or 're-learn' procedure required after replacement?
- What is the warranty on the replacement part and your labor?
Where to Take It: Dealer vs Independent vs Chain
- Dealer:
A safe but expensive option. Best for in-warranty repairs or if you can't find a trusted independent shop with the right tools.
Best for: Vehicles under warranty (especially GM models with special coverage N232395330)., Complex German brands (VW, Audi, BMW) where specific diagnostic tools (VCDS, ISTA) are essential for calibration., When you want the highest probability of a correct first-time fix, regardless of cost.
Downsides: Highest labor rates, often 1.5-2x more than independent shops., May default to quoting a full turbocharger replacement, which is often unnecessary and significantly more expensive. (Typical cost: +50% vs. baseline) - Independent Shop:
Best fit for most owners. Find a well-reviewed, ASE-certified independent shop and ask them specifically about their experience with turbo actuators and calibration before committing.
Best for: Most out-of-warranty vehicles where cost is a factor., Shops that specialize in your vehicle's brand (e.g., a VW/Audi specialist)., Getting a more personalized and transparent repair experience.
Downsides: Shop quality and equipment vary greatly. You MUST verify they have a bi-directional scan tool capable of performing the turbo actuator calibration for your specific vehicle. (Typical cost: +0% vs. baseline) - Chain Shop:
AVOID. The risk of an incomplete repair (no calibration) or a major misdiagnosis (selling a turbo when only wiring is needed) is very high.
Best for: Simple jobs like oil changes, tires, and brakes.
Downsides: Technicians lack the specialized training and expensive bi-directional tools required for actuator calibration., High pressure to upsell leads to misdiagnosis and unnecessary, costly repairs. (Typical cost: -10% vs. baseline)
When to Walk Away From the Repair
If the total estimated repair cost exceeds 40-50% of your car's private-party market value, it's time to seriously consider selling or trading it in.
- Car worth $3500, fix is $2800: Walk away. The repair cost is nearly the entire value of the car. Sell as a 'mechanic's special' or scrap it.
- Car worth $15000, fix is $1100: Fix it. This repair is a reasonable cost to keep a valuable vehicle running well.
- Car worth $6000, fix is $2500: Borderline. Get a second opinion to see if a cheaper repair (e.g., actuator only) is possible before authorizing the expensive fix.
What Scan Tool You Need for This Code
Minimum: A scan tool that reads live data PIDs for the turbocharger actuator position sensor voltage and commanded position.
A basic $20 code reader only shows 'P2564'. It cannot show live sensor voltage to confirm the electrical fault, nor can it perform the mandatory actuator calibration after you replace the part. A DIY repair is impossible without a more capable tool.
Budget: BlueDriver Pro Scan Tool (~$100) — Excellent for diagnosis. It reads the code, provides freeze-frame data, and graphs the live voltage from the position sensor. However, it lacks the bi-directional control needed to perform the final calibration.
Mid-range: Foxwell NT510 Elite or brand-specific software (VCDS, FORScan) (~$180) — The sweet spot for DIY. These tools offer full live data and provide the bi-directional 'Active Test' or 'Basic Setting' functions needed to command the actuator and perform the post-repair calibration.
Professional: Autel MaxiCOM MK808S / MK808BT Pro (~$500) — Provides full, professional-level capabilities. It has robust bi-directional control for virtually all makes/models, performs the actuator calibration, and offers advanced features for diagnosing tricky wiring issues.
Rent vs buy: You must buy. The free rental scanners available at auto parts stores are basic code readers. They DO NOT have the necessary bi-directional capability to perform the mandatory actuator calibration.
How to Clear the Code After You Fix It
- Reconnect battery if disconnected for repair
- Use an OBD-II scan tool to clear all diagnostic trouble codes.
- Perform the mandatory actuator calibration/re-learn if the actuator was replaced.
- Perform a complete OBD-II drive cycle to allow readiness monitors to run.
Drive cycle (~30 minutes): From a cold start, let the engine idle for 2-3 minutes. Drive in mixed city/highway conditions, including several steady-speed cruises (e.g., 5 minutes at 55 mph) and some gentle accelerations and decelerations. Allow the vehicle to cool down completely and repeat if necessary.
Readiness monitors affected: Catalyst (CAT) monitor, Oxygen (O2) Sensor monitor, Exhaust Gas Recirculation (EGR) system monitor
Before emissions retest: drive at least 50 miles to fully set monitors.
Watch out for:
- Clearing the code with a scanner without performing a drive cycle results in a 'Not Ready' status at an emissions test.
- The code returns immediately if the post-repair actuator calibration was skipped.
Will This Fail Emissions / State Inspection?
Yes — this code typically fails an OBD-II emissions inspection.
- California: An illuminated Check Engine Light is an automatic failure. All OBD-II readiness monitors must be set to 'Ready' to pass; clearing the code requires a drive cycle before re-testing.
- New York: Your vehicle automatically fails the emissions portion of the annual safety inspection if the Check Engine Light is on.
- Texas: An active P2564 code causes the vehicle to fail the OBD-II portion of the inspection.
Most Commonly Affected Vehicles
- Ford F-250 / F-350 Super Duty (2020-2022) — Extremely common on the 6.7L Power Stroke. Ford TSB SSM 53328 advises replacing only the actuator (LC3Z-9G488-B) instead of the entire turbo. Calibration requires a warm engine (over 158°F).
- Chevrolet / Buick Cruze / Sonic / Encore (2011-2018) — The 1.4L turbo engine suffers frequent wastegate actuator failures, causing underboost (P0299) and P2564. The actuator (55589100) is replaceable separately.
- Volkswagen / Audi Jetta / Golf / Polo / A3 (2005-2018) — On older TDIs, the vacuum actuator rusts and fails. On newer models, the electronic actuator fails. Replacement requires a 'Basic Setting' adaptation with VCDS.
- Hyundai / Kia Sonata / Optima / Santa Fe (2011-2019) — TSB 15-FL-003 requires adjusting the electronic wastegate actuator rod to achieve a specific closed-position voltage (4.0V-4.3V) before condemning the part.
- Honda CR-V / Accord / Civic (2017-2023) — On 1.5T engines, the official diagnostic procedure confirms the fault if the lift sensor voltage drops below 0.16V.
- Subaru WRX / Forester XT (2015-2021) — The electronic wastegate actuator on the FA20DIT engine is a known failure point. Replacement of the electronic actuator unit is the standard fix.
- BMW Various models with N20/N55 engines (2011-2017) — Caused by a failing electronic wastegate actuator. Diagnosis with ISTA involves commanding the actuator through its sweep to check for smooth movement.
- Nissan Juke / Sentra (2011-2017) — On 1.6L turbo engines (MR16DDT), the boost control actuator position sensor fails frequently, triggering P2564 and P0299.
Manufacturer-Specific Notes
- Ford: For 6.7L Power Stroke engines (2020-2022), TSB SSM 53328 explicitly advises replacing only the turbo actuator (LC3Z-9G488-B). Calibration is mandatory and the engine must be warm (over 158°F) for the procedure to succeed.
- Hyundai / Kia: Before replacing the electronic wastegate actuator, adjust the actuator rod to set the sensor's closed-position voltage to 4.0V-4.3V (key on, engine off). Skipping this leads to incorrectly condemning a good part.
- Volkswagen / Audi: After replacing the actuator, a 'Basic Setting' adaptation must be performed with VCDS. Without this step, the PCM rejects the new part's position range and the code returns immediately.
- Honda: On 1.5T engines, the Honda Diagnostic System (HDS) specifies checking if the EWG lift sensor voltage is below 0.16 volts. If it is, the fault condition is confirmed.
- General Motors (Chevrolet/Buick): GM issued Special Coverage Adjustment N232395330 for the turbocharger on 2016-2018 1.4L engines, extending the warranty to 10 years or 120,000 miles. Your repair may be covered at no cost.
Real Owner Stories
2005 VW Jetta TDI (BEW) with ~150K miles
Check Engine Light came on, car went into limp mode. Code P2564 was present. Dealer quoted over $3,000 for a new turbocharger and intake manifold.
What they tried:
- Visual inspection revealed the vacuum actuator canister on the back of the turbo had a large rust hole, preventing it from holding vacuum.
Outcome: Owner purchased a new VNT actuator online for under $200 and replaced it themselves in 1.5 hours. The code was cleared and did not return, restoring full power.
Lesson: On older VW TDI models, a rusted actuator is a common cause. Do not accept a quote for a full turbo replacement without inspecting the actuator, which is a cheap, separate part.
2020 Ford F-350 6.7L Power Stroke
Check Engine Light and Wrench Light appeared, with a severe lack of power. Codes P2564 and P003A were stored.
What they tried:
- Technician followed TSB guidance to replace the actuator (LC3Z-9G488-B).
Outcome: Upon removing the actuator, the tech discovered the VGT linkage arm on the turbocharger was mechanically seized. The actuator was fine; the entire turbo assembly required replacement.
Lesson: Always check for mechanical binding before replacing the actuator. If the turbo's internal vanes are seized, replacing the actuator will not fix the problem.
2013 VW Polo 1.2 TDI
Coil symbol flashing on the dashboard, intermittent P2564 code, and loss of power.
What they tried:
- A mechanic investigated the wiring harness between the actuator and the Engine Control Module (ECM) using a wiggle test.
Outcome: The mechanic found a single faulty wire within the loom going to the ECM. After repairing the wire, the P2564 code was resolved permanently.
Lesson: Don't immediately replace parts. An intermittent 'Circuit Low' code is often caused by a damaged wire. A wiggle test pinpoints these hard-to-find wiring faults.
How to Prevent This Code From Triggering
- Use high-quality synthetic oil and change it on schedule (Every 5,000-7,500 miles) — Clean oil lubricates the turbocharger's high-speed bearings. Old oil causes sludge and carbon deposits, causing mechanical components to stick and indirectly leading to actuator faults.
- Allow for a brief engine cool-down period after hard driving (After every spirited drive or towing session) — Shutting off a hot engine stops oil circulation, causing oil to burn onto the hot turbo bearings. Idling for 30-60 seconds prevents deposit buildup that seizes components.
- Regularly inspect and replace the engine air filter (Inspect every oil change, replace as needed) — A clogged air filter restricts airflow, forcing the turbo to work harder. Ingested debris destroys the compressor wheel, leading to catastrophic failure.
- Exercise the turbo's full range of motion periodically (Weekly) — Constant low-RPM driving leads to carbon buildup on the variable vanes. Hard accelerations force the actuator through its full travel, breaking loose minor deposits.
Frequently Asked Questions
Do I need to replace the whole turbo for a P2564 code?
Usually, no. The problem is most often the separate electronic or vacuum actuator bolted onto the turbocharger. On most modern vehicles, this part is purchased and replaced on its own, saving thousands over a full turbo replacement.
My actuator is new but the code came back. What now?
There are three likely culprits. First, the mandatory calibration procedure was skipped. Second, the underlying issue is in the wiring harness, not the part. Third, the replacement part is faulty out of the box.
Is the Turbocharger Boost Control Position Sensor the same as the Boost Pressure Sensor?
No, they are different but related sensors. The Boost Control Position Sensor (P2564) reports the physical position of the wastegate. The Boost Pressure Sensor (MAP) measures the actual air pressure in the intake manifold.
Can I pass an emissions test with a P2564 code?
No. An active Check Engine Light is an automatic failure for an emissions or safety inspection in virtually all jurisdictions. You must repair the fault and clear the code before testing.
What is a common misdiagnosis for P2564?
The most common and costly misdiagnosis is replacing the entire turbocharger assembly when only the actuator has failed. Many shops quote a full turbo replacement by default. Always confirm if the actuator is available as a separate, serviceable part.
What happens if I ignore the P2564 code?
Ignoring the code forces you to drive with poor engine performance and bad fuel economy. More seriously, it puts prolonged stress on the turbocharger and causes soot buildup in the exhaust system. This leads to damaged catalytic converters or DPFs, costing thousands in secondary repairs.
Can a bad battery cause a P2564 code?
It is highly unlikely. While a low battery causes erratic electrical codes, P2564 points specifically to a low voltage signal from the turbo position sensor circuit. The cause is almost always localized to the sensor, its dedicated wiring, or its connector.
What is the difference between an electronic and a vacuum actuator?
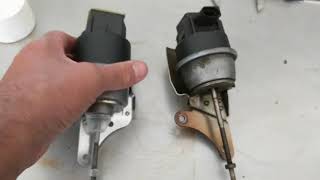
A vacuum actuator uses engine vacuum, controlled by a solenoid, to move a diaphragm connected to the wastegate arm. An electronic actuator uses a precise electric motor controlled directly by the PCM. Electronic actuators are more common on modern vehicles because they offer faster, more precise control.
Key Takeaways
- Code P2564 points directly to a failed turbocharger electronic actuator or damaged wiring in 80% of cases, not a failed turbocharger.
- Expect an immediate 40-50% loss of engine power as the vehicle enters 'limp mode' to protect the engine from improper boost levels.
- Dealerships often quote $2,500+ for a full turbo replacement, but the actuator is available as a separate $150-$450 part on most modern vehicles.
- Replacing the actuator requires a mandatory electronic calibration using a $150+ bi-directional scan tool; skipping this guarantees the code returns.
- Driving with P2564 for more than a few weeks causes excessive soot buildup, leading to $1,200+ in secondary damage to the DPF or catalytic converter.
Helpful Videos


The information in this article is provided for general reference and educational purposes only. Vehicle specifications, procedures, and part compatibility can vary by production date, trim level, and region. Always consult your vehicle's factory service manual and verify part numbers before purchasing or performing repairs. Safety-critical components such as airbags, seat belts, and braking systems should be installed by a qualified professional.
- 🎬 Helpful Videos
- What Does P2564 Mean?
- Can I Drive With P2564?
- Common Causes
- Symptoms
- Diagnostic Flowchart
- Common Fixes & Costs
- Used vs. New Parts: Buying Guide
- What Happens If You Wait — Timeline
- Cost of Not Fixing It
- Diagnosis Steps
- When This Code Triggers (Freeze-Frame Conditions)
- Related Codes
- Climate & Environmental Factors
- How to Talk to a Mechanic About This Code
- Where to Take It: Dealer vs Independent vs Chain
- When to Walk Away From the Repair
- What Scan Tool You Need for This Code
- How to Clear the Code After You Fix It
- Will This Fail Emissions / State Inspection?
- Most Commonly Affected Vehicles
- Manufacturer-Specific Notes
- Real Owner Stories
- 2005 VW Jetta TDI (BEW) with ~150K miles
- 2020 Ford F-350 6.7L Power Stroke
- 2013 VW Polo 1.2 TDI
- How to Prevent This Code From Triggering
- Frequently Asked Questions
- Do I need to replace the whole turbo for a P2564 code?
- My actuator is new but the code came back. What now?
- Is the Turbocharger Boost Control Position Sensor the same as the Boost Pressure Sensor?
- Can I pass an emissions test with a P2564 code?
- What is a common misdiagnosis for P2564?
- What happens if I ignore the P2564 code?
- Can a bad battery cause a P2564 code?
- What is the difference between an electronic and a vacuum actuator?
- Key Takeaways
- 🎟️ Get 5% Off