

OBD-II Code P2534: Ignition Switch Run/Start Position Circuit Low
What P2534 means, why it triggers, and how to fix it
- P2534 creates an immediate safety hazard by causing sudden engine stalls that disable power steering and brakes.
- Test the battery, fuses, and relays before replacing expensive parts; a $5 blown fuse is the most common cause of this code.
- For 2019+ GM trucks, check the 10A F47 transmission fuse first; a shorted 4WD front axle actuator frequently blows this fuse and triggers P2534.
- If P2534 appears alongside P0700 or U-series communication codes, diagnose P2534 first, as restoring ignition voltage usually clears the secondary faults.
What Does P2534 Mean?

P2534 means the Powertrain Control Module (PCM) detects low voltage in the ignition switch's 'Run/Start' circuit. When you turn the key, critical modules like the PCM, Transmission Control Module (TCM), and fuel pump require full battery voltage to operate. This code flags a power loss in that circuit, preventing the engine from starting or causing sudden stalls while driving.
Technical definition: The official SAE definition is 'Ignition Switch Run/Start Position Circuit Low'. It triggers when a control module registers voltage from the ignition switch below the manufacturer's threshold—typically under 11.5 volts when it expects over 12 volts.
Can I Drive With P2534?
No — Do Not Drive. Do not drive. The engine will stall without warning, instantly disabling power steering and power brakes. This creates a severe safety hazard, especially in traffic or at highway speeds.
Common Causes

- Blown Fuse or Faulty Relay (Very Common) — A blown fuse or failing run/start relay is the most frequent cause. On GM trucks, a shorted front axle actuator often blows the transmission fuse, directly triggering this code.
- Faulty Ignition Switch (Common) — The ignition switch's internal electrical contacts wear out, corrode, or burn over time. This creates high resistance, dropping the voltage before it reaches the vehicle's control modules.
- Damaged Wiring or Connectors (Common) — Ignition circuit wires fray, corrode, or short to ground from heat, vibration, or chafing. This frequently occurs in the steering column harness or near the main fuse box.
- Weak Battery or Corroded Terminals (Less Common) — A dying battery cannot supply the minimum required voltage during startup. Dirty or loose battery terminals also restrict current flow, mimicking a circuit failure.
- Loose or Corroded Ground Wires (Less Common) — A loose or corroded main engine-to-chassis ground strap restricts current flow, causing low voltage readings across the ignition circuit.
- Improperly Installed Aftermarket Accessories (Less Common) — Poorly spliced aftermarket remote starters or alarms draw excessive power or create shorts in the ignition circuit. Technicians check these first to rule out non-factory wiring faults.
- Faulty Fuse Block / Power Distribution Center (Rare) — Internal corrosion, loose terminals, or cracked circuit boards inside the main fuse block create high resistance, dropping voltage across the entire circuit.
- Faulty Control Module (PCM, BCM, or TCM) (Rare) — In rare cases, a control module fails internally and incorrectly reads voltage. For example, C6 Corvettes occasionally suffer from hairline cracks in the BCM circuit board. Check this only after ruling out all wiring and switch issues.
Symptoms

- Engine will not start or has a delayed start — The engine cranks but does not fire, or experiences a long delay before starting.
- Engine stalls while driving — The engine suddenly shuts off, frequently after hitting a bump that disrupts a loose ignition connection.
- Check Engine Light is on — The PCM illuminates the Malfunction Indicator Lamp (MIL) to alert the driver.
- Transmission stuck in 'limp mode' — The Transmission Control Module (TCM) loses power and defaults to a single gear (usually 2nd or 3rd) to prevent damage, often triggering code P0700.
- Flashing security or immobilizer light — Low voltage interferes with the anti-theft system, flashing the security light and disabling the starter.
- Flickering or dim dashboard lights — Unstable ignition voltage causes instrument cluster lights and interior electronics to flicker or dim.
- Weak acceleration or poor engine performance — Intermittent low voltage causes poor performance, weak acceleration, and potential catalytic converter overheating.
Diagnostic Flowchart
Tap your situation to follow the diagnostic path that matches what you're seeing on this code.
Common Fixes & Costs
- Replace Blown Fuse / Faulty Relay — Parts: $1-$25, Labor: $0-$50, ~0.2 hr book time (DIY)
- Replace Ignition Switch — Parts: $80-$150, Labor: $150-$300, ~1.5 hr book time (Intermediate)
- Replace Battery — Parts: $200-$400, Labor: $25-$75, ~0.5 hr book time (DIY)
- Repair Damaged Wiring — Parts: $10-$50, Labor: $150-$400, ~2.5 hr book time (Professional)
- Replace Powertrain Control Module (PCM) — Parts: $600-$900, Labor: $150-$250, ~1.5 hr book time (Professional)
Used vs. New Parts: Buying Guide
When a used part is worth it: For an ignition switch, a used OEM part from a low-mileage vehicle is a cost-effective alternative to a new aftermarket part, especially for older vehicles on a budget.
Donor-vehicle mileage cap: roughly under 60000 miles for the part to have meaningful remaining life.
Donor quality checklist:
- Verify the donor vehicle's mileage and ensure it was not scrapped due to electrical or flood damage.
- Match the part number exactly, including trim levels (keyed vs. push-button start).
- Visually inspect the connector pins on the used switch for corrosion, melting, or damage.
Decision logic:
- If The vehicle is less than 10 years old and the new OEM part is available → Buy a new OEM part for maximum reliability and compatibility with anti-theft systems.
- If The vehicle is over 15 years old and budget is the main priority → A used OEM switch or a new aftermarket switch from a reputable brand are acceptable options.
- If The part is for a vehicle with complex immobilizer integration → Favor a new OEM part to avoid potential programming and security-related conflicts.
Warranty tradeoff: Used parts from salvage yards typically offer a 30-90 day warranty. New aftermarket parts often come with a 1-year to limited lifetime warranty. New OEM parts carry a 1-2 year warranty.
Worst-case if a used part fails: $200-$400 if a used or cheap aftermarket switch fails prematurely, requiring repeat labor costs.
What Happens If You Wait — Timeline
- 0-2 weeks: Code P2534 appears, accompanied by intermittent symptoms like a delayed start or a single, unexplained stall. The Check Engine Light illuminates. (MPG impact: 0-1%% · Added cost: $0)
- 2 weeks - 2 months: Stalling becomes frequent and predictable, often occurring when hitting bumps. The risk of a stall in a dangerous situation increases significantly. (MPG impact: 1-3%% · Added cost: $100-$300 in potential towing fees.)
- 2-6 months: Constant power loss and voltage spikes stress control modules. The vehicle frequently enters 'limp mode,' and secondary codes (P0700, U-codes) become persistent. (MPG impact: 3-5%% · Added cost: $200-$500 in diagnostic fees as the problem becomes more complex.)
- 6+ months: Cascading failure occurs. Electrical stress damages a sensitive control module like the PCM, BCM, or TCM, requiring expensive replacement and programming. (MPG impact: 5-10%% · Added cost: $750-$1,500+ to replace the damaged control module.)
Cost of Not Fixing It
- Immediate: High risk of the engine stalling in traffic, leading to a loss of power steering and brakes. This is a significant safety hazard. (Added cost: Potential for towing fees ($100-$300) and accident-related damages.)
- 1-3 months: Repeated low voltage and stalling events stress electronic components, causing poor engine performance and potentially overheating the catalytic converter. (Added cost: $1200-$2800 for catalytic converter replacement if damaged.)
- 3+ months: Continued electrical instability causes cascading failures in sensitive electronics, including the Powertrain Control Module (PCM) or Body Control Module (BCM). (Added cost: $750-$1,500+ for control module replacement and programming.)
Diagnosis Steps

- Scan for All Codes and Review Freeze Frame Data
Use a professional-grade OBD-II scanner to read codes from all modules (ECM, TCM, BCM). Note all codes present, especially P0700 or U-series codes. Review the freeze-frame data for P2534 to see the exact voltage at the moment the fault occurred.
Tools: Professional OBD-II Scanner (Beginner) - Check the Battery and Charging System
Use a multimeter to check the battery voltage with the car off; it must be around 12.6 volts. Start the engine and check the alternator output; it must be above 13.5 volts. Inspect the battery terminals for corrosion and ensure they are tight.
Tools: Multimeter, Battery Terminal Cleaner (Beginner) - Inspect Fuses and Swap Relays
Visually inspect all fuses related to the ignition, engine (ECM/PCM), and transmission (TCM). Swap the 'run/start' or 'ignition' relay with an identical one from a non-essential system, like the horn. If the car starts, the relay is bad.
Tools: Fuse Puller or Pliers (Beginner) - Visually Inspect the Wiring Harness and Grounds
Carefully inspect the wiring harness running from the steering column and around the engine bay. Look for chafing, melting, corrosion, or loose connectors. Inspect and clean the main engine-to-chassis ground strap.
Tools: Flashlight, Mirror (Intermediate) - Perform a Voltage Drop Test on the Ignition Circuit
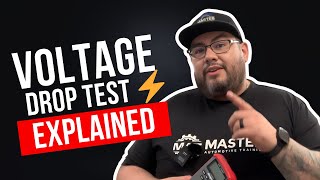
Set your multimeter to DC volts. Place the positive lead on the battery's positive terminal and the negative lead on the input side of the ignition fuse. A reading above 0.2-0.3 volts with the key in 'Run' indicates high resistance in the wiring between the battery and that test point.
Tools: Multimeter, Vehicle-Specific Wiring Diagram (Advanced) - Test the Ignition Switch Circuit Voltage (Wiggle Test)
Back-probe the ignition switch 'run' signal wire at the PCM connector. With the key in 'Run', voltage must be above 12 volts. Wiggle the key in the ignition and move the steering column wiring harness. If voltage fluctuates or drops, you have an intermittent open in the switch or wiring.
Tools: Multimeter, Vehicle-Specific Wiring Diagram, T-pins for back-probing (Intermediate) - Test the Ignition Switch Continuity and Resistance
Disconnect the battery and the ignition switch connector. Using a multimeter set to Ohms (Ω), test the resistance across the switch's terminals. With the key in 'Run' or 'Start', resistance between the battery input terminal and the output terminal must be near 0 Ω. A higher reading confirms worn internal contacts, requiring switch replacement.
Tools: Multimeter, Vehicle-Specific Wiring Diagram (Advanced) - Advanced Voltage Measurement at Control Modules
Measure the 'Ignition 1 Voltage' PID directly at the affected module's connector (e.g., PCM or TCM). With Key On, Engine Off (KOEO), this voltage must be nearly identical to battery voltage. A reading below 11.5V indicates high resistance between the battery and the module.
Tools: Multimeter, Vehicle-Specific Wiring Diagram, Back-probe pins (Advanced) - Isolate the Circuit with a Fuse Tester/Short Finder
If a specific fuse blows repeatedly, use a circuit tester with a resettable breaker. Disconnect components on that circuit one by one (e.g., unplug the front axle actuator) until the short-circuit condition disappears, pinpointing the faulty component.
Tools: Fuse-socket circuit breaker/tester (Advanced)
When This Code Triggers (Freeze-Frame Conditions)
- Ignition 1 Voltage: < 11.5 Volts (Triggers when the PCM or another module sees voltage in the run/start circuit drop below the manufacturer's specified threshold.)
- Engine RPM: 0 or fluctuating (Sets during a failed startup (crank-no-start) or at the exact moment the engine stalls while driving.)
- Vehicle Speed: 0 mph or any speed (Occurs when trying to start the car (0 mph) or during operation at any speed, capturing the stall event.)
- Control Module: PCM, TCM, or BCM (Indicates which module initially reported the low voltage condition, narrowing down the diagnostic path.)
Related Codes
- P0700 — This code means the Transmission Control Module (TCM) requested the check engine light. It appears with P2534 because the TCM is powered by the ignition circuit. When voltage drops, the TCM loses power and sends the P0700 request.
- P2535 — This code is for 'Ignition Switch Run/Start Position Circuit High'. It is the direct opposite of P2534.
- U-Series Codes (e.g., U3023, U0100) — U-codes are communication codes. When the ignition circuit has low voltage, multiple control modules fail to communicate on the data network, triggering a cascade of these codes alongside P2534.
- P1682 — This is a GM-specific code for 'Ignition 1 Switch Circuit 2'. It is closely related to P2534, which is often for 'Ignition 1 Switch Circuit 1'.
Climate & Environmental Factors
- High Humidity and Road Salt: These conditions significantly accelerate the corrosion of wiring, connectors, fuse box terminals, and chassis grounds. Vehicles in the rust belt or coastal areas are highly prone to developing high resistance in the ignition circuit.
- Extreme Cold: Cold weather lowers a battery's effective voltage and cranking amps. A borderline weak battery or a circuit with existing high resistance fails when the temperature drops, triggering P2534 during a cold start.
How to Talk to a Mechanic About This Code
Say this: "I have a P2534 code, and the car is stalling intermittently. I'd like to schedule a diagnostic appointment. Please start by checking fuses, relays, and performing a voltage drop test on the ignition circuit before recommending any part replacements."
This signals you understand P2534 is an electrical circuit fault, not a simple part failure. It directs the technician toward proper electrical testing and prevents them from blindly replacing an expensive ignition switch or control module.
Avoid saying:
- 'Just fix whatever's wrong'
- 'My check engine light is on, can you look at it?' (too vague — invites upsell)
- 'My car is stalling, it's probably the ignition switch.' (Don't diagnose for them)
Questions to ask before authorizing the repair:
- What was the result of the voltage drop test on the ignition circuit?
- Did you find a blown fuse, and if so, did you locate the short that caused it to blow?
- Can you confirm the specific voltage reading at the affected module (PCM/TCM) that was below specification?
- What is the warranty on this electrical repair, including labor?
Where to Take It: Dealer vs Independent vs Chain
- Dealer:
Best for: Vehicles still under warranty, Diagnosing manufacturer-specific TSBs (like on newer GM trucks), Complex issues possibly involving module replacement and programming
Downsides: Highest labor rates, May prefer to replace a whole wiring harness instead of repairing a single wire (Typical cost: +50% vs. baseline) - Independent Shop:
Best fit. A reputable independent shop with strong electrical diagnostic skills is the ideal choice for accurately diagnosing and cost-effectively repairing a P2534 code.
Best for: Out-of-warranty vehicles where cost is a factor, Finding and repairing specific wiring faults, General electrical diagnostics for common vehicles
Downsides: Diagnostic skill varies greatly; ensure the shop has strong electrical expertise and ASE-certified technicians. (Typical cost: +0% vs. baseline) - Chain Shop:
AVOID for initial diagnosis. The complexity and potential for misdiagnosis of P2534 are high, making chain shops a risky choice for this specific code.
Best for: Simple part replacements like a battery or alternator AFTER a proper diagnosis has already been made elsewhere.
Downsides: Technicians lack the advanced electrical diagnostic training needed for intermittent faults., High pressure to sell parts leads to misdiagnosis (e.g., selling a battery when the ignition switch is bad). (Typical cost: -10% vs. baseline)
When to Walk Away From the Repair
If the estimated repair cost exceeds 50% of the car's private-party value, seriously consider selling or trading it in instead of repairing it.
- Car worth $4000, fix is $450: Fix it. This is a relatively inexpensive repair compared to the car's value.
- Car worth $5000, fix is $2800: Walk away. The repair cost is over 50% of the car's value, and other age-related failures are likely.
- Car worth $12000, fix is $1150: Fix it. The repair cost is well below the 50% threshold and restores a valuable vehicle.
What Scan Tool You Need for This Code
Minimum: A scanner that reads codes from all vehicle modules (Engine, Transmission, Body Control) and displays live data, specifically the 'Ignition 1 Voltage' PID.
A basic $20 code reader only shows the P2534 code from the engine module. It cannot see related codes from the transmission (like P0700) or display the live voltage data essential to confirm the fault.
Budget: BlueDriver Pro (~$90) — Reads codes from all modules (Engine, ABS, Airbag, Transmission), displays freeze frame data, and graphs live data PIDs like module voltage, which is crucial for diagnosing P2534.
Mid-range: Foxwell NT510 Elite (~$180) — Offers all features of the budget pick plus bidirectional controls. This allows you to command certain components to test their function, aiding in advanced electrical diagnosis.
Professional: Autel MaxiCOM MK808S/MK808BT (~$350-500) — Provides full-system diagnostics with extensive live data and graphing. Its key advantage is robust bidirectional control, allowing a technician to actively test relays, switches, and circuits directly from the scanner.
How to Clear the Code After You Fix It
- Reconnect the battery if it was disconnected for the repair.
- Use an OBD-II scan tool to formally clear the P2534 code and any related trouble codes.
- Perform a complete drive cycle to allow the vehicle's readiness monitors to run and confirm the fix.
Drive cycle (~20 minutes): A drive cycle includes a cold start (after sitting 8+ hours), a few minutes of idling, followed by mixed city and highway driving. Operate the vehicle at various speeds to allow all system monitors to run self-tests.
Readiness monitors affected: Comprehensive Component Monitor (CCM), Catalyst (CAT) Monitor, Evaporative System (EVAP) Monitor
Before emissions retest: drive at least 50 miles to fully set monitors.
Watch out for:
- Disconnecting the battery clears the code but resets emissions readiness monitors to 'incomplete', causing an automatic smog test failure.
- The code returns immediately if the underlying electrical fault (e.g., bad wire, faulty switch) is not properly repaired.
Will This Fail Emissions / State Inspection?
Yes — this code typically fails an OBD-II emissions inspection.
- California: A vehicle automatically fails the smog inspection if the Check Engine Light is on for code P2534. After repairs, all readiness monitors must be 'complete' before a re-test.
- New York: The NYS DMV emissions inspection includes an OBD-II scan. An active P2534 code results in an immediate inspection failure.
- Texas: In the 17 Texas counties requiring emissions testing, a vehicle with an illuminated Check Engine Light for P2534 fails the OBD portion of the inspection.
Most Commonly Affected Vehicles

- Chevrolet / GMC Silverado / Sierra 1500/2500/3500 (2019-2024) — Prone to this code due to issues outlined in TSBs, such as a faulty front axle actuator blowing the TCM ignition fuse (F47) or wiring harness chafing issues.
- Honda Accord (1998-2002) — Often traced back to a failing ignition switch. Models from 1998-2002 were subject to a recall for ignition switch defects causing stalling.
- Ford F-150 / Freestar / Escape (2001-2020) — Causes often point to the ignition switch or related wiring harnesses. Freestar and Escape models from the mid-2000s were known for faulty ignition switches.
- Chevrolet Corvette (2005-2013) — On C6 Corvette models, P2534 accompanied by P0700 traces to an intermittent internal failure of the Body Control Module (BCM), such as a hairline crack on the circuit board.
- BMW 3-Series, X5, and other models (2006-2013) — Complex electrical systems are sensitive to voltage drops. Causes are typically a faulty ignition switch, wiring, or issues within the CAS power distribution module.
- Hyundai / Kia Various Models (2006-2015) — Causes typically align with the most common culprits: faulty ignition switch, relays, or wiring problems.
- Chevrolet Malibu (2004-2012) — Frequently cited as a vehicle where P2534 appears, often related to a failing ignition switch or wiring problems.
- Dodge Ram (2009-2018) — P2534 is a known issue, frequently linked to failures in the ignition switch assembly or associated circuits.
Manufacturer-Specific Notes
- General Motors (Chevrolet/GMC): GM issued multiple TSBs for P2534. TSB 18-NA-301 for 2019+ trucks links P2534 and P0700 to a shorted front axle actuator blowing the 10A transmission fuse (F47). TSB 24-NA-124 addresses a no-start/stall on 2020-2024 models related to wiring harness chafing.
- Saab: On some Saab models, the Transmission Control Module (TCM) sets P2534 if it detects the ignition voltage is less than 8.6 volts for more than one second, highlighting a specific programmed threshold.
- Honda: Ignition switches on older models were subject to recalls for electrical failures causing stalling. Recalls included NHTSA campaign 02V120 (1997-2000 models) and 05V025000 (1999-2002 Accords), addressing premature wear of electrical contacts.
- Engine Swaps (GM E38 ECM): In custom engine swaps using a GM E38 ECM with a 6L80E transmission, P2534 and P0700 appear if the ECM and TCM don't power down simultaneously. Wire a relay controlled by ECM pin 59 to power the TCM's ignition circuit.
Real Owner Stories
2015 Buick Encore with P2534 & P0700
Vehicle was stuck in limp mode, unable to exceed 40 mph, with a loud bang when shifting gears. A transmission shop quoted $6,500 for a new transmission.
What they tried:
- Owner was quoted for a full transmission replacement.
Outcome: The actual problem was a single blown fuse for the Transmission Control Module (TCM). The owner replaced it with a spare fuse, and all symptoms disappeared.
Lesson: Always check the simplest solutions first. For P2534 and P0700, a blown fuse is a common culprit that saves you from a catastrophic misdiagnosis.
2007 Chevrolet Silverado with intermittent P2534 & P0700
Truck randomly entered limp mode and showed a 'Service 4WD' light. The owner replaced numerous parts attempting to fix the issue.
What they tried:
- Replaced all transmission solenoids
- Replaced 4WD actuator
- Replaced fuel pump driver module
- Replaced Transmission Control Module (TCM)
- Replaced ignition switch
Outcome: The problem persisted after replacing expensive parts. The actual cause, noted in GM TSB 18-NA-301, was a shorted front axle actuator blowing the TCM fuse.
Lesson: Do not replace expensive components without targeted electrical tests. For GM trucks, if P2534 and P0700 appear with a 4WD light, immediately inspect the TCM fuse (F47) and the front axle actuator circuit.
Chevrolet Corvette with intermittent P2534, P0700, and limp mode
The car intermittently threw codes P2534 and P0700, got stuck in 3rd gear, and caused the transmission to overheat. The issue was weather-dependent.
What they tried:
- Cleared codes temporarily.
- Tested battery and alternator (both good).
- Taken to multiple dealerships under warranty.
Outcome: Diagnostics revealed a hairline crack in the Body Control Module (BCM) circuit board. The crack separated under certain temperatures, breaking the circuit. Replacing the BCM resolved the issue.
Lesson: For intermittent, weather-sensitive electrical faults, a cracked circuit board in a control module is a rare but possible cause. Check this only after ruling out wiring and fuses.
How to Prevent This Code From Triggering
- Periodically Inspect and Clean Battery Terminals and Ground Straps (Every 6-12 months) — Corrosion creates high resistance, lowering system voltage. Cleaning these points ensures a solid, low-resistance path for electrical current.
- Apply Dielectric Grease to Critical Connectors (When replacing parts or during major service) — Dielectric grease seals out moisture from connectors for the ignition switch, PCM, and fuse block, preventing pin corrosion and voltage drops.
- Inspect Wiring Harnesses for Chafing (During oil changes or under-hood maintenance) — Securing loose harnesses with zip ties prevents wires from rubbing through their insulation against sharp metal edges, avoiding shorts to ground.
- Avoid Overloading Electrical Circuits with Aftermarket Accessories (During installation of any new electronics) — Improperly installed accessories draw too much current. Ensure additions use their own fused, relay-isolated power source directly from the battery.
- Don't Hang Heavy Keychains from the Ignition Key (Daily habit) — Excessive weight on the key accelerates wear on the internal electrical contacts of the ignition switch, leading to premature failure.
Frequently Asked Questions
Can I just replace the ignition switch to fix P2534?
While a faulty ignition switch is a common cause, it is not the only one. Test fuses, relays, and wiring first to confirm the switch is actually the problem before spending money on parts. Blindly replacing the switch often wastes money.
Why did my car stall in traffic and now show code P2534?
Your car stalled because the electrical circuit powering the fuel pump, ignition system, and engine computer lost voltage. This is usually caused by a momentary failure in the ignition switch, a loose wire, or a faulty relay. Once power drops, the engine instantly shuts down.
Is it expensive to fix code P2534?
Repair costs range from a $5 fuse to over $1,000 for a new control module. A typical ignition switch replacement costs between $230 and $450. A professional diagnosis usually costs $100 to $200 and is highly recommended to pinpoint the exact electrical fault.
My battery is new, so why am I getting a low voltage code?
A new battery does not guarantee correct voltage reaches every component. Code P2534 refers to low voltage in a specific circuit downstream from the battery. A blown fuse, bad wire, or worn ignition switch blocks the power from your new battery from reaching the engine computer.
Can a bad remote starter or alarm cause code P2534?
Yes. Aftermarket accessories like remote starters and alarms tap directly into the main ignition wires. Poor installations, bad splices, or internal accessory shorts draw excessive current, causing a voltage drop that triggers P2534.
What is 'limp mode' and how does P2534 cause it?
Limp mode is a safety feature where the transmission locks into a single gear to prevent internal damage. P2534 causes this because the Transmission Control Module (TCM) loses ignition voltage. The TCM shuts down normal shifting to protect itself, forcing limp mode and setting code P0700.
What does 'jiggling the key' to get the car to start mean?
Starting the car by jiggling the key is a classic sign of a worn-out electrical ignition switch. The physical movement temporarily forces the failing internal contacts to touch, allowing power to flow. This confirms the ignition switch itself is the most likely culprit.
Key Takeaways
- P2534 creates an immediate safety hazard by causing sudden engine stalls that disable power steering and brakes.
- Test the battery, fuses, and relays before replacing expensive parts; a $5 blown fuse is the most common cause of this code.
- For 2019+ GM trucks, check the 10A F47 transmission fuse first; a shorted 4WD front axle actuator frequently blows this fuse and triggers P2534.
- If P2534 appears alongside P0700 or U-series communication codes, diagnose P2534 first, as restoring ignition voltage usually clears the secondary faults.
Helpful Videos

The information in this article is provided for general reference and educational purposes only. Vehicle specifications, procedures, and part compatibility can vary by production date, trim level, and region. Always consult your vehicle's factory service manual and verify part numbers before purchasing or performing repairs. Safety-critical components such as airbags, seat belts, and braking systems should be installed by a qualified professional.
- 🎬 Helpful Videos
- What Does P2534 Mean?
- Can I Drive With P2534?
- Common Causes
- Symptoms
- Diagnostic Flowchart
- Common Fixes & Costs
- Used vs. New Parts: Buying Guide
- What Happens If You Wait — Timeline
- Cost of Not Fixing It
- Diagnosis Steps
- When This Code Triggers (Freeze-Frame Conditions)
- Related Codes
- Climate & Environmental Factors
- How to Talk to a Mechanic About This Code
- Where to Take It: Dealer vs Independent vs Chain
- When to Walk Away From the Repair
- What Scan Tool You Need for This Code
- How to Clear the Code After You Fix It
- Will This Fail Emissions / State Inspection?
- Most Commonly Affected Vehicles
- Manufacturer-Specific Notes
- Real Owner Stories
- 2015 Buick Encore with P2534 & P0700
- 2007 Chevrolet Silverado with intermittent P2534 & P0700
- Chevrolet Corvette with intermittent P2534, P0700, and limp mode
- How to Prevent This Code From Triggering
- Frequently Asked Questions
- Can I just replace the ignition switch to fix P2534?
- Why did my car stall in traffic and now show code P2534?
- Is it expensive to fix code P2534?
- My battery is new, so why am I getting a low voltage code?
- Can a bad remote starter or alarm cause code P2534?
- What is 'limp mode' and how does P2534 cause it?
- What does 'jiggling the key' to get the car to start mean?
- Key Takeaways
- 🎟️ Get 5% Off