

OBD-II Code P2509: Engine Computer Power Problem
What P2509 means, why it triggers, and how to fix it
- Code P2509 indicates the Powertrain Control Module (PCM) is losing power, causing unpredictable engine stalls and immediate loss of power steering.
- Over 80% of P2509 codes stem from weak batteries, corroded terminals, or loose ground straps rather than a failed computer.
- Always load-test the battery and clean all terminal connections before spending $800+ on a replacement PCM.
- On 2006-2019 Dodge Ram diesel trucks, a massive voltage drop from a shorted intake grid heater relay frequently triggers this code during cold starts.
- Do not drive with an active P2509 code, as the vehicle will stall without warning and likely fail to restart.
What Does P2509 Mean?
Code P2509 means your car's main computer (Powertrain Control Module or PCM) is losing electrical power. This is an intermittent failure where power cuts in and out, disrupting engine operation. The PCM has detected its voltage supply dropped below a critical threshold (often 9 volts) or was briefly interrupted.
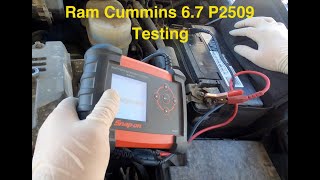
Technical definition: The official definition for P2509 is "ECM/PCM Power Input Signal Intermittent." 🎬 Watch: A quick overview of P2509 causes and common fixes. The computer controlling the engine and transmission has detected an unstable power supply from the battery. The PCM relies on a constant 'keep-alive' battery feed and a switched ignition feed. Failing to power down correctly and retain battery voltage for 30 seconds after key-off also triggers this code.
Can I Drive With P2509?
No — Do Not Drive. Do not drive. The engine will stall unpredictably, including at highway speeds. A sudden stall causes an immediate loss of power steering and power brakes, creating a severe safety hazard. The vehicle will likely not restart, leaving you stranded.
Common Causes
- Loose or Corroded Battery Terminals (Very Common) — This is the most frequent cause. Dirty, corroded, or loose battery connections prevent the PCM from receiving steady power.
- Failing or Weak Battery (Very Common) — An old battery unable to hold a proper charge causes voltage drops, especially during engine cranking. In dual-battery trucks, one failed battery brings down the entire system.
- Damaged Wiring or Poor Ground Connection (Common) — A frayed wire, loose engine ground strap, or damaged PCM harness interrupts the power supply. Hidden corrosion inside the cable sheathing is a frequent culprit.
- Failing Alternator (Common) — A failing alternator provides unstable or insufficient voltage while the engine runs, causing intermittent PCM power loss.
- Faulty PCM Power Relay or Blown Fuse (Less Common) — A sticking relay or blown fuse cuts power to the computer. On many Chrysler, Dodge, and Jeep vehicles, this relay is integrated into the Totally Integrated Power Module (TIPM), which fails internally.
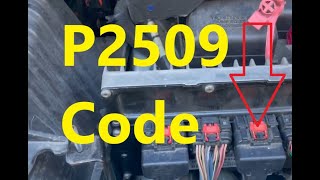
- Shorted Grid Heater Relay (Diesel Trucks) (Less Common) — Diesel intake air grid heaters draw massive current on startup. A failing or shorted relay causes a severe voltage drop, triggering P2509. 🎬 See how to diagnose P2509 on a Ram 2500 diesel.
- Faulty Ignition Switch (Less Common) — Worn internal contacts in the ignition switch cause the switched power to the PCM to drop out intermittently while driving.
- Improperly Installed Aftermarket Accessories (Less Common) — High-power accessories wired improperly draw excessive current or create electrical noise, causing voltage drops.
- Internal PCM Power Regulation Fault (Rare) — Modern PCMs have internal voltage regulators. This component rarely fails, so rule out all other electrical issues before replacing the PCM.
Symptoms
- Engine Stalls Randomly — The engine shuts off unexpectedly while driving or stopped at a light, creating a major safety hazard.
- No-Start or Hard Start — The engine cranks but does not start, or fails to crank entirely when turning the key.
- Check Engine Light On — This is the most obvious sign of a fault, though the code is sometimes stored without an active light.
- Erratic Dashboard Lights or Gauges — Warning lights flash, or gauges (like the voltmeter or tachometer) behave strangely as the computer loses and regains power.
- Erratic Transmission Shifting or Limp Mode — Intermittent power loss causes harsh shifting, failure to shift, or forces the transmission into a 'limp mode' stuck in one gear.
Diagnostic Flowchart
Tap your situation to follow the diagnostic path that matches what you're seeing on this code.
Common Fixes & Costs
- Clean or Tighten Battery Terminals — Parts: $0-$15, Labor: $0-$50, ~0.2 hr book time (DIY)
- Replace Battery — Parts: $150-$350 (AGM up to $400), Labor: $50-$100, ~0.5 hr book time (DIY)
- Repair Wiring or Ground Connection — Parts: $10-$50, Labor: $150-$300, ~2.0 hr book time (Intermediate)
- Replace Alternator — Parts: $250-$600, Labor: $150-$400, ~2.5 hr book time (Intermediate)
- Replace PCM Power Relay — Parts: $15-$70, Labor: $50-$150, ~0.3 hr book time (DIY)
- Replace PCM/ECM — Parts: $800-$2500+, Labor: $150-$300 (plus programming fees), ~1.5 hr book time (Professional)
DIY vs Professional
- Clean/Tighten Terminals or Replace Battery — Beginner: Yes
Tools: Basic hand tools (wrench set), wire brush. - Replace PCM Power Relay — Beginner: Yes (if it's a simple relay)
Tools: None or needle-nose pliers. - Replace Alternator — Beginner: Maybe
Tools: Socket set, serpentine belt tool, multimeter. - Repair Wiring or Ground Connection — Beginner: No
Tools: Multimeter, soldering iron, heat shrink, wire strippers. - Replace PCM/ECM — Beginner: No
Tools: Specialized scan tools for programming.
Used vs. New Parts: Buying Guide
When a used part is worth it: Used parts make sense for alternators or PCMs on vehicles over 150,000 miles where budget is the primary concern. A used part from a low-mileage, accident-damaged donor vehicle is a cost-effective option.
Donor-vehicle mileage cap: roughly under 80000 miles for the part to have meaningful remaining life.
Donor quality checklist:
- Verify the donor vehicle's mileage and reason for being scrapped (avoid flood or electrical fire vehicles).
- For PCMs, you MUST match the part number exactly. A used PCM requires reprogramming by a dealer or specialist to match your vehicle's VIN and security system.
- For alternators, ask if the part has been tested. Visually inspect for corrosion or damage.
Decision logic:
- If The part is a battery or wiring harness → Always buy new. The risk of inheriting a problem is too high.
- If The part is an alternator and the vehicle is < 100K miles → Buy a new or professionally remanufactured unit for better reliability and warranty.
- If The part is a PCM → Favor a new or remanufactured unit from a reputable supplier offering pre-programming and a warranty. A used PCM is high-risk due to anti-theft system integration.
Warranty tradeoff: Used parts from a salvage yard typically offer a 30-90 day warranty on the part only (no labor). Remanufactured parts often come with a 1-year to lifetime warranty. New OEM parts carry a 1-2 year warranty.
Worst-case if a used part fails: $500-$1500 if a used electronic part like a PCM or alternator fails. This includes the cost of a second replacement part plus repeated diagnostic and labor charges.
What Happens If You Wait — Timeline
- 0-2 weeks: Code P2509 appears, Check Engine Light is on. Occasional hard start or a single, unexplained stall. No other perceptible symptoms. (MPG impact: 0%% · Added cost: $0)
- 2 weeks - 2 months: Stalling becomes more frequent, especially when cold or hitting bumps. The battery is repeatedly drained and requires jump-starts, damaging its internal plates and reducing its lifespan. (MPG impact: 0-1%% · Added cost: $50-$150 in wasted time, tow services, or a new battery if it fails completely.)
- 2-6 months: The weak battery or poor connections force the alternator to run at maximum output continuously, causing it to overheat and leading to premature failure. (MPG impact: 1-3%% · Added cost: $400-$1000 to replace both the now-failed battery and the overworked alternator.)
- 6+ months: The entire electrical system is unstable. Constant voltage spikes from jump-starts and a failing alternator send damaging voltage to sensitive electronics. The PCM, TCM, or other modules suffer internal damage, leading to a cascade of electronic failures. (MPG impact: 5-10%% · Added cost: $1000-$3500+ for replacing multiple electronic modules and extensive diagnostic labor.)
Cost of Not Fixing It
- Immediate: Catastrophic safety risk. The engine stalls unpredictably, resulting in an immediate loss of power steering and brakes. The vehicle will likely fail to restart. (Added cost: Potentially infinite (in case of accident).)
- 0-3 months: Damage to the battery and alternator. Repeated voltage spikes, drops, and jump-starts strain the charging system, leading to premature failure of the battery and alternator. (Added cost: $350-$1000)
- 3+ months: Damage to other electronic modules. Unstable voltage corrupts software or damages sensitive electronics in other control units (e.g., Transmission Control Module, ABS module), leading to a cascade of expensive failures. (Added cost: $500-$3000+)
Diagnosis Steps
- Inspect Battery Terminals and Cables
Visually check the battery terminals for white or greenish corrosion. Ensure the cable clamps are tight and do not move when wiggled. On dual-battery systems, check all four terminals and the crossover cable.
Tools: Wrench set, wire brush or battery terminal cleaner (Beginner) - Test the Battery (Static and Cranking Voltage)
Check the static battery voltage. A healthy, fully charged battery reads between 12.4 and 12.6 volts with the engine off. Next, have a helper crank the engine while you measure voltage at the terminals. Voltage dropping below 10.5 volts indicates a weak battery unable to handle the starter load.
Tools: Digital Multimeter (Beginner) - Perform a Battery Load Test
A simple voltage test is insufficient. Load-test the battery using a carbon pile or electronic tester to verify it delivers rated amperage while maintaining voltage. For dual-battery systems, disconnect and test each battery individually.
Tools: Electronic Battery Load Tester (Beginner) - Inspect Main Ground Connections
Locate the main ground straps connecting the engine to the frame and the negative battery cable to the chassis. Ensure connections are clean, tight, and rust-free. Torque ground bolts to the manufacturer's specification (usually 20–25 ft-lb).
Tools: Wrench or socket set, wire brush, torque wrench (Intermediate) - Test the Alternator Output Voltage
With the engine running, check the voltage at the battery terminals. A healthy alternator outputs between 13.5 and 14.5 volts. A reading below 13.2V or above 15V indicates a failing alternator or voltage regulator.
Tools: Digital Multimeter (Beginner) - Check Fuses and Relays
Locate the fuses and relays labeled for the ECM or PCM. Visually inspect the fuse and swap the PCM relay with an identical one from a non-essential system (like the horn) to see if the problem resolves.
Tools: Owner's manual, fuse puller or needle-nose pliers (Beginner) - Perform a Voltage Drop Test on Power and Ground Cables
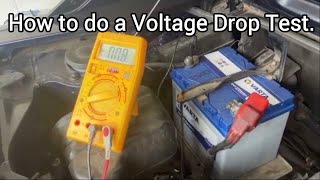
Set a multimeter to a low DC Volts scale. Place one lead on the negative battery post and the other on the engine block, then crank the engine. A reading over 0.5 volts indicates a poor ground. Repeat on the positive side (positive post to starter motor stud). Readings over 0.5 volts indicate high resistance in the cables.
Tools: Digital Multimeter with long leads (Advanced) - Test for Alternator AC Ripple Voltage
Set your multimeter to AC Volts. With the engine running under electrical load (headlights, fan on high), place the leads on the battery terminals. A reading above 200 millivolts (0.2V AC) confirms a failing alternator rectifier bridge.
Tools: Digital Multimeter with AC volt setting (Advanced) - Monitor Live Data with a Scan Tool
Connect a scan tool and monitor the 'Module Voltage' or 'Battery Voltage' PID. Drive the vehicle to recreate the stall conditions. A stable 13.5-14.5V reading that suddenly plummets below 12V just before a fault points directly to an intermittent power feed interruption.
Tools: Professional OBD-II Scan Tool with Live Data (Advanced) - Perform a Parasitic Draw Test
Connect a multimeter in series with the negative battery cable to measure current draw. Wait 30-60 minutes after shutting off the car for modules to enter 'sleep mode'. A draw above 50 milliamps (0.050A) indicates a parasitic drain killing the battery.
Tools: Digital Multimeter with 10A amp setting (Advanced)
When This Code Triggers (Freeze-Frame Conditions)
- Engine State: N/A (During engine cranking, especially in cold weather when battery voltage is lowest.)
- Vehicle Speed: Any (Often occurs when hitting a bump, causing a loose connection to be momentarily lost.)
- Electrical Load: High (When high-current accessories (like headlights, A/C, or diesel grid heaters) turn on, causing a voltage drop that exposes a weak battery or connection.)
- RPM: 0 or dropping (The code is often logged at the exact moment the engine stalls and RPMs fall to zero due to the power interruption.)
Related Codes
- P0562 — Means 'System Voltage Low.' Having both P0562 and P2509 strongly indicates a systemic charging problem like a weak battery or failing alternator is the root cause.
- P0685 — Means 'ECM/PCM Power Relay Control Circuit/Open.' If present with P2509, the fault is almost certainly the PCM power relay or its control circuit wiring.
- P2507 — Means 'ECM/PCM Power Input Signal Low.' P2507 points to a constant low voltage state (undercharging alternator), whereas P2509 suggests a power supply cutting out completely (loose connection).
- U0100 — Means 'Lost Communication With ECM/PCM.' If the power interruption is severe enough, other modules lose communication with the PCM and log this code, pointing to a significant primary power/ground issue.
Climate & Environmental Factors
- Cold Weather: Cold temperatures reduce a battery's chemical efficiency and ability to deliver amperage. Simultaneously, diesel engines activate high-current intake grid heaters, placing a massive load on the electrical system. A borderline weak battery fails under these conditions, causing a significant voltage drop and triggering P2509.
- High Humidity / Road Salt: In humid climates or areas using road salt, moisture accelerates corrosion on battery terminals, ground strap connection points, and wiring harness connectors. This corrosion creates unwanted resistance, leading to voltage drops.
- Vibration and Heat: Constant engine vibration and heat cycles cause electrical connections to loosen over time. An intermittent connection causes power to cut out when the vehicle hits a bump or during certain engine RPMs.
How to Talk to a Mechanic About This Code
Say this: "I have a P2509 code and the vehicle is stalling intermittently. I'd like to schedule a diagnostic focused on the electrical system. Please start by load testing the battery and checking the alternator's output, as well as inspecting the main power and ground connections before looking at the PCM itself."
This shows you understand the common causes are basic electrical issues, not a bad computer. It directs the technician to perform the most likely and cost-effective diagnostic steps first, preventing them from immediately quoting an expensive PCM replacement.
Avoid saying:
- 'My check engine light is on, can you fix it?'
- 'I think I need a new computer.'
- 'Just do whatever it takes to get it running.'
Questions to ask before authorizing the repair:
- What was the battery's voltage during a load test and a cranking test?
- What is the alternator's output voltage at idle, and what is its AC ripple voltage?
- Did you perform a voltage drop test on the main power and ground cables? What were the readings?
- Can you show me the corroded wire or loose connection you found?
- What is the warranty on the recommended parts and labor?
Where to Take It: Dealer vs Independent vs Chain
- Dealer:
Best for: Vehicles still under warranty, Known manufacturer-specific issues like a TIPM failure on a Jeep or a required PCM software update (TSB) on a Ram truck.
Downsides: Significantly higher labor rates, often 1.5x to 2x more than independent shops., May be quicker to replace a whole module (like a TIPM) rather than attempt a more nuanced wiring repair. (Typical cost: +50% vs. baseline) - Independent Shop:
Best fit for most cases. An experienced independent technician is ideal for tracing the root cause of an electrical problem like P2509, which is often a simple but hard-to-find issue with a battery, cable, or ground.
Best for: Out-of-warranty vehicles where cost is a factor., Diagnosing complex, intermittent electrical faults, as they often have more flexibility in their diagnostic approach compared to a dealer's rigid procedures.
Downsides: Quality and expertise vary greatly. It is crucial to find a shop with strong reviews and ASE-certified technicians specializing in electrical diagnostics. (Typical cost: +0% vs. baseline) - Chain Shop:
Acceptable for a free battery test, but use caution for full diagnosis. P2509 requires more in-depth electrical troubleshooting than their typical repair.
Best for: Simple, clear-cut parts replacement like a battery or alternator *after* a definitive diagnosis has already been made.
Downsides: Technician skill varies widely, and they lack the advanced diagnostic experience needed for intermittent electrical problems., High pressure to sell parts leads to misdiagnosis (e.g., selling a new battery when the real problem is a corroded ground wire). (Typical cost: -10% vs. baseline)
When to Walk Away From the Repair
If the estimated repair cost exceeds 50% of the car's private-party value, you should seriously consider selling the vehicle as-is or trading it in.
- Car worth $9000, fix is $4500: Walk away. A worst-case scenario involving a new PCM, alternator, and batteries easily reaches this cost on an older truck.
- Car worth $12000, fix is $800: Fix it. This cost is typical for replacing an alternator and both batteries, which is a common fix and well below the threshold.
- Car worth $4000, fix is $2200: Walk away. The repair cost is over half the vehicle's value. It is not a sound financial decision.
What Scan Tool You Need for This Code
Minimum: A scanner that reads and graphs live data, specifically the 'Control Module Voltage' or 'Battery Voltage' PID.
A basic $20 code reader only shows the P2509 code. It cannot show the real-time voltage the PCM is seeing. To diagnose an intermittent power loss, you must watch the voltage graph and see it drop out when the fault occurs.
Budget: BlueDriver Pro (~$100) — Connects to your smartphone and displays live data streams, including module voltage. This is sufficient for a DIYer to confirm if the PCM is losing power while wiggling wires or driving.
Mid-range: Foxwell NT510 Elite (~$180) — A powerful handheld scanner providing detailed live data and graphing. Some versions offer bi-directional controls useful for testing relays.
Professional: Autel MaxiCOM MK808BT / THINKCAR Thinkscan 689BT (~$500-800) — Professional-level tools with full bi-directional capabilities. Necessary if the final diagnosis points to a failed PCM, as they perform the programming and coding required for the new module.
Rent vs buy: For a one-time diagnosis, many auto parts stores scan codes for free. However, to diagnose an intermittent issue like P2509, you need to view live data, requiring your own scanner. A budget pick like the BlueDriver is a worthwhile investment.
How to Clear the Code After You Fix It
- Ensure all connections are secure and the battery is fully charged.
- Use an OBD-II scan tool to clear active and pending trouble codes.
- Perform the specific drive cycle required by the manufacturer to allow readiness monitors to run.
Drive cycle (~30 minutes): A general drive cycle includes a cold start, 5 minutes of idling, 15 minutes of mixed city/highway driving (with steady speeds and acceleration/deceleration), followed by a 5-minute steady cruise at highway speed. The vehicle must then cool down completely to ambient temperature to complete a 'warm-up cycle'.
Readiness monitors affected: Comprehensive Component Monitor (CCM), Misfire Monitor, Evaporative System Monitor
Before emissions retest: drive at least 100 miles to fully set monitors.
Watch out for:
- Clearing the code with a scanner does not clear a Permanent DTC (PDTC). The PDTC only clears after the vehicle's computer completes a series of self-tests over multiple drive cycles.
- If the root cause (e.g., a loose ground) is not fixed, the code returns immediately.
- Disconnecting the battery clears active codes but resets all readiness monitors, guaranteeing an emissions test failure until a full drive cycle is completed.
Will This Fail Emissions / State Inspection?
Yes — this code typically fails an OBD-II emissions inspection.
- California: An active P2509 code is an automatic failure. If the code is stored as a Permanent DTC (PDTC), the vehicle fails unless it has completed a specific number of warm-up cycles and driven miles (e.g., 15 cycles and 200 miles) to prove the repair is valid.
- New York: The NYS DMV inspection includes an OBD-II scan. An illuminated Check Engine Light or a stored fault code like P2509 results in an emissions test failure.
- Texas: In the 17 counties requiring emissions testing, an active P2509 code causes the vehicle to fail the OBD-II portion of the inspection.
Most Commonly Affected Vehicles
- Dodge / Ram 2500/3500 with Cummins Diesel (2006-2019) — Extremely common. Often caused by a weak driver-side battery, corroded terminals, bad engine grounds, or a failing grid heater relay. A TSB for 2006-2007 models suggests a PCM reflash fixes the issue if no electrical faults are found.
- Ford F-Series with Power Stroke Diesel (2005-2016) — Dual-battery systems are a frequent source of the problem. On 6.0L Power Stroke engines (2003-2007), a failing Fuel Injection Control Module (FICM) power supply causes similar voltage-related codes.
- Chevrolet / GMC Silverado/Sierra with Duramax Diesel (2007-2018) — Voltage supply issues from batteries or the alternator are a known cause. Highly susceptible to corroded ground connections in rust-prone areas.
- Jeep Grand Cherokee / Wrangler (2011-2018) — Often caused by an internal failure of the Totally Integrated Power Module (TIPM), which houses the PCM power relay.
- BMW X5 / 3-Series / 5-Series (2007-2015) — Triggered by a faulty Intelligent Battery Sensor (IBS) on the negative terminal, which incorrectly reports battery status and disrupts charging.
- Hyundai / Kia Santa Fe / Sorento (2010-2020) — Often linked to a failing alternator failing to provide stable charging voltage, or issues within the main engine wiring harness.
- Subaru Outback / Forester (2010-2019) — Triggered by failing alternators or poor ground connections, particularly the main ground from the battery to the chassis.
- Ford Transit (2015-2021) — Common in commercial vans due to high electrical demands. Often related to the dual-battery setup, alternator issues, or wiring problems from frequent vibration.
Manufacturer-Specific Notes
- Dodge / Ram (Cummins): For 2006-2007 trucks, TSB 18-001-07 REV. A suggests a PCM software update fixes the code if no electrical faults are found. Always check for the latest software calibration before replacing hardware.
- Chrysler / Dodge / Jeep: The PCM relay is integrated into the Totally Integrated Power Module (TIPM). A failure inside the TIPM causes P2509. Repair requires replacing or repairing the entire module, which is significantly more expensive than a simple relay.
- Ford (Power Stroke): On older 6.0L Power Stroke engines, the Fuel Injection Control Module (FICM) has its own power supply prone to failure. A failing FICM causes voltage issues misdiagnosed as a P2509-related problem.
- BMW: Many models use an Intelligent Battery Sensor (IBS) on the negative terminal. If the IBS fails, it disrupts the charging system and causes intermittent power codes like P2509, even if the battery and alternator are good.
Real Owner Stories
2021 Ram 3500 Cummins at 20K miles
Truck would not turn over one morning, just a click. Started with a jump. The next morning, same issue. Code P2509 was present.
What they tried:
- Took it to an auto parts store where both batteries tested 'fine'.
- Visually inspected for loose or damaged wires, finding none.
Outcome: The owner replaced both stock batteries despite the passing test. The no-start issue resolved, indicating one of the original batteries was faulty.
Lesson: A simple battery test at a parts store is insufficient for dual-battery systems. A battery with a bad cell causes an intermittent voltage drop under load, triggering P2509, yet still passes a basic test. Load testing each battery individually is critical.
2006 Dodge Ram 5.9L Cummins
Truck stalled intermittently while driving in cold weather, then restarted itself. Eventually, it died and cranked but would not start. Code P2509 was active.
What they tried:
- Replaced both batteries on the side of the road, allowing the truck to start.
- Cleaned and tightened all visible ground connections.
- Despite new batteries and clean grounds, the truck stalled three times in 23-degree weather the next day.
Outcome: After replacing the obvious parts (batteries), the problem persisted. The root cause was a faulty grid heater relay causing an excessive voltage drop only when cold.
Lesson: If new batteries do not fix P2509 on a Cummins, especially when cold, perform a cranking voltage test and an alternator output test. New batteries often mask a deeper issue with the charging or high-load electrical system.
2004 Dodge Ram 2500 5.9L
Truck electronics came on, but the engine would not turn over. After a few tries, it set code P2509.
What they tried:
- Checked all fuses.
- Cleaned the ground connections for the ECM and fan clutch.
- Cleaned the battery terminal connections.
Outcome: After cleaning all connections, the truck started correctly. The owner cleared the code and it did not return, confirming the issue was a poor connection.
Lesson: Always start with the simplest, cheapest solution. Before suspecting expensive components like the ECM, thoroughly clean all power and ground connection points. Corrosion creates resistance invisible to the eye but significant enough to trigger P2509.
How to Prevent This Code From Triggering
- Clean Battery Terminals and Ground Connections Annually (Once per year, or every oil change in salty/humid climates) — Prevents the buildup of insulating corrosion that creates electrical resistance and causes voltage drops. A solution of baking soda and water neutralizes acid buildup.
- Apply Anti-Corrosion Sealant to Terminals (After every cleaning) — Using dielectric grease or a dedicated anti-corrosion spray seals the metal surfaces from moisture and oxygen, significantly extending the life of the clean connection.
- Proactively Replace Vehicle Battery (Every 4-5 years) — Car batteries have a finite chemical lifespan. Replacing the battery before it fails completely prevents the low voltage and instability that triggers P2509 and strains the alternator.
- Periodically Check Connection Tightness (During every oil change) — Engine vibration causes critical power and ground connections to loosen over time. A quick check with a wrench ensures battery terminals and ground strap bolts are snug.
Frequently Asked Questions
What is the most common misdiagnosis for P2509?
The most common mistake is replacing the Powertrain Control Module (PCM) without performing a thorough diagnosis. PCM failure is the least likely cause. Always load-test the batteries, clean all terminals, and verify alternator output before condemning the computer.
Can I just clear the code and keep driving?
You can clear the code, but it will return because P2509 indicates a physical problem with the power supply. Ignoring it is dangerous as it causes stalling in traffic or being unable to start the car.
Can a P2509 code prevent my car from passing an emissions test?
Yes. Even if the Check Engine Light is off, the code remains stored as a 'Permanent DTC'. In many regions, a permanent code causes an automatic failure of an emissions test until the vehicle completes a full drive cycle.
Why did the code appear after I jump-started my car?
This happens because the underlying problem is a weak or dead battery. A jump-start gets the car running, but the battery still cannot provide stable power. The PCM logs the fault once it detects the unstable voltage.
Why does P2509 sometimes appear in cold weather?
Cold temperatures reduce a battery's effectiveness. On diesel trucks, the intake grid heater activates in the cold and draws a massive amount of current. A borderline weak battery fails under this heavy load, causing a voltage drop and triggering the code.
Can P2509 cause transmission problems?
Yes. The PCM controls both the engine and the transmission. When it loses power intermittently, it cannot control transmission solenoids correctly, leading to harsh shifting or limp mode.
What does it mean if the code is stored as 'permanent'?
A Permanent Diagnostic Trouble Code (PDTC) cannot be erased with a standard scan tool. The vehicle's computer must verify the repair by running and passing a self-test over specific warm-up cycles and miles driven before clearing the code.
Key Takeaways
- Code P2509 indicates the Powertrain Control Module (PCM) is losing power, causing unpredictable engine stalls and immediate loss of power steering.
- Over 80% of P2509 codes stem from weak batteries, corroded terminals, or loose ground straps rather than a failed computer.
- Always load-test the battery and clean all terminal connections before spending $800+ on a replacement PCM.
- On 2006-2019 Dodge Ram diesel trucks, a massive voltage drop from a shorted intake grid heater relay frequently triggers this code during cold starts.
- Do not drive with an active P2509 code, as the vehicle will stall without warning and likely fail to restart.
Helpful Videos

The information in this article is provided for general reference and educational purposes only. Vehicle specifications, procedures, and part compatibility can vary by production date, trim level, and region. Always consult your vehicle's factory service manual and verify part numbers before purchasing or performing repairs. Safety-critical components such as airbags, seat belts, and braking systems should be installed by a qualified professional.
- 🎬 Helpful Videos
- What Does P2509 Mean?
- Can I Drive With P2509?
- Common Causes
- Symptoms
- Diagnostic Flowchart
- Common Fixes & Costs
- DIY vs Professional
- Used vs. New Parts: Buying Guide
- What Happens If You Wait — Timeline
- Cost of Not Fixing It
- Diagnosis Steps
- When This Code Triggers (Freeze-Frame Conditions)
- Related Codes
- Climate & Environmental Factors
- How to Talk to a Mechanic About This Code
- Where to Take It: Dealer vs Independent vs Chain
- When to Walk Away From the Repair
- What Scan Tool You Need for This Code
- How to Clear the Code After You Fix It
- Will This Fail Emissions / State Inspection?
- Most Commonly Affected Vehicles
- Manufacturer-Specific Notes
- Real Owner Stories
- 2021 Ram 3500 Cummins at 20K miles
- 2006 Dodge Ram 5.9L Cummins
- 2004 Dodge Ram 2500 5.9L
- How to Prevent This Code From Triggering
- Frequently Asked Questions
- What is the most common misdiagnosis for P2509?
- Can I just clear the code and keep driving?
- Can a P2509 code prevent my car from passing an emissions test?
- Why did the code appear after I jump-started my car?
- Why does P2509 sometimes appear in cold weather?
- Can P2509 cause transmission problems?
- What does it mean if the code is stored as 'permanent'?
- Key Takeaways
- 🎟️ Get 5% Off