

OBD-II Code P2420: EVAP System Switching Valve Control Circuit High
The Ultimate Guide to What P2420 Means, Why It Triggers, and How to Fix It for Good
- Code P2420 triggers when the engine computer detects near 12 volts on the EVAP switching valve circuit when it expects 0 volts, indicating a short to power or a failed solenoid.
- You will experience zero drivability issues, but the illuminated Check Engine Light guarantees an automatic failure on state emissions tests.
- Replacing the entire $400-$700 charcoal canister assembly is the official, required fix for the most commonly affected vehicle: the 2014-2018 Toyota Corolla.
- Save hundreds of dollars by testing the valve connector with a multimeter first; a reading of 12V with the key on confirms a wiring short, not a broken canister.
What Does P2420 Mean?
Code P2420 means the Engine Control Module (ECM) detects excessive voltage in the electrical circuit for the EVAP system's switching valve. This valve controls the flow of fuel vapors into the charcoal canister. 'Circuit High' means the computer sees near battery voltage (12V) on the control wire when it expects zero volts. The computer runs this specific self-test 5 to 7 hours after the engine shuts off, which is why the Check Engine Light typically appears first thing in the morning.
Technical definition: The SAE/OBD-II definition is 'Evaporative Emission System Switching Valve Control Circuit High'. The PCM logs this fault when it commands the valve's driver circuit 'off' (expecting near-zero voltage) but receives a high voltage return signal (near 12V). This indicates a short to a power source in the wiring harness or an internal solenoid failure. Manufacturers also refer to this component as a canister pump module, leak detection pump, or fuel vapor containment valve.
Can I Drive With P2420?
Yes, But With Caution. You can safely drive your vehicle with a P2420 code, as it does not cause stalling, hesitation, or power loss. However, the illuminated Check Engine Light guarantees an automatic failure on state emissions tests. Ignoring the code long-term forces the engine to run with an unoptimized air-fuel mixture, putting thermal stress on the catalytic converter and risking a $1,500 to $2,500 replacement.
Common Causes
- Faulty EVAP Switching Valve / Canister Assembly (Very Common) — The valve itself is the most frequent point of failure. The internal solenoid shorts out or becomes mechanically stuck. On many modern vehicles (especially Toyota and Honda), this valve is permanently integrated into the charcoal canister assembly, requiring the entire unit to be replaced.
- Wiring Harness Short to Power (Common) — The control wire leading from the PCM to the valve often chafes against the frame or suffers rodent damage. If the exposed copper touches a 12-volt power source, it creates the exact 'Circuit High' condition that triggers the code. This damage typically occurs near the rear wheels or inside the trunk.
- Damaged or Corroded Connector (Common) — The electrical connector at the switching valve sits under the vehicle, exposed to moisture and road salt. This corrodes the pins, creating a short circuit across the terminals that disrupts the voltage signal.
- Use of Incorrect/Incompatible Aftermarket Part (Less Common) — Installing a cheap aftermarket canister assembly or valve frequently triggers this code. Non-OEM parts often have incorrect internal resistance values, which the PCM immediately flags as a circuit fault.
- Clogged EVAP System Vent Hose (Less Common) — Spiders or debris build nests inside the fresh air vent hose connected to the EVAP canister. A clogged vent causes pressure spikes within the system that the PCM misinterprets as a valve circuit malfunction.
- Faulty Powertrain Control Module (PCM) (Rare) — The internal driver circuit within the PCM that controls the valve fails, sending a constant high voltage signal. Consider this only after exhaustively testing the valve and all wiring.
- Loose or Damaged Gas Cap (Very Rare) — A bad gas cap causes EVAP leak codes (like P0455), but it does not cause a P2420 electrical circuit code. Do not waste time or money replacing the gas cap to fix this specific issue.
Symptoms
- Check Engine Light is On — This is the primary and often the only symptom you will notice.
- Failed Emissions Test — The vehicle automatically fails state emissions inspections because the EVAP monitor is blocked from reaching a 'Ready' state.
- Slight Fuel Smell — You notice a faint smell of gasoline near the rear wheels, as fuel vapors vent directly to the atmosphere instead of being contained.
- Instrument Cluster Warning Message — Certain vehicles (like Mitsubishi) display a specific dashboard message, such as 'REFUELING SYSTEM SERVICE REQUIRED'.
Diagnostic Flowchart
Tap your situation to follow the diagnostic path that matches what you're seeing on this code.
Common Fixes & Costs
- Replace Charcoal Canister Assembly
— Parts: $350-$650, Labor: $100-$200, ~1.0 hr book time
(Intermediate)
Toyota Corolla (2014-2018): OEM
Honda Accord (2013-2017): OEM - Replace EVAP Switching/Vent Valve — Parts: $80-$150, Labor: $100-$150, ~0.8 hr book time (Intermediate)
- Repair Damaged Wiring Harness — Parts: $10-$50, Labor: $150-$300, ~1.5 hr book time (Professional)
- Clean or Replace Connector — Parts: $10-$30, Labor: $50-$100, ~0.5 hr book time (Beginner)
- Replace Powertrain Control Module (PCM) — Parts: $600-$900, Labor: $150-$300, ~1.5 hr book time (Professional)
DIY vs Professional
- Replace Charcoal Canister Assembly — Beginner: Yes
Tools: Jack and jack stands, 12mm socket set, pliers, flathead screwdriver. - Repair Damaged Wiring Harness — Beginner: No
Tools: Multimeter, wire strippers, soldering iron, heat shrink tubing, wiring diagrams. - Clean or Replace Connector — Beginner: Yes
Tools: Electrical contact cleaner, wire brush, wire strippers, crimp tool.
Used vs. New Parts: Buying Guide
When a used part is worth it: Buying a used charcoal canister from a salvage yard makes sense only for vehicles over 12 years old where a new OEM canister exceeds $600.
Donor-vehicle mileage cap: roughly under 60000 miles for the part to have meaningful remaining life.
Donor quality checklist:
- Verify the part number matches exactly.
- Source from a dry-climate state to guarantee the internal solenoid isn't corroded.
Decision logic:
- If Vehicle is under 10 years old → Buy a new OEM part. The reliability outweighs the savings, and aftermarket parts are notorious for triggering repeat codes.
- If The part is a standalone valve (not a full canister) → Buy new. Standalone valves cost under $100, making used parts an unnecessary risk.
Warranty tradeoff: Used parts offer a 30-day warranty. New OEM parts guarantee fitment and last another 100,000 miles.
Worst-case if a used part fails: $500 if a used canister fails immediately, requiring you to pay labor twice.
What Happens If You Wait — Timeline
- 0-1 month: Check Engine Light illuminates. The car drives perfectly, but the EVAP readiness monitor locks, causing an automatic emissions test failure. (MPG impact: 0-1%% · Added cost: $0)
- 1-6 months: A faint fuel odor becomes noticeable near the rear wheels. Fuel economy drops slightly as unburned vapors escape into the atmosphere. (MPG impact: 1-3%% · Added cost: $20-$60 in wasted fuel)
- 6-18 months: The persistent EVAP fault alters the engine's air-fuel mixture, placing long-term thermal stress on the catalytic converter. (MPG impact: 3-5%% · Added cost: $50-$150 in wasted fuel)
- 18+ months: Sustained operation with an incorrect air-fuel mixture melts the catalytic converter's internal honeycomb, triggering a P0420 code and requiring a massive repair bill. (MPG impact: 5-10%% · Added cost: $1500-$2500 for catalytic converter replacement)
Cost of Not Fixing It
- 0-1 month: Guaranteed failure of state emissions/smog testing. (Added cost: $0)
- 1-12 months: Continued release of raw fuel vapors and a 1-3% drop in fuel economy. (Added cost: $50)
- 12+ months: Permanent thermal damage to the catalytic converter due to a sustained incorrect air/fuel mixture. (Added cost: $1500-$2500)
Diagnosis Steps
- Read Codes and Freeze Frame Data
Use an OBD-II scanner to verify P2420. Record the freeze frame data to see the exact engine temperature and fuel level when the fault triggered. Clear the codes to see if it returns immediately upon the next cold start.
Tools: OBD-II Scanner (Beginner) - Visually Inspect Wiring and Connector
Locate the charcoal canister near the fuel tank. Unplug the electrical connector and inspect the pins for green corrosion or melting. Trace the wiring harness back as far as you can see, looking for chafed insulation or rodent chew marks.
Tools: Flashlight, Jack and Jack Stands (Beginner) - Test Switching Valve Circuit Voltage (Pro Tip)
Disconnect the connector at the switching valve. Turn the ignition ON (engine OFF). Set a multimeter to DC volts. Ground the black lead and probe the control wire terminal with the red lead. A reading near 12V confirms a short to power in the wiring harness. A reading near 0V means the wiring is fine and the valve itself is broken.
Tools: Multimeter, Vehicle-Specific Wiring Diagram (Intermediate) - Test Solenoid Resistance
If the wiring shows 0V, test the valve. Set the multimeter to Ohms. Measure the resistance between the power and control pins directly on the valve. Compare this to the manufacturer spec (typically 15-35 ohms). A reading of 'OL' (Open Line) or 0 ohms confirms internal solenoid failure.
Tools: Multimeter (Intermediate) - Perform Continuity Check on Control Wire
If you suspect a wiring short, disconnect the battery, the PCM connector, and the valve connector. Measure resistance from the PCM control pin to the valve control pin. It should be under 1 ohm. If it shows 'OL', the wire is broken inside the harness.
Tools: Multimeter, Vehicle-Specific Wiring Diagram (Advanced) - Command Valve with Bi-Directional Scanner
Use an advanced scan tool to command the EVAP vent valve ON and OFF. Listen for a physical 'click' at the rear of the car. If the scanner commands the valve but it doesn't click, the valve is mechanically jammed.
Tools: Advanced Bi-Directional Scan Tool (Advanced) - Check for Faulty PCM
If the valve and wiring test perfectly, monitor the voltage at the PCM's output pin. If the PCM sends a constant 12V signal even when commanded off, the internal driver has failed and the PCM requires replacement.
Tools: Advanced Scan Tool, Multimeter (Professional)
When This Code Triggers (Freeze-Frame Conditions)
- Time Since Engine Off: 5-8 hours (The vehicle must sit overnight (cold soak) to allow fuel tank temperatures and pressures to stabilize before the test runs.)
- Fuel Tank Level: 25-75% (The EVAP monitor aborts the self-test if the fuel tank is completely full or nearly empty.)
Related Codes
- P2419 — EVAP System Switching Valve Control Circuit Low. This is the exact opposite of P2420. P2420 means a short to power (unexpected 12V), while P2419 means a short to ground or a broken wire (unexpected 0V).
- P0455 — EVAP System Leak Detected (Large Leak). If the switching valve cannot close due to the P2420 electrical fault, the unsealed vent causes the system to fail its pressure test, logging a false leak code. Fix P2420 first.
- P0441 — Incorrect Purge Flow. A broken switching valve prevents the system from controlling pressure during the purge cycle, triggering this flow error.
Climate & Environmental Factors
- Road Salt & Grime: Regions using winter road salt see a massive spike in P2420 codes. Salt water bridges the electrical connector pins, creating a short circuit that the PCM reads as 'Circuit High'.
- High Humidity: Consistently humid climates accelerate corrosion inside the valve assembly, causing the internal solenoid to seize.
How to Talk to a Mechanic About This Code
Say this: "I have a P2420 code for the EVAP switching valve circuit high. I need a diagnostic to confirm if the fault is a wiring short to power or a failed solenoid inside the canister."
This proves you understand the specific electrical nature of the code. It forces the technician to test the wiring harness before blindly quoting you $800 for a new charcoal canister.
Avoid saying:
- 'I think I need a new gas cap.'
- 'Just fix whatever is making the check engine light come on.'
Questions to ask before authorizing the repair:
- Did you test the voltage at the switching valve connector? Was it 12V, confirming a wiring short, or 0V, pointing to the valve?
- Are you quoting an OEM canister or an aftermarket brand?
Where to Take It: Dealer vs Independent vs Chain
- Dealer:
Use the dealer only if the repair is covered under warranty or a specific TSB.
Best for: Vehicles under the 8-year/80,000-mile federal emissions warranty., 2014-2018 Toyota Corollas covered by the official TSB.
Downsides: Labor rates are 50% higher than independent shops., Dealers default to replacing the entire $700 canister rather than repairing a $10 broken wire. (Typical cost: +50% vs. baseline) - Independent Shop:
The best overall choice. An independent tech will actually trace a wiring short, saving you hundreds over a dealer's parts-cannon approach.
Best for: Out-of-warranty vehicles., Diagnosing and repairing wiring harness shorts.
Downsides: Diagnostic skill varies; ensure the shop has an ASE-certified electrical technician. (Typical cost: +0% vs. baseline) - Chain Shop:
Avoid for repairs. They will likely sell you an incompatible aftermarket canister that fails to fix the code.
Best for: Reading the code for free.
Downsides: Lube techs lack the electrical diagnostic skills to differentiate a wiring short from a failed component. (Typical cost: -10% vs. baseline)
When to Walk Away From the Repair
If the estimated repair cost exceeds 40% of your car's private-party value, consider selling the vehicle.
- Car worth $4000, fix is $850: Fix it. The repair is 21% of the car's value.
- Car worth $3000, fix is $1500: Walk away. The repair is 50% of the car's value. Put that money toward a replacement vehicle.
What Scan Tool You Need for This Code
Minimum: A code reader that displays freeze frame data.
A $20 reader gives you the code but cannot command the EVAP valve to open or close, which is the fastest way to prove the valve is mechanically jammed.
Budget: BlueDriver Pro (~$99) — Connects to your phone to read codes, display freeze frame data, and graph live EVAP system pressure.
Mid-range: Foxwell NT510 Elite (~$150) — Offers bidirectional control. You can press a button on the scanner to command the valve closed. If you don't hear a click, you instantly know the valve is dead.
Professional: Autel MaxiCOM MK808S (~$450) — Provides full OEM-level diagnostics, advanced bidirectional controls, and component test procedures.
How to Clear the Code After You Fix It
- Use an OBD-II scan tool to clear the active DTCs.
- Ensure the fuel tank is between 1/4 and 3/4 full.
- Perform a complete drive cycle, then let the car sit overnight to allow the EVAP monitor to run.
Drive cycle (~30 minutes): Cold start the engine and idle for 3 minutes. Drive for 20 minutes mixing stop-and-go traffic with steady 60 mph highway cruising. Park the car and leave the engine off for 8 hours.
Readiness monitors affected: EVAP System, Catalyst, Oxygen Sensor (O2S)
Before emissions retest: drive at least 100 miles to fully set monitors.
Watch out for:
- Disconnecting the battery clears the code but resets all readiness monitors, guaranteeing an emissions test failure until you complete a full drive cycle.
- The EVAP monitor refuses to run if the fuel tank is above 85% or below 15%.
Will This Fail Emissions / State Inspection?
Yes — this code typically fails an OBD-II emissions inspection.
- California: An active P2420 code is an automatic smog check failure. After repair, the EVAP readiness monitor must read 'Ready', requiring an overnight cold soak before retesting.
- New York: The NYS inspection includes a strict OBD-II scan. An illuminated Check Engine Light results in an automatic failure.
Most Commonly Affected Vehicles
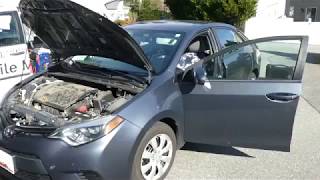
- Toyota Corolla (2014-2018) — Toyota issued Technical Service Bulletin T-SB-0024-15 Rev1 acknowledging a faulty charcoal canister assembly. The official fix requires replacing the entire canister (Part No. 77740-02220) and adding a filter kit.
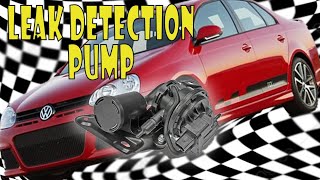
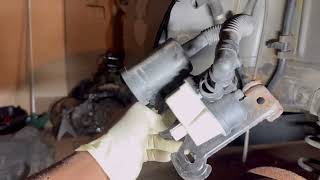
- Volkswagen Jetta, Golf (2011-2018) — P2420 points directly to the Leak Detection Pump (LDP) located in the rear passenger wheel well. The plastic housing cracks easily, allowing water to short the internal circuit.
- Toyota RAV4 (2006-2012) — Diagnosis frequently reveals a broken wire in the harness between the canister and the PCM, rather than a failed canister pump module.
- Honda Accord, Civic (2013-2017) — Honda refers to this as the 'Fuel Vapor Containment Valve'. The valve is integrated into the canister and fails internally due to moisture intrusion.
Manufacturer-Specific Notes
- Toyota: Toyota integrates the switching valve into a 'Canister Pump Module'. You cannot buy the valve separately; you must replace the entire $500 charcoal canister assembly.
- Volkswagen: VW calls this component the 'Leak Detection Pump' (LDP). It is mounted behind the rear passenger wheel well liner, making it highly susceptible to cracking from rock strikes.
- Mitsubishi: A P2420 code triggers a 'REFUELING SYSTEM SERVICE REQUIRED' dashboard message and physically locks the fuel filler door as a fail-safe to prevent vapor release.
Real Owner Stories
2017 Toyota Corolla - The $1,100 Misdiagnosis
The Check Engine Light triggered P2420. A mechanic replaced the purge valve, but the light returned in three days. They then replaced the charcoal canister with an aftermarket unit, but the light returned a week later.
What they tried:
- Replaced purge valve (incorrect part for this code).
- Replaced charcoal canister with a cheap aftermarket brand.
Outcome: The issue remained unresolved after spending $1,100. The underlying cause was the use of an incompatible aftermarket canister that lacked the correct electrical resistance.
Lesson: Never use aftermarket EVAP parts on a Toyota. Always check for TSBs (like T-SB-0024-15) and insist on OEM parts to prevent repeat failures.
2013 VW Jetta - The 30-Minute DIY Fix
The owner scanned a P2420 code and researched the common failure points for their specific vehicle.
What they tried:
- Removed the rear passenger wheel well liner.
- Unbolted the cracked Leak Detection Pump (LDP) and installed a new $120 OEM replacement.
Outcome: The code cleared permanently. The location of the VW LDP makes it highly vulnerable to road debris, but also incredibly easy to access for a DIY repair.
Lesson: Vehicle-specific research saves hundreds in labor. On VWs, P2420 is almost always a cracked LDP that takes basic hand tools to replace.
How to Prevent This Code From Triggering
- Apply undercoating to the EVAP connectors (Annually, before winter) — Products like Fluid Film create a waterproof barrier over the exposed EVAP canister connectors, preventing the salt corrosion that causes P2420 short circuits.
- Pressure wash the vehicle's undercarriage (Weekly during winter months) — Removes accumulated road salt that bridges electrical contacts and rots the wiring harness.
Frequently Asked Questions
What is the most common misdiagnosis for P2420?
Mechanics frequently confuse the purge valve (located under the hood) with the switching/vent valve (located near the gas tank). P2420 strictly refers to the rear switching valve circuit. Replacing the front purge valve is a waste of money.
I replaced the canister but the code came back. Now what?
You either have a wiring short or you installed a defective aftermarket part. Re-test the control wire for a persistent 12V short to power. If the wiring is fine, replace the cheap aftermarket canister with an OEM unit.
Will replacing my gas cap fix a P2420 code?
No. P2420 is an electrical circuit fault, not a system pressure leak. A loose gas cap triggers P0455, but it is physically impossible for a gas cap to cause a 'Circuit High' voltage error.
Why did the code appear after my car sat overnight?
The engine computer runs the EVAP self-test 5 to 7 hours after the engine shuts off to ensure fuel temperatures have stabilized. This delayed testing cycle is why the Check Engine Light illuminates the next morning.
How much does it cost to fix P2420?
If you have a broken wire, expect to pay $150 to $300 for a professional repair. If the charcoal canister requires replacement, expect a total bill between $450 and $850 depending on OEM part prices.
Key Takeaways
- Code P2420 triggers when the engine computer detects near 12 volts on the EVAP switching valve circuit when it expects 0 volts, indicating a short to power or a failed solenoid.
- You will experience zero drivability issues, but the illuminated Check Engine Light guarantees an automatic failure on state emissions tests.
- Replacing the entire $400-$700 charcoal canister assembly is the official, required fix for the most commonly affected vehicle: the 2014-2018 Toyota Corolla.
- Save hundreds of dollars by testing the valve connector with a multimeter first; a reading of 12V with the key on confirms a wiring short, not a broken canister.
Helpful Videos

The information in this article is provided for general reference and educational purposes only. Vehicle specifications, procedures, and part compatibility can vary by production date, trim level, and region. Always consult your vehicle's factory service manual and verify part numbers before purchasing or performing repairs. Safety-critical components such as airbags, seat belts, and braking systems should be installed by a qualified professional.
- 🎬 Helpful Videos
- What Does P2420 Mean?
- Can I Drive With P2420?
- Common Causes
- Symptoms
- Diagnostic Flowchart
- Common Fixes & Costs
- DIY vs Professional
- Used vs. New Parts: Buying Guide
- What Happens If You Wait — Timeline
- Cost of Not Fixing It
- Diagnosis Steps
- When This Code Triggers (Freeze-Frame Conditions)
- Related Codes
- Climate & Environmental Factors
- How to Talk to a Mechanic About This Code
- Where to Take It: Dealer vs Independent vs Chain
- When to Walk Away From the Repair
- What Scan Tool You Need for This Code
- How to Clear the Code After You Fix It
- Will This Fail Emissions / State Inspection?
- Most Commonly Affected Vehicles
- Manufacturer-Specific Notes
- Real Owner Stories
- 2017 Toyota Corolla - The $1,100 Misdiagnosis
- 2013 VW Jetta - The 30-Minute DIY Fix
- How to Prevent This Code From Triggering
- Frequently Asked Questions
- What is the most common misdiagnosis for P2420?
- I replaced the canister but the code came back. Now what?
- Will replacing my gas cap fix a P2420 code?
- Why did the code appear after my car sat overnight?
- How much does it cost to fix P2420?
- Key Takeaways
- 🎟️ Get 5% Off