

OBD-II Code P2151: Fuel Injector Group 'B' Supply Voltage Circuit High
What P2151 means, why it triggers, and how to fix it
- A damaged wiring harness shorting to a power source causes over 70% of P2151 codes, usually due to heat or friction in the engine bay.
- The PCM immediately disables the affected injector group to prevent electrical fires, resulting in a severe loss of power, rough idle, and a solid Check Engine Light.
- Driving with P2151 destroys catalytic converters within 50 miles and causes extreme combustion temperatures that melt pistons.
- Never replace a $1,000 PCM or fuel injector without first testing the wiring harness for shorts using a multimeter and a physical wiggle test.
What Does P2151 Mean?

Code P2151 means the Powertrain Control Module (PCM) detects voltage in the power supply circuit for fuel injector 'Group B' exceeding the manufacturer's maximum limit. The PCM powers fuel injectors in banks to improve efficiency. When this fault occurs, the PCM immediately shuts down the affected injector group to prevent electrical fires or damage to internal driver circuits, causing severe performance drops.
Technical definition: The official SAE/OBD-II definition is "Fuel Injector Group 'B' Supply Voltage Circuit High". The PCM registered a voltage reading on the Group B supply circuit exceeding the maximum threshold (typically above 15.0 volts). This indicates a direct short to a power source in the wiring harness or a failing control module.
Can I Drive With P2151?
No — Do Not Drive. Do not drive. The engine runs rough, lacks power, and is unsafe in traffic. Continuing to drive with a high voltage condition causes a lean air/fuel mixture, creating extreme heat that melts pistons. It also destroys the catalytic converter (an $800-$2500 repair) and overloads the PCM's driver circuits, turning a $100 wiring issue into a $1,500 module replacement.
Common Causes

- Damaged or Shorted Wiring Harness (Very Common) — The wiring supplying power to the fuel injectors routes near hot engine components. Insulation becomes brittle, cracks, or melts, creating a short circuit where the power wire touches another live wire or metal bracket. Rodent damage is another frequent cause.
- Faulty Fuel Injection Control Module (FICM) (Common On Diesel) — On diesel engines, particularly the Ford 6.0L Power Stroke, a dedicated FICM provides the 48V needed to operate injectors. A failure in the FICM's internal power supply causes injector group voltage codes.
- Corroded or Loose Electrical Connectors (Common) — Electrical connectors for the fuel injector harness and PCM corrode from moisture or loosen from engine vibrations. This creates high resistance paths that the PCM interprets as a high voltage condition.
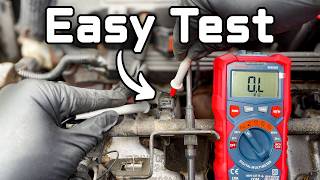
- Faulty Fuel Injector (Less Common) — An internal short circuit within a Group B fuel injector 🎬 See how to test fuel injectors using basic hand tools causes a high voltage reading for the entire circuit.
- Failing Powertrain Control Module (PCM) (Less Common) — The internal driver circuit (MOSFET) within the PCM that controls the fuel injectors fails, locking the output voltage high. This is a last-resort diagnosis after eliminating wiring shorts.
- Charging System Fault (Rare) — A failing alternator voltage regulator produces excessive voltage (over 15.0V at the battery), creating a vehicle-wide overvoltage situation that triggers P2151.
- Faulty Power Relay (Rare) — A stuck Auto Shutdown (ASD) relay or dedicated fuel injector power relay shorts internally, supplying continuous excessive voltage to the injector circuit.
- Improperly Installed Aftermarket Accessories (Rare) — Aftermarket electronics (remote starters, alarms) improperly tapped into the fuel injector power supply introduce higher voltage and trigger this code.
Symptoms
- Rough Idle and Engine Misfires — With injectors disabled, the engine runs unevenly, shakes, and stumbles, especially at idle.
- Reduced Engine Power and Poor Acceleration — The car feels sluggish and struggles to accelerate. The PCM activates a 'limp mode' to protect the engine, severely limiting throttle response.
- Hard Starting or No Start — The engine takes longer than usual to start or fails to start entirely if the PCM disables a critical number of injectors.
- Decreased Fuel Economy — The engine runs inefficiently as the PCM attempts to compensate for the disabled injectors, burning excess fuel.
- Increased Smoke from Exhaust — An improper air/fuel mixture caused by the injector fault leads to visible black or white smoke from the exhaust.
- Check Engine Light is On (also visible on scanner) — The Malfunction Indicator Lamp (MIL) illuminates immediately on your dashboard.
Diagnostic Flowchart
Tap your situation to follow the diagnostic path that matches what you're seeing on this code.
Common Fixes & Costs
- Repairing Damaged Wiring Harness — Parts: $10-$50, Labor: $200-$600, ~2.5 hr book time (Intermediate)
- Replacing the Fuel Injection Control Module (FICM)
— Parts: $400-$1000, Labor: $150-$300, ~2 hr book time
(Intermediate)
: OEM - Replacing a Corroded Connector or Pigtail — Parts: $20-$50, Labor: $100-$250, ~1.2 hr book time (DIY)
- Replacing a Faulty Fuel Injector
— Parts: $50-$1600 per injector (highly dependent on vehicle), Labor: $300-$500, ~3.5 hr book time
(Intermediate)
: OEM
: OEM
: OEM - Replacing the Powertrain Control Module (PCM) — Parts: $800-$1200, Labor: $250-$400 (includes programming), ~1.5 hr book time (Professional)
Used vs. New Parts: Buying Guide
When a used part is worth it: For fuel injectors, 'remanufactured' from a reputable supplier is a better value than 'used'. True used injectors are a gamble, as they come from high-mileage engines with an unknown history. A quality remanufactured injector is disassembled, cleaned, inspected, and reassembled with new seals and wear components.
Donor-vehicle mileage cap: roughly under 75000 miles for the part to have meaningful remaining life.
Donor quality checklist:
- For remanufactured injectors, verify the seller uses OEM cores (Bosch, Denso, etc.) and replaces all seals, O-rings, and filters.
- Avoid 'refurbished' injectors, which are often just cleaned on the outside without internal inspection.
- Ensure the part number is an exact match for your vehicle's engine.
Decision logic:
- If The part is a complex electronic module like a PCM or FICM → Buy new or from a specialized remanufacturer that provides programming and a warranty. A used module requires expensive dealer programming.
- If The part is a fuel injector for a daily driver and budget is a concern → A quality remanufactured injector from a supplier with a good warranty is a smart choice.
- If The vehicle is high-performance or brand new → Buy new OEM injectors to guarantee performance and avoid potential tuning issues.
Warranty tradeoff: Used/salvage parts have a 30-90 day warranty at best. Quality remanufactured injectors come with a 1-year to a limited lifetime warranty.
Worst-case if a used part fails: $400-$1000 if a faulty used or poorly remanufactured injector fails, requiring repeat labor costs and the purchase of another part.
What Happens If You Wait — Timeline
- 0-1 week: Code sets, MIL is on. The PCM disables the affected injector group. The engine runs rough, misfires, and has a significant lack of power. The car is hard to start. (MPG impact: 5-15%% · Added cost: $0)
- 1 week - 2 months: Continued driving with a misfiring engine and improper air/fuel ratio overheats the catalytic converter. The unburned fuel and air from the dead cylinders act like a blowtorch on the catalyst substrate. (MPG impact: 10-20%% · Added cost: $50-200 in wasted fuel. Risk of catalytic converter damage begins.)
- 2-6 months: The persistent high voltage from the electrical short back-feeds into the Powertrain Control Module (PCM), stressing and destroying the injector driver circuit for that group. The catalytic converter substrate melts or breaks apart, causing a blockage. (MPG impact: 15-25%% · Added cost: $1200-$2800 (Catalytic converter replacement becomes likely))
- 6+ months: The injector driver in the PCM fails completely, requiring a module replacement ($1000-$1500). A lean condition in other cylinders leads to extreme combustion temperatures, melting a piston and requiring an engine rebuild or replacement. (MPG impact: N/A (Vehicle likely undrivable)% · Added cost: $2500-$7000+ (PCM and catalytic converter replacement, plus potential for major engine damage))
Cost of Not Fixing It
- 0-1 month: Noticeable drop in fuel economy (5-10%), rough idle, poor performance, and potential for stalling in traffic. (Added cost: $50-$150 in wasted fuel)
- 1-6 months: Continued high voltage damages the catalytic converter from an improper air/fuel mixture, leading to overheating and failure. (Added cost: $1200-$2800)
- 6+ months: The electrical short overloads and destroys the driver circuits within the Powertrain Control Module (PCM), requiring a costly replacement. A persistent lean condition causes internal engine damage like melted pistons. (Added cost: $1000-$5000+)
Diagnosis Steps

- Read Codes and Freeze Frame Data
Use an OBD-II scanner to confirm P2151 is active. Note any other codes present (e.g., P020x, P2148, P0611). Analyze the freeze frame data to see the exact engine conditions when the fault triggered. Pay attention to the system voltage PID; a value over 15.0V points to a charging system issue.
Tools: OBD-II Scanner (Beginner) - Perform a Thorough Visual Inspection
Carefully inspect the fuel injector wiring harness for Group B. Look for melted insulation, chafing, cracking, or obvious damage where the harness rubs against the engine or brackets. Check connectors at the injectors and the PCM for corrosion, bent pins, or a loose fit.
Tools: Flashlight, Inspection Mirror (Beginner) - Verify Charging System Voltage
With the engine running, use a multimeter to check the voltage at the battery terminals. A normal reading is between 13.2 and 14.8 volts. A reading over 15.0V indicates an overcharging problem with the alternator or voltage regulator that must be fixed first.
Tools: Multimeter (Intermediate) - Perform a 'Wiggle Test'
If the fault is intermittent, have a helper monitor the live voltage data on a scan tool while you gently wiggle and manipulate the wiring harness and connectors for Group B. If the voltage spikes or the code reappears during the wiggle test, you isolated the area of the short.
Tools: OBD-II Scanner (with live data) (Intermediate) - Test FICM Voltage (Diesel Specific)
For Ford 6.0L Power Stroke, test the Fuel Injection Control Module (FICM) output. Using a scan tool, monitor the 'FICM_MPWR' (Main Power) PID. With the key on, during cranking, and while running, this voltage must remain above 45 volts. A reading below 45V indicates a failing FICM power supply.
Tools: OBD-II Scanner (with PIDs), Multimeter, T-20 Torx Driver (Advanced) - Test Supply Voltage at the Injector
Using a wiring diagram to identify the correct wire, backprobe the power supply wire at a Group B fuel injector. With the Key On, Engine Off (KOEO), the voltage should be close to battery voltage (~12.6V). If the voltage is significantly higher (e.g., >15V), it confirms a high voltage condition in the circuit.
Tools: Multimeter, Wiring Diagram (Intermediate) - Isolate the Circuit by Disconnecting Components
If high voltage is confirmed, disconnect the Group B injectors one by one. If the voltage returns to normal after disconnecting a specific injector, that injector is shorted internally. If the voltage remains high with all injectors disconnected, the short is in the wiring harness or an upstream component like the PCM or FICM.
Tools: Basic Hand Tools (Intermediate) - Test Injector Resistance (Quantitative)
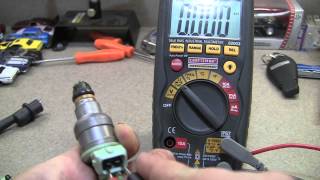
Turn the ignition off and disconnect the connector for an injector in Group B. Set a multimeter to Ohms (Ω). Measure the resistance between the two electrical terminals on the injector itself. Most standard high-impedance injectors read between 10 and 16 ohms. A reading near 0 ohms indicates a shorted coil. Compare the reading to the other injectors in the group; they should all be within 1 ohm of each other.
Tools: Multimeter (Advanced) - Check for a Short to Voltage (Advanced)
Turn the ignition off and disconnect the ECM/PCM harness connector. For some vehicles, you need to jump the ASD relay to power the circuit. With the injectors disconnected, use a multimeter to measure the voltage on the injector high-side control circuit. There should be zero voltage. If voltage is present, it confirms a short to another power source in the harness.
Tools: Multimeter, Wiring Diagram, Jumper Wire (Advanced) - Use a Lab Scope for Waveform Analysis (Pro Tip)
For a definitive diagnosis, connect a lab scope to the command (ground) side of a Group B injector. A healthy waveform shows a sharp drop to ground when the injector opens, followed by an inductive kick (voltage spike) when it closes. A short to power corrupts this pattern, showing sustained high voltage and no inductive kick. This test definitively rules out a faulty PCM driver.
Tools: Oscilloscope (Lab Scope) (Professional)
When This Code Triggers (Freeze-Frame Conditions)
- Engine Coolant Temp: 180-200°F (Fully warmed up during steady driving.)
- RPM: 1500-2500 (Triggers under light to moderate acceleration or steady-state cruise.)
- Engine Load: 30-60% (Corresponds to normal cruising or slight uphill grades, not heavy acceleration.)
- System Voltage: >15.0V (This is the key parameter; the fault sets when the PCM sees voltage above the normal charging system range.)
Related Codes
- P2148 — This code is for 'Fuel Injector Group 'A' Supply Voltage Circuit High'. Diagnostically, it is identical to P2151, but the inspection and testing must be performed on the wiring and injectors belonging to Group 'A'.
- P2150 — This code means 'Fuel Injector Group 'B' Supply Voltage Circuit/Open'. P2151 indicates too much voltage (a short to power), while P2150 indicates a loss of voltage (an open circuit or blown fuse).
- P0201, P0202, etc. — These are injector-specific circuit malfunction codes (e.g., P0202 for cylinder 2). If you have P2151 alongside a P020x code, it strongly points to the fault being with that specific injector or its dedicated wiring.
- P0611 — This code stands for 'Fuel Injector Control Module Performance'. On diesel vehicles like the Ford 6.0L Power Stroke, seeing P0611 along with P2151 is a strong indicator that the FICM itself has a faulty power supply.
- U0105 — This code means 'Lost Communication With Fuel Injector Control Module'. If this code appears with P2151, it suggests a severe FICM failure or a major wiring issue between the PCM and the FICM.
Climate & Environmental Factors
- High Humidity: High humidity accelerates corrosion on electrical connectors and fuse blocks. Moisture seeps into micro-cracks in wire insulation, creating pathways for shorts to ground or other circuits.
- Extreme Heat: High under-hood temperatures, especially on turbocharged engines or in hot climates, cause wiring insulation to become brittle and crack over time. This makes the wires highly susceptible to shorting out against engine components.
- Cold Weather: On Ford 6.0L Power Stroke engines, cold weather exacerbates a failing FICM. A weak power supply that provides borderline voltage (e.g., 45-46V) when warm drops below the 45V threshold on a cold start, leading to hard-starting and setting injector codes.
- Road Salt / Corrosive Environments: In regions where road salt is used in winter, corrosive slush splashes into the engine bay, severely accelerating corrosion on exposed wiring, connectors, and grounds. This significantly increases the likelihood of electrical shorts.
How to Talk to a Mechanic About This Code
Say this: "I have a P2151 code and I'd like to schedule a diagnostic. I want to authorize one hour of diagnostic time to trace the high voltage condition in the Group B injector circuit. Please start with a thorough visual inspection of the wiring harness and check for a system-wide overcharging issue before testing any components."
This signals you understand the likely causes (wiring, alternator) are cheaper to diagnose than immediately replacing expensive parts. It sets a clear, time-boxed budget for diagnosis and directs the technician to follow a logical, cost-effective diagnostic path, preventing them from just swapping parts.
Avoid saying:
- 'Just fix whatever's wrong'
- 'My check engine light is on, can you look at it?'
- 'My car is running rough, I think it's a bad injector'
Questions to ask before authorizing the repair:
- What was the specific voltage reading on the Group B supply circuit, and where did you measure it?
- If you're recommending a wiring repair, can you show me the damaged section?
- If you're recommending an injector, what was its resistance reading compared to the others?
- If you're recommending a PCM or FICM, how did you definitively rule out a wiring short or a faulty alternator?
Where to Take It: Dealer vs Independent vs Chain
- Dealer:
A strong, but expensive, choice if you value manufacturer-specific expertise and can't find a trusted independent electrical specialist.
Best for: Vehicles still under powertrain warranty, Vehicles with known TSBs for this issue (e.g., GM 3.6L), Complex German makes (BMW, Audi, VW)
Downsides: Highest labor rates, Quick to recommend expensive module (PCM/FICM) replacement over time-consuming wiring repair (Typical cost: +50% vs. baseline) - Independent Shop:
The best overall fit, provided you find a shop with ASE-certified technicians known for successfully diagnosing complex electrical faults. Ask if they have tools like a lab scope for advanced diagnosis.
Best for: Out-of-warranty vehicles where cost is a major factor, Finding a shop that specializes in electrical diagnostics
Downsides: Diagnostic skill varies dramatically; you must vet the shop's reputation for electrical work specifically., Lacks access to the very latest manufacturer-specific TSBs. (Typical cost: +0% vs. baseline) - Chain Shop:
AVOID for diagnosing P2151. This code requires a diagnostic specialist, not a generalist parts-fitter. Taking it here results in misdiagnosis and unnecessary parts replacement.
Best for: Simple part swaps like a battery or alternator (only after it's been properly diagnosed elsewhere)
Downsides: Technician skill is highly variable, Business model incentivizes quick parts replacement over detailed diagnostics, Not equipped for in-depth wiring harness tracing (Typical cost: -10% vs. baseline)
When to Walk Away From the Repair
If the total estimated repair cost for the worst-case scenario (e.g., PCM replacement + collateral damage) exceeds 50% of your car's private-party market value, it's time to seriously consider walking away.
- Car worth $4000, fix is $2200: Walk away. The repair cost is over half the car's value. Sell as a 'mechanic special' or trade it in, fully disclosing the issue.
- Car worth $12000, fix is $600: Fix it. A $600 wiring repair is a small fraction of the car's value and is a wise investment.
- Car worth $7500, fix is $3000: Borderline. The repair is 40% of the vehicle's value. Get a second opinion to confirm the diagnosis and cost. If the car is otherwise in excellent condition, the repair is justifiable.
What Scan Tool You Need for This Code

Minimum: A scanner that reads engine codes, clears them, and displays live data PIDs, especially System Voltage.
A basic $20 code reader only gives you the P2151 code. It cannot show live system voltage to check for an overcharging alternator, nor can it help you perform a 'wiggle test' by graphing voltage in real-time. Live data is essential for diagnosis.
Budget: BlueDriver Pro or Foxwell NT301 (~$100-120) — These scanners connect to your smartphone or have a built-in screen to display and graph live data. You watch the system voltage in real-time as you wiggle harnesses, which is critical for finding intermittent shorts. They also read freeze-frame data.
Mid-range: Foxwell NT510 Elite or Autel MaxiCOM MK808 (~$150-350) — In addition to live data, these tools offer manufacturer-specific diagnostics, providing more detailed information than generic OBD-II. Some offer limited bidirectional controls, which help in testing relays.
Professional: Autel MaxiSys or Launch X431 Series (~$500-1500) — These professional-level tools offer full bidirectional control, access to wiring diagrams, and interface with an oscilloscope. A scope is the ultimate tool for diagnosing this code, as it shows the injector voltage waveform and definitively proves if a driver circuit, injector, or wiring is at fault.
Rent vs buy: For a one-time diagnosis, auto parts stores (like AutoZone) have a free loaner tool program for basic scanners. If you plan on doing your own repairs more than once a year, buying a budget pick like the BlueDriver or Foxwell NT301 is a worthwhile investment.
How to Clear the Code After You Fix It
- Reconnect battery if it was disconnected for the repair.
- Use an OBD-II scan tool to formally clear the P2151 and any related trouble codes.
- Perform a complete drive cycle to allow readiness monitors to run.
Drive cycle (~30 minutes): Start the engine from a cold start. Idle for 2-3 minutes. Drive for 15 minutes in mixed city/highway conditions, including several steady-throttle accelerations and decelerations. Drive for 5 minutes at a steady highway speed (55-65 mph). Allow the vehicle to cool down completely.
Readiness monitors affected: Catalyst (CAT) monitor, Oxygen (O2) Sensor monitor, Comprehensive Component Monitor (CCM)
Before emissions retest: drive at least 100 miles to fully set monitors.
Watch out for:
- Disconnecting the battery clears the code, but it also resets all readiness monitors to 'Not Ready', causing an automatic emissions test failure.
- The code returns immediately if the underlying electrical short or component failure has not been properly repaired.
- Not driving the vehicle under specific conditions (e.g., steady speed, specific fuel level) prevents certain monitors like EVAP from setting.
Will This Fail Emissions / State Inspection?
Yes — this code typically fails an OBD-II emissions inspection.
- California: An active P2151 code is an automatic smog check failure. After repair, all OBD readiness monitors must be 'Ready' before a retest can be passed. This requires 100+ miles of driving.
- New York: The NYS DMV inspection includes an OBD-II scan. An illuminated Check Engine Light for a code like P2151 results in an automatic failure.
- Texas: In counties requiring emissions testing (like Harris, Dallas, Travis), an active P2151 code causes the vehicle to fail the inspection. After repair, readiness monitors must be set before re-inspection.
Most Commonly Affected Vehicles

- Chevrolet / GMC Malibu, Traverse, Acadia, STS (with 3.6L V6) (2009-2017) — A known issue covered by GM Technical Service Bulletin (TSB) #PIP4924D involves the fuel injector wiring harness chafing against engine components, leading to a short. The harness is routed tightly, making it prone to this failure.
- Dodge / Ram Ram 2500/3500 (with Cummins Diesel) (2007-2018) — The injector wiring harness on Cummins engines is prone to heat damage and vibration in the valley of the engine, causing shorts or open circuits. The plastic conduit becomes brittle over time.
- Ford F-Series, E-Series (with 6.0L Power Stroke Diesel) (2003-2010) — Caused by a failing Fuel Injection Control Module (FICM) power supply, which fails to regulate voltage correctly. Symptoms include hard starting when cold, rough idle, and white smoke. Low battery voltage is a known cause of premature FICM failure.
- Hyundai / Kia Various models (2010-2020) — This code is triggered by a short to positive in the wiring harness or a faulty engine control relay. The relay is a common and inexpensive first part to check after visual inspection.
- Mazda 6 (with Skyactiv-D 2.2) (2014-2016) — Mazda's diagnostic procedure for P2151:00 on the SKYACTIV-D 2.2 points specifically to a high input circuit for injectors #2 and #3. It is caused by wiring faults or requires a PCM software update after an injector failure.
- Subaru Outback, Legacy (2010-2015) — Instances of this code trace back to faulty injector relays or shorts in the harness near the engine block where it is secured by metal clips.
- BMW Various models (e.g., 3-Series, 5-Series) (2006-2016) — Related to wiring harness insulation becoming brittle from high engine bay temperatures, especially on turbocharged models. The main power supply connector is also a source of issues.
- Volkswagen / Audi Various models with FSI/TSI engines (2008-2017) — Typically caused by wiring harness shorts near the engine or, less commonly, an internal fault in the Engine Control Module (ECM).
Manufacturer-Specific Notes
- General Motors (GM): A well-documented issue covered by TSB #PIP4924D exists for 3.6L V6 engines where the injector harness chafes on mounting brackets or the intake manifold. This is a primary suspect for P2151 on affected GM vehicles.
- Dodge/Ram (Cummins): The injector wiring harness is situated in the hot, high-vibration valley of the engine, making it susceptible to heat and friction damage over time. The plastic sheathing becomes brittle and breaks apart.
- Ford (Power Stroke): On 6.0L engines, the Fuel Injection Control Module (FICM) is a common failure point. Its internal power supply weakens and fails to regulate the 48-volt supply to the injectors, triggering injector voltage codes.
- Mitsubishi: On some models with Euro 5 emissions standards, the factory diagnostic procedure for P2151 specifically points to checking 'Injector Common 2' (which covers cylinders 2 and 3) for a short circuit to the battery.
Real Owner Stories
2011 Chevy Traverse with 120K miles
Check Engine Light came on, engine began running very rough with noticeable power loss. Owner reported the vehicle was stumbling and hesitating. Code scanner revealed P2151.
Outcome: The chafed wires were exposed and shorting out. The owner repaired the damaged section of the harness using solder and heat-shrink tubing, then secured the harness away from the bracket with a zip tie. The code was cleared and did not return.
Lesson: Always perform a thorough visual inspection of the wiring harness before replacing expensive components. On many GM 3.6L V6 engines, harness chafing is a very common cause for this specific code.
2006 Ford F-250 6.0L Power Stroke with 185K miles
Vehicle was very hard to start in the morning, especially in cold weather. When it did start, it ran rough, idled poorly, and produced white smoke from the exhaust. Codes P2151 and P0611 were present.
Outcome: The FICM's internal power supply had failed, a common issue on 6.0L Power Stroke engines. Instead of replacing the entire module, the owner purchased a FICM power supply repair kit for around $150. After soldering the new components to the board, the FICM was reinstalled. The truck started immediately, and all codes were resolved.
Lesson: On diesel engines with a FICM, especially the Ford 6.0L, injector voltage codes are frequently caused by a failing FICM, not the injectors themselves. Always test FICM output voltage before condemning injectors, as a repair kit saves hundreds of dollars over a replacement module.
2015 Mazda 6 with 80K miles
While driving on the highway, the Check Engine Light illuminated, and the car lost significant power, began idling very roughly, and was essentially running on only two cylinders.
Outcome: The problem was misdiagnosed. The issue was not the injector itself, but an intermittent short to voltage in the wiring harness leading to the injector. The initial high voltage spike from the short damaged the original injector, but replacing it didn't fix the source of the problem. The wiring harness had to be traced, and the shorted section repaired.
Lesson: If a part is replaced and the code returns, the underlying cause was misdiagnosed. An intermittent wiring fault damages the component it connects to, making it seem like the component was the original failure. A 'wiggle test' on the harness while monitoring live data exposes intermittent shorts.
Dodge Ram 2500 with Cummins Engine
Owner experienced a sudden loss of power, rough idle, and the P2151 code appeared. The issue was intermittent, sometimes disappearing after the truck was turned off and on again.
Outcome: A different mechanic performed a detailed inspection and found that the main wiring harness in the engine valley had become brittle from heat and vibration. The insulation on the wire for the Group B injector supply had cracked and was intermittently shorting to the engine block. The repair involved fixing the wire and wrapping the harness in a new protective heat-resistant loom for about $400.
Lesson: Be wary of a diagnosis that immediately condemns an expensive computer module like the PCM. For P2151, the fault is far more likely to be a wiring or connector issue, which is significantly cheaper to repair. Always insist on a thorough circuit diagnosis first.
How to Prevent This Code From Triggering
- Install Protective Wire Loom/Conduit (Once, during any engine service) — Factory wire conduit becomes brittle and cracks from engine heat. Replacing sections of conduit, especially where the harness runs near hot or vibrating components, with new split-loom tubing prevents the chafing and shorts that cause P2151.
- Use Dielectric Grease on Connectors (Whenever a connector is disconnected) — Applying a small amount of dielectric grease to connector seals and terminals prevents moisture intrusion and corrosion, which causes high resistance and voltage spikes.
- Secure Wiring Harnesses (During regular oil changes) — Perform a quick visual inspection. If any part of a wiring harness is loose, dangling, or rubbing against a metal edge or engine component, secure it with a high-quality zip tie. This prevents friction from wearing through the insulation.
- Install a Voltage Spike/Surge Protector (Once (for vehicles with sensitive aftermarket electronics)) — For vehicles with expensive audio or electronic equipment, a dedicated automotive surge protector clamps voltage spikes from the alternator or jump-starts, protecting all electronics, including the PCM's sensitive driver circuits.
Frequently Asked Questions
Can I fix a P2151 code myself?
You can DIY this if you find a visibly chafed wire or corroded connector. Tracing a hidden short or replacing a PCM requires specialized tools and programming. Stop DIYing and go to a shop if visual inspections reveal nothing.
What happens if I ignore a P2151 code?
Ignoring this code causes severe engine damage, such as melted pistons, from a lean fuel condition. It also destroys the catalytic converter and overloads the PCM's injector driver circuits. This turns a $200 wiring repair into a $3,000+ engine or module replacement.
Why is it called 'Group B'?
The PCM groups fuel injectors into banks, controlling multiple injectors with a single driver circuit to improve efficiency. 'Group A' and 'Group B' are the standard names for these banks. The specific cylinders in each group vary by engine design.
The mechanic replaced an injector, but the code came back. Why?
The root cause was likely an intermittent wiring short, not the injector itself. The high voltage from the short either damaged the new injector or the underlying wiring problem remains unfixed. A thorough circuit diagnosis is required before replacing parts.
What are common mistakes when diagnosing P2151?
The most common mistake is replacing the PCM without definitively proving it failed. Most P2151 codes stem from a much cheaper wiring fault. Failing to check for improperly installed aftermarket accessories tapped into the injector circuit is another frequent pitfall.
What's the role of the ASD or fuel injector relay in this code?
The Auto Shutdown (ASD) or dedicated fuel injector relay supplies battery voltage to the injector circuit. If this relay sticks closed or shorts internally, it forces the supply voltage high. This triggers the P2151 code.
What is a FICM and could it cause P2151?
A Fuel Injection Control Module (FICM) steps up battery voltage to 48V to fire the injectors on diesels like the Ford 6.0L. A failing FICM power supply cannot regulate its output voltage correctly. This is a primary cause of P2151 on these trucks.
How can I prevent code P2151?
Periodically inspect the engine bay for wiring harnesses rubbing against sharp metal edges or hot exhaust parts. Secure loose harnesses with zip ties to extend their life. Apply dielectric grease to electrical connectors during other services to prevent corrosion.
Key Takeaways
- A damaged wiring harness shorting to a power source causes over 70% of P2151 codes, usually due to heat or friction in the engine bay.
- The PCM immediately disables the affected injector group to prevent electrical fires, resulting in a severe loss of power, rough idle, and a solid Check Engine Light.
- Driving with P2151 destroys catalytic converters within 50 miles and causes extreme combustion temperatures that melt pistons.
- Never replace a $1,000 PCM or fuel injector without first testing the wiring harness for shorts using a multimeter and a physical wiggle test.
Helpful Videos

The information in this article is provided for general reference and educational purposes only. Vehicle specifications, procedures, and part compatibility can vary by production date, trim level, and region. Always consult your vehicle's factory service manual and verify part numbers before purchasing or performing repairs. Safety-critical components such as airbags, seat belts, and braking systems should be installed by a qualified professional.
- 🎬 Helpful Videos
- What Does P2151 Mean?
- Can I Drive With P2151?
- Common Causes
- Symptoms
- Diagnostic Flowchart
- Common Fixes & Costs
- Used vs. New Parts: Buying Guide
- What Happens If You Wait — Timeline
- Cost of Not Fixing It
- Diagnosis Steps
- When This Code Triggers (Freeze-Frame Conditions)
- Related Codes
- Climate & Environmental Factors
- How to Talk to a Mechanic About This Code
- Where to Take It: Dealer vs Independent vs Chain
- When to Walk Away From the Repair
- What Scan Tool You Need for This Code
- How to Clear the Code After You Fix It
- Will This Fail Emissions / State Inspection?
- Most Commonly Affected Vehicles
- Manufacturer-Specific Notes
- Real Owner Stories
- 2011 Chevy Traverse with 120K miles
- 2006 Ford F-250 6.0L Power Stroke with 185K miles
- 2015 Mazda 6 with 80K miles
- Dodge Ram 2500 with Cummins Engine
- How to Prevent This Code From Triggering
- Frequently Asked Questions
- Can I fix a P2151 code myself?
- What happens if I ignore a P2151 code?
- Why is it called 'Group B'?
- The mechanic replaced an injector, but the code came back. Why?
- What are common mistakes when diagnosing P2151?
- What's the role of the ASD or fuel injector relay in this code?
- What is a FICM and could it cause P2151?
- How can I prevent code P2151?
- Key Takeaways
- 🎟️ Get 5% Off