

P2138 on 2005-2010 Pontiac G6: "Reduced Engine Power" Causes and Fixes
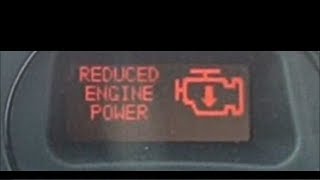
On a 2005-2010 Pontiac G6, code P2138 is most often caused by a faulty Accelerator Pedal Position (APP) sensor or a wiring issue between the pedal and the computer. This triggers the "Reduced Engine Power" warning. Replacing the pedal assembly costs about $60-$120 for the part and is a common DIY fix. However, a well-documented water leak causing corrosion at a specific wiring connector in the driver's kick panel is equally common and should be inspected first.
- P2138 on a Pontiac G6 almost always means a problem with the accelerator pedal assembly or its wiring.
- The most common symptom is the "Reduced Engine Power" message, which severely limits acceleration.
- Before buying parts, check for the well-documented issue of a corroded wiring connector in the driver's kick panel, as described in GM TSB #070604019F.
- If the wiring is fine, the next most likely fix is replacing the entire accelerator pedal assembly, which is a straightforward DIY job.
- Do not immediately assume the expensive PCM is the problem; it is rarely the cause.
What's Unique About the 2005-2010 Pontiac G6

For this generation of Pontiac G6 and other similar GM vehicles like the Chevy Malibu and Saturn Aura, the P2138 code is notoriously linked to a specific wiring problem. GM has issued multiple Technical Service Bulletins (TSBs) acknowledging that water can get into the instrument panel-to-body harness connector (often called C206, X206, or C210), causing corrosion and intermittent signal loss from the accelerator pedal. This means that while the pedal sensor itself can fail, the wiring connector is a very common, well-documented point of failure on the G6 that should be inspected before replacing parts.
Diagnostic Flowchart

Tap your situation to follow the diagnostic path that matches what you're seeing on this vehicle.
Symptoms You May Notice

- "Reduced Engine Power" message on the dash display.
- Check Engine Light is on.
- Poor or no acceleration; vehicle may not go faster than 5-10 mph.
- Vehicle may stall when coming to a stop.
- Unstable or erratic idle.
- Sudden loss of power while driving at cruising speeds.
- Replacing the throttle body. P2138 specifically points to a correlation issue with the *pedal* sensors, not usually the throttle body sensors. Many owners have replaced the throttle body only to have the problem persist.
- Replacing the PCM without thoroughly checking all wiring first. Wiring issues are far more common and cheaper to fix.
- Replacing the accelerator pedal assembly when the actual fault is the corroded IP-to-body harness connector. The TSB explicitly warns against replacing the pedal before checking the connector.
Most Likely Causes

- Faulty Accelerator Pedal Position (APP) Sensor 🔴 High Probability The APP sensor is a high-use electronic component that wears out over time. It is a complete, non-serviceable assembly containing two separate sensors for redundancy.
How to confirm: Use an OBD-II scanner to monitor live data for APP Sensor 1 and APP Sensor 2. As you press the pedal, the voltage readings should be smooth and correlate correctly (one may rise while the other falls, or both rise at different rates). Any jumps, dropouts, or flat lines indicate a bad sensor. Many owners report successfully diagnosing and fixing this themselves.
Typical fix: Replace the entire accelerator pedal assembly. It is held in by two or three 10mm nuts and has one electrical connector. This is a common DIY repair that can be done in under 30 minutes.
Est. part cost: $60-$120 - Corroded or Damaged Wiring/Connector 🔴 High Probability As documented in GM TSBs #070604019F and #07-06-04-019E, water can intrude into the instrument panel-to-body harness connector (known as C206/X206), causing corrosion and setting code P2138. Common leak sources are clogged sunroof drains, bad A-pillar seals, or poor windshield sealing. The issue is often triggered after heavy rain.
How to confirm: Visually inspect the IP-to-body harness connector, located in the driver-side kick panel area, for any signs of green or white corrosion, moisture, or backed-out pins. Check for dampness in the driver's side carpet. Wiggle the harness while monitoring APP sensor data to see if the signal cuts out.
Typical fix: Clean the connector terminals with a small pick and electrical contact cleaner if corrosion is minor. If terminals are damaged, replace the connector pigtail. Apply dielectric grease to the connection upon reassembly. The source of the water leak must also be found and repaired. GM recommends applying a sealant (GM P/N 12378521 or equivalent) to the connector body to prevent future intrusion.
Est. part cost: $20-$50 - Chafed Wiring Harness in Engine Bay ⚪ Low Probability On some GM vehicles, the engine wiring harness can rub against the edge of a valve cover or other engine components, eventually wearing through the insulation and causing wires to short out.
How to confirm: Visually inspect the entire wiring harness that runs over the top of the engine and down to the throttle body for any signs of rubbing, melting, or exposed copper wires, particularly where it contacts the valve cover.
Typical fix: Repair the damaged wires using solder and heat shrink tubing. Then, protect the harness by re-routing it or adding protective conduit or wrapping. Ensure it is secured away from any sharp or vibrating components.
Est. part cost: $5-$15
Rare But Worth Checking
- Faulty Powertrain Control Module (PCM): This is very rare. The PCM should only be considered after all other possibilities, including wiring and sensors, have been exhaustively tested and ruled out.
- Faulty Throttle Body: While P2138 is primarily related to the pedal sensor, a problem with the Throttle Position Sensor (TPS) on the throttle body can sometimes cause similar correlation codes. However, this would typically set other codes like P2135 and is a common misdiagnosis for P2138.
Diagnosis Steps
- Read the trouble codes with an OBD-II scanner. Confirm P2138 is present.
- Use the scanner's live data function to view the voltage signals from 'APP Sensor 1' and 'APP Sensor 2'.
- With the engine off and key on, slowly press and release the accelerator pedal. Watch the two sensor readings. They should change smoothly without any glitches or dropouts.
- If the data is erratic, the APP sensor assembly is the most likely culprit.
- If the data looks good, the problem is likely intermittent and related to wiring. Check the driver's side floor and kick panel for any signs of dampness.
- Locate the instrument panel-to-body harness connector (C206/X206) in the driver's side kick panel area. Disconnect it and inspect for any signs of water intrusion or corrosion (green/white powder).
- Inspect the wiring harness connected directly to the accelerator pedal for any damage.
- If no issues are found, perform a 'wiggle test' on the harness between the pedal and the kick panel connector while watching the live data to see if you can force the fault to occur.
- Visually inspect the engine wiring harness for any chafing, especially where it passes over the valve cover.
- If all wiring and the pedal sensor check out, the issue could be a rare fault in the PCM.
Parts You'll Likely Need

- Accelerator Pedal Position (APP) Sensor Assembly
(OEM #25832864)— This is the most common part to fail. The assembly contains the two sensors that generate the P2138 code when they no longer agree. It is a single, non-serviceable unit.
Trusted brands: ACDelco, Dorman (699-203)
OEM price range: $90-$120
Aftermarket price range: $60-$90 - IP-to-Body Harness Connector Pigtail — If the TSB-documented issue of water intrusion has occurred, the connector terminals may be too corroded to clean and will require replacement.
Trusted brands: ACDelco, Dorman
OEM price range: $30-$50
Aftermarket price range: $20-$40
Technical Service Bulletins (TSBs) & Recalls
- 070604019F: Intermittent Malfunction Indicator Lamp (MIL) Illuminated, DTC P2138 with Reduced Engine Power (Repair Instrument Panel (IP) to Body Harness Connector).
- 07-06-04-019E: An earlier revision of the same TSB, also pointing to the harness connector as the cause for DTC P2138 and Reduced Engine Power.
Platform-Specific Known Issues
- A known issue, documented in TSB #070604019F, involves water leaking into the cabin and corroding the instrument panel-to-body harness connector (C206/X206), which carries the accelerator pedal signals. This is a primary cause of intermittent P2138 codes on the Pontiac G6. Owners often report the problem occurs after heavy rain or a car wash.
- Real Owner Experience: A user on a Pontiac G6 forum described their P2138 issue appearing intermittently, especially in damp weather. After replacing the pedal assembly with no luck, they inspected the connector in the kick panel and found green corrosion on several pins. Cleaning the pins with a contact cleaner and a small brush, then applying dielectric grease, permanently solved the issue.
Mechanic-Grade Diagnostic Values
- APP Sensor 1 Voltage Sweep (Live Data) — expected: Smoothly sweeps from approx. 0.29V (pedal up) to 4.87V (pedal down).. Failure: Any jumps, dropouts, or readings that do not change smoothly with pedal movement.
- APP Sensor 2 Voltage Sweep (Live Data) — expected: Smoothly sweeps from approx. 0.20V (pedal up) to 2.03V (pedal down).. Failure: Any jumps, dropouts, or a voltage difference greater than 0.5V compared to the expected correlation with Sensor 1.
- APP Sensor 5V Reference Voltage — expected: 4.8-5.2 volts at the connector with key on, engine off.. Failure: Voltage below 4.8V or above 5.2V indicates a circuit issue or a problem with another sensor on the same reference circuit.
- APP Sensor Circuit Resistance — expected: 0.03 ohms or less on each of the six wires between the pedal connector and the PCM.. Failure: High resistance (e.g., > 20 ohms) indicates a corroded or broken wire.
Scan Tool Commands That Help
- No Tool Required: Throttle Body Relearn / Idle Learn Procedure — After replacing the accelerator pedal, throttle body, or disconnecting the vehicle's battery. Start the engine and let it idle for 3 minutes. Turn the engine off for 60 seconds. Restart and let it idle for another 3 minutes. Drive the vehicle for at least 10 minutes to complete the process.
Wiring & Ground Locations
- C206 (or X206) — Above the left front kick panel, connecting the instrument panel harness to the body harness.. This is the specific connector identified in GM TSBs as being prone to water intrusion, which causes corrosion on the APP sensor signal pins passing through it, triggering P2138.
- APP Sensor Connector Pinout — The 6-pin connector at the accelerator pedal assembly.. Knowing the pin functions is essential for testing. Pin E is APP Sensor 1 Signal, Pin B is APP Sensor 2 Signal, Pins F & C are 5V Reference, and Pins D & A are Low Reference.
- G303 — On the left front of the passenger compartment, in the back of the left front kick panel.. This is a major interior ground point located very close to the C206 connector. A poor connection here could cause intermittent electrical issues for circuits in this area.
- G105 / G106 — On a transmission housing stud, at the left rear of the engine compartment.. This is a primary ground location for the Engine Control Module (ECM) and Transmission Control Module (TCM). A loose or corroded ground here can cause a wide range of erratic sensor readings and codes, including P2138.
Real Owner Repair Stories
- YouTube user recap on a 2005 Pontiac Grand Prix GXP (2005 Pontiac Grand Prix GXP (platform mate with similar electronics)) — "Reduced Engine Power" message, car entering safe/limp mode, P2138 code present.
❌ Tried (didn't work) Cleaning the throttle body., Replacing the entire throttle body assembly.
✅ What actually fixed it Replacing the complete accelerator pedal assembly, which includes the integrated pedal position sensors. The owner reported driving 1,500 miles after the repair with no further issues. - YouTube technician Brian from South Florida Technical Training (General GM vehicles 2005-2018 with P2138) — P2138 code returns even after replacing the accelerator pedal.
❌ Tried (didn't work) Replacing the accelerator pedal assembly alone.
✅ What actually fixed it Bypassing the problematic IP-to-body harness connector (C206) entirely. The professional fix is to run new, dedicated wires from the accelerator pedal connector directly to the ECM connector pins, soldering and sealing them properly. This eliminates the corroded connector as a failure point.
OEM Part Supersession History
15101848, 15847349→25832864— Standard part revision and consolidation by the manufacturer.
Helpful Videos


The information in this article is provided for general reference and educational purposes only. Vehicle specifications, procedures, and part compatibility can vary by production date, trim level, and region. Always consult your vehicle's factory service manual and verify part numbers before purchasing or performing repairs. Safety-critical components such as airbags, seat belts, and braking systems should be installed by a qualified professional.
- Pontiac G6:
- 🎬 Helpful Videos
- What's Unique About the 2005-2010 Pontiac G6
- Diagnostic Flowchart
- Symptoms You May Notice
- Most Likely Causes
- Rare But Worth Checking
- Diagnosis Steps
- Parts You'll Likely Need
- Technical Service Bulletins (TSBs) & Recalls
- Platform-Specific Known Issues
- Mechanic-Grade Diagnostic Values
- Scan Tool Commands That Help
- Wiring & Ground Locations
- Real Owner Repair Stories
- OEM Part Supersession History
- 🎟️ Get 5% Off