

OBD-II Code P2135: Throttle/Pedal Position Sensor/Switch 'A'/'B' Voltage Correlation
The ultimate guide to what P2135 means, why it triggers, and how to fix it for good.
- Code P2135 triggers when the two throttle position sensors report conflicting voltages, instantly forcing the vehicle into a 25-mph 'Limp Mode' to prevent unintended acceleration.
- Replacing the entire throttle body assembly fixes P2135 in over 70% of cases, as the internal carbon-film sensors wear out and cannot be purchased separately on most modern vehicles.
- Graph the live TPS1 and TPS2 voltage data using an OBD-II scanner before buying parts; a smooth 5.0V combined total confirms the wiring is good and isolates the fault to the sensor.
- Perform a mandatory 'Idle Relearn' procedure after installing a new throttle body, and ensure GM models from 2008-2010 receive a PCM software update to prevent the code from returning.
What Does P2135 Mean?

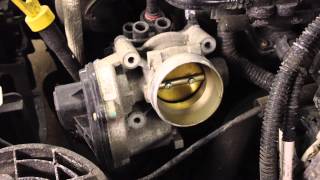
Your car's Powertrain Control Module (PCM) is receiving conflicting voltage signals from the two sensors that measure the throttle plate's position. These sensors (TPS 'A' and 'B') are a critical safety component of the 'drive-by-wire' system. Because the computer cannot trust the signals, it does not know how far you are pressing the gas pedal. To prevent sudden acceleration or stalling, it locks the car into a restrictive safety mode.
Technical definition: The official SAE/OBD-II definition is 'Throttle/Pedal Position Sensor/Switch A/B Voltage Correlation.' The PCM constantly compares the primary and secondary throttle position sensor (TPS) voltage signals. These two sensors work inversely or in parallel; their combined voltage must remain a constant value (typically 5.0 volts). If the total deviates by more than a predetermined amount (e.g., 0.2V) for over 2 seconds, the PCM sets code P2135.
Can I Drive With P2135?
Yes, But With Caution. You can drive, but it is highly dangerous. The vehicle enters 'Reduced Engine Power' or 'Limp Mode,' capping speeds at 25-30 mph. This sudden loss of power leaves you vulnerable when merging or driving on the highway. This mode is a hardcoded safety feature to prevent unintended acceleration; repair it immediately to restore safe operation.
Common Causes

- Faulty Throttle Position Sensor (TPS) / Throttle Body Assembly (Very Common) — This is the root cause in over 70% of cases. The carbon-film tracks inside the sensors wear out over time, creating 'dead spots' that drop the voltage signal. On modern vehicles from GM, Honda, and Nissan, the sensor is integrated into the throttle body, requiring replacement of the entire assembly.
- Damaged Wiring or Fretting Corrosion at Connector (Common) — Engine vibration and heat damage the wiring harness connector at the throttle body. Micro-vibrations cause 'fretting corrosion'—a high-resistance gray oxidation on the terminal pins. This alters the sensitive low-voltage signals and triggers a correlation fault. Applying excessive or incorrect dielectric grease also insulates the pins and causes this exact failure.
- Faulty Accelerator Pedal Position (APP) Sensor (Less Common) — The sensor connected to the gas pedal inside the cabin operates identically to the TPS. While a failing pedal sensor usually triggers code P2138, it occasionally triggers P2135 first depending on the manufacturer's specific software logic.
- Dirty or Sticking Throttle Body (Less Common) — Heavy carbon buildup causes the throttle plate to stick or move sluggishly. This creates a physical mismatch between where the computer commands the throttle to be and where the sensors report it actually is, triggering the correlation code.
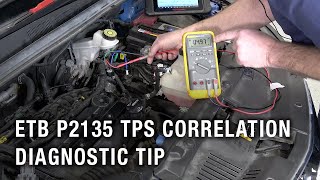
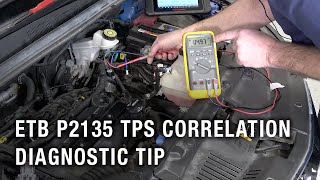
- Low or Unstable Battery Voltage (Uncommon) — A weak battery or failing alternator drops system voltage, causing unpredictable behavior from the 5V reference circuit that powers the TPS. Always verify the battery holds at least 12.4V 🎬 Watch: A step-by-step guide on how to test your TPS. before diagnosing sensor circuits.
- Faulty Powertrain Control Module (PCM) (Rare) — The car's main computer fails internally and cannot correctly process the incoming sensor signals. Consider this only after thoroughly eliminating the throttle body, wiring harness, and connector terminals.
Symptoms

- Reduced Engine Power or 'Limp Mode' — The car suddenly loses power, accelerates extremely slowly, and caps speed at 25-30 mph. A 'Reduced Engine Power' warning illuminates on the dashboard.
- Check Engine Light is On — The malfunction indicator lamp (MIL) illuminates immediately when the PCM detects the voltage correlation fault.
- Hesitation, Surging, or Stumbling — Pressing the gas pedal causes the car to hesitate, stumble, or suddenly surge forward as the sensors momentarily agree and then disagree.
- Engine Stalling — The engine stalls when coming to a stop or idling because the PCM cannot accurately control the idle airflow.
- High or Unstable Idle — The engine idles at a higher RPM than normal, or the idle speed fluctuates up and down without any driver input.
- Traction Control Light On — The vehicle disables traction and stability control systems as a safety precaution when P2135 sets, illuminating the respective warning lights.
Diagnostic Flowchart
Tap your situation to follow the diagnostic path that matches what you're seeing on this code.
Common Fixes & Costs
- Replace the entire Throttle Body Assembly
— Parts: $150-$450, Labor: $120-$250, ~1.2 hr book time
(Intermediate)
Chevrolet Silverado / GMC Sierra (2007-2013): OEM GM 12629992, ACDelco 217-3428 (Alt: Bosch, Hitachi, Dorman, Walker)
Honda Accord / CR-V (2008-2017): OEM Honda 16400-R44-A02 (Varies by exact model) (Alt: Bosch, Denso, Standard Motor Products) - Repair Wiring or Replace Connector Pigtail
— Parts: $20-$100, Labor: $120-$250, ~1.5 hr book time
(Intermediate)
General Motors (Various): OEM ACDelco PT2628 (Varies by application) (Alt: Dorman, Standard Motor Products) - Replace the Throttle Position Sensor (if sold separately)
— Parts: $40-$150, Labor: $60-$150, ~0.8 hr book time
(DIY)
Chevrolet Express / GMC Savana (per TSB): OEM GM 19259452 (TPS Cover Kit) (Alt: N/A) - Replace the Accelerator Pedal Position Sensor
— Parts: $75-$250, Labor: $50-$100, ~0.6 hr book time
(DIY)
Chevrolet Silverado / GMC Sierra (2007-2013): OEM GM 25832864 (Alt: Dorman, Standard Motor Products) - Perform PCM Software Update / Reprogramming — Parts: $0, Labor: $100-$250, ~1 hr book time (Pro Only)
DIY vs Professional
- Replace the entire Throttle Body Assembly — Beginner:
Tools: Basic socket/ratchet set, pliers, flashlight, throttle body cleaner, new gasket. - Repair Wiring or Replace Connector Pigtail — Beginner:
Tools: Soldering iron, heat shrink tubing, wire strippers/cutters, multimeter, terminal tools. - Replace the Throttle Position Sensor (if sold separately) — Beginner:
Tools: Screwdriver/Torx bit set, basic hand tools. - Replace the Accelerator Pedal Position Sensor — Beginner:
Tools: Basic socket/ratchet set or wrenches.
Used vs. New Parts: Buying Guide
When a used part is worth it: A used OEM throttle body from a low-mileage, accident-damaged vehicle is a cost-effective alternative to a new aftermarket part, especially for older vehicles where new OEM parts are cost-prohibitive.
Donor-vehicle mileage cap: roughly under 60000 miles for the part to have meaningful remaining life.
Donor quality checklist:
- Verify the donor vehicle's mileage and ensure it was not scrapped for engine-related issues.
- Inspect the electrical connector pins for any gray fretting corrosion or physical damage.
- Match the part number exactly. Internal electronics differ drastically between model years even if the housing looks identical.
Decision logic:
- If Vehicle is less than 8 years old and under 100K miles → Buy a new OEM or high-quality aftermarket part for maximum reliability and warranty coverage.
- If Vehicle is over 10 years old and budget is the primary concern → Purchase a used OEM part from a reputable salvage yard, accepting the shorter lifespan.
- If The specific vehicle (e.g., Nissan models) is known to reject non-OEM parts → Strictly purchase a new OEM or a used OEM part to avoid repeat failures.
Warranty tradeoff: Used parts typically include a 30-90 day warranty. New aftermarket parts offer a 1-year to limited lifetime warranty. New OEM parts usually carry a 1-year warranty.
Worst-case if a used part fails: $300-$600 if a used part fails shortly after installation, requiring you to pay for labor a second time plus the cost of another replacement part.
What Happens If You Wait — Timeline
- 0-1 week: Intermittent Check Engine Light and 'Reduced Engine Power' message. Restarting the car temporarily clears the issue. No other perceivable symptoms exist. (MPG impact: 0-2%% · Added cost: $0)
- 1 week - 2 months: Limp mode events become frequent and require multiple restarts to clear. The driver notices hesitation or surging during light acceleration. (MPG impact: 3-8%% · Added cost: $50-150 in wasted fuel and significant safety risk.)
- 2-6 months: The vehicle enters Limp Mode on every drive, making it dangerously slow. The engine stalls at idle. The constant stress of limp mode strains the transmission and engine mounts. (MPG impact: 5-15%% · Added cost: $200-$800 for potential strain on drivetrain components.)
- 6+ months: The fault is permanent, rendering the car undrivable. Prolonged operation with an erratic throttle forces an incorrect air/fuel mixture, destroying the catalytic converter. (MPG impact: 10-20%% · Added cost: $1200-$2800 for catalytic converter replacement.)
Cost of Not Fixing It
- 0-1 month: Unpredictable stalling and sudden power loss create a severe safety hazard. You risk being stranded or causing an accident. Fuel economy drops by 5-10% due to inefficient throttle control. (Added cost: Negligible, but high safety risk.)
- 1-6 months: Continued erratic throttle operation leads to excessive carbon buildup on valves and pistons. The stress of frequent 'limp mode' cycles strains the transmission and engine mounts. (Added cost: $200-$800)
- 6+ months: A persistently malfunctioning throttle system forces an incorrect air/fuel mixture, destroying the catalytic converter and requiring a massive repair bill. (Added cost: $1200-$2800)
Diagnosis Steps

- Read All Trouble Codes
Use an OBD-II scanner to confirm P2135 is active. Note any other codes present, as they provide critical clues (e.g., P2138 for the pedal, P1516 for GM TAC, P0121 for a single sensor fault). Document and clear the codes to see which return immediately.
Tools: OBD-II Scanner (Beginner) - Graph the Sensor Data (The Definitive Test)
Use a scan tool with live data graphing to display TPS1 and TPS2 voltages simultaneously. With Key On, Engine Off, slowly press the gas pedal to the floor and back up. One line rises smoothly (e.g., 0.5V to 4.5V) while the other mirrors it, falling smoothly (e.g., 4.5V to 0.5V). Any glitch or dropout in one line confirms a faulty sensor.
Tools: Advanced OBD-II Scanner with Live Data Graphing (Intermediate) - Perform a Detailed Visual and Physical Inspection
Visually inspect the throttle body connector and wiring harness for corrosion, bent pins, or frayed wires. Physically wiggle the connector and harness with the engine running to see if it causes a stumble or a glitch in the live scanner data.
Tools: Flashlight (Beginner) - Check for Technical Service Bulletins (TSBs)
Search online for TSBs or recalls for P2135 on your specific vehicle. Manufacturers like GM have detailed bulletins that dictate specific repair kits and mandatory software updates, saving hours of diagnostic time.
Tools: Internet Access (Beginner) - Check Power and Ground at the Sensor
Using a wiring diagram, identify the 5V reference and ground wires at the throttle body connector. With the key on, use a multimeter to confirm a steady 5V reference and a solid ground (<0.1V). A missing or fluctuating voltage points to a wiring or PCM issue, not a faulty sensor.
Tools: Digital Multimeter, Vehicle-Specific Wiring Diagram (Intermediate) - [PRO TIP] Perform Advanced Voltage Correlation Test
Using a scan tool, add the live voltage readings of TPS1 and TPS2 together. The sum must remain constant (typically 5.0V) throughout the entire pedal travel. If the sum deviates below 4.8V or above 5.2V at any point, it confirms a correlation error that sets the code.
Tools: Advanced OBD-II Scanner or Digital Multimeter (Advanced) - [PRO TIP] Test for Fretting Corrosion and Terminal Integrity
Disconnect the throttle body connector. Inspect the terminals for a dull, gray coating indicating fretting corrosion. Use a dedicated terminal cleaning tool to gently abrade the surfaces. Use a multimeter to check for voltage drop across the connector to confirm wiring integrity.
Tools: Terminal Cleaning Kit, Digital Multimeter (Advanced) - [ADVANCED] Test Sensor Resistance with a Multimeter
Disconnect the TPS connector. Use a multimeter set to Ohms (Ω) to measure resistance between the signal and ground pins of each sensor. Slowly rotate the throttle plate by hand. The resistance reading must change smoothly. An erratic reading confirms an internal failure of the sensor's resistive track.
Tools: Digital Multimeter, Vehicle-Specific Wiring Diagram (Advanced) - Clean the Throttle Body
If the throttle plate has significant carbon buildup, remove the throttle body and clean it thoroughly with dedicated cleaner and a soft cloth. Do not spray cleaner directly into the electronics. This eliminates mechanical sticking as a contributing factor.
Tools: Socket Set, Throttle Body Cleaner, Shop Towels (Intermediate)
When This Code Triggers (Freeze-Frame Conditions)
- Engine Coolant Temp: 180-200°F (82-93°C) (The fault occurs most often when the engine is fully warmed up and operating in closed-loop fuel control.)
- RPM: 1500-2500 (The code frequently sets during light acceleration or while maintaining a steady cruising speed.)
- Engine Load: 20-45% (Indicates a partial throttle opening, where the sensor's internal carbon tracks experience the most wear and create erratic signals.)
- Vehicle Speed: 25-55 mph (The fault appears during active city or highway driving, rarely at idle or wide-open throttle.)
Related Codes
- P2138 — This code specifically points to a voltage correlation issue with the Accelerator Pedal Position (APP) sensors. If you have P2138, focus your diagnosis entirely on the gas pedal assembly inside the cabin, not the throttle body.
- P1516 — This is a GM-specific code meaning 'Throttle Actuator Control (TAC) Module Throttle Actuator Position Performance'. When the PCM sets P2135 due to untrustworthy sensor signals, it triggers P1516 as a direct result of losing confidence in throttle control.
- P2101 — This code means 'Throttle Actuator Control Motor Circuit Range/Performance'. It indicates a problem with the electric motor moving the throttle plate. A failing throttle body triggers both P2101 (bad motor) and P2135 (bad sensors) simultaneously.
- P0121 — This code means 'Throttle Position Sensor A Circuit Range/Performance'. It indicates a problem with just one of the throttle sensors, not a disagreement between the two. P2135 points to a disagreement, while P0121 isolates a single sensor's output.
Climate & Environmental Factors
- Cold Weather: Cold temperatures exacerbate the problem. Worn metal contacts inside the sensor shrink from the cold, losing their tenuous connection and triggering the fault. The problem often disappears once the engine bay warms up.
- High Humidity: Moisture and humidity accelerate fretting corrosion on the connector terminals. This creates a high-resistance connection that alters the sensor's voltage signal and triggers a correlation fault.
How to Talk to a Mechanic About This Code
Say this: "I have a P2135 code causing the car to go into 'Reduced Power' mode. I'd like to book a diagnostic appointment. Please start by graphing the live data from the two throttle position sensors to check for glitches or correlation errors. Also, please perform a wiggle test on the throttle body wiring harness before recommending a part replacement."
This signals you have done research and directs the technician to perform the correct diagnostic tests first. It prevents them from immediately replacing the expensive throttle body without confirming it is the true cause, saving you money if the issue is just a bad wire.
Avoid saying:
- 'My car is hesitating and the check engine light is on.' (Too vague, invites a wide-ranging and expensive diagnostic).
- 'Just replace the throttle body.' (You are asking for an expensive part you may not need).
- 'My buddy said it's the gas pedal.' (This is a common misdiagnosis; P2135 is almost always the throttle body, not the pedal).
Questions to ask before authorizing the repair:
- Did you see a glitch or dropout on the live data graph for TPS1 or TPS2? Can you show me the data?
- Did you inspect the connector terminals for corrosion and check the wiring harness for damage?
- If the throttle body needs replacement, does my vehicle require a PCM software update or a relearn procedure afterward?
- What is the warranty on the new part and your labor?
Where to Take It: Dealer vs Independent vs Chain
- Dealer:
Recommended if your vehicle (especially GM) requires a dealer-only software reflash after the repair, or if it is still under warranty. Otherwise, a qualified independent shop is more cost-effective.
Best for: Vehicles under warranty., Vehicles with known TSBs requiring a mandatory PCM software update after repair (common for GM)., Complex cases where an independent shop has already failed to fix the issue.
Downsides: Highest labor rates and part costs., Often defaults to replacing the entire throttle body assembly even if a simpler wiring fix is possible. (Typical cost: +50% vs. baseline) - Independent Shop:
Best overall fit for most situations. A good independent shop diagnoses a faulty sensor vs. a wiring problem effectively and has lower labor rates than a dealer. Ask if they are comfortable with 'drive-by-wire' throttle diagnostics.
Best for: Most out-of-warranty vehicles., Shops that have technicians with strong electrical diagnostic skills., Getting a second opinion on a dealer's quote.
Downsides: Shop quality and diagnostic equipment vary greatly. Ensure they have a scan tool capable of live data graphing., Cannot always perform required PCM software updates for all makes. (Typical cost: +0% vs. baseline) - Chain Shop:
AVOID for P2135 diagnosis. This code requires more than just reading the fault. Without live data graphing, they guess and replace the wrong parts, costing you more in the long run.
Best for: Selling you parts you do not need.
Downsides: Technician skill is highly variable., Often lack the advanced diagnostic tools (live data graphing, bidirectional controls) needed for a proper P2135 diagnosis., Business model encourages replacing parts rather than diagnosing complex electrical faults. (Typical cost: -10% vs. baseline)
When to Walk Away From the Repair
If the total estimated repair cost for the P2135 fault exceeds 50% of your car's private-party value (check Kelley Blue Book), seriously consider selling or trading in the vehicle instead of repairing it.
- Car worth $4500, fix is $800: Fix it. The repair cost is well under the 50% threshold and restores the car to a safe, usable condition.
- Car worth $3000, fix is $1600: Walk away. The repair cost is over half the car's value. It is not an economically sound repair.
- Car worth $8000, fix is $1200: Fix it. This is a significant but worthwhile repair to maintain the value and function of a more valuable vehicle.
What Scan Tool You Need for This Code
Minimum: A scan tool that graphs two live data PIDs (Parameter IDs) simultaneously.
A basic $20 code reader only shows the 'P2135' code. It cannot display the live sensor voltage data, which is essential to see the two sensors disagreeing in real-time. Without live data graphing, you are just guessing at the cause.
Budget: BlueDriver Pro / Ancel BD310 (~$90) — These Bluetooth scanners connect to a smartphone app that allows you to view and graph live data for both throttle position sensors (TPS1 and TPS2) at the same time. This is the minimum requirement to confirm a sensor fault by watching for glitches in the voltage graphs.
Mid-range: Foxwell NT604 Elite / XTOOL D7 (~$350) — In addition to live data graphing, these handheld scanners include the crucial 'Throttle Body Relearn' or 'Throttle Adaptation' function. This is a required step after you replace the throttle body on most vehicles to make the car idle correctly.
Professional: Autel MaxiCOM MK900 / Innova 5610 (~$500-900) — Offers full bidirectional control to perform throttle relearns, PCM software checks, and access manufacturer-specific codes and data. These provide OE-level diagnostics that quickly distinguish between a sensor, wiring, or PCM fault.
Rent vs buy: For a one-time P2135 diagnosis, you cannot rely on free rental scanners from auto parts stores as they are typically basic code readers. You must buy a scanner with live data graphing capabilities. A budget pick like the BlueDriver is a worthwhile investment.
How to Clear the Code After You Fix It
- Use an OBD-II scan tool to clear the P2135 and any related fault codes.
- Perform the Idle Relearn/Throttle Body Adaptation procedure specific to your vehicle.
- Perform a complete drive cycle to allow the vehicle's readiness monitors to run and confirm the fix.
Drive cycle (~30 minutes): A general drive cycle includes a cold start (after sitting for 8+ hours), a 2-3 minute idle, 10-15 minutes of mixed city/suburban driving (stop-and-go), followed by 5-10 minutes of steady highway speed (55-65 mph). Specific procedures vary by manufacturer.
Readiness monitors affected: Catalyst Monitor, Oxygen (O2) Sensor Monitor, EVAP System Monitor
Before emissions retest: drive at least 100 miles to fully set monitors.
Watch out for:
- Disconnecting the battery clears the code but resets all readiness monitors, guaranteeing an emissions test failure until a full drive cycle is completed.
- The code returns immediately if the root cause (e.g., bad wiring, faulty replacement part) was not properly fixed.
- Failing to perform the mandatory idle relearn procedure after replacing the throttle body causes severe idling and performance issues.
Will This Fail Emissions / State Inspection?
Yes — this code typically fails an OBD-II emissions inspection.
- California: A P2135 code is an automatic failure. After repair, a full drive cycle must be completed to set all readiness monitors before the vehicle can be re-tested by a Smog Check station.
- New York: The NYS DMV inspection includes an OBD-II scan. An active P2135 code results in an immediate inspection failure.
- Texas: In the 17 counties requiring emissions testing, a vehicle with an illuminated Check Engine Light and an active P2135 code fails the OBD portion of the annual inspection.
Most Commonly Affected Vehicles
- Chevrolet Silverado, Suburban, Tahoe, Impala, Equinox, Aveo, Trax (2005-2016) — Extremely common. GM issued multiple TSBs. TSB 11-06-04-007 notes that 2008-2010 models require an ECM reprogram after repair, while 2011 models do not. The most reliable fix is replacing the entire throttle body.
- GMC Sierra, Yukon, Acadia (2007-2016) — Shares platforms with Chevrolet, making them equally prone to P2135. GM's Special Coverage Adjustment 15595 extended the warranty for this issue on many models, though this program is largely expired.
- Honda Accord, Civic, CR-V, Fit, HR-V, Odyssey (2009-2022) — Frequently reported across the Honda lineup. Honda does not sell the TPS separately, requiring replacement of the complete throttle body assembly. Aftermarket sensors are highly unreliable.
- Hyundai Santa Fe, Elantra, Sonata, Tucson, Veloster (2008-2016) — Commonly seen across the Hyundai lineup. For some models, an updated, separately sold throttle position sensor is available as a fix, saving the cost of a full throttle body.
- Ford Fiesta, Mustang, F-150, Focus (2011-2018) — Owners frequently report P2135, leading to throttle body replacement. Diagnosis requires checking the APP sensor, throttle body, and wiring harness for faults.
- Nissan Altima, Sentra, Rogue (2013-2019) — A known issue that recurs if aftermarket (non-OEM) throttle bodies are used. A faulty ground cable from the battery is sometimes the root cause after multiple throttle body replacements fail to fix the code.
- Saturn Vue, Aura (2007-2009) — These GM models are listed in TSBs related to code P2135, indicating a known issue with the throttle position sensors identical to their Chevrolet counterparts.
- Pontiac G6, Torrent (2006-2009) — As part of the GM family, these vehicles suffer from the exact same throttle body sensor correlation issues covered under GM TSBs.
Manufacturer-Specific Notes
- General Motors (Chevrolet, GMC, etc.): GM TSB 11-06-04-007C advises technicians to replace the throttle position sensor cover and terminals (Kit P/N 19259452) instead of the entire throttle body. This TSB specifies that 2008-2010 models MUST have the ECM reprogrammed after this repair, while 2011 and newer models do not.
- Honda: On most modern Honda models, the individual throttle position sensors are not available as a separate part from the dealer. If one sensor fails, you must purchase and replace the entire throttle body assembly.
- Nissan: Nissan vehicles with P2135 are highly sensitive to aftermarket throttle bodies. The code frequently returns shortly after installing a non-OEM part. Using a genuine Nissan throttle body is mandatory for a lasting repair.
- Harley-Davidson (Motorcycles): On motorcycle applications, fretting corrosion at the Throttle Control Actuator (TCA) and ECM connectors is the primary cause of P2135 due to extreme engine vibration. The fix involves replacing the specific female terminals in the ECM connector harness.
Real Owner Stories
2008 Chevy Trailblazer at 189K miles
Vehicle suddenly went into 'Reduced Engine Power' mode on the highway. After stopping and restarting, the Check Engine Light remained on, but the truck drove normally for 170 miles before the issue recurred.
What they tried:
- Pulled code P2135 at an auto parts store.
Outcome: Forum advice strongly pointed to a failed throttle body assembly, the most common cause for this code on high-mileage GM vehicles. The owner replaced the throttle body, permanently resolving the issue.
Lesson: Even if 'limp mode' temporarily resolves after a restart, code P2135 indicates a hard electrical fault that always returns. The throttle body is the primary culprit on high-mileage GM trucks.
2020 Ford Fusion at 55K miles - A Misdiagnosis Story
Intermittent 'wrench' light, followed by Check Engine Light with code P2135. The issue kept returning despite multiple dealership repairs.
What they tried:
- Dealer replaced the throttle body assembly; the code returned.
- Dealer replaced the accelerator pedal assembly; the code returned again, forcing the car into limp mode.
Outcome: The owner experienced recurring failures after replacing the two most common components. The root cause was eventually traced to a damaged wire in the harness leading to the throttle body.
Lesson: If P2135 returns after replacing the throttle body or pedal, the root cause is a wiring harness or connector failure. Insist on a detailed wiring voltage drop test before authorizing more parts.
Infiniti G35 with recurring P2135
Check Engine Light and P2135 code returned every 100 miles, despite replacing the throttle position sensor twice and installing a new throttle body assembly.
What they tried:
- Replaced TPS.
- Replaced entire throttle body assembly.
- Performed throttle relearn procedure multiple times.
Outcome: The owner unplugged the throttle body connector, cleaned the pins with electrical contact cleaner, tweaked the female terminals for better tension, and applied Nyogel 760G dielectric grease. This permanently fixed the code.
Lesson: Fretting corrosion or loose terminal pins create intermittent signal drops that mimic a failed sensor. Always clean and inspect connectors thoroughly before buying expensive parts.
How to Prevent This Code From Triggering
- Periodically clean the throttle body (Every 30,000-50,000 miles) — Cleaning prevents carbon buildup that causes the throttle plate to stick. This mechanical restriction stresses the actuator motor and contributes to premature wear of the electronic components.
- Inspect and clean the throttle body electrical connector (During throttle body cleaning or other engine work) — Spraying the connector with electronics-safe cleaner removes dirt and moisture that promote corrosion, ensuring the sensitive 5V signals remain uncompromised.
- Apply specialized dielectric grease to connector terminals (Anytime the connector is unplugged) — Using a grease designed to prevent fretting corrosion (e.g., Nyogel 760G) lubricates the terminal surfaces against micro-vibrations, preventing the oxidation that leads to signal loss.
- Ensure engine and transmission mounts are in good condition (Inspect every 50,000 miles) — Worn mounts allow excessive engine movement. This vibration is the primary cause of fretting corrosion at electrical connectors and leads to wire chafing over time.
Frequently Asked Questions
Can I just clean the throttle body to fix P2135?
While cleaning a dirty throttle body is good maintenance, it rarely fixes a P2135 code. The code indicates an electrical correlation fault between two sensors, not a mechanical sticking issue. A failed electronic sensor is the most common root cause.
What is the most common misdiagnosis for P2135?
The most common mistake is immediately replacing the accelerator pedal assembly (gas pedal). P2135 almost always points to the throttle body on the engine, while code P2138 points to the pedal. Failing to check for simple wiring issues before buying an expensive throttle body is another frequent error.
Why did P2135 come back after I replaced the throttle body?
If the code returns, the replacement part was likely a low-quality aftermarket unit, or the actual problem lies in the wiring harness. Additionally, a required PCM software update or idle relearn procedure was likely skipped.
Do I need to do a 'relearn' procedure after replacing the throttle body?
Yes, absolutely. After installing a new throttle body, you must perform an Idle Relearn or Throttle Body Adaptation procedure. This allows the PCM to learn the new sensor's closed and full-throttle positions, preventing erratic idling.
Is the problem my gas pedal or the part on the engine?
P2135 almost always refers to the sensors on the throttle body, located on the engine where air enters the manifold. A similar but distinct code, P2138, points specifically to the sensor attached to your gas pedal inside the cabin.
What is the difference between code P2135 and P0121?
P2135 is a 'correlation' code, meaning the two throttle sensors send signals that disagree with each other. P0121 is a 'range/performance' code, meaning the signal from a single sensor falls outside its expected voltage range. P2135 points to a disagreement, while P0121 isolates a problem with one specific sensor.
Can a vacuum leak cause a P2135 code?
It is highly unlikely that a vacuum leak directly causes a P2135 code. A vacuum leak introduces unmetered air, causing a high idle or lean running condition, but it does not cause the two throttle position sensors to disagree electrically. However, a high idle caused by a vacuum leak is sometimes misdiagnosed as a throttle system problem.
Key Takeaways
- Code P2135 triggers when the two throttle position sensors report conflicting voltages, instantly forcing the vehicle into a 25-mph 'Limp Mode' to prevent unintended acceleration.
- Replacing the entire throttle body assembly fixes P2135 in over 70% of cases, as the internal carbon-film sensors wear out and cannot be purchased separately on most modern vehicles.
- Graph the live TPS1 and TPS2 voltage data using an OBD-II scanner before buying parts; a smooth 5.0V combined total confirms the wiring is good and isolates the fault to the sensor.
- Perform a mandatory 'Idle Relearn' procedure after installing a new throttle body, and ensure GM models from 2008-2010 receive a PCM software update to prevent the code from returning.
Helpful Videos

The information in this article is provided for general reference and educational purposes only. Vehicle specifications, procedures, and part compatibility can vary by production date, trim level, and region. Always consult your vehicle's factory service manual and verify part numbers before purchasing or performing repairs. Safety-critical components such as airbags, seat belts, and braking systems should be installed by a qualified professional.
- 🎬 Helpful Videos
- What Does P2135 Mean?
- Can I Drive With P2135?
- Common Causes
- Symptoms
- Diagnostic Flowchart
- Common Fixes & Costs
- DIY vs Professional
- Used vs. New Parts: Buying Guide
- What Happens If You Wait — Timeline
- Cost of Not Fixing It
- Diagnosis Steps
- When This Code Triggers (Freeze-Frame Conditions)
- Related Codes
- Climate & Environmental Factors
- How to Talk to a Mechanic About This Code
- Where to Take It: Dealer vs Independent vs Chain
- When to Walk Away From the Repair
- What Scan Tool You Need for This Code
- How to Clear the Code After You Fix It
- Will This Fail Emissions / State Inspection?
- Most Commonly Affected Vehicles
- Manufacturer-Specific Notes
- Real Owner Stories
- 2008 Chevy Trailblazer at 189K miles
- 2020 Ford Fusion at 55K miles - A Misdiagnosis Story
- Infiniti G35 with recurring P2135
- How to Prevent This Code From Triggering
- Frequently Asked Questions
- Can I just clean the throttle body to fix P2135?
- What is the most common misdiagnosis for P2135?
- Why did P2135 come back after I replaced the throttle body?
- Do I need to do a 'relearn' procedure after replacing the throttle body?
- Is the problem my gas pedal or the part on the engine?
- What is the difference between code P2135 and P0121?
- Can a vacuum leak cause a P2135 code?
- Key Takeaways
- 🎟️ Get 5% Off