

OBD-II Code P2127: Throttle & Pedal Position Sensor 'E' Circuit Low
What P2127 means, why it triggers, and how to fix it
- P2127 triggers when the accelerator pedal's 'E' sensor circuit sends a voltage signal below 0.3V, forcing the vehicle into a dangerous 30-50 mph Limp Mode.
- Do not replace the $150+ pedal assembly without first inspecting the wiring harness and connector for corrosion or loose pins, which cause a significant percentage of these faults.
- Diagnose companion codes like P2122 and P2138 immediately; seeing them alongside P2127 strongly indicates a complete pedal assembly failure or a shared 5V reference wire short.
- Use an OBD-II scanner with live data capabilities to watch the APP2 voltage sweep; a flatline near 0V confirms a dead sensor or severed signal wire.
What Does P2127 Mean?

P2127 means the Powertrain Control Module (PCM) detects a voltage signal from the gas pedal's 'E' position sensor below the 0.2-0.3 volt minimum. The gas pedal uses two redundant sensors for safety; this code flags a failure in the 'E' circuit. This communication breakdown forces the car into a protective low-power mode.
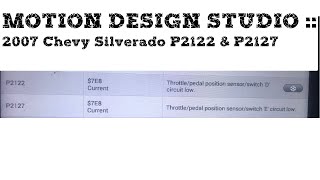
Technical definition: The SAE/OBD-II definition is "Throttle/Pedal Position Sensor/Switch 'E' Circuit Low Input". The PCM triggers this code when the voltage signal from the 'E' circuit of the accelerator pedal position (APP) sensor falls below the manufacturer-specified threshold (typically 0.2V to 0.3V 🎬 Watch: How to test the sensor for a P2127 code) for a few hundred milliseconds. This specific circuit is one of two redundant sensors used to monitor pedal position.
Can I Drive With P2127?

No — Do Not Drive. Do not drive. Your car enters a 'Reduced Power' or 'Limp Mode,' capping speed and making it dangerously slow for traffic. Continuing to drive causes unpredictable stalling or complete loss of throttle response. Prolonged driving in limp mode strains the transmission and risks catalytic converter damage.
Common Causes

- Faulty Accelerator Pedal Position (APP) Sensor (Very Common) — The sensor inside the gas pedal assembly is the most frequent point of failure. It develops internal shorts or open circuits over time, causing it to send an incorrect, low voltage signal. The sensor is integrated into the pedal assembly and must be replaced as a single unit.
- Wiring Harness Damage or Poor Connection (Common) — The wires running from the gas pedal to the PCM chafe against sharp metal brackets under the dash, get pinched by floor mats, or suffer from loose pins in the connector. Poor pin tension in the connector is the primary culprit on many GM trucks. 🎬 See how to fix reduced power mode on GMC and Chevy trucks
- Water Intrusion and Connector Corrosion (Common) — Water leaking into the cabin from a compromised windshield seal, clogged sunroof drain, or wet shoes drips onto the APP sensor's electrical connector. This moisture causes corrosion on the connector pins, creating high resistance or a short to ground.
- Bad or Missing Ground (Common) — The APP sensor relies on a solid ground connection to provide an accurate signal. A loose, corroded, or broken ground wire in the sensor circuit or at the main chassis ground point causes the sensor's signal voltage to drop.
- Broken Pedal Stop (Less Common) — On vehicles like the Nissan 350Z, a small plastic stopper for the pedal arm breaks off. This allows the pedal to travel past its normal resting position, causing the sensor to report a voltage outside its expected range at startup.
- A Failing or Weak Battery (Less Common) — When starting the car, a weak battery's voltage drops significantly. If it drops below the 9-volt minimum threshold required by the vehicle's sensors, it temporarily triggers a P2127 code, a known issue on several Ford models.
- Improperly Installed Aftermarket Accessories (Less Common) — Aftermarket accessories like remote starters tapped into the 5-volt reference or signal wires for the APP sensor draw down the voltage, causing the PCM to see an out-of-range reading.
- Powertrain Control Module (PCM) Failure (Rare) — A fault within the PCM's internal circuits prevents it from correctly reading the signal from the APP sensor. This is the last component to suspect after exhaustively ruling out wiring and sensor failures.
Symptoms
- Reduced Engine Power ('Limp Mode') — The car has very little acceleration, and an 'Engine Power is Reduced' message appears on the dash. Speed is typically capped at 30-40 mph.
- Poor or No Throttle Response — You press the gas pedal, but the car barely accelerates or doesn't respond at all. The response is delayed or intermittent.
- Check Engine Light is On — The malfunction indicator lamp (MIL) illuminates immediately upon the PCM detecting the fault.
- Engine Stalling or Rough Idle — The engine stalls when coming to a stop or idles erratically because it lacks correct throttle instructions from the pedal.
- Traction Control or Stability Control Light On — Because the throttle is a key component of traction and stability control systems, a fault triggers these warning lights, often displaying a 'Service Stabilitrak' message on GM vehicles.
- Flashing Cruise Control Light — On Subaru and some other models, the cruise control light flashes to indicate the system is disabled due to the electronic throttle control fault.
Diagnostic Flowchart
Tap your situation to follow the diagnostic path that matches what you're seeing on this code.
Common Fixes & Costs
- Replace Accelerator Pedal Assembly — Parts: $70-$280, Labor: $75-$150, ~1.2 hr book time (DIY)
- Repair Wiring or Connector — Parts: $10-$50, Labor: $125-$250, ~2 hr book time (Intermediate)
- Replace Battery — Parts: $150-$350, Labor: $25-$50, ~0.5 hr book time (DIY)
- Professional Diagnosis — Parts: $0, Labor: $120-$180, ~1.5 hr book time (Professional)
- Replace Powertrain Control Module (PCM) — Parts: $600-$1200, Labor: $150-$300, ~1.5 hr book time (Professional)
Used vs. New Parts: Buying Guide
When a used part is worth it: Buying a used accelerator pedal assembly is not recommended. The savings are minimal compared to the risk of the used electronic part failing prematurely. A used part makes sense only if the vehicle is very old, the budget is extremely tight, and the part comes from a low-mileage donor with a return policy.
Donor-vehicle mileage cap: roughly under 50000 miles for the part to have meaningful remaining life.
Donor quality checklist:
- Verify donor vehicle mileage is low.
- Ensure the part number matches exactly.
- Purchase from a reputable seller offering at least a 30-90 day warranty.
Decision logic:
- If Vehicle is your primary transportation and less than 15 years old → Buy a new OEM or high-quality aftermarket part. The peace of mind and warranty are worth the extra cost.
- If The cost of a new part is more than 25% of the vehicle's value → A used part from a reputable source with a warranty is an acceptable risk.
- If The part has a known high failure rate → Favor new, as a used part is likely to have significant wear.
Warranty tradeoff: Used parts typically come with a 30-90 day functional warranty, which does not cover labor costs. New aftermarket parts often have a 1-year to limited lifetime warranty, while new OEM parts carry a 1-2 year warranty.
Worst-case if a used part fails: $200-$400 if a used part fails after installation, representing repeat labor costs plus the cost of another part.
What Happens If You Wait — Timeline
- Immediate (First Occurrence): The Check Engine Light illuminates and the vehicle enters 'Reduced Power' or 'Limp Mode'. Throttle response becomes extremely limited, and speed is capped at 30-50 mph. (MPG impact: 5-15%% · Added cost: $0 (if addressed immediately))
- 0-1 Month (Ignoring the issue): The vehicle is dangerously unpredictable and stalls at low speeds or fails to accelerate at junctions. Restarting the car temporarily clears limp mode, but it returns. (MPG impact: 10-20%% · Added cost: $150-$300 (Potential towing and diagnostic fees when it fails completely).)
- 1-4 Months (Continued Driving): Driving in limp mode locks the transmission in a single gear, putting significant strain on the transmission and drivetrain components. This accelerates wear on clutches and torque converters. (MPG impact: 15-25%% · Added cost: $500-$2,500 (Risk of accelerated transmission wear leading to premature failure).)
- 4+ Months (Severe Neglect): The underlying electrical fault worsens, causing intermittent voltage spikes or shorts on shared circuits. This damages the sensitive driver circuits within the Powertrain Control Module (PCM). (MPG impact: N/A (Vehicle likely undrivable)% · Added cost: $1,200-$2,500+ (High risk of PCM damage on top of the original fault).)
Cost of Not Fixing It
- Immediate: Vehicle is dangerously unpredictable. It enters limp mode at any time, leaving you unable to accelerate in traffic, or stalls unexpectedly. (Added cost: $250+ (Towing and diagnostic fees when it leaves you stranded).)
- 1-3 Months: Continued driving in limp mode locks the transmission in a single gear, accelerating wear on transmission components. (Added cost: $500 - $3,500+ (Accelerated transmission wear or damage).)
- 3+ Months: A wiring short worsens and damages the Powertrain Control Module (PCM). A simple wire repair turns into an expensive PCM replacement. (Added cost: $800 - $2,000+ (Cost to replace and program a damaged PCM).)
Diagnosis Steps

- Scan for All DTCs and Review Freeze Frame Data
Use a professional OBD-II scanner to read all stored codes. Record the freeze frame data, which shows the exact conditions (RPM, vehicle speed) when the code was set. Note if companion codes like P2122 or P2138 are present.
Tools: OBD-II Scanner (Beginner) - Visually Inspect Pedal, Connector, and Wiring
Look at the wiring harness and connector at the accelerator pedal assembly. Check for frayed wires, corrosion, or pushed-out pins. Ensure floor mats are not interfering with the pedal and check for water intrusion on the floorboards.
Tools: Flashlight (Beginner) - Check for Technical Service Bulletins (TSBs)
Search for TSBs for your specific vehicle. For example, GM TSB #PIP3783D addresses poor connector pin tension as a cause for P2127 on trucks, providing a diagnostic path that saves you from buying an unnecessary pedal assembly.
Tools: Online access to TSB database (Intermediate) - Analyze Live Data from APP Sensors
Using a scan tool, monitor the live data for APP Sensor 1 and APP Sensor 2. With the key on and engine off, slowly press the accelerator. Normal operation shows two smooth, opposing voltage sweeps. For P2127, APP Sensor 2 ('E') voltage remains stuck below 0.3V or drops out intermittently.
Tools: OBD-II Scanner with Live Data (Intermediate) - Perform a 'Wiggle Test'
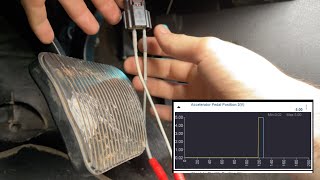
With the ignition on (engine off), view live data for APP Sensor 2. Gently wiggle the connector and wiring harness at the pedal and along its path to the firewall. If the voltage reading jumps, drops, or spikes, you have a bad connection or broken wire.
Tools: OBD-II Scanner with Live Data (Intermediate) - Test the 5V Reference and Ground Circuits
Disconnect the APP sensor connector. With the key on, use a multimeter to test the 5-volt reference wire; it must read between 4.9V and 5.1V. Test the ground wire for continuity to a known good chassis ground; it must read near 0 ohms. A missing reference voltage or bad ground points to a wiring or PCM issue.
Tools: Multimeter, Vehicle-specific wiring diagram (Advanced) - Test Signal Wire for Short to Ground
With the APP sensor and PCM connectors disconnected, measure the resistance between the APP sensor 2 signal wire and a chassis ground. The reading must be infinite (OL). A reading near 0 ohms indicates a short to ground in the harness, the direct cause of a 'Circuit Low' code.
Tools: Multimeter, Vehicle-specific wiring diagram (Advanced) - Test Sensor Internal Resistance
With the pedal assembly disconnected, measure the resistance between the signal and ground pins for the 'E' circuit. You must see a reading that smoothly changes as you press the pedal (typically 3.0-5.0 kΩ). An open circuit (OL) or static reading indicates an internal sensor failure.
Tools: Multimeter, Vehicle-specific wiring diagram (Advanced) - Test Sensor Voltage with an Oscilloscope
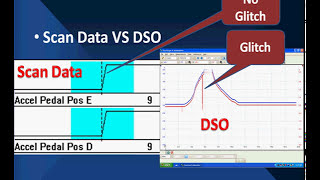
Backprobe the APP sensor 1 and 2 signal wires. As you press the pedal, you must see two smooth, opposing voltage ramps without glitches. For P2127, the 'E' circuit signal flatlines near zero volts, confirming the sensor failed internally or lost its signal path.
Tools: Oscilloscope, Backprobe pins (Professional) - Test with a Known-Good Part
If the wiring, reference voltage, and ground are confirmed good, the sensor itself is the culprit. Swapping in a new accelerator pedal assembly is the definitive way to confirm the diagnosis.
Tools: Basic hand tools (Intermediate)
When This Code Triggers (Freeze-Frame Conditions)
- Engine Coolant Temp: 175-205°F (Engine at full operating temperature.)
- RPM: 1200-2500 RPM (During steady-state cruise or light acceleration.)
- Engine Load: 25-55% (Maintaining speed on a level road or slight incline.)
- Vehicle Speed: 30-60 mph (City or highway driving, not from a standstill.)
Related Codes
- P2122 — The companion code to P2127. P2122 is a low voltage fault on sensor 'D', while P2127 is for sensor 'E'. Seeing both codes together strongly indicates the entire accelerator pedal assembly failed, or a shared 5V reference/ground wire is broken.
- P2138 — Means 'Throttle/Pedal Position Sensor/Switch 'D'/'E' Voltage Correlation'. If sensor 'E' fails and sends a low signal (P2127), it disagrees with sensor 'D', triggering P2138. Fix the root cause of P2127 first to resolve P2138.
- P2135 — Relates to the sensors in the throttle body itself, not the pedal. A major electrical issue like a faulty ground or unstable 5V reference causes both pedal and throttle body codes to appear simultaneously.
- U0107 — Means 'Lost Communication With Throttle Actuator Control Module'. Seeing this with P2127 points to a system-wide issue, such as a PCM problem or a wiring harness failure affecting multiple components.
Climate & Environmental Factors
- High Humidity / Water Intrusion: Moisture from wet climates, snowmelt from boots, or clogged sunroof drains gets into the APP sensor connector. This leads to pin corrosion, increasing resistance or creating a short-to-ground, directly causing a P2127 low voltage code.
- Extreme Cold: Extreme cold weakens battery performance. The resulting voltage drop during cranking drops below the 9V threshold, triggering a false P2127 code on sensitive vehicles like certain Ford models.
- Altitude: There is no direct correlation between high altitude and an increase in P2127 faults. This code relates to the electronic signaling of the pedal, not air/fuel mixture calculations.
How to Talk to a Mechanic About This Code
Say this: "I have a P2127 code and my car is in limp mode. I know this is either the pedal sensor or a wiring issue. Please test the connector and wiring before recommending a pedal replacement."
This signals you are an informed customer. It directs the mechanic to perform a complete diagnosis of the circuit, preventing misdiagnosis and unnecessary costs.
Avoid saying:
- My check engine light is on, can you just fix it?
- My car is acting weird and won't accelerate.
- Just replace the gas pedal sensor.
Questions to ask before authorizing the repair:
- Did you see the voltage for APP sensor 2 drop out on the live data scan?
- Did you perform a 'wiggle test' on the harness and connector to check for intermittent connection?
- Did you confirm the 5-volt reference and ground at the connector are good?
- Is there a Technical Service Bulletin (TSB) for this issue on my vehicle?
- What is the warranty on the part and the labor for this repair?
Where to Take It: Dealer vs Independent vs Chain
- Dealer:
A strong choice if a known TSB applies or if the vehicle is under warranty. For out-of-warranty vehicles, it is a more expensive but reliable option.
Best for: Vehicles under warranty., Vehicles with known Technical Service Bulletins (TSBs) for this specific code (e.g., GM trucks)., Complex electrical issues requiring factory-specific diagnostic tools.
Downsides: Higher labor rates, often 1.5x to 2x that of independent shops., May default to replacing the entire pedal assembly rather than repairing a connector. (Typical cost: +50% vs. baseline) - Independent Shop:
Best overall fit for most out-of-warranty vehicles. A reputable independent shop with ASE-certified technicians handles the diagnosis and repair effectively and affordably.
Best for: Out-of-warranty vehicles where cost is a factor., Common vehicles where technicians have likely diagnosed P2127 before., Getting a second opinion on a dealership's diagnosis.
Downsides: Quality and diagnostic skill vary greatly between shops., May lack access to the latest manufacturer-specific TSBs. (Typical cost: +0% vs. baseline) - Chain Shop:
AVOID for P2127 diagnosis. The risk of misdiagnosis is high. They are less likely to correctly identify and repair a subtle wiring or connector fault.
Best for: Simple, routine maintenance like oil changes or battery replacement.
Downsides: Technician skill varies dramatically; lacks experience for nuanced electrical diagnostics., High pressure to upsell services; recommends replacing the pedal without proper diagnosis of the wiring. (Typical cost: -10% vs. baseline)
When to Walk Away From the Repair
If the estimated repair cost exceeds 50% of the car's private-party value, seriously consider selling or trading in the vehicle instead of repairing it.
- Car worth $8000, fix is $450: Fix it. The repair cost is a small fraction of the car's value.
- Car worth $3000, fix is $450: Borderline, but likely worth fixing. The cost is significant relative to the value, but the car is undrivable without the repair.
- Car worth $1500, fix is $450: Walk away. The repair cost is nearly a third of the car's value. Consider selling it as a 'mechanic's special' or scrapping it.
What Scan Tool You Need for This Code
Minimum: An OBD-II scanner that reads and graphs live data for the accelerator pedal position sensors (APP1 and APP2).
A basic $20 code reader only shows the P2127 code. It cannot show the live voltage signals from the pedal's two sensors, which is essential to see if the signal is dropping out, noisy, or completely dead.
Budget: BlueDriver Pro Scan Tool (~$100) — Connects to your smartphone via Bluetooth and graphs live data from both accelerator pedal sensors. This is sufficient to watch the voltage sweeps and identify dropouts.
Mid-range: Foxwell NT510 Elite (~$180) — A handheld unit providing live data with graphing. Offers manufacturer-specific functions and limited bi-directional controls, useful for advanced diagnostics if other codes are present.
Professional: Autel MaxiCOM MK808S (~$450) — A professional-level tablet scanner offering fast, detailed live data graphing and full bi-directional controls. Allows testing of other components in the electronic throttle control system.
Rent vs buy: If this is a one-time diagnosis, auto parts stores like AutoZone offer a 'Loan-A-Tool' program. You pay a deposit for a scanner, use it to diagnose the issue, and get a full refund when returned within 90 days.
How to Clear the Code After You Fix It
- Perform the physical repair (e.g., replace pedal assembly or repair wiring).
- Reconnect the battery if it was disconnected.
- Use an OBD-II scan tool to clear the P2127 and any related codes.
- Perform a complete OBD-II drive cycle to allow readiness monitors to run.
Drive cycle (~30 minutes): A generic drive cycle includes a cold start (sitting for 8+ hours), idling for 2-3 minutes, 10-15 minutes of mixed city driving with stop-and-go, and 10 minutes of steady highway driving between 50-60 mph.
Readiness monitors affected: Catalyst Monitor, Oxygen (O2) Sensor Monitor, EVAP System Monitor
Before emissions retest: drive at least 50 miles to fully set monitors.
Watch out for:
- Clearing the code with a scanner does not fix the underlying electrical problem; the code returns immediately.
- Disconnecting the battery clears the code but resets all onboard memory and readiness monitors, making it impossible to pass an emissions test until a full drive cycle is completed.
- Not driving long enough or under the right conditions leaves readiness monitors showing 'Not Ready'.
Will This Fail Emissions / State Inspection?
Yes — this code typically fails an OBD-II emissions inspection.
- California: An active Check Engine Light from code P2127 is an automatic smog check failure. After repairs, a complete drive cycle must be performed to set all readiness monitors before a retest.
- New York: The NYS DMV vehicle inspection includes an OBD-II scan. An illuminated Malfunction Indicator Lamp (MIL) due to P2127 results in an automatic failure.
- Texas: In the 17 Texas counties requiring emissions testing, an active P2127 code and illuminated Check Engine Light causes the vehicle to fail the OBD-II portion of the state inspection.
Most Commonly Affected Vehicles
- Chevrolet / GMC Silverado, Suburban, Tahoe / Sierra, Yukon (2007-2014) — Extremely prone to P2127 due to poor terminal tension in the accelerator pedal connector (GM TSB #PIP3783D). The fix requires repairing the connector or replacing the pigtail, not the pedal itself.
- Dodge / Ram Ram 1500/2500/3500 (2010-2018) — Frequently experiences P2127, often accompanied by P2122 and P2138. This combination strongly indicates a failure of the accelerator pedal assembly itself.
- Ford F-150, Focus, Escape (2007-2017) — A weak battery triggers this code during startup. TSB SSM 46829 notes that on 2015-2017 F-150s, the APP sensor harness chafes behind the brake pedal bracket, causing a short.
- Honda Civic, Accord, CR-V (2006-2017) — Commonly experiences P2127 due to an internal failure of the Accelerator Pedal Position (APP) sensor. Replacement of the entire pedal assembly is the standard repair.
- Hyundai / Kia Elantra, Sonata / Optima, Sorento (2010-2016) — Often paired with P2138 (correlation fault). The most frequent solution is replacing the entire accelerator pedal assembly. Some models were subject to recalls for this issue.
- Subaru Forester, Outback, Impreza (2007-2014) — P2127 appears with a solid Check Engine Light and a flashing 'CRUISE' light, indicating cruise control is disabled as a safety precaution. The cause is almost always a faulty APP sensor.
- Nissan Altima, Titan, Frontier (2005-2015) — A broken plastic pedal stop causes the pedal to rest at an incorrect angle, triggering the code at startup. Wiring issues are also common.
Manufacturer-Specific Notes
- General Motors (Chevy/GMC): GM released TSB #PIP3783D advising technicians to test the female terminals in the APP connector for proper grip before replacing the pedal assembly. Replacing the connector pigtail is often the correct fix.
- Ford: A weak battery causes a significant voltage drop during engine cranking, triggering a false P2127 code. TSB SSM 46829 addresses an improperly routed APP sensor harness that chafes behind the brake pedal bracket on 2015-2017 F-150s.
- Dodge / Ram: Displays a flashing red lightning bolt icon on the dashboard along with the check engine light. This icon specifically indicates a critical issue with the Electronic Throttle Control (ETC) system.
- Nissan: A small, brittle plastic pedal stop disintegrates and falls out. This allows the pedal to rest at a lower-than-normal position, causing the sensor to read an out-of-range voltage at startup.
- Hyundai / Kia: Several models have been subject to recalls (like NHTSA campaign 13V113000 for 2011-2013 Elantras) or warranty extensions for accelerator pedal sensor issues. Check with a dealer for VIN-specific coverage.
Real Owner Stories
2007 Chevy Avalanche with intermittent P2127 & P2138
Vehicle randomly entered reduced power mode, more frequently on warmer days (>85F).
Outcome: The owner suspected an intermittent short to ground on the 5V reference circuit shared by other sensors, pointing towards a potentially faulty Fuel Tank Pressure (FTP) sensor.
Lesson: Intermittent electrical faults are difficult to diagnose. Replacing the most obvious part doesn't always work. A graphing scan tool is invaluable for catching brief voltage drops a multimeter misses.
2017 Chevy Silverado 5.3L with P2127
Truck went into limp mode with only code P2127 present.
Outcome: Code P2127 returned immediately after the throttle body replacement. The issue was the pedal assembly or wiring, which the code originally pointed to.
Lesson: Trust the code. P2127 specifically points to the accelerator pedal circuit. Diagnose the circuit indicated by the primary code first to avoid replacing expensive, unrelated parts.
2007 Ford F-150 5.4L with recurring P2127
Truck repeatedly set a P2127 code with odd throttle response.
Outcome: A forum member advised checking pins 1 and 6 on the APP connector for a stable 5-volt reference to verify the power supply before replacing the part.
Lesson: Before replacing the pedal assembly, perform a simple voltage test on the connector's 5V reference and ground pins. A missing voltage points to a wiring or PCM issue.
Saturn Ion with P2127, repair made it worse
Car had intermittent low power and set code P2127. A mechanic replaced the accelerator pedal sensor assembly.
Outcome: The fault was likely in the wiring harness or connector from the start. Replacing the pedal did not fix the underlying issue.
Lesson: Replacing the pedal does not fix a wiring harness issue. This highlights the importance of diagnosing the entire circuit (power, ground, signal wire) instead of just replacing the most common part.
How to Prevent This Code From Triggering
- Apply Dielectric Grease to the APP Connector (Once, or during any under-dash service) — Dielectric grease seals electrical connectors from moisture, oxygen, and salt. Applying a small amount to the APP sensor connector prevents pin corrosion, a primary cause of low voltage signals.
- Inspect and Secure the APP Wiring Harness (Every 30,000 miles or during cabin filter change) — Periodically check that the wiring harness running to the pedal is secure and not pinched by floor mats or chafing against sharp metal brackets. Use zip ties to secure loose wiring.
- Check for and Address Water Leaks into the Cabin (Annually, especially before rainy/winter season) — Clogged sunroof drains or degraded windshield seals allow water to drip onto low-lying electronics like the APP sensor. Regularly cleaning drains prevents water intrusion that leads to shorts.
- Avoid Resting Wet or Snowy Boots Near the Pedal Assembly (Daily habit during winter) — Snow and water melting off shoes seeps directly onto the APP sensor and its connector. Using all-weather floor mats with high edges contains the moisture.
Frequently Asked Questions
I replaced the pedal, but the code came back. What's the most common misdiagnosis?
The most common mistake is replacing the pedal assembly without testing the wiring and connector. An intermittent open or short in the wiring is not fixed by a new pedal. Always perform a 'wiggle test' on the harness while watching live sensor data.
My cruise control light is flashing along with the Check Engine Light. Is that related to P2127?
Yes, on many vehicles (especially Subaru), the cruise control system automatically disables as a safety measure when a critical electronic throttle fault occurs. The flashing cruise light is a secondary indicator that turns off once the P2127 fault is fixed.
Can I just clean the sensor to fix P2127?
No. The accelerator pedal position sensor is a sealed electronic unit, and its internal components cannot be cleaned. You can only clean the external electrical connector with electronic contact cleaner if it shows corrosion.
What's the difference between the Accelerator Pedal Position (APP) sensor and the Throttle Position Sensor (TPS)?
The APP sensor is on your gas pedal and tells the computer how far your foot presses it. The TPS is on the engine's throttle body and reports the throttle plate's position. P2127 specifically points to a problem with the APP sensor circuit on the pedal.
Will clearing the P2127 code fix the problem?
No. Clearing the code only turns off the check engine light temporarily. Because P2127 is a hard electrical fault, the PCM detects the low voltage signal again immediately, returning the car to limp mode.
Can a bad ground cause code P2127?
Absolutely. The APP sensor requires a stable ground to send an accurate voltage signal. A loose, corroded, or broken ground wire skews the signal voltage, resulting in a circuit low code.
Does my car need a 'relearn' procedure after replacing the pedal?
Most modern vehicles do not require a special relearn procedure for the accelerator pedal sensor itself. However, some manufacturers require a throttle body relearn if the battery was disconnected during the repair. Check your specific vehicle's service manual.
Why does the code say 'Circuit E'?
For safety, the accelerator pedal has two separate position sensors providing redundant signals. The SAE generically labels these circuits with letters ('D', 'E', etc.). 'Circuit E' simply refers to the second of these two sensors (often called APP Sensor 2).
Key Takeaways
- P2127 triggers when the accelerator pedal's 'E' sensor circuit sends a voltage signal below 0.3V, forcing the vehicle into a dangerous 30-50 mph Limp Mode.
- Do not replace the $150+ pedal assembly without first inspecting the wiring harness and connector for corrosion or loose pins, which cause a significant percentage of these faults.
- Diagnose companion codes like P2122 and P2138 immediately; seeing them alongside P2127 strongly indicates a complete pedal assembly failure or a shared 5V reference wire short.
- Use an OBD-II scanner with live data capabilities to watch the APP2 voltage sweep; a flatline near 0V confirms a dead sensor or severed signal wire.
Helpful Videos

The information in this article is provided for general reference and educational purposes only. Vehicle specifications, procedures, and part compatibility can vary by production date, trim level, and region. Always consult your vehicle's factory service manual and verify part numbers before purchasing or performing repairs. Safety-critical components such as airbags, seat belts, and braking systems should be installed by a qualified professional.
- 🎬 Helpful Videos
- What Does P2127 Mean?
- Can I Drive With P2127?
- Common Causes
- Symptoms
- Diagnostic Flowchart
- Common Fixes & Costs
- Used vs. New Parts: Buying Guide
- What Happens If You Wait — Timeline
- Cost of Not Fixing It
- Diagnosis Steps
- When This Code Triggers (Freeze-Frame Conditions)
- Related Codes
- Climate & Environmental Factors
- How to Talk to a Mechanic About This Code
- Where to Take It: Dealer vs Independent vs Chain
- When to Walk Away From the Repair
- What Scan Tool You Need for This Code
- How to Clear the Code After You Fix It
- Will This Fail Emissions / State Inspection?
- Most Commonly Affected Vehicles
- Manufacturer-Specific Notes
- Real Owner Stories
- 2007 Chevy Avalanche with intermittent P2127 & P2138
- 2017 Chevy Silverado 5.3L with P2127
- 2007 Ford F-150 5.4L with recurring P2127
- Saturn Ion with P2127, repair made it worse
- How to Prevent This Code From Triggering
- Frequently Asked Questions
- I replaced the pedal, but the code came back. What's the most common misdiagnosis?
- My cruise control light is flashing along with the Check Engine Light. Is that related to P2127?
- Can I just clean the sensor to fix P2127?
- What's the difference between the Accelerator Pedal Position (APP) sensor and the Throttle Position Sensor (TPS)?
- Will clearing the P2127 code fix the problem?
- Can a bad ground cause code P2127?
- Does my car need a 'relearn' procedure after replacing the pedal?
- Why does the code say 'Circuit E'?
- Key Takeaways
- 🎟️ Get 5% Off