

OBD-II Code P2125: Throttle/Pedal Position Sensor/Switch 'E' Circuit Malfunction
What P2125 means, why it triggers, and how to fix it for good
- Code P2125 forces your vehicle into a dangerous 5-15 mph 'Limp Mode,' requiring immediate repair before highway driving.
- Do not replace the throttle body; this code specifically isolates an electrical failure in the accelerator pedal assembly or its wiring.
- Perform a free 'wiggle test' on the gas pedal connector while monitoring live voltage data to instantly rule out a loose wire before buying parts.
- On 2007-2014 GM trucks, a known defect with loose connector pins (TSB #PIP3783D) causes the majority of these codes and costs under $30 to fix with a new pigtail.
What Does P2125 Mean?
P2125 means the Powertrain Control Module (PCM) detects a critical electrical fault in your electronic gas pedal circuit. Modern 'drive-by-wire' pedals use multiple sensors to measure acceleration. This code triggers when the signal from 'Circuit E' (APP Sensor 2) falls outside the expected voltage range, forcing the car into a failsafe mode to prevent unintended acceleration.
Technical definition: The SAE definition is 'Throttle/Pedal Position Sensor/Switch “E” Circuit Malfunction'. The PCM triggers this when the accelerator pedal position (APP) sensor's 'E' circuit voltage drops below or spikes above its operational range. On many GM vehicles, this sets if the APP sensor 2 signal stays below 0.24V or above 4.49V for over 0.5 seconds.
Can I Drive With P2125?
Yes, But With Caution. You can drive, but it is highly dangerous. Your vehicle will enter 'Limp Mode,' capping speed at 5-15 mph and severely limiting acceleration. Continuing to drive risks stalling in traffic. Prolonged driving with a faulty throttle signal forces a rich fuel mixture, potentially destroying your catalytic converter—an $800-$2500 repair.
Common Causes
- Faulty Accelerator Pedal Position (APP) Sensor (Very Common) — The sensor assembly is the most frequent failure point. Internal potentiometers wear out over time, sending erratic voltage signals to the computer. On modern vehicles, you must replace the entire pedal assembly as a single unit.
- Damaged Wiring or Loose Connectors (Very Common) — The wiring harness in the driver's footwell is highly vulnerable to kicks, wet shoes, and road salt. This causes corroded pins, broken wires, or loose terminal tension (especially on GM trucks), interrupting the 5V reference or signal.
- Aftermarket Floor Mat Interference (Uncommon) — A thick or improperly placed floor mat physically obstructs the pedal, preventing it from returning to zero. The computer reads a resting voltage that doesn't match the expected idle value and flags a fault.
- Faulty Powertrain Control Module (PCM) (Rare) — Internal PCM circuit failures, such as water intrusion or a blown voltage regulator, prevent the computer from reading the sensor signal. This triggers the code even with a perfect pedal and wiring.
- Outdated PCM Software (Rare) — A manufacturer software glitch causes the PCM to misinterpret normal sensor voltage fluctuations. A dealership re-flash resolves this by updating the voltage tolerances.
Symptoms
- Poor or No Throttle Response — The vehicle hesitates, surges unexpectedly, or feels completely 'dead' when you press the gas pedal.
- Engine Stalling or Rough Idle — The engine idles erratically or stalls completely when coming to a stop.
- Reduced Engine Power (Limp Mode) (also visible on scanner) — A 'Reduced Engine Power' warning appears, and the vehicle severely limits acceleration and caps speed to 15-30 mph.
- Check Engine Light is On (also visible on scanner) — The Malfunction Indicator Lamp illuminates immediately upon detecting the circuit fault.
- Traction/Stability Control Light On (also visible on scanner) — Because throttle control links to stability systems, a pedal fault disables traction control and illuminates its warning light.
Diagnostic Flowchart
Tap your situation to follow the diagnostic path that matches what you're seeing on this code.
Common Fixes & Costs
- Replace Accelerator Pedal Position (APP) Sensor Assembly
— Parts: $60-$250, Labor: $50-$170, ~0.8 hr book time
(DIY)
Chevrolet/GMC (2007-2014 Trucks/SUVs): OEM ACDelco 25832864 (Alt: Dorman 699-105)
Hyundai Elantra (2011-2016): OEM Hyundai 32700-3X100 (Alt: Standard Motor Products APS306)
Honda CR-V (2012-2014): OEM Honda 37971-RDJ-A01 (Alt: Dorman 699-201) - Repair Wiring or Replace Connector Pigtail
— Parts: $15-$50, Labor: $100-$250, ~1.5 hr book time
(Advanced)
General Motors (Common): OEM ACDelco PT2628 (Alt: Dorman 645-500) - Clean and Repin APP Sensor Connector — Parts: $5-$20, Labor: $50-$120, ~0.5 hr book time (Intermediate)
- Replace Powertrain Control Module (PCM) — Parts: $600-$900, Labor: $200-$300, ~2.0 hr book time (Professional)
DIY vs Professional
- Replace Accelerator Pedal Position (APP) Sensor Assembly — Beginner: Yes
Tools: Basic hand tools (socket set, screwdriver). - Repair Wiring or Connector — Beginner: No
Tools: Multimeter, wire strippers, crimpers, soldering iron, heat shrink, terminal pin kit, wiring diagrams. - Replace Powertrain Control Module (PCM) — Beginner: No
Tools: Advanced diagnostic scanner, specific programming tools.
Used vs. New Parts: Buying Guide
When a used part is worth it: Buying used is rarely recommended. The internal sensors are wear items, and a used part from a salvage yard has unknown history. The savings are minimal compared to the risk of the part failing again soon.
Donor-vehicle mileage cap: roughly under 40000 miles for the part to have meaningful remaining life.
Donor quality checklist:
- Verify the donor vehicle's mileage is low.
- Ensure the part number matches exactly; superseded numbers can be tricky.
- Avoid parts from vehicles in flood-damaged or high-corrosion areas.
Decision logic:
- If New aftermarket part is available for under $100 → buy new aftermarket — the warranty and known-good condition outweigh the small savings of a used part.
- If Vehicle is over 10 years old and budget is extremely tight → a used part from a low-mileage, accident-damaged vehicle is a possibility, but accept the risk of a shorter lifespan.
- If The part has a known high failure rate (like on GMT900 trucks) → favor a new OEM or quality aftermarket part, as even a low-mileage used part is prone to the same failure.
Warranty tradeoff: Used parts typically have a 30-90 day warranty at best. New aftermarket parts often come with a 1-year to lifetime warranty. New OEM parts carry a 12-month/12,000-mile warranty.
Worst-case if a used part fails: $150-$300 if a used pedal fails shortly after installation, requiring repeat labor costs and a new part.
What Happens If You Wait — Timeline
- Immediate: The 'Check Engine' and 'Reduced Power' lights illuminate. The vehicle enters 'limp mode,' severely limiting engine RPM and vehicle speed to 15-30 mph. Throttle response is sluggish. (MPG impact: 10-30% (due to inefficient operation)% · Added cost: $100-$300 in potential towing fees if stranded.)
- 0-1 month of continued (not recommended) driving: Driving in limp mode forces the engine and transmission to operate in a stressed state. The PCM defaults to a rich fuel mixture, which begins to foul spark plugs. (MPG impact: 15-40%% · Added cost: $50-$150 in wasted fuel and potential spark plug replacement.)
- 1-3 months of continued driving: Sustained operation with a rich fuel mixture causes the catalytic converter to overwork and overheat. The internal ceramic substrate begins to degrade. (MPG impact: 20-50%% · Added cost: $200-$400 in wasted fuel and accelerated catalytic converter wear.)
- 3+ months of continued driving: Catastrophic failure of the catalytic converter becomes highly likely. The substrate melts, causing a major exhaust blockage and severe power loss. (MPG impact: >50% (vehicle may become undrivable)% · Added cost: $800-$2500 for a catalytic converter replacement, plus the original P2125 repair cost.)
Cost of Not Fixing It
- Immediate: Vehicle is in a dangerous, low-power 'limp mode'. Risk of stalling in traffic or being unable to accelerate to merge safely. (Added cost: Potential towing fees ($100-$300))
- 0-1 month: Continued driving in limp mode puts extra strain on the engine and transmission as they operate outside of normal parameters. (Added cost: Negligible if driven only to a repair shop.)
- 1-6 months: If the fault causes an incorrect fuel mixture, it fouls spark plugs and overheats the catalytic converter. (Added cost: $800-$2500 for catalytic converter replacement.)
Diagnosis Steps
- Read Codes and Review Freeze Frame Data
Use an OBD-II scanner to confirm P2125. Check for companion codes (P2120, P2127, P2138) and review freeze frame data to see exact engine conditions when the fault triggered.
Tools: OBD-II Scanner (Beginner) - Thorough Visual Inspection
Remove the floor mat entirely to rule out physical interference. Inspect the pedal assembly, connector, and wiring for obvious damage, loose pins, or corrosion.
Tools: Flashlight (Beginner) - Perform a 'Wiggle Test' (Pro Tip)
With the ignition on (engine off), monitor live data for APP Sensor 2 voltage. Gently wiggle the wiring harness and connector at the pedal. If the voltage jumps or drops, you have a wiring or connector integrity issue.
Tools: OBD-II Scanner with Live Data (Intermediate) - Test the Sensor Signal Voltage Sweep
Backprobe the APP Sensor 2 signal wire. Slowly press the pedal to the floor and release. The voltage must sweep cleanly (e.g., ~0.5V to ~4.5V) with no spikes or dropouts. Erratic readings confirm a bad sensor.
Tools: Multimeter or OBD-II Scanner, Backprobe Kit (Intermediate) - Check for 5V Reference and Ground
Disconnect the APP sensor. With the key on, use a multimeter on the harness connector to verify a steady 5-volt reference and a solid ground (near-zero resistance). Missing voltage points to a PCM or harness issue.
Tools: Multimeter, Wiring Diagram (Intermediate) - Check for Terminal Tension (GM Specific)
On GM vehicles, use a spare male terminal pin to test the tension of each female terminal in the connector. If the pin feels loose, the terminal requires replacement or re-tensioning per TSB #PIP3783D.
Tools: Terminal Pin Test Kit (Advanced) - Check for Wiring Shorts/Opens
Disconnect the pedal and PCM. Use a multimeter to check the signal wire for continuity end-to-end, shorts to ground, and shorts to power.
Tools: Multimeter, Wiring Diagram (Advanced) - Analyze Live Data PID Correlation
Monitor live data for APP Sensor 1 and 2. On most vehicles, Sensor 2 voltage remains exactly half of Sensor 1 voltage. If this 2:1 ratio breaks during pedal movement, the pedal assembly is faulty.
Tools: OBD-II Scanner with Live Data (Advanced) - Analyze with an Oscilloscope
Graph the voltage patterns of both APP sensors simultaneously. A failing sensor shows micro-glitches or dropouts in the waveform that a standard multimeter misses.
Tools: Automotive Oscilloscope, Backprobe Kit (Professional)
When This Code Triggers (Freeze-Frame Conditions)
- Engine Coolant Temp: 175-210°F (Fully warmed up)
- RPM: 700-2500 (Idle or during light to moderate acceleration)
- Engine Load: 15-50% (Steady-state driving or gentle acceleration)
- Vehicle Speed: Any (Fault triggers at any speed, including at a standstill)
Related Codes
- P2138 — Indicates a 'Voltage Correlation' error between APP1 and APP2. If paired with P2125, the fault lies within the pedal assembly or its direct connector.
- P2120 — Points to a fault in APP Sensor 1 (Circuit 'D'). Seeing P2120 and P2125 together guarantees a shared problem, like a bad main connector or lost 5V reference.
- P2127 — Means 'Circuit Low'. The computer sees a voltage below the minimum threshold (<0.24V). Focus diagnosis on finding a short to ground.
- P2128 — Means 'Circuit High'. The voltage exceeds the maximum threshold (>4.49V). Focus diagnosis on finding a short to a 5V or 12V power source.
Climate & Environmental Factors
- High Humidity: Accelerates corrosion on electrical connector pins and wiring. The driver's footwell traps moisture from wet shoes, making the APP sensor connector vulnerable.
- Road Salt (Cold Climates): Road salt introduced into the footwell via wet boots speeds up corrosion of the APP sensor connector, leading to intermittent signals and circuit failures.
How to Talk to a Mechanic About This Code
Say this: "I have a P2125 code and the vehicle is in reduced power mode. I'd like to schedule a diagnostic. Please focus on testing the accelerator pedal sensor and its wiring circuit. I'd like to rule out a simple connector or wiring issue before replacing the whole pedal assembly."
This signals you know the code relates to the pedal, not the throttle body, and that you're aware common issues are often in the wiring. It steers the technician away from an expensive misdiagnosis.
Avoid saying:
- 'My car is acting weird and won't accelerate'
- 'The check engine light is on, can you just fix it?'
- 'My friend said I need a new throttle body'
Questions to ask before authorizing the repair:
- Did you monitor the live data from both APP sensors while wiggling the harness? What were the results?
- If the pedal assembly needs to be replaced, can you show me the failed voltage sweep test results from the old part?
- Have you checked for any Technical Service Bulletins (TSBs) related to this code for my specific vehicle?
- What is the warranty on the parts and labor for this repair?
Where to Take It: Dealer vs Independent vs Chain
- Dealer:
Best for: Vehicles still under the powertrain warranty, Known issues covered by a TSB or special coverage program, Complex software-related issues requiring a PCM re-flash
Downsides: Highest labor rates, Defaults to replacing the entire pedal assembly even if a simpler wiring fix is possible (Typical cost: +50% vs. baseline) - Independent Shop:
Best fit. An experienced independent technician efficiently diagnoses the sensor, connector, and wiring to find the true root cause without defaulting to the most expensive fix.
Best for: Out-of-warranty vehicles where cost is a factor, Diagnosing electrical faults, as they often have more flexible diagnostic approaches, Vehicles with common, well-documented P2125 issues (like GM trucks)
Downsides: Diagnostic skill varies greatly; choose a shop with excellent reviews for electrical work and ASE-certified technicians. (Typical cost: +0% vs. baseline) - Chain Shop:
Use with caution. Acceptable if you are certain the pedal assembly is faulty and just need it replaced, but not recommended for initial diagnosis.
Best for: Simple, straightforward part replacement if you have already diagnosed the issue yourself.
Downsides: Technician skill is inconsistent for nuanced electrical diagnostics., Lacks the advanced tools or experience to differentiate between a bad sensor and a wiring fault. (Typical cost: -10% vs. baseline)
When to Walk Away From the Repair
If the estimated repair cost exceeds 40-50% of the car's private-party value, and the car has other pending issues, you should pause and evaluate your options.
- Car worth $3500, fix is $400: Fix it. This is a critical safety repair and the cost is well below the threshold.
- Car worth $2000, fix is $1100: Walk away. If the diagnosis points to a rare and expensive PCM failure, the repair cost is too high relative to the car's value.
- Car worth $4500, fix is $400: Fix it, but be mindful of other issues. While the P2125 repair is affordable, consider the overall health of the vehicle before investing more.
What Scan Tool You Need for This Code
Minimum: A scanner that can read and graph live sensor data, specifically for the Accelerator Pedal Position (APP) sensor PIDs.
A basic $20 code reader only shows the P2125 code. It cannot display the live voltage signals from the pedal sensor, which is essential to determine if the sensor is failing or if you have a wiring issue.
Budget: BlueDriver Pro (~$100) — Connects to your smartphone via Bluetooth and allows you to view and graph the APP sensor voltages in real-time. This is the key function needed to perform a 'voltage sweep test' and a 'wiggle test'.
Mid-range: Foxwell NT510 Elite (~$180) — Offers manufacturer-specific diagnostics, providing more accurate data PIDs for your vehicle. It graphs live data and offers bidirectional controls to test circuits.
Professional: Autel MaxiCOM MK808 (~$450) — Provides comprehensive, all-system diagnostics on a tablet interface. It offers fast and detailed live data graphing of multiple PIDs at once, making it easier to see the relationship between APP Sensor 1 and 2.
Rent vs buy: For a one-time fix, auto parts stores read codes for free, but their tools may not show live data. Buying a tool like the BlueDriver is a worthwhile investment that saves money on future repairs.
How to Clear the Code After You Fix It
- Reconnect battery if it was disconnected for the repair.
- Use an OBD-II scan tool to erase the diagnostic trouble codes.
- Perform a complete OBD-II drive cycle to allow readiness monitors to run.
Drive cycle (~20 minutes): A general drive cycle involves: 1) Cold start and idle for 2-3 minutes. 2) Drive in city traffic (25-35 mph) with several stops for 10 minutes. 3) Drive on a highway at a steady speed (55-60 mph) for 5-10 minutes. 4) Let the vehicle cool down.
Readiness monitors affected: Comprehensive Component Monitor, Catalyst Monitor, Oxygen (O2) Sensor Monitor
Before emissions retest: drive at least 50 miles to fully set monitors.
Watch out for:
- Disconnecting the battery clears the code but resets all readiness monitors to 'Not Ready', causing an automatic emissions test failure.
- The code returns immediately if the underlying electrical fault is not repaired.
- Not completing the full drive cycle leaves monitors 'incomplete', preventing a successful smog check.
Will This Fail Emissions / State Inspection?
Yes — this code typically fails an OBD-II emissions inspection.
- California: An illuminated Check Engine Light is an automatic failure. All required readiness monitors must be 'complete' before a test can be passed.
- New York: A vehicle automatically fails the emissions portion of the NYS inspection if the Check Engine Light is on.
- Texas: In counties requiring emissions testing, an illuminated Check Engine Light is an automatic failure. After clearing codes, you can only have one or two 'Not Ready' monitors to pass.
Most Commonly Affected Vehicles
- Chevrolet Silverado, Tahoe, Suburban, Avalanche (2007-2014) — Extremely common on the GMT900 platform. The primary cause is poor terminal tension in the APP sensor connector (TSB #PIP3783D). Fix the connector before replacing the pedal.
- Hyundai Sonata, Elantra, Santa Fe, Tucson (2010-2020) — Frequently caused by a failing internal pedal sensor. Requires direct replacement of the pedal assembly; cleaning the throttle body will not resolve this.
- Honda CR-V, Accord, Civic (2010-2023) — Often appears as P2125-1C. Typically resolved by replacing the pedal module. Part numbers vary strictly by year.
- Ford Fiesta (2011-2013) — Notorious for recurring P2125 codes caused by chafed wires in the main harness between the pedal and ECU, rather than the pedal itself.
- Subaru Forester, Outback, Impreza (2005-2015) — Intermittent limp mode traced to a failing accelerator pedal sensor. Requires live data monitoring to catch the voltage dropouts.
- Nissan Titan, Altima, Murano (2017-2021) — Prone to reduced power warnings. After replacing the pedal sensor, a specific multi-step 'relearn' procedure is required to calibrate the new part with the ECU.
- Jeep Grand Cherokee, Wrangler (2004-2014) — Corrosion and bad connections at the throttle pedal are common causes, particularly in regions with high humidity or road salt usage.
Manufacturer-Specific Notes
- General Motors (Chevrolet/GMC): TSB #PIP3783D addresses poor terminal tension in the accelerator pedal connector for 2007-2014 trucks. Inspect and test the connector before replacing the pedal assembly, as a simple terminal repair solves the problem.
- General Motors (Chevrolet/Buick): Special Coverage Adjustment N182188250 extends the warranty on the accelerator pedal position sensor for certain 2016-2018 Malibu, 2017-2018 LaCrosse, and 2018 Regal models to 10 years or 150,000 miles.
- Nissan: After replacing a pedal sensor, a specific multi-step 'relearn' procedure is required. This involves a sequence of key turns and pedal presses to recalibrate the new sensor with the car's computer.
- Ford: On the Fiesta, this code returns even after replacing the pedal and throttle body. The root cause is a hard-to-find wiring fault, such as chafing in the harness between the components.
- Hyundai/Kia: Some models require a throttle position relearn procedure after pedal replacement. This is accomplished by a specific sequence of turning the key on, waiting, and turning it off to reset the ECU's learned values.
Real Owner Stories
2008 Chevy Silverado, 115K miles - The Classic Connector Wiggle Fix
Owner experienced sudden 'Reduced Engine Power' message and code P2125 while driving. The truck was dangerously slow and could barely accelerate from a stop.
What they tried:
- Initially thought it was a major engine or transmission problem.
- Read online forums pointing to the accelerator pedal connector as a common issue on GMT900 trucks.
Outcome: Owner reached under the dash, unplugged the connector from the gas pedal, inspected it, and plugged it back in firmly. The code cleared and full power was restored. The fix was free and took 5 minutes.
Lesson: On 2007-2014 GM trucks and SUVs, always check the pedal connector first. It's a well-known issue covered by TSB #PIP3783D, and reseating the connector often solves the problem without a new $150 pedal assembly.
2012 Ford Fiesta, 80K miles - The Misdiagnosis Nightmare
Car intermittently entered limp mode with the powertrain warning light on. An OBD scan showed code P2125. The issue disappeared after restarting but returned daily.
What they tried:
- Replaced the accelerator pedal assembly with a brand new Ford part - the problem returned.
- Replaced the entire throttle body assembly - the problem still returned.
- An auto electrician performed live data analysis.
Outcome: The root cause was a chafed wire in the main wiring harness between the pedal and the ECU. Repairing the single wire resolved the issue permanently. The owner spent hundreds on unneeded parts.
Lesson: If replacing the pedal assembly doesn't fix the code, dive into the wiring harness. On the Fiesta, wiring faults are a known, hard-to-find cause for this code.
2013 Hyundai Elantra, 95K miles - A Straightforward Replacement
Check Engine Light came on, car went into limp mode. Codes P2125 and P2138 were present, pointing to a pedal sensor correlation error.
What they tried:
- Clearing the codes did nothing; they returned instantly.
- A visual inspection of the wiring and connector showed no obvious damage.
Outcome: The owner replaced the entire accelerator pedal assembly (Hyundai part #32700-3X100). The repair took 20 minutes with basic hand tools and immediately solved the problem. The car did not require a relearn procedure.
Lesson: When P2125 is paired with P2138, it strongly indicates a failure within the pedal assembly itself. For Hyundai, a direct replacement is a high-confidence DIY repair.
How to Prevent This Code From Triggering
- Use only factory-style or high-quality, custom-fit floor mats with retention hooks. (Always) — Prevents the mat from sliding forward and physically interfering with the pedal's movement or putting stress on the wiring harness.
- Periodically inspect and clean the APP sensor connector. (Every 30,000 miles or during other interior work) — Unplugging it, spraying with electrical contact cleaner, and applying dielectric grease prevents moisture and corrosion from causing intermittent signal loss.
- Be mindful of your feet in the driver's footwell. (Daily habit) — Avoid kicking the wiring harness near the pedal. Repeated physical stress damages the wires or loosens the connector over time.
- Address water leaks into the cabin immediately. (As needed) — Water from a clogged sunroof drain saturates the carpet and promotes corrosion on low-lying electrical connectors like the APP sensor.
Frequently Asked Questions
What does 'Circuit E' mean in the code definition?
'Circuit E' is the SAE standard name for the second accelerator pedal sensor's signal wire (APP Sensor 2). Modern cars use dual sensors for safety redundancy. This code isolates a failure specifically on that second circuit.
What is the most common misdiagnosis for a P2125 code?
The most common mistake is replacing the throttle body. P2125 strictly isolates the accelerator pedal sensor circuit inside the cabin, not the throttle position sensor under the hood. Always diagnose the gas pedal and its wiring first.
Can a dirty throttle body cause a P2125 code?
No. A dirty throttle body causes rough idling or stalling, but it triggers throttle-specific codes (like P2135). P2125 is strictly an electrical circuit failure at the gas pedal.
Is it safe to drive my car with a P2125 code?
No. Your car enters 'limp mode' with severely limited power, making merging or climbing hills dangerous. Drive only a short distance to a safe location or repair shop.
Will clearing the code fix the problem?
No. P2125 indicates a hard electrical fault. The PCM will detect the out-of-range voltage on the next key cycle, instantly returning the code and limp mode.
Can a bad battery cause a P2125 code?
Yes. A weak battery causes low system voltage during startup, making the PCM misinterpret sensor signals. If you experience slow cranking alongside this code, load-test your battery before replacing sensors.
Do I need to perform a 'relearn' procedure after replacing the pedal sensor?
It depends on the manufacturer. GM vehicles typically do not require a relearn, while Nissan and Hyundai often require a specific key-cycle sequence to calibrate the new pedal. Always check your specific vehicle's service manual.
Key Takeaways
- Code P2125 forces your vehicle into a dangerous 5-15 mph 'Limp Mode,' requiring immediate repair before highway driving.
- Do not replace the throttle body; this code specifically isolates an electrical failure in the accelerator pedal assembly or its wiring.
- Perform a free 'wiggle test' on the gas pedal connector while monitoring live voltage data to instantly rule out a loose wire before buying parts.
- On 2007-2014 GM trucks, a known defect with loose connector pins (TSB #PIP3783D) causes the majority of these codes and costs under $30 to fix with a new pigtail.
Helpful Videos
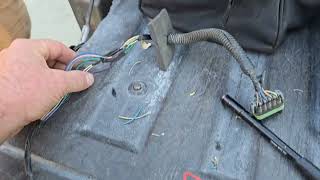

The information in this article is provided for general reference and educational purposes only. Vehicle specifications, procedures, and part compatibility can vary by production date, trim level, and region. Always consult your vehicle's factory service manual and verify part numbers before purchasing or performing repairs. Safety-critical components such as airbags, seat belts, and braking systems should be installed by a qualified professional.
- 🎬 Helpful Videos
- What Does P2125 Mean?
- Can I Drive With P2125?
- Common Causes
- Symptoms
- Diagnostic Flowchart
- Common Fixes & Costs
- DIY vs Professional
- Used vs. New Parts: Buying Guide
- What Happens If You Wait — Timeline
- Cost of Not Fixing It
- Diagnosis Steps
- When This Code Triggers (Freeze-Frame Conditions)
- Related Codes
- Climate & Environmental Factors
- How to Talk to a Mechanic About This Code
- Where to Take It: Dealer vs Independent vs Chain
- When to Walk Away From the Repair
- What Scan Tool You Need for This Code
- How to Clear the Code After You Fix It
- Will This Fail Emissions / State Inspection?
- Most Commonly Affected Vehicles
- Manufacturer-Specific Notes
- Real Owner Stories
- 2008 Chevy Silverado, 115K miles - The Classic Connector Wiggle Fix
- 2012 Ford Fiesta, 80K miles - The Misdiagnosis Nightmare
- 2013 Hyundai Elantra, 95K miles - A Straightforward Replacement
- How to Prevent This Code From Triggering
- Frequently Asked Questions
- What does 'Circuit E' mean in the code definition?
- What is the most common misdiagnosis for a P2125 code?
- Can a dirty throttle body cause a P2125 code?
- Is it safe to drive my car with a P2125 code?
- Will clearing the code fix the problem?
- Can a bad battery cause a P2125 code?
- Do I need to perform a 'relearn' procedure after replacing the pedal sensor?
- Key Takeaways
- 🎟️ Get 5% Off