

P2122 on 2015-2019 Ram 2500: Accelerator Pedal Sensor Causes & Fixes
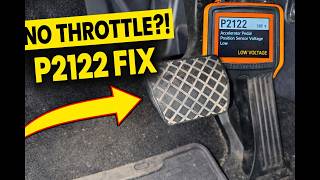
This code means your truck's computer sees a low voltage signal from the accelerator pedal sensor, typically below 0.17 volts. The most common fix is replacing the entire accelerator pedal assembly, which costs around $200-$300 for the part. However, always check the wiring and connector first, as damage from the adjustable pedal mechanism or chafing is a well-documented issue on these trucks.
- P2122 on a Ram 2500 points to a problem with the accelerator pedal sensor, usually causing limp mode.
- Before buying a new pedal, ALWAYS inspect the wiring harness for damage and check the connector for issues, as this is a common problem highlighted by Ram's own service bulletins. Specifically check for pinching by the adjustable pedal motor.
- The most likely fix is replacing the entire accelerator pedal assembly, which is a straightforward DIY job for most owners. Ensure you buy the correct part for models with or without adjustable pedals.
- This code is often paired with P2127, which points to the second sensor in the same pedal assembly.
What's Unique About the 2015-2019 Ram 2500
On this generation of Ram 2500, the factory Technical Service Bulletins (TSBs) strongly emphasize that wiring and connector issues are common causes for P2122. Technicians are specifically warned to check the wiring harness for damage and ensure the connector is secure before replacing the accelerator pedal assembly. [Bulletin #9004225, Bulletin #9003413] A frequently cited real-world failure is the wiring harness getting pinched or chafed by the power-adjustable pedal mechanism, leading to a short. 🎬 Watch: Why it's often the wiring, not the pedal assembly. The TSBs also note that simply disconnecting the pedal during other diagnostic work can trigger this code, so it's crucial to confirm the code is active and not a result of recent service. [Bulletin #9004225, Bulletin #9003413]
Diagnostic Flowchart
Tap your situation to follow the diagnostic path that matches what you're seeing on this vehicle.
Symptoms You May Notice
- Check Engine Light is on
- Electronic Throttle Control (ETC) or "lightning bolt" warning light is on
- Vehicle enters "limp mode" with severely reduced engine power and limited speed
- No throttle response or delayed acceleration, sometimes described as a "dead pedal"
- Engine stumbles or hesitates during acceleration
- Sudden loss of power while driving, which may return intermittently
- Replacing the throttle body. This code relates to the accelerator pedal sensor in the cabin, not the throttle body on the engine.
- Replacing the accelerator pedal assembly without first inspecting the wiring harness and connector, as specifically warned against in TSBs and confirmed by owner experiences with pinched wires. [Bulletin #9004225, Bulletin #9003413, 19]
Most Likely Causes
- Faulty Accelerator Pedal Position (APP) Sensor 🔴 High Probability The sensor is integrated into the accelerator pedal assembly. Like any electronic component, it can wear out over time, causing internal circuits to fail. It is critical to order the correct part based on whether the truck has power-adjustable pedals, as the parts are not interchangeable.
How to confirm: Use a scan tool with live data capability to monitor the voltage from APP sensor circuits 1 and 2 as you press the pedal. A faulty sensor will show erratic readings, dropouts, or a voltage that doesn't change smoothly. The voltage for the affected circuit will typically be stuck below 0.25V.
Typical fix: Replace the entire accelerator pedal assembly. This is a simple DIY job requiring only a 10mm socket and about 20-30 minutes.
Est. part cost: $200-$300 - Wiring Harness or Connector Issue 🟡 Medium Probability As highlighted by manufacturer TSBs, the wiring harness leading to the pedal can become chafed, or pins in the connector can become loose or corroded. [Bulletin #9004225, Bulletin #9003413] A very common failure point is the harness getting pinched by the adjustable pedal mechanism's motor, causing a short in the wires. Owners have fixed this by repairing the wires and using a zip-tie to secure the harness away from the moving parts.
How to confirm: Visually inspect the entire length of the wiring harness from the pedal to the firewall for any signs of damage, chafing, or pinching, paying close attention to the area around the adjustable pedal motor. Unplug the connector and check for corrosion, moisture, or bent/loose pins.
Typical fix: Repair the damaged section of wire or clean/replace the connector pigtail. Secure the harness away from any moving parts with a zip tie.
Est. part cost: $10-$50 - Faulty Powertrain Control Module (PCM) ⚪ Low Probability
How to confirm: This should be the last resort after thoroughly ruling out the pedal sensor and all wiring. A professional diagnosis is required to confirm a faulty PCM, which involves checking for proper 5-volt reference signals and continuity from the PCM to the sensor.
Typical fix: Replace and reprogram the PCM.
Est. part cost: $500-$1000+
Diagnosis Steps
- Read all fault codes using an OBD-II scanner.
- Check for Technical Service Bulletins (TSBs) related to P2122 for your specific vehicle. The known TSBs are #9004225 and #9003413.
- Visually inspect the accelerator pedal wiring harness for any signs of chafing, pinching, or damage, especially near the adjustable pedal mechanism.
- Disconnect the electrical connector at the accelerator pedal. Inspect for corrosion, moisture, or loose/damaged pins. Ensure it is fully seated when reconnected.
- If you have a scan tool with live data, monitor the voltage readings for APP Sensor 1 and APP Sensor 2. Press the pedal slowly from fully released to fully depressed. The voltage should change smoothly without any dropouts or spikes. A P2122 fault will typically show one voltage reading stuck below ~0.25V.
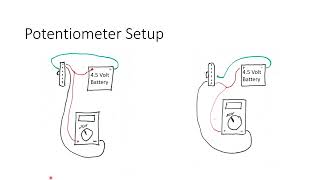
- Using a multimeter, check for 5V reference at the connector. With the ignition on (engine off), measure voltage between the 5-volt supply pin and the ground pin. It should be between 4.5 and 5.2 volts.
- Check the signal wire for continuity. With the ignition off and the pedal and PCM disconnected, measure the resistance of the APP Sensor 1 signal circuit from the pedal connector to the PCM connector. Resistance should be below 5.0 ohms.
- If the wiring and connector are confirmed to be good and the live data shows an erratic or non-responsive sensor, the accelerator pedal assembly is faulty.
- After replacing the pedal, use a professional scan tool to perform the 'ETC RELEARN' function to calibrate the new sensor. If a scan tool is unavailable, a manual relearn may work: with the key on and engine off, slowly press the pedal to the floor and then slowly release it. Turn the key off, then start the vehicle.
- If the pedal and wiring are good, the issue may be with the PCM, which requires professional diagnosis.
Parts You'll Likely Need
- Accelerator Pedal Assembly
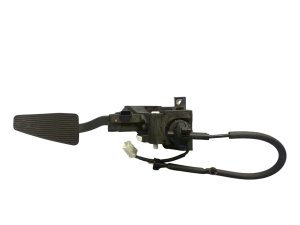
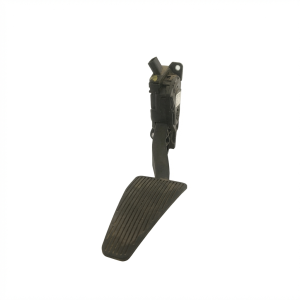
(OEM #68163998AB (For models with adjustable pedals, verify for your specific VIN))— This assembly contains the integrated Accelerator Pedal Position (APP) sensor, which is the most common point of failure for this code after wiring is ruled out. It is critical to get the correct part for your truck's configuration (with or without adjustable pedals).
Trusted brands: Mopar, Dorman, Standard Motor Products, Carquest
OEM price range: $250-$350
Aftermarket price range: $200-$250
Related Codes That Often Appear With This One
- P2127 — This code indicates a 'Low Input' for the second circuit ('E') of the APP sensor. Since both sensors are in the same assembly, it's common for them to fail together or for a wiring issue to affect both circuits. The TSBs mention these codes appearing together. [Bulletin #9004225, Bulletin #9003413]
- P2299 — This code for 'Brake Pedal Position / Accelerator Pedal Position Incompatible' can be set alongside APP sensor codes. The TSBs for this vehicle specifically mention this code in the context of accelerator pedal diagnosis. [Bulletin #9004225, Bulletin #9003413]
- P2121 — This code indicates a performance/rationality error in the pedal sensor circuit, rather than a simple low voltage. It can appear alongside P2122 if the sensor is failing intermittently or providing erratic signals.
Technical Service Bulletins (TSBs) & Recalls
- 9004225: Warns that P2122 can be set by disconnecting the pedal connector during diagnosis and advises checking wiring before replacing the pedal.
- 9003413: Similar to the above TSB, emphasizes checking wiring and connectors and ensuring the code is active before replacing the accelerator pedal.
Platform-Specific Known Issues
- TSB #9004225 and #9003413 explicitly state to check wiring and connectors before replacing the accelerator pedal, as disconnecting the pedal can set this code. They advise ensuring the code is active before proceeding with replacement.
- A common point of failure is the wiring harness for the pedal getting pinched by the motor for the power-adjustable pedals. Owners have documented this with photos and videos, showing a repair that involves freeing the wire and securing it with a zip-tie.
- It is critical to differentiate between pedals for trucks with and without the power-adjustable pedal option. They are not interchangeable.
Mechanic-Grade Diagnostic Values
- APP Sensor 1 ('D' Circuit) Voltage at Idle — expected: Approx. 0.45V.. Failure: Voltage is below 0.25V.
- APP Sensor 1 ('D' Circuit) Voltage at Wide Open Throttle — expected: Above 4.6V.. Failure: Voltage does not rise smoothly or fails to reach the expected level.
- APP Sensor 2 ('E' Circuit) Voltage at Idle — expected: 0.19V to 0.27V.. Failure: Voltage is outside the expected range.
- APP Sensor 5-Volt Supply — expected: 4.5V to 5.2V.. Failure: Voltage is outside this range, indicating a PCM or wiring issue.
- Signal Circuit Resistance — expected: Below 5.0 ohms.. Failure: Resistance is above 5.0 ohms, indicating an open or high-resistance in the wire.
Scan Tool Commands That Help
- wiTECH or equivalent professional scan tool: ETC RELEARN — This function must be performed after replacing the Accelerator Pedal Position (APP) sensor assembly to calibrate the new sensor's values with the Powertrain Control Module (PCM).
Wiring & Ground Locations
- Accelerator Pedal Connector (6-Pin) — At the top of the accelerator pedal assembly, under the driver's side dashboard.. This is the primary connection point for testing. Knowing the pinout allows for precise measurement of supply voltage, ground, and the signal wire specific to code P2122.
- Pin 2 (BR/WT wire) - APP Signal 1 — In the 6-pin accelerator pedal connector.. This is the specific signal wire for the 'D' circuit. A low voltage reading on this pin is what triggers the P2122 code. Testing should be focused here.
- Pin 1 (PK/YL wire) and Pin 6 (YL/PK wire) — In the 6-pin accelerator pedal connector.. These are the two 5-volt supply circuits from the PCM. Verifying correct voltage here is a critical first step before condemning the sensor.
- Pin 3 (BR/YL wire) and Pin 4 (BR/VT wire) — In the 6-pin accelerator pedal connector.. These are the sensor ground return circuits. A poor ground connection on these pins can cause incorrect voltage readings.
Real Owner Repair Stories
- YouTube channel 'Parts shooter' (Chrysler vehicle with adjustable pedals (demonstrates identical system to Ram)) — P2122 code, delayed acceleration, limp mode.
❌ Tried (didn't work) A previous shop had replaced the throttle body, which did not fix the issue.
✅ What actually fixed it The wiring harness for the accelerator pedal was found to be pinched and chafed by the adjustable pedal motor. The mechanic repaired the damaged wires and used a zip-tie to secure the harness away from the moving parts, which resolved the code. - RamForum.com user (2019 Ram 1500) — ETC warning light, limp mode, stored codes P2122 and U1428.
❌ Tried (didn't work) The issue occurred suddenly while driving.
✅ What actually fixed it A temporary fix to get out of limp mode was disconnecting the negative battery terminal and stepping on the brake pedal for ten seconds to drain residual power. This allowed the truck to run fine temporarily, but the P2122 code remained stored as 'Permanent', indicating the underlying fault was not resolved.
Helpful Videos
We Have This Part in Stock


The information in this article is provided for general reference and educational purposes only. Vehicle specifications, procedures, and part compatibility can vary by production date, trim level, and region. Always consult your vehicle's factory service manual and verify part numbers before purchasing or performing repairs. Safety-critical components such as airbags, seat belts, and braking systems should be installed by a qualified professional.
- Ram 2500:
- 🎬 Helpful Videos
- 🛍️ Shop This Part
- What's Unique About the 2015-2019 Ram 2500
- Diagnostic Flowchart
- Symptoms You May Notice
- Most Likely Causes
- Diagnosis Steps
- Parts You'll Likely Need
- Related Codes That Often Appear With This One
- Technical Service Bulletins (TSBs) & Recalls
- Platform-Specific Known Issues
- Mechanic-Grade Diagnostic Values
- Scan Tool Commands That Help
- Wiring & Ground Locations
- Real Owner Repair Stories
- 🎟️ Get 5% Off