

OBD-II Code P2122: Accelerator Pedal Position (APP) Sensor 'D' Circuit Low
What P2122 means, why it triggers, and how to fix it
- Code P2122 triggers when the accelerator pedal sensor's 'D' circuit sends a voltage signal below 0.2V to the engine computer.
- Replacing the entire accelerator pedal assembly resolves this code in over 70% of cases, costing between $120 and $470.
- Chafed wiring harnesses and water-corroded connectors—especially on 2015-2021 Ford and GM trucks—frequently mimic a failed pedal sensor.
- Driving with P2122 is dangerous; the vehicle forces a 30-40 mph 'limp mode' and causes sudden loss of throttle response in traffic.
- Verify the sensor is faulty by checking for a steady 5V reference and ground at the pedal connector before buying replacement parts.
What Does P2122 Mean?

Code P2122 means the Powertrain Control Module (PCM) detects the voltage from the accelerator pedal position sensor's 'D' circuit is too low (typically under 0.2 volts). Because the computer cannot determine how hard you are pressing the gas pedal, it disables normal throttle control to prevent unintended acceleration.
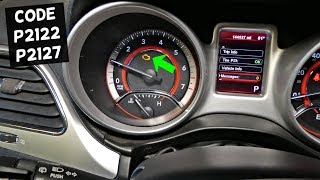
🎬 Watch: P2122 code explained and how to fix throttle response.Technical definition: The SAE/OBD-II definition is 'Throttle/Pedal Position Sensor/Switch 'D' Circuit Low Input'. This indicates the signal from the primary sensor ('D' or APP1) in the accelerator pedal assembly falls below the specified minimum voltage threshold (usually <0.2V) for a set duration (e.g., 200 milliseconds).
Can I Drive With P2122?
No — Do Not Drive. Your vehicle enters 'limp mode,' severely limiting speed to 30-40 mph and disabling normal acceleration. You risk sudden, complete loss of throttle response in traffic, creating a major collision hazard. Limp directly to a nearby repair shop, but do not attempt highway driving or ignore the issue.
Common Causes

- Faulty Accelerator Pedal Assembly (APP Sensor) (Very Common) — Internal wear and tear on the sensor's potentiometer causes voltage dropouts. Because the sensor is integrated into the pedal, the entire accelerator pedal assembly requires replacement. 🎬 Watch: How to test and replace the pedal position sensor.
- Damaged Wiring Harness or Connectors (Common) — Wires chafe against metal brackets (especially on GM and Ford trucks), causing a short to ground. Connectors at the pedal also suffer from poor pin tension or water intrusion from wet floor mats.
- Low System Voltage (Rare) — A failing battery (under 12V) or weak alternator reduces the 5V reference power supplied to the APP sensor, causing an artificially low input signal.
- Faulty Powertrain Control Module (PCM) (Very Rare) — The vehicle's main computer suffers an internal hardware failure or requires a software calibration update to correctly read the sensor voltage.
Symptoms

- Limp Mode and Loss of Acceleration — The PCM restricts engine RPMs and limits top speed to 30-40 mph. The engine hesitates, accelerates erratically, or ignores gas pedal input entirely.
- Erratic Idle and Stalling — Idle speed surges unpredictably or the engine stalls when releasing the gas pedal due to conflicting throttle position commands.
- Check Engine Light and ETC Light (also visible on scanner) — The Check Engine Light illuminates immediately. Many vehicles also display a wrench or lightning bolt icon indicating an Electronic Throttle Control (ETC) fault.
Diagnostic Flowchart

Tap your situation to follow the diagnostic path that matches what you're seeing on this code.
Common Fixes & Costs
- Replace Accelerator Pedal Assembly
— Parts: $70-$300, Labor: $50-$170, ~0.7 hr book time
(DIY)
Ford F-150 (2015-2017, w/ adj. pedals): OEM Consult Dealer (Alt: Standard Motor Products APS584, NGK AD0415)
Chevy Silverado 1500 (2007-2014): OEM GM 25832864 (Alt: Dorman 699-105, NTK AD0456)
Ram 1500 (2013-2018, w/o adj. pedals): OEM Mopar 68043161AD (Alt: Standard Motor Products APS399, Wells 5S13063) - Repair Damaged Wiring or Connectors — Parts: $10-$50, Labor: $100-$250, ~1.5 hr book time (Intermediate)
- Update or Reprogram the PCM — Parts: $0, Labor: $100-$200, ~1.2 hr book time (Professional)
- Replace the Powertrain Control Module (PCM) — Parts: $800-$1200, Labor: $150-$250, ~2 hr book time (Professional)
Used vs. New Parts: Buying Guide
When a used part is worth it: A used OEM accelerator pedal assembly is a cost-effective option for older, high-mileage vehicles where a new OEM part exceeds $200.
Donor-vehicle mileage cap: roughly under 80000 miles for the part to have meaningful remaining life.
Donor quality checklist:
- Verify the part number matches exactly, including options for adjustable pedals.
- Inspect the electrical connector for bent pins, corrosion, or cracked plastic.
- Prefer donors from dry climates to minimize corrosion risk.
Decision logic:
- If Vehicle is newer or has under 80k miles → Buy a new OEM or high-quality aftermarket part for maximum reliability.
- If Vehicle has over 150k miles and the new part is over $200 → A low-mileage used part is an acceptable risk to save money.
- If You prioritize safety and peace of mind → Always purchase a new part with a warranty.
Warranty tradeoff: Used parts carry a 30-90 day warranty covering only the part. New aftermarket parts offer 1-year to lifetime warranties. New OEM parts carry a 1-year warranty.
Worst-case if a used part fails: $150-$500 if a used part fails, requiring a second replacement part and duplicate labor costs.
What Happens If You Wait — Timeline
- 0-1 month (Intermittent): Code P2122 appears randomly, often triggered by temperature changes or bumps. Limp mode occurs occasionally but clears after restarting the vehicle. (MPG impact: 0-5%% · Added cost: $0-$30 in wasted fuel.)
- 1-3 months (Frequent): Limp mode happens multiple times a week. The vehicle becomes highly unreliable for highway driving. The driver learns to 'feather' the pedal to avoid dead spots. (MPG impact: 5-10%% · Added cost: $30-$100 in wasted fuel and increased transmission stress.)
- 3+ months (Constant): The fault is constant. The vehicle enters limp mode immediately upon starting. Throttle response is dangerously unpredictable, rendering the vehicle undrivable. (MPG impact: 10-20%% · Added cost: High risk of collision. Sustained inefficient combustion contributes to premature catalytic converter wear.)
Cost of Not Fixing It
- Immediate: Significant safety risk due to sudden power loss or limp mode in traffic. Unpredictable acceleration and stalling occur. (Added cost: High risk of collision.)
- 1-6 months: Erratic throttle signals cause harsh shifting, stressing the transmission and engine mounts. Fuel economy decreases by 5-10%. (Added cost: $50-$200 in wasted fuel, plus potential driveline repair costs.)
- 6+ months: Long-term poor engine control contributes to premature catalytic converter wear from a consistently incorrect air/fuel mixture. (Added cost: $1200-$2800+ for catalytic converter replacement.)
Diagnosis Steps
- Verify Code and Freeze Frame
Plug an OBD-II scanner into the port to confirm P2122. Note related codes (P2123, P2127, P2138). Review freeze frame data to see the exact RPM and speed when the fault occurred.
Tools: OBD-II Scanner (Beginner) - Visual Inspection of Pedal Area
Inspect the wiring harness and connector at the accelerator pedal. Look for frayed wires, bent pins, or corrosion. Check the driver's footwell for dampness or water intrusion.
Tools: Flashlight (Beginner) - Test Battery Voltage
Check battery voltage with the vehicle off. It must read between 12.4V and 12.7V. Low system voltage causes modules to malfunction and set false low-input codes.
Tools: Multimeter (Beginner) - Live Data Voltage Sweep
Monitor the 'APP Sensor D' PID on a scanner (Key On, Engine Off). Voltage should sit between 0.5V-1.1V released, and rise smoothly to 4.0V-4.5V when pressed. Dropouts or a reading stuck below 0.2V indicate a fault.
Tools: Advanced OBD-II Scanner (Intermediate) - Check 5V Reference and Ground
Disconnect the pedal connector (Key On). Check for a steady 4.9V-5.1V reference signal from the PCM. Check the ground wire for continuity to the chassis (less than 1 ohm). Missing voltage points to a wiring or PCM issue.
Tools: Multimeter, Wiring Diagram (Advanced) - Perform a Wiggle Test
While monitoring the APP sensor voltage, wiggle the wiring harness between the pedal and the firewall. If voltage jumps or drops, you have located an intermittent break or short in the wiring.
Tools: Advanced OBD-II Scanner or Multimeter (Advanced) - Check for Short to Ground
Disconnect the pedal and PCM connectors. Check for continuity between the APP sensor signal wire and chassis ground. Continuity (near zero ohms) confirms the wire is shorted and requires repair.
Tools: Multimeter (Advanced)
When This Code Triggers (Freeze-Frame Conditions)
- Engine Coolant Temp: 180-210°F (82-99°C) (Faults frequently occur when the engine is fully warmed up and cabin temperatures fluctuate.)
- RPM: 1500-2500 RPM (Sets during steady-state driving where the pedal is held at a constant, partial position, exposing a worn 'dead spot' in the sensor.)
- Engine Load: 25-50% (Occurs under light to moderate engine load, consistent with maintaining speed on a flat road.)
- Vehicle Speed: 40-65 mph (Triggered during highway or steady arterial road driving.)
Related Codes
- P2121 — Indicates a 'Range/Performance' problem. The signal is erratic or illogical, rather than stuck low like P2122.
- P2123 — The direct opposite of P2122. Indicates a 'Circuit High Input' (>4.8V), usually caused by a short to power rather than a short to ground.
- P2127 — Identical 'Circuit Low' code for the redundant 'E' sensor. Seeing P2122 and P2127 together points to a shared failure like a bad ground or completely failed pedal assembly.
- P2138 — A 'Voltage Correlation' error. Sets when the 'D' sensor drops low (P2122) while the 'E' sensor reads normally, proving the sensors disagree.
Climate & Environmental Factors
- Humidity and Moisture: Water from wet floor mats or windshield leaks pools in the driver's footwell, corroding the pedal connector and causing a low voltage short.
- Cold Weather: Metal contracts in freezing temperatures, worsening loose connector pins or marginally chafed wires, increasing resistance enough to trigger the code.
How to Talk to a Mechanic About This Code
Say this: "I have a P2122 code with limp mode and would like to schedule a diagnostic. Before replacing the pedal assembly, please test the 5V reference, ground, and signal wire at the pedal connector to confirm if the issue is the sensor or the circuit."
This signals you understand the common failure points (sensor vs. wiring) and prevents a shop from replacing the most expensive part without proper diagnosis.
Avoid saying:
- 'Just fix whatever's wrong'
- 'My check engine light is on, can you look at it?'
- 'Whatever you recommend'
Questions to ask before authorizing the repair:
- Did the live data show a smooth voltage increase when sweeping the pedal, or were there dropouts?
- Did you check for any Technical Service Bulletins (TSBs) related to the wiring harness for my specific vehicle?
- If recommending a pedal replacement, did you confirm the 5-volt reference and ground at the connector were good?
- What is the warranty on the recommended repair and the part itself?
Where to Take It: Dealer vs Independent vs Chain
- Dealer:
Choose the dealer if the issue involves a known TSB or if the vehicle is under warranty. Otherwise, it is the most expensive option.
Best for: Vehicles under warranty, Repairs involving a known Technical Service Bulletin (TSB), When a PCM software update or replacement is required
Downsides: Highest labor rates, May replace an entire assembly rather than repair a wire (Typical cost: +50% vs. baseline) - Independent Shop:
Best fit for most cases. A reputable independent shop diagnoses pedal, wiring, and connector issues effectively at a lower cost than a dealer.
Best for: Out-of-warranty vehicles, Diagnosing and repairing electrical faults like wiring shorts or bad connectors, Getting a second opinion on a dealership quote
Downsides: Diagnostic skill varies; vet the shop's reputation for electrical work, May lack access to the latest manufacturer software updates (Typical cost: +0% vs. baseline) - Chain Shop:
High risk. They may replace a pedal assembly but fail to diagnose an underlying wiring issue, leading to wasted money on unneeded parts.
Best for: Simple part replacements like batteries or brakes
Downsides: Technician skill and diagnostic equipment are inconsistent, Lacks experience for complex wiring diagnostics (Typical cost: -10% vs. baseline)
When to Walk Away From the Repair
If the estimated repair cost exceeds 50% of the car's private-party value, seriously consider selling the vehicle.
- Car worth $4000, fix is $450: Fix it. The repair cost is a small fraction of the vehicle's value.
- Car worth $3000, fix is $1500: Walk away. The repair costs 50% of the car's value. Unless the car is in perfect condition, it is not a wise investment.
- Car worth $15000, fix is $1200: Fix it. While a significant cost, it restores a valuable asset.
What Scan Tool You Need for This Code

Minimum: A scanner that reads and graphs live sensor data, specifically the Accelerator Pedal Position PIDs.
A basic $30 code reader only shows the P2122 code. It cannot display the live voltage from the pedal sensor, which is essential for diagnosing dropouts or dead spots.
Budget: BlueDriver Bluetooth Pro (~$120) — Pairs with your smartphone to view and graph live voltage data from the APP sensor. Provides a database of verified fixes.
Mid-range: Foxwell NT510 Elite (~$180) — A handheld tool providing live data graphing and bi-directional tests to activate components.
Professional: Autel MaxiCOM MK808Z (~$450) — A professional tablet scanner offering comprehensive diagnostics, fast live data graphing, and detailed data for complex electrical issues.
Rent vs buy: For a one-time repair, borrow a capable scanner from an auto parts store loaner program. Buy a scanner only if you plan to perform regular diagnostics.
How to Clear the Code After You Fix It
- Use an OBD-II scan tool to clear all fault codes.
- Ensure the fuel tank is between 30% and 70% full.
- Perform a complete drive cycle to allow the vehicle's readiness monitors to run.
Drive cycle (~30 minutes): Start with a cold soak (vehicle off for 8+ hours). Idle for 3 minutes. Drive for 15 minutes in mixed stop-and-go traffic. Drive for 10 minutes at a steady highway speed (55-60 mph). Allow the vehicle to cool down.
Readiness monitors affected: Catalyst Monitor, Oxygen (O2) Sensor Monitor, Comprehensive Component Monitor
Before emissions retest: drive at least 50 miles to fully set monitors.
Watch out for:
- Disconnecting the battery resets all readiness monitors, guaranteeing an emissions test failure.
- The code returns immediately if the underlying electrical fault remains unfixed.
- Failing to drive at steady highway speeds leaves monitors 'Not Ready'.
Will This Fail Emissions / State Inspection?
Yes — this code typically fails an OBD-II emissions inspection.
- California: An illuminated Check Engine Light results in an automatic Smog Check failure. A full drive cycle must be completed after repairs to set readiness monitors.
- New York: An active P2122 code causes an automatic failure during the OBD-II scan portion of the NYS inspection.
- Texas: In emissions-testing counties, an illuminated Check Engine Light is an automatic failure. Driving after a code clear is necessary to set readiness monitors.
Most Commonly Affected Vehicles
- Ford F-150, Fusion, Focus, Escape (2010-2022) — TSB SSM 46829 (2015-2017 F-150) highlights harness chafing on the brake pedal bracket. TSBs 50116/50245 (2020-2021 Escape) point to steering shaft chafing.
- Chevrolet / GMC Silverado, Suburban, Tahoe, Traverse (2007-2021) — TSB 21-NA-149 (2019-2021 Silverado) points to a chafed engine harness. TSB PIP3783D (2007-2014 SUVs) notes poor pin tension in the APP connector.
- Dodge / Ram Ram 1500/2500/3500, Durango (2005-2018) — Frequently reported alongside codes P2127 and P2138, strongly indicating a failed accelerator pedal assembly.
- Hyundai Sonata, Elantra, Tucson, Santa Fe (2008-2018) — High failure rate of the accelerator pedal assembly itself.
- Kia Optima, Sorento, Sportage, Forte (2008-2020) — Similar to Hyundai, requires replacement of the integrated pedal assembly.
- Nissan Altima, Sentra, Titan (2006-2017) — Requires a 'Throttle Valve Closed Position Learning' procedure via scan tool after pedal replacement.
- Subaru WRX, Forester, Impreza (2008-2016) — Prone to difficult-to-diagnose wiring harness issues in addition to pedal failures.
- Volkswagen Jetta, Golf, Scirocco (2006-2017) — Triggers the EPC (Electronic Power Control) light and limp mode. Diagnosis often points to wiring issues.
Manufacturer-Specific Notes
- General Motors (Chevrolet/GMC): Highly prone to wiring issues. Always check for chafed harnesses (TSB 21-NA-149) and poor connector pin tension (TSB PIP3783D) before replacing the pedal.
- Nissan: Requires a 'Throttle Valve Closed Position Learning' and 'Idle Air Volume Learning' scan tool procedure after replacing the pedal assembly to recalibrate the system.
- Hyundai / Kia: The two internal APP sensors maintain a strict 2:1 voltage ratio. Monitoring this ratio on a scan tool easily identifies a failing sensor.
- Ford: On 2015-2017 F-150s, the harness frequently chafes near the brake pedal (TSB SSM 46829). Inspect this area first.
Real Owner Stories
2016 Ford F-150 with Intermittent P2122
Vehicle intermittently entered limp mode with codes P2122 and P2138. The issue was unpredictable.
Outcome: The technician found the wiring harness chafing behind the brake pedal bracket (Ford TSB SSM 46829). Repairing and rerouting the harness permanently resolved the codes.
Lesson: Always check for manufacturer Technical Service Bulletins (TSBs) and inspect the wiring harness before replacing the expensive pedal assembly.
2012 Chevy Silverado with P2122
Owner experienced 'Reduced Engine Power' warnings and a P2122 code when driving over bumps.
Outcome: Voltage dropped out when wiggling the connector. Tightening the female pin terminals in the connector (addressing GM TSB #PIP3783D) fixed the issue without a new pedal.
Lesson: Intermittent electrical faults usually stem from poor connections. A wiggle test confirms connector issues before buying parts.
How to Prevent This Code From Triggering
- Apply Dielectric Grease to the APP Connector (Any time the connector is disconnected for service.) — Seals the electrical connection from moisture and dirt, preventing pin corrosion that causes increased resistance and low voltage signals.
- Secure Floor Mats (Weekly or after cleaning.) — Prevents thick mats from physically interfering with pedal movement and stops trapped moisture (snow, rain) from corroding the low-mounted APP sensor connector.
- Inspect Wiring Harnesses (During routine maintenance.) — Securing the harness under the dash with zip ties or anti-abrasion tape prevents chafing against sharp metal brackets.
Frequently Asked Questions
How much does it cost to fix code P2122?
Replacing the accelerator pedal assembly costs $120-$470. Wiring repairs average $100-$250, while professional diagnostics run $80-$155. Rare PCM replacements exceed $1,000.
What are the most common misdiagnosis mistakes for P2122?
The biggest mistake is immediately replacing the accelerator pedal assembly without testing the circuit. A wiring short, corroded connector, or bad ground causes the exact same code. Always verify the 5V reference and ground before buying parts.
Can I fix P2122 myself?
Replacing the accelerator pedal assembly is a straightforward job for DIYers, requiring basic hand tools and taking under an hour. However, correctly diagnosing the root cause requires electrical testing skills and a multimeter. Take the vehicle to a shop if you lack experience back-probing live circuits.
My floor mats were wet, could that cause a P2122 code?
Yes. The accelerator pedal sensor and its electrical connector sit in the driver's footwell. Water intrusion from a windshield leak or wet floor mats corrodes the connector, causing a low voltage signal.
What is the difference between the APP sensor and the Throttle Position Sensor (TPS)?
The APP sensor sits on your gas pedal and tells the computer how far you press it. The Throttle Position Sensor (TPS) sits on the throttle body in the engine bay and confirms the actual position of the throttle plate. They work together as checks and balances.
Will clearing the code fix the problem?
No. Clearing the code turns off the check engine light temporarily, but it returns immediately once the PCM detects the low voltage again. You must fix the underlying electrical or mechanical fault.
Can a bad ground cause P2122?
Yes. The APP sensor circuit relies on a solid ground connection to provide an accurate voltage reading. A corroded or loose ground wire increases circuit resistance, causing the PCM to see a lower-than-normal voltage and trigger P2122.
Key Takeaways
- Code P2122 triggers when the accelerator pedal sensor's 'D' circuit sends a voltage signal below 0.2V to the engine computer.
- Replacing the entire accelerator pedal assembly resolves this code in over 70% of cases, costing between $120 and $470.
- Chafed wiring harnesses and water-corroded connectors—especially on 2015-2021 Ford and GM trucks—frequently mimic a failed pedal sensor.
- Driving with P2122 is dangerous; the vehicle forces a 30-40 mph 'limp mode' and causes sudden loss of throttle response in traffic.
- Verify the sensor is faulty by checking for a steady 5V reference and ground at the pedal connector before buying replacement parts.
Helpful Videos

The information in this article is provided for general reference and educational purposes only. Vehicle specifications, procedures, and part compatibility can vary by production date, trim level, and region. Always consult your vehicle's factory service manual and verify part numbers before purchasing or performing repairs. Safety-critical components such as airbags, seat belts, and braking systems should be installed by a qualified professional.
- 🎬 Helpful Videos
- What Does P2122 Mean?
- Can I Drive With P2122?
- Common Causes
- Symptoms
- Diagnostic Flowchart
- Common Fixes & Costs
- Used vs. New Parts: Buying Guide
- What Happens If You Wait — Timeline
- Cost of Not Fixing It
- Diagnosis Steps
- When This Code Triggers (Freeze-Frame Conditions)
- Related Codes
- Climate & Environmental Factors
- How to Talk to a Mechanic About This Code
- Where to Take It: Dealer vs Independent vs Chain
- When to Walk Away From the Repair
- What Scan Tool You Need for This Code
- How to Clear the Code After You Fix It
- Will This Fail Emissions / State Inspection?
- Most Commonly Affected Vehicles
- Manufacturer-Specific Notes
- Real Owner Stories
- 2016 Ford F-150 with Intermittent P2122
- 2012 Chevy Silverado with P2122
- How to Prevent This Code From Triggering
- Frequently Asked Questions
- How much does it cost to fix code P2122?
- What are the most common misdiagnosis mistakes for P2122?
- Can I fix P2122 myself?
- My floor mats were wet, could that cause a P2122 code?
- What is the difference between the APP sensor and the Throttle Position Sensor (TPS)?
- Will clearing the code fix the problem?
- Can a bad ground cause P2122?
- Key Takeaways
- 🎟️ Get 5% Off