

OBD-II Code P2121: Accelerator Pedal Position Sensor 'D' Circuit Range/Performance
The Ultimate Guide to Diagnosing and Fixing P2121
- Code P2121 triggers 'limp mode,' capping your vehicle's speed at 30-50 mph due to a failing accelerator pedal sensor.
- Replacing the accelerator pedal assembly fixes this code 80% of the time, costing between $150 and $475 for parts and labor.
- Inspect the pedal area for bunched floor mats and perform a 'wiggle test' on the wiring harness before buying any replacement parts.
- For Chevrolet and GMC owners, cleaning a carbon-caked throttle body often resolves P2121 without touching the pedal assembly.
- Search for Technical Service Bulletins (TSBs) using your VIN, as manufacturers frequently issue PCM software updates to fix overly sensitive pedal codes.
What Does P2121 Mean?

P2121 means the Powertrain Control Module (PCM) detects an irrational signal from the 'D' circuit of the accelerator pedal. Modern drive-by-wire systems use redundant sensors on the gas pedal to track your foot's position. The code triggers when the primary sensor's voltage fails to logically match its partner sensor, indicating a hardware failure or communication breakdown.
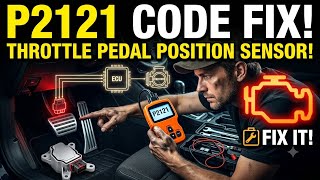
🎬 Watch: Troubleshooting and fixing the P2121 sensor circuitTechnical definition: SAE/OBD-II defines P2121 as "Throttle/Pedal Position Sensor/Switch 'D' Circuit Range/Performance." The PCM sets this code when the voltage signal from the primary accelerator pedal position (APP) sensor falls outside its pre-programmed expected range (typically 0.5V to 4.5V) or fails to correlate with the secondary sensor circuit.
Can I Drive With P2121?
No — Do Not Drive. We strongly advise against driving. Your vehicle will enter 'limp mode,' severely reducing engine power and capping your top speed at 30-50 mph. This creates a severe safety hazard on highways and in heavy traffic. Tow the vehicle or drive slowly on back roads to a repair shop immediately.
Common Causes

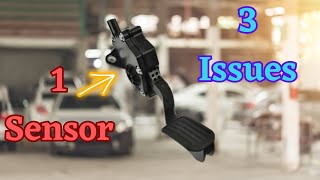
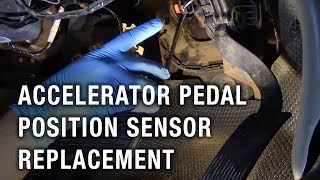
- Faulty Accelerator Pedal Position (APP) Sensor (Very Common) — The sensor assembly is the most frequent culprit. 🎬 Watch: How to replace your accelerator pedal position sensor Internal potentiometers wear out over thousands of pedal presses, creating dead spots or erratic voltage signals.
- Wiring or Connector Issues (Common) — Wires leading to the APP sensor chafe against brackets, or the connector becomes loose. Water intrusion from cabin leaks also corrodes the connector pins, disrupting the sensitive 5-volt signal.
- Poor Ground Connection (Common) — A corroded or loose ground wire for the PCM or the sensor circuit causes an unstable voltage reference. This leads to irrational sensor readings and false range/performance codes.
- Dirty Throttle Body (Less Common) — On GM vehicles, a throttle body caked with carbon sticks or responds slowly. This creates a logic mismatch between the pedal sensor and the throttle position sensor, indirectly triggering a pedal code.
- Software Glitch (Rare) — Manufacturers occasionally release Technical Service Bulletins (TSBs) with PCM software updates to correct overly sensitive code triggers or logic errors related to the pedal sensors.
Symptoms

- Reduced Engine Power ('Limp Mode') — The vehicle severely limits acceleration and caps speed at 2,000-3,000 RPM to prevent unintended acceleration.
- Poor or No Throttle Response ('Dead Pedal') — The engine hesitates, surges, or completely ignores inputs when you press the gas pedal.
- Unstable or High Idle — The engine idles roughly, surges, or maintains a higher-than-normal RPM when stopped.
- Engine Stalling — The engine stalls unexpectedly when coming to a stop due to inconsistent fuel and air commands.
- Check Engine Light is On (also visible on scanner) — The Malfunction Indicator Lamp (MIL) illuminates immediately upon the PCM detecting the fault.
Diagnostic Flowchart

Tap your situation to follow the diagnostic path that matches what you're seeing on this code.
Common Fixes & Costs
- Replace Accelerator Pedal Position (APP) Sensor Assembly — Parts: $75-$300, Labor: $75-$175, ~1.0 hr book time (DIY)
- Repair Damaged Wiring or Connectors — Parts: $10-$60, Labor: $125-$300, ~1.5 hr book time (Intermediate)
- Clean the Throttle Body — Parts: $10-$20, Labor: $75-$150, ~0.8 hr book time (Intermediate)
- Repair Faulty Ground Connection — Parts: $5-$25, Labor: $50-$150, ~0.7 hr book time (Intermediate)
- Update PCM Software — Parts: $0, Labor: $100-$250, ~1.0 hr book time (Professional)
Used vs. New Parts: Buying Guide
When a used part is worth it: Buying a used accelerator pedal assembly is rarely recommended. The failure stems from internal mechanical wear, meaning a used part is already degrading. The minimal savings do not justify the risk of repeat labor.
Donor-vehicle mileage cap: roughly under 40000 miles for the part to have meaningful remaining life.
Donor quality checklist:
- Verify the exact OEM part number matches perfectly.
- Avoid parts from flood-damaged vehicles.
- Inspect the connector pins for any green corrosion before purchasing.
Decision logic:
- If The cost of a new aftermarket part is less than $150 → Always buy new. The labor cost to replace it twice outweighs any savings.
- If The vehicle is over 15 years old and the OEM part exceeds $500 → A low-mileage used part from a reputable salvage yard is a viable budget option.
- If The part is for a diesel truck (like a Cummins APPS) → Buy a new, upgraded aftermarket unit (like a Timbo APPS) to permanently solve the known design flaw.
Warranty tradeoff: Used parts offer a 30-day warranty. New aftermarket parts include a 1-year to lifetime warranty. New OEM parts carry a 1-2 year warranty.
Worst-case if a used part fails: $200 - $450 if a used part fails shortly after installation, covering repeat labor and a new part.
What Happens If You Wait — Timeline
- 0-1 month: Check Engine Light illuminates. Vehicle experiences occasional hesitation or a brief 'dead pedal' that resolves upon restarting. (MPG impact: 0-5%% · Added cost: $0 - $25)
- 1-3 months: Limp mode activates consistently. Unpredictable throttle response makes highway driving dangerous and difficult. (MPG impact: 5-10%% · Added cost: $50 - $150)
- 3-6 months: Erratic signals cause incorrect fuel mixtures, fouling spark plugs and overheating the catalytic converter. (MPG impact: 10-15%% · Added cost: $200 - $500)
- 6+ months: The pedal fails completely, causing uncontrolled acceleration or total power loss. The catalytic converter melts, requiring replacement. (MPG impact: 15-25%% · Added cost: $1200 - $3000)
Cost of Not Fixing It
- Immediate: Unpredictable throttle response and limp mode create a severe safety hazard in traffic. (Added cost: 0)
- 1-3 months: Erratic signals cause incorrect fuel mixture commands, fouling spark plugs and decreasing fuel economy. (Added cost: $50 - $200)
- 3-12 months: Persistently rich fuel mixtures overheat and melt the catalytic converter substrate. (Added cost: $1200 - $2800)
Diagnosis Steps
- Scan Codes & Review Freeze Frame Data
Use an OBD-II scanner to confirm P2121. Analyze the freeze-frame data to see the exact engine load, RPM, and vehicle speed when the fault occurred. Diagnose codes in the order they were stored.
Tools: OBD-II Scanner (Beginner) - Visual Inspection & Wiggle Test
Ensure the floor mat is not bunched under the pedal. With the engine idling (if safe) and a scan tool graphing pedal position, wiggle the wiring harness at the APP sensor connector. If the idle stumbles or the graph spikes, you have a loose connection or damaged wire.
Tools: Flashlight, Advanced Scan Tool (Beginner) - Check for Technical Service Bulletins (TSBs)
Search online for TSBs related to P2121 for your specific VIN. A manufacturer may have a known fix, such as a PCM software update, saving you from buying unnecessary parts.
Tools: Internet access (Beginner) - Clean the Throttle Body (GM Vehicles)
If diagnosing a Chevrolet or GMC, remove the air intake duct and inspect the throttle plate. Clean any carbon buildup with throttle body cleaner and a soft cloth to resolve correlation issues between the pedal and throttle.
Tools: Basic hand tools, Throttle body cleaner, Rag (Intermediate) - Analyze Live Data PIDs
Monitor live data for 'Accel Sensor 1' and 'Accel Sensor 2'. Slowly press the pedal. The voltages should increase smoothly and proportionally. Any jumps, flat spots, or dropouts indicate a failing internal sensor.
Tools: Advanced Scan Tool (Intermediate) - Test Sensor Voltages & Resistance
Back-probe the APP sensor connector with the key on, engine off. Verify a stable 5-volt reference and a solid ground (less than 100mV). Disconnect the sensor and measure internal resistance while pressing the pedal to spot dead zones.
Tools: Digital Multimeter, Back-probe kit, Wiring diagram (Advanced) - Graph Sensor Data with an Oscilloscope
Connect an oscilloscope to both signal wires. Slowly press the pedal to view the voltage waveforms. Jagged 'stairsteps' or vertical dropouts confirm worn internal contacts that a slow scan tool might miss.
Tools: Oscilloscope, Back-probe kit (Advanced) - Verify PCM Integrity
If the sensor, wiring, and grounds test perfectly, suspect the PCM. This requires professional diagnostics to rule out all other variables before replacing the expensive computer.
Tools: Advanced diagnostic equipment (Professional)
When This Code Triggers (Freeze-Frame Conditions)
- Engine Coolant Temp: 185-210°F (85-99°C) (Fully warmed up. The code often sets after the engine reaches operating temperature and under-hood heat increases electrical resistance.)
- RPM: 1200-2800 (Occurs during light acceleration or while attempting to maintain a steady cruising speed.)
- Engine Load: 20-50% (Indicates moderate demand from the driver, not idle and not full throttle.)
- Vehicle Speed: 25-60 mph (Triggers during city or highway cruise conditions when making small, steady pedal adjustments.)
Related Codes
- P2122 — Indicates the 'D' circuit signal is too low (short to ground). Seeing P2121 and P2122 together confirms a failed sensor or a severed signal wire.
- P2123 — Indicates the 'D' circuit signal is too high (short to power). This points to a short to the 5V reference wire or an internal sensor short.
- P2127 — Indicates a low input for the 'E' circuit (the secondary sensor). Seeing P2121 and P2127 together strongly suggests a failed pedal assembly or a disconnected main harness.
- P2138 — Indicates a voltage correlation issue between sensors 'D' and 'E'. P2121 and P2138 share the exact same root cause: a faulty pedal assembly.
- P2135 — A correlation fault between the Throttle Position Sensor and the APP sensor. This means the PCM sees a conflict between the pedal and the throttle blade, often caused by a dirty throttle body.
Climate & Environmental Factors
- Cold Weather: Freezing temperatures cause borderline batteries to provide insufficient voltage during startup, triggering spurious P2121 codes. Cold also makes aging wiring brittle and prone to cracking.
- High Humidity & Road Salt: Moisture and winter road salt penetrate connectors and ground points. This corrosion increases electrical resistance, disrupting the sensitive 5-volt sensor circuit.
How to Talk to a Mechanic About This Code
Say this: "I have a P2121 code causing limp mode. Before replacing the pedal assembly, please test the sensor's live data with a graphing scanner and perform a wiggle test on the wiring harness."
This directs the technician to check for cheaper, common failure points like wiring or a bad connection before quoting an expensive part replacement.
Avoid saying:
- 'Just fix whatever's wrong'
- 'My check engine light is on, can you look at it?'
- 'Go ahead and put a new gas pedal in it'
Questions to ask before authorizing the repair:
- Did you see the sensor voltage drop out or spike on the live data graph?
- Did you check for any Technical Service Bulletins (TSBs) for a software update?
- Have you confirmed the 5-volt reference and ground at the sensor are good?
- What is the warranty on the recommended part and the labor?
Where to Take It: Dealer vs Independent vs Chain
- Dealer:
Recommended only if a known software update (TSB) is the fix or if the vehicle is under warranty.
Best for: Vehicles under powertrain warranty, Known issues fixed by a PCM software update (TSB), Complex electrical issues on newer vehicles
Downsides: Highest labor rates., Defaults to replacing entire assemblies rather than repairing wires. (Typical cost: +50% vs. baseline) - Independent Shop:
Best fit for most cases. A shop with strong electrical diagnostic skills solves this effectively and affordably.
Best for: Out-of-warranty vehicles, Cost-effective diagnosis of electrical codes
Downsides: Diagnostic skill varies; vet shops by ASE certifications., May lack proprietary software for PCM reflashing. (Typical cost: +0% vs. baseline) - Chain Shop:
Use with caution. Best used only if you are certain the pedal assembly needs replacement and just need installation.
Best for: Simple parts replacement after a confirmed diagnosis
Downsides: Technician experience with electrical diagnosis is inconsistent., Highly likely to replace parts based solely on the code. (Typical cost: -10% vs. baseline)
When to Walk Away From the Repair
If the estimated repair cost exceeds 40-50% of the car's private-party value, consider selling the vehicle as-is.
- Car worth $3000, fix is $450: Fix it. The repair cost is a small fraction of the car's value and restores critical safety.
- Car worth $8000, fix is $600: Fix it. This is a routine repair cost for a vehicle of this value.
- Car worth $2000, fix is $900: Walk away. The repair cost approaches half the car's value.
What Scan Tool You Need for This Code
Minimum: A scanner that reads and graphs live data PIDs for the accelerator pedal position sensors.
A basic $20 code reader only shows the P2121 code. You need to see the voltage signal as a live graph to spot the dropouts that confirm a bad sensor, preventing you from wasting money on unneeded parts.
Budget: BlueDriver Pro (~$100) — Connects to your smartphone and provides excellent live data graphing to watch pedal sensor voltage in real-time.
Mid-range: Foxwell NT510 Elite (~$180) — Offers live data graphing and supports bi-directional controls and special service functions (like throttle relearns) for specific makes.
Professional: Autel MaxiCOM MK808S (~$450) — Provides fast, detailed live data graphing for multiple PIDs and extensive bi-directional controls for most makes and models.
Rent vs buy: Buying a tool with graphing capability like the BlueDriver is a smart investment for diagnosing P2121. Auto parts store loaner tools rarely offer the graphing resolution needed to spot sensor dropouts.
How to Clear the Code After You Fix It
- Use an OBD-II scan tool to clear the Confirmed and Pending DTCs.
- Perform a drive cycle to ensure the fault does not return and to allow emissions readiness monitors to run.
- Perform a throttle body idle relearn procedure if the throttle body was cleaned.
Drive cycle (~20 minutes): Cold start (coolant temp below 122°F). Idle for 3 minutes. Drive at a steady 55 mph for 5 minutes. Decelerate without braking to 20 mph. Accelerate back to 55 mph and hold for 5 minutes. Decelerate and idle for 2 minutes.
Readiness monitors affected: Comprehensive Component Monitor, Catalyst (CAT) Monitor, Evaporative (EVAP) System Monitor
Before emissions retest: drive at least 50 miles to fully set monitors.
Watch out for:
- Disconnecting the battery fails to clear the code from permanent memory on vehicles newer than 2010.
- The code returns immediately upon startup if the underlying electrical fault remains.
- Failing to complete a full drive cycle leaves readiness monitors incomplete, causing an automatic emissions test failure.
Will This Fail Emissions / State Inspection?
Yes — this code typically fails an OBD-II emissions inspection.
- California: An active P2121 code causes an automatic smog check failure. All readiness monitors must be 'Complete' after repair before re-testing.
- New York: The NYS DMV inspection includes an OBD-II scan. The illuminated Check Engine Light results in an immediate failure.
- Texas: In the 17 counties requiring emissions testing, an active P2121 code prevents the vehicle from passing inspection.
Most Commonly Affected Vehicles
- Chevrolet/GMC Silverado, Sierra, Tahoe, Suburban (2007-2014) — Extremely common issue. Often related to a dirty throttle body causing a logic conflict. Always clean the throttle body before replacing the pedal assembly.
- Ford F-150, Explorer, Fusion (2004-2012) — Prone to failures in the APP sensor itself and wiring harnesses rubbing against under-dash brackets. A multimeter test easily confirms sensor failure.
- Nissan Titan, Altima, Frontier, Rogue (2004-2023) — Known for APP sensor failures leading to limp mode. For newer models (2021+), check for TSBs addressing software sensitivity before replacing parts.
- Dodge/Ram Ram 1500/2500/3500 (Cummins) (2004-2010) — Frequently causes a 'dead pedal' symptom. On diesel models, the sensor is called an APPS and mounts on the engine block in older years, or the pedal in newer years.
- Toyota Camry, Corolla, Tundra, Tacoma (2005-2015) — Toyota ECM logic is highly sensitive. If the voltage difference between the two internal pedal sensors deviates for more than 0.5 seconds, it triggers limp mode.
- Hyundai/Kia Sonata, Elantra, Optima, Sorento (2010-2022) — Prevalent across many models. Diagnosis must include checking for TSBs, as Hyundai/Kia issued numerous software updates for throttle and sensor performance codes.
Manufacturer-Specific Notes
- General Motors (Chevy/GMC): A dirty throttle body is the leading cause of pedal-related codes on GM trucks. Always clean the throttle body and perform an idle relearn before replacing the pedal.
- Dodge/Ram (Cummins): Associated with 'dead pedal' syndrome. On 2004 and older models, the APPS mounts on the engine block. On 2004.5+ models, it integrates into the cabin pedal assembly.
- Ford: The wiring harness to the APP sensor frequently rubs against sharp metal brackets under the dash, causing intermittent shorts. A thorough 'wiggle test' is mandatory.
- Toyota: Extremely strict voltage correlation parameters. If the voltage difference between the two pedal sensors deviates slightly for just half a second, the vehicle violently enters limp mode.
Real Owner Stories
2008 Ram 2500 6.7L Cummins after engine swap
After an engine swap, the truck entered limp mode with codes P2121 and P2127. Throttle randomly cut out while driving.
What they tried:
- Replaced both batteries.
- Performed the pedal reset procedure.
- Replaced the accelerator pedal assembly.
- Cleaned all ground connections.
Outcome: While watching live data, the owner wiggled the C130 main harness connector under the hood, causing the pedal voltage to spike. Disconnecting, cleaning, and tightly re-seating the C130 connector permanently resolved the issue.
Lesson: After major repairs, a loose main harness connector is the primary suspect. A 'wiggle test' while monitoring live data prevents wasting money on expensive parts.
2015 Toyota Tacoma with intermittent P2121
Check engine light illuminated, triggering limp mode and P2121. Bizarre electrical issues followed, including headlights flickering randomly.
What they tried:
- Cleaned the Mass Airflow (MAF) sensor.
- Cleaned the throttle body.
- Performed a gas pedal relearn procedure.
- Replaced the headlight relay.
Outcome: The owner wire-brushed the main ground connections near the fuse box and on the frame rail. This restored proper voltage, clearing the P2121 code and stopping all electrical flickering.
Lesson: A single bad ground causes multiple, seemingly unrelated electrical failures. Always clean major ground points before suspecting the sensor or PCM.
2006 Dodge Ram 2500 Cummins with 130k miles
Experienced a sudden 'dead pedal' followed by unintended acceleration where the throttle spiked to 100% with light pressure. Codes P2121 and P2123 stored.
What they tried:
- Parked the truck immediately due to the severe safety risk.
Outcome: Replaced the Accelerator Pedal Position Sensor (APPS) assembly inside the cabin. The three-bolt replacement completely fixed the dangerous throttle behavior.
Lesson: P2121 combined with unintended acceleration points directly to a failed pedal assembly. Stop driving immediately and replace the part.
How to Prevent This Code From Triggering
- Clean major ground connections (Every 30,000 miles or 2 years) — Corrosion on battery-to-chassis grounds increases resistance, causing unstable voltage for sensitive 5V sensors like the APP. Cleaning ensures a solid reference voltage.
- Clean the throttle body (Every 50,000 miles) — Carbon buildup causes the throttle plate to stick, creating a logic conflict between the pedal sensor and throttle sensor that triggers P2121.
- Apply dielectric grease to the APP connector (Whenever disconnected) — Dielectric grease seals the connector from moisture and dirt, preventing pin corrosion that causes intermittent signal loss.
- Ensure floor mats are secured (Every time the vehicle is cleaned) — A bunched-up floor mat physically obstructs the pedal, preventing it from returning to zero. The PCM interprets this as a sensor fault.
Frequently Asked Questions
Is the Accelerator Pedal Position (APP) sensor the same as the Throttle Position Sensor (TPS)?
No. The APP sensor connects to your gas pedal inside the cabin and tracks your foot's movement. The TPS mounts on the engine's throttle body and measures how far the throttle blade opens. They are separate components in a drive-by-wire system.
Can I just clean the accelerator pedal sensor?
No. The APP sensor is a sealed, non-serviceable electronic unit. Attempting to open and clean the internal contacts destroys the sensor and creates a severe safety risk. You must replace the entire pedal assembly.
Do I need to do a 'relearn' procedure after replacing the pedal?
Most vehicles automatically adapt to a new accelerator pedal without a specific relearn procedure. However, if you also cleaned the throttle body, you must perform an 'Idle Relearn' so the engine idles correctly. Check your specific vehicle's service manual to confirm.
Can a bad battery cause a P2121 code?
Yes. A weak battery provides unstable voltage during startup, starving the PCM. This causes the computer to misread the sensitive 5-volt reference signals from the APP sensor, triggering a false P2121 code.
How do I clear the P2121 code after a repair?
Use an OBD-II scanner to clear the code from the PCM's memory. Disconnecting the battery fails to clear permanent codes on modern vehicles and erases valuable adaptive memory. Always test drive the vehicle afterward to ensure the limp mode does not return.
What does the 'D' in 'Circuit D' mean?
The 'D' is an SAE standard designation identifying a specific sensor circuit. In the accelerator pedal assembly, it refers to the primary sensor (often paired with sensor 'E'). This tells the technician exactly which internal circuit failed.
Key Takeaways
- Code P2121 triggers 'limp mode,' capping your vehicle's speed at 30-50 mph due to a failing accelerator pedal sensor.
- Replacing the accelerator pedal assembly fixes this code 80% of the time, costing between $150 and $475 for parts and labor.
- Inspect the pedal area for bunched floor mats and perform a 'wiggle test' on the wiring harness before buying any replacement parts.
- For Chevrolet and GMC owners, cleaning a carbon-caked throttle body often resolves P2121 without touching the pedal assembly.
- Search for Technical Service Bulletins (TSBs) using your VIN, as manufacturers frequently issue PCM software updates to fix overly sensitive pedal codes.
Helpful Videos

The information in this article is provided for general reference and educational purposes only. Vehicle specifications, procedures, and part compatibility can vary by production date, trim level, and region. Always consult your vehicle's factory service manual and verify part numbers before purchasing or performing repairs. Safety-critical components such as airbags, seat belts, and braking systems should be installed by a qualified professional.
- 🎬 Helpful Videos
- What Does P2121 Mean?
- Can I Drive With P2121?
- Common Causes
- Symptoms
- Diagnostic Flowchart
- Common Fixes & Costs
- Used vs. New Parts: Buying Guide
- What Happens If You Wait — Timeline
- Cost of Not Fixing It
- Diagnosis Steps
- When This Code Triggers (Freeze-Frame Conditions)
- Related Codes
- Climate & Environmental Factors
- How to Talk to a Mechanic About This Code
- Where to Take It: Dealer vs Independent vs Chain
- When to Walk Away From the Repair
- What Scan Tool You Need for This Code
- How to Clear the Code After You Fix It
- Will This Fail Emissions / State Inspection?
- Most Commonly Affected Vehicles
- Manufacturer-Specific Notes
- Real Owner Stories
- 2008 Ram 2500 6.7L Cummins after engine swap
- 2015 Toyota Tacoma with intermittent P2121
- 2006 Dodge Ram 2500 Cummins with 130k miles
- How to Prevent This Code From Triggering
- Frequently Asked Questions
- Is the Accelerator Pedal Position (APP) sensor the same as the Throttle Position Sensor (TPS)?
- Can I just clean the accelerator pedal sensor?
- Do I need to do a 'relearn' procedure after replacing the pedal?
- Can a bad battery cause a P2121 code?
- How do I clear the P2121 code after a repair?
- What does the 'D' in 'Circuit D' mean?
- Key Takeaways
- 🎟️ Get 5% Off