

P2120 on 2007-2014 Chevrolet Tahoe: Causes and Fixes for the Pedal Position Sensor Circuit
On a 2007-2014 Tahoe, code P2120 almost always points to a faulty accelerator pedal position (APP) sensor or a bad electrical connection at the pedal. This can trigger 'Reduced Engine Power' mode. The fix is usually replacing the entire accelerator pedal assembly, which costs about $60-$150, but the connector and wiring should be checked first per a GM TSB.
- P2120 on a Tahoe means there's a problem with your gas pedal's electronic sensor.
- The most common symptom is the 'Reduced Engine Power' message, which severely limits acceleration.
- Before replacing the pedal assembly (~$100), always inspect the electrical connector for loose pins, as this is a known GM issue covered by a TSB.
- The fix is almost always either replacing the accelerator pedal assembly or repairing its electrical connector.
What's Unique About the 2007-2014 Chevrolet TAHOE
For this generation of Chevrolet Tahoe and other similar GM trucks on the GMT900 platform, a known weak point is the electrical connector at the accelerator pedal. A specific Technical Service Bulletin (TSB #PIP3783D) was issued, advising technicians to inspect the APP sensor circuits for poor terminal tension. This means that before you replace the pedal itself, it's critical to check if the female pins in the connector have spread apart and are no longer making a tight connection with the male pins on the sensor. This is a well-documented issue that can cause intermittent signal loss and mimic a completely failed sensor.
Diagnostic Flowchart
Tap your situation to follow the diagnostic path that matches what you're seeing on this vehicle.
Symptoms You May Notice
- "Reduced Engine Power" message on the dashboard
- Check Engine Light is on
- Poor or no throttle response
- Vehicle is stuck in "limp mode," with limited speed and acceleration
- "Service Stabilitrac" and "Traction Control Off" messages may also appear simultaneously
- Engine may stall or have a rough idle
- Sudden loss of power while driving, especially after hitting a bump.
- Replacing the throttle body. The throttle body has its own position sensors (TPS), but P2120 specifically relates to the accelerator pedal assembly. Owners may replace the throttle body hoping to fix the 'Reduced Engine Power' message, but this code points to the driver's input (the pedal), not the engine's output (the throttle).
Most Likely Causes
- Faulty Accelerator Pedal Position (APP) Sensor Assembly 🔴 High Probability The APP sensor is a high-use electronic component (a potentiometer) that wears out over time from constant use. The internal resistive strips can develop dead spots, causing signal dropouts. The entire pedal assembly must be replaced as the sensors are integrated and not sold separately.
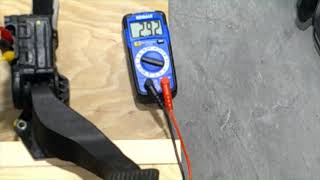
How to confirm: Using a scan tool, monitor the live data for APP Sensor 1 and APP Sensor 2 voltages while slowly pressing and releasing the pedal. The voltages should move smoothly. Any spikes, dropouts, or flat spots indicate a bad sensor. 🎬 Watch: How to test your pedal and see a glitched sensor example.
Typical fix: Replace the entire accelerator pedal assembly. No programming is required for the new part.
Est. part cost: $60-$150 - Poor Connection or Damaged Wiring at the APP Sensor 🔴 High Probability As noted in TSB #PIP3783D, these vehicles are known to have issues with poor terminal tension in the APP sensor connector. The female terminals in the plastic connector can spread, causing a loose connection. Vibration and foot traffic in the area can also lead to chafed or broken wires right at the connector.
How to confirm: Visually inspect the wiring harness and connector at the accelerator pedal for any signs of damage, corrosion, or loose pins. Gently wiggle the connector with the engine running (or monitoring live data) to see if it triggers the fault or causes the voltage readings to fluctuate.
Typical fix: If terminals are loose, they may be carefully re-tensioned with a small pick, or the connector pigtail can be replaced. Solder and heat-shrink new pigtails for a durable repair. Common pigtail part numbers include Dorman 85186 and ACDelco PT1035.
Est. part cost: $15-$40 - Damaged Wiring Harness or Poor Ground ⚪ Low Probability Wires can get chafed or damaged where they pass through the firewall or run along the engine bay. A specific, documented failure point is a small black ground wire on the passenger side of the intake manifold harness that can corrode and break, causing intermittent power loss over bumps. In other cases, a main ground point like G103 or G104 can become corroded, causing widespread electrical issues including this code.
How to confirm: Perform a continuity test on each wire between the APP sensor connector and the Engine Control Module (ECM) connector to check for opens or shorts. Check for voltage drops on power and ground circuits. Specifically inspect the ground wire on the passenger side intake harness by gently tugging on it.
Typical fix: Repair the specific section of the damaged wire. For grounding issues, clean the contact point and replace the ground wire terminal.
Est. part cost: $5-$20
Rare But Worth Checking
- Faulty Engine Control Module (ECM): This is extremely rare and should only be considered after all other possibilities, including wiring, connectors, and the sensor itself, have been definitively ruled out.
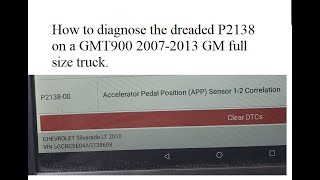
- Water Intrusion into IP-to-Body Harness Connector: Per TSB #07-06-04-019F, water can leak into the instrument panel-to-body harness connector, causing corrosion and voltage discrepancies between the two APP sensors. The fix involves drying, cleaning, and properly sealing the connector or, in severe cases, bypassing it 🎬 See the real fix for P2138 and the reduced power message. by running new wires from the pedal to the ECM.
Diagnosis Steps
- Read all fault codes with an OBD-II scanner. Note any other codes present, especially P2122, P2123, P2125, P2127, and P2138, as they help pinpoint the issue.
- Visually inspect the accelerator pedal's wiring harness and connector for any obvious damage, corrosion, or loose connections. Pay close attention to the area where wires enter the connector.
- Following TSB #PIP3783D, carefully check for poor terminal tension in the APP sensor connector. The female pins should grip the male pins tightly. A loose connection here is a primary suspect.
- With a scan tool capable of viewing live data, graph the voltage readings from APP Sensor 1 and APP Sensor 2.
- Slowly press and release the accelerator pedal. Both signals should change smoothly. Look for any voltage spikes, dropouts, or flat spots, which indicate a failing sensor.
- Confirm APP sensor voltage ranges. With the key on, engine off, APP1 should be ~0.5-1.1V at idle and ~2.6-4.5V at full throttle. APP2 should be ~1.2-2.0V at idle and ~3.4-5.3V at full throttle. A reading outside 0.24V-4.49V can trigger the code.
- Inspect critical ground locations. Check the small black ground wire in the harness on the passenger side of the intake manifold for breaks or corrosion. Also inspect engine grounds G103 (front of passenger cylinder head) and G104 (rear driver's side of engine).
- If a wiring issue is suspected, perform a continuity test on each wire between the APP sensor and the ECM. Check for shorts to ground or power.
- If the wiring and connector are confirmed to be good but the sensor data is faulty, replace the accelerator pedal assembly.
- After the repair, clear the codes and perform a Throttle Body Relearn procedure. Then, test drive to ensure the problem is resolved.
Parts You'll Likely Need
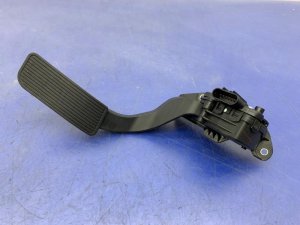
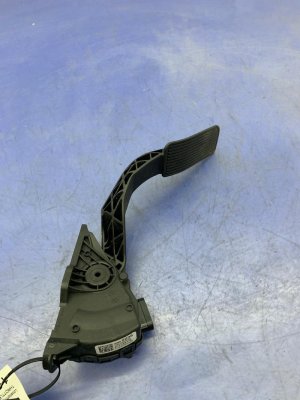
- Accelerator Pedal Assembly with Position Sensor
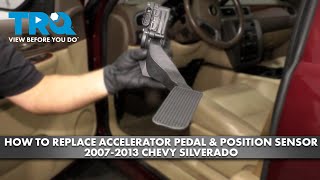
(OEM #25832864)— This is the most common failure point for code P2120. The sensors are integrated into the pedal assembly and are not sold separately. This part number has superseded previous versions. 🎬 Watch this step-by-step walkthrough to replace the accelerator pedal assembly.
Trusted brands: ACDelco (OEM), Dorman (e.g., 699-105), NTK, DIY Solutions
OEM price range: $120-$150
Aftermarket price range: $60-$100 - APP Sensor Connector Pigtail
(OEM #ACDelco PT1035)— Needed if the original connector is damaged or the terminals have lost tension and cannot be repaired. A new pigtail ensures a solid connection.
Trusted brands: ACDelco, Dorman (e.g., 85186)
OEM price range: $30-$45
Aftermarket price range: $15-$25
Related Codes That Often Appear With This One
- P2122 — Indicates the 'D' circuit (APP Sensor 1) voltage is low.
- P2123 — Indicates the 'D' circuit (APP Sensor 1) voltage is high.
- P2125 — Relates to a fault in the other pedal position sensor circuit ('E' or APP Sensor 2).
- P2127 — Indicates the 'E' circuit (APP Sensor 2) voltage is low.
- P2138 — Indicates a correlation problem between the two pedal position sensor signals (APP1 vs APP2). This is very common to see with P2120 as the ECM constantly compares the two signals for safety.
Technical Service Bulletins (TSBs) & Recalls
- PIP3783D: Addresses Diagnostic Trouble Codes P2120, P2122, P2123, P2125, P2127, P2128, and/or P2138. The primary instruction is to inspect the Accelerator Pedal Position circuits for poor terminal tension before replacing parts.
- 07-06-04-019F: Addresses intermittent P2138 and related codes caused by water intrusion into the instrument panel (IP) to body harness connector.
Platform-Specific Known Issues
- A prominent issue for this platform is poor terminal tension at the accelerator pedal connector, as documented in GM Technical Service Bulletin #PIP3783D. This can cause intermittent signal loss and trigger the P2120 code, even if the pedal sensor itself is functional.
- Water intrusion into the cabin, sometimes from a poorly sealed windshield or sunroof drains, can drip onto the instrument panel-to-body harness connector, causing corrosion and a range of electrical problems that can manifest as APP sensor codes, as noted in TSB #07-06-04-019F.
Mechanic-Grade Diagnostic Values
- APP Sensor 1 (D Circuit) Voltage — expected: Key On, Engine Off: ~0.5-1.1V at pedal released, ~2.6-4.5V at pedal depressed.. Failure: Voltage is less than 0.24V or more than 4.49V for over 0.5 seconds.
- APP Sensor 2 (E Circuit) Voltage — expected: Key On, Engine Off: ~1.2-2.0V at pedal released, ~3.4-5.3V at pedal depressed.. Failure: Voltage is less than 0.24V or more than 4.49V for over 0.5 seconds.
- APP Sensor 5V Reference — expected: Approximately 5.0V at the sensor connector with key on.. Failure: Voltage is less than 4.49V or more than 5.21V.
- APP Sensor Ground Circuit — expected: Near 0V, with continuity to a known good ground measuring near 0 Ohms.. Failure: Voltage significantly above 0V or high resistance (open circuit) on the ground wire.
Scan Tool Commands That Help
- Manual Procedure (No Scan Tool Required): Throttle Body Relearn / Idle Learn Procedure — After replacing the throttle body, accelerator pedal, or disconnecting the battery. This allows the ECM to relearn the idle position. A common procedure is: 1) Start engine and let it idle for 3 minutes. 2) Turn engine off for 60 seconds. 3) Restart engine and let it idle for another 3 minutes. 4) The idle should now be stable.
Wiring & Ground Locations
- Problematic Ground Wire — A small black wire coming out of the main wiring harness on the passenger side of the intake manifold.. This specific ground wire is known to corrode and break at its terminal, causing intermittent loss of power and various throttle-related codes. The failure often happens when hitting bumps. It is often overlooked during diagnosis.
- G103 — On the front of the passenger side cylinder head.. This is a major engine ground. Corrosion here can cause a host of electrical issues, including erratic sensor readings for the APP and throttle body systems.
- G104 — On the left rear corner of the engine, near the brake booster. A ground strap often connects from here to the firewall.. This ground is critical for various components. A poor connection here can lead to intermittent electrical faults that are hard to trace.
- ECM Connectors (E38 ECM) — The Engine Control Module has three main connectors: X1 (Blue), X2 (Black), and X3 (Gray).. Knowing the connector colors is essential for correctly identifying pins when performing continuity or voltage tests between the ECM and the APP sensor.
Real Owner Repair Stories
- YouTube channel 'Rainman Ray's Repairs' (GM Truck (Silverado/Sierra platform)) — Reduced Engine Power message, vehicle would die when hitting bumps, multiple TAC module and communication codes.
❌ Tried (didn't work) Adding multiple new, redundant ground wires from the engine to the chassis.
✅ What actually fixed it Found a small, black factory ground wire on the passenger side of the intake manifold harness that was corroded and broken. Splicing in a new eyelet terminal and re-securing the ground permanently fixed the issue. - YouTube channel 'South Florida Technical Training' (2007-2011 GM Truck) — Persistent P2138 code (APP sensor correlation) and Reduced Engine Power message, even after replacing the accelerator pedal.
❌ Tried (didn't work) Replacing the accelerator pedal assembly.
✅ What actually fixed it The issue was identified as water intrusion into the instrument panel-to-body harness connector, per TSB #07-06-04-019F. The professional fix is to run new, dedicated wires for the APP sensor circuits, bypassing the compromised connector entirely. - Reddit user 'Joelnaimee' on r/ChevyTahoe (2004 Chevrolet Tahoe) — Goes into reduced power mode shortly after starting to drive. Issue repeats if the vehicle sits for several hours. Throttle body and TPS were already replaced.
❌ Tried (didn't work) Replacing throttle body, Replacing throttle position sensor, Cleaning some ground wire locations
✅ What actually fixed it A user suggested the fix was a small, hard-to-see ground wire on the harness along the firewall, toward the passenger side. The advice was to pull on it, and if it breaks, re-splice it and extend it to a clean ground point on the firewall.
"I Checked Everything" — The Actual Cause
- While a smoke test is not used for this electronic fault, a similar pattern exists where standard electrical tests can be misleading. A technician might test the APP sensor and find its readings are perfect, and test the wiring for continuity to the ECM and find it's intact. However, the root cause is an intermittent ground connection, like the small black wire on the intake harness, that only loses contact when the engine vibrates or the vehicle hits a bump. The problem won't show up during a static test in the garage, leading to a misdiagnosis. The fix is to physically inspect and tug on these known-problematic ground wires.
When the Usual Fixes Don't Work
- While replacing the accelerator pedal assembly is the most common fix, numerous owner and technician reports confirm that this often does not solve the problem. The true root cause is frequently found in the wiring, specifically at the pedal connector (per TSB #PIP3783D), a broken ground wire on the intake manifold harness, or a corroded intermediate body connector. Throwing a new pedal at the code without first thoroughly inspecting these specific wiring and ground points is a common and costly misdiagnosis.
OEM Part Supersession History
15101848, 15847349→25832864— Part has been updated by the manufacturer over time to integrate new materials or design improvements.
Helpful Videos
We Have This Part in Stock

The information in this article is provided for general reference and educational purposes only. Vehicle specifications, procedures, and part compatibility can vary by production date, trim level, and region. Always consult your vehicle's factory service manual and verify part numbers before purchasing or performing repairs. Safety-critical components such as airbags, seat belts, and braking systems should be installed by a qualified professional.
- Chevrolet TAHOE:
- 🎬 Helpful Videos
- 🛍️ Shop This Part
- What's Unique About the 2007-2014 Chevrolet TAHOE
- Diagnostic Flowchart
- Symptoms You May Notice
- Most Likely Causes
- Rare But Worth Checking
- Diagnosis Steps
- Parts You'll Likely Need
- Related Codes That Often Appear With This One
- Technical Service Bulletins (TSBs) & Recalls
- Platform-Specific Known Issues
- Mechanic-Grade Diagnostic Values
- Scan Tool Commands That Help
- Wiring & Ground Locations
- Real Owner Repair Stories
- "I Checked Everything" — The Actual Cause
- When the Usual Fixes Don't Work
- OEM Part Supersession History
- 🎟️ Get 5% Off