

OBD-II Code P2120: Throttle/Pedal Position Sensor 'D' Circuit Malfunction
The Ultimate Guide to Diagnosing and Fixing P2120
- Code P2120 triggers 'Reduced Engine Power' mode, limiting vehicle speed to 30-50 mph and creating an immediate safety hazard in traffic.
- Faulty electrical connections cause 70% of P2120 codes, not the sensor itself; always perform a 'wiggle test' on the pedal connector before buying parts.
- On 2007-2014 GM trucks and SUVs, a broken intake manifold ground wire (G103) or loose connector pins (TSB #PIP3783D) are the definitive root causes.
- Replacing a failed APP sensor requires swapping the entire $60-$300 gas pedal assembly, a simple 1-hour DIY job requiring only basic hand tools.
- Never replace the throttle body for a P2120 code; this fault isolates strictly to the accelerator pedal circuit and its wiring.
What Does P2120 Mean?
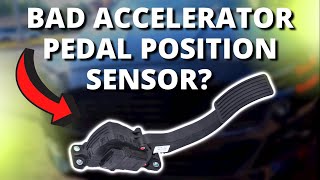
P2120 means the Powertrain Control Module (PCM) detects a malfunction in the 'D' circuit of the Accelerator Pedal Position (APP) sensor. This sensor, integrated into the gas pedal assembly, tells the computer how far you press the pedal. For safety, it uses two or more separate internal sensors for redundancy. When one sends a signal that is erratic, out of range, or mismatched, the computer logs P2120 and drastically limits engine power to prevent unintended acceleration.
Technical definition: The SAE/OBD-II definition is "Throttle/Pedal Position Sensor/Switch 'D' Circuit Malfunction". The PCM detects the voltage signal from the 'D' circuit (APP Sensor 1) is outside its 0.24V to 4.49V pre-programmed range for more than 0.5 seconds. This indicates a short, open circuit, or internal sensor failure.
Can I Drive With P2120?
No — Do Not Drive. Driving is strongly discouraged. Your vehicle will enter 'Reduced Engine Power' or 'Limp Mode,' severely limiting acceleration and speed to 30-50 mph, creating an immediate safety hazard in traffic. The engine often idles poorly, fails to accelerate from a stop, or shuts off entirely. Continuing to drive with this fault forces inconsistent air/fuel mixtures, damaging the catalytic converter and adding $1,200-$2,800 to the final repair bill.
Common Causes
- Damaged wiring or poor connection at the APP sensor (Very Common) — The most frequent cause is the wiring and connector attached to the sensor. Wires fray, corrode, or pins lose tension from vibration (especially on GM vehicles), interrupting the 5-volt signal.
- Broken or corroded ground wire connection (Common) — On GM trucks and SUVs, a specific ground wire for the sensor circuit located on the engine intake manifold (G103) breaks or corrodes. This causes intermittent signal loss and triggers P2120, even if the pedal is perfect.
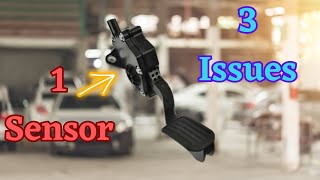
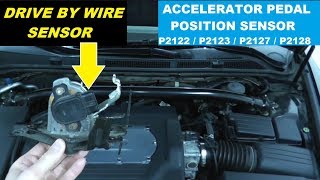
- Failed Accelerator Pedal Position (APP) sensor assembly (Common) — The sensor assembly, integrated into the gas pedal, fails internally due to wear, moisture, or a cracked circuit board. Because it is non-serviceable, the entire pedal assembly requires replacement. 🎬 Watch: How to test and replace a drive-by-wire sensor.
- Water intrusion into a harness connector (Less Common) — Water leaking into the cabin from a bad windshield seal or clogged sunroof drains drips onto intermediate body harness connectors (often in the driver's kick panel), corroding pins and shorting the APP sensor circuit.
- Outdated PCM Software / Calibration Issue (Less Common) — Manufacturers occasionally release software updates adjusting the tolerance thresholds for sensor voltage readings. Outdated software is overly sensitive and sets a P2120 code when no hardware fault exists.
- Faulty Powertrain Control Module (PCM) (Very Rare) — The vehicle's main computer fails and cannot correctly interpret sensor signals. Consider this only after exhaustively ruling out wiring, grounds, and the pedal assembly.
Symptoms
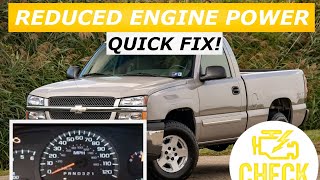
- Reduced Engine Power / Limp Mode — The vehicle severely limits acceleration and speed to 30-50 mph. A 'Reduced Engine Power' message appears on the dash.
- Check Engine Light is on — The Malfunction Indicator Lamp (MIL) illuminates or flashes on the dashboard.
- Poor, erratic, or delayed throttle response — The engine hesitates, surges, or feels sluggish and unresponsive when pressing the gas pedal. It feels 'dead' at first touch.
- Engine stalls or idles roughly — The engine stalls unexpectedly when coming to a stop, misfires under load, or runs poorly at idle due to incorrect air/fuel mixtures.
- Stability Control Disabled message — The PCM disables the stability/traction control system as a precaution, as these systems rely on accurate throttle data. 🎬 Watch: See common symptoms of a failing accelerator pedal sensor.
Diagnostic Flowchart
Tap your situation to follow the diagnostic path that matches what you're seeing on this code.
Common Fixes & Costs
- Repairing wiring or connector at the APP sensor — Parts: $20-$60, Labor: $100-$200, ~1.5 hr book time (Intermediate)
- Repairing a broken or corroded ground wire — Parts: $5-$20, Labor: $100-$180, ~1.0 hr book time (Intermediate)
- Replacing the Accelerator Pedal Position (APP) Sensor Assembly — Parts: $60-$300, Labor: $80-$150, ~1.0 hr book time (DIY)
- Updating PCM Software / Re-flashing PCM — Parts: $0, Labor: $100-$250, ~1.0 hr book time (Professional)
- Replacing the Powertrain Control Module (PCM) — Parts: $600-$1200, Labor: $200-$300, ~1.5 hr book time (Professional)
DIY vs Professional
- Repairing wiring or connector at the APP sensor — Beginner: False
Tools: Wire strippers, crimpers, heat shrink tubing, multimeter, connector pin tools. - Repairing a broken or corroded ground wire — Beginner: False
Tools: Socket set, wire brush, sandpaper, dielectric grease, wiring repair tools. - Replacing the Accelerator Pedal Position (APP) Sensor Assembly — Beginner: True
Tools: Basic socket set (10mm or 13mm sockets), flashlight. - Updating PCM Software / Re-flashing PCM — Beginner: False
Tools: Manufacturer-specific diagnostic tool, subscription to service information, stable battery charger.
Used vs. New Parts: Buying Guide
When a used part is worth it: For a common, non-luxury vehicle where a new OEM pedal exceeds $200, a used part from a low-mileage, accident-damaged donor is a cost-effective solution.
Donor-vehicle mileage cap: roughly under 80000 miles for the part to have meaningful remaining life.
Donor quality checklist:
- Verify the donor vehicle was not scrapped due to electrical or flood damage.
- Match the part number exactly; superseded numbers or different trim levels are often incompatible.
- Inspect the connector pins on the used part for corrosion, damage, or looseness.
Decision logic:
- If The vehicle is less than 8 years old and the new part costs under $200 → Buy a new OEM or high-quality aftermarket part (e.g., Dorman, SMP) for reliability and warranty.
- If The vehicle is over 10 years old and budget is the primary concern → A used part is an acceptable risk, but expect a significantly shorter remaining lifespan.
- If The part is for a luxury vehicle (BMW, Mercedes) → Buy a new part from an OEM supplier (e.g., Bosch, Hella). The electronics are highly sensitive and repeat labor costs are prohibitive.
Warranty tradeoff: Salvage yard parts include a 30-90 day warranty. New aftermarket parts offer 1-year to limited lifetime warranties. New OEM parts carry a 1-2 year warranty.
Worst-case if a used part fails: $200-$400 if a used part fails shortly after installation, representing repeat labor costs plus a second replacement part.
What Happens If You Wait — Timeline
- Immediate: The PCM detects the circuit fault, illuminates the Check Engine Light, and enters 'Reduced Engine Power' mode. Acceleration and speed are restricted to 30-50 mph. (MPG impact: 15-30%% · Added cost: $100-$300 in potential towing fees if the vehicle is unsafe to proceed.)
- 0-1 week: Attempting to use the vehicle in limp mode creates a significant safety hazard. Merging or climbing hills becomes impossible. The fault will not self-correct. (MPG impact: 15-30%% · Added cost: $50-$100 in wasted fuel due to inefficient operation.)
- 1-3 months: If the fault is intermittent, the PCM commands incorrect air/fuel ratios. This causes stress and carbon buildup on spark plugs and the catalytic converter. (MPG impact: 15-30%% · Added cost: $0, but wear on other components is accelerated.)
- 3+ months: Prolonged operation with an improper air/fuel mixture overheats and permanently damages the catalytic converter substrate, leading to a separate P0420 code. (MPG impact: 15-30%% · Added cost: $1200-$2800 for catalytic converter replacement.)
Cost of Not Fixing It
- Immediate: Vehicle enters 'Limp Mode,' creating a significant safety hazard due to severely limited speed and acceleration. You cannot merge safely or maintain highway speeds. (Added cost: Potential towing fees ($100-$300).)
- 1-3 months: Continued driving with an incorrect air/fuel mixture causes carbon buildup and severe stress on the catalytic converter, reducing its efficiency. (Added cost: Accelerates wear on critical emissions components.)
- 3+ months: The catalytic converter becomes permanently damaged from prolonged exposure to improper air/fuel ratios, leading to overheating and failure. This triggers P0420 and requires replacement. (Added cost: $1200-$2800)
Diagnosis Steps
- Read Codes and Freeze Frame Data
Use an OBD-II scanner to confirm P2120 and check for related codes (e.g., P2122, P2138). Do not clear the codes. Analyze the freeze frame data to identify the exact engine temp, speed, and pedal angle that triggered the fault.
Tools: OBD-II Scanner (Beginner) - Visually Inspect Pedal, Connector, and Wiring
Thoroughly inspect the accelerator pedal's wiring harness and connector. Look for frayed wires, bent pins, or green corrosion. Ensure the connector is plugged in securely and check for aftermarket floor mats obstructing the pedal.
Tools: Flashlight (Beginner) - Perform a 'Wiggle Test'
With the ignition ON (engine OFF), use a scan tool to graph the pedal sensor voltage (APP Sensor 1). Gently wiggle the connector and wiring harness at the pedal. If the voltage reading jumps or drops out, you have a loose connection.
Tools: OBD-II Scanner with Live Data (Intermediate) - Test the Sensor with a Scan Tool
Observe live data for APP Sensor 1 ('D' circuit). Slowly press and release the gas pedal. It should sweep smoothly from ~0.5V (released) to ~4.5V (depressed). Any glitches, flat spots, or jumps indicate a failing sensor.
Tools: OBD-II Scanner with Live Data (Intermediate) - Check for Reference Voltage and Ground
Using a multimeter, backprobe the sensor connector while connected. You must find a steady 5-volt reference signal from the PCM (4.8V-5.2V) on one wire and a solid ground (near 0 volts) on another. If missing, the harness or PCM is faulty.
Tools: Multimeter (Advanced) - Ground Circuit Voltage Drop Test
Place one multimeter lead on the negative battery terminal and the other on the ground pin at the APP sensor connector. With the ignition ON, the reading must be less than 100mV (0.1V). Higher readings indicate high resistance in the ground circuit.
Tools: Multimeter (Advanced) - Check Wire Continuity to the PCM
Disconnect the battery, APP sensor connector, and PCM connector. Using a wiring diagram, check for continuity on the signal wire ('D' circuit) between the sensor and PCM. Resistance must be near zero ohms. Check for shorts to ground or power.
Tools: Multimeter, Vehicle-specific wiring diagram (Professional)
When This Code Triggers (Freeze-Frame Conditions)
- Engine Coolant Temp: 180-200°F (82-93°C) (The fault often occurs once the engine is fully warmed up and enters closed-loop operation.)
- RPM: 1500-2500 (The code frequently sets during steady-state cruising or light acceleration, not necessarily during aggressive throttle movements.)
- Engine Load: 25-50% (Corresponds to normal city or highway driving conditions where the pedal is held at a relatively constant angle.)
- Vehicle Speed: 30-60 mph (The issue manifests during a commute as the system registers the erratic signal over time.)
Related Codes
- P2138 — Indicates a voltage correlation problem between the two pedal sensors ('D' and 'E'). Seeing P2138 with P2120 confirms the PCM sees a disagreement, strongly suggesting a failed pedal assembly or wiring common to both sensors.
- P2122 — Specifically means the 'D' circuit voltage is too low. Seeing P2120 and P2122 together points to an open circuit, a short to ground, or a sensor failed in a low-voltage state.
- P2123 — Means the 'D' circuit voltage is too high. Seeing P2120 and P2123 together strongly suggests a short to a voltage source on the signal wire or a sensor failed in a high-voltage state.
- P2125 — Points to a fault in the *other* pedal position sensor circuit ('E'). Seeing this with P2120 indicates a fault in both independent circuits, making a faulty pedal assembly or main connector the most likely cause.
Climate & Environmental Factors
- High Humidity / Water Intrusion: Moisture accelerates corrosion on connector pins, wiring, and ground points. Water leaking into the cabin from bad seals pools in harness connectors located in the kick panel, shorting the circuit.
- Cold Weather: Plastic wiring insulation and connectors become brittle in freezing temperatures, cracking from vibration and causing intermittent open circuits that only appear when the vehicle is cold.
- Vibration and Age: Constant engine vibration causes wires to chafe against brackets, wearing through insulation and causing shorts. It also forces metal terminals within connectors to lose tension, creating poor connections.
How to Talk to a Mechanic About This Code
Say this: "I have a P2120 code with a 'Reduced Engine Power' light. Please start by checking the accelerator pedal sensor circuit, specifically the connector, wiring, and grounds, before recommending a part replacement."
This signals you know the common causes are electrical, not the pedal sensor itself. It directs the technician to perform crucial diagnostic steps like a 'wiggle test' and voltage drop test first, preventing an expensive part replacement.
Avoid saying:
- 'Just fix whatever's wrong'
- 'My check engine light is on, can you look at it?'
- 'My car is in limp mode, I think it's the throttle body.'
Questions to ask before authorizing the repair:
- Did you perform a 'wiggle test' on the pedal connector and harness? What were the results on the live data graph?
- Did you confirm a stable 5-volt reference and a good ground (under 100mV) at the sensor connector?
- If you're recommending a pedal assembly replacement, can you show me the scan tool data proving the sensor signal is erratic?
- Have you ruled out the common ground wire issue known for this vehicle?
Where to Take It: Dealer vs Independent vs Chain
- Dealer:
Recommended only if a software update is required or if the vehicle is under warranty. Otherwise, an independent shop is more cost-effective.
Best for: Vehicles under warranty, Vehicles requiring a PCM software update, Complex electrical issues on high-end European brands (BMW, Mercedes)
Downsides: Highest labor rates, Defaults to replacing the entire pedal assembly even for a simple wiring issue (Typical cost: +50% vs. baseline) - Independent Shop:
Best fit. A reputable independent shop has the diagnostic tools and experience to trace this electrical fault efficiently without defaulting to the most expensive fix.
Best for: Most out-of-warranty vehicles, Diagnosing common, well-known issues (like GM ground wires or connector problems), A balance of expertise and value
Downsides: Quality and diagnostic skill vary; vet shops by reviews and ASE certifications. (Typical cost: +0% vs. baseline) - Chain Shop:
Use with caution. Acceptable for a straightforward pedal swap, but AVOID for initial diagnosis of an intermittent P2120, which requires advanced electrical troubleshooting.
Best for: If you have already diagnosed a bad pedal assembly yourself and just need it installed.
Downsides: Technician skill for electrical diagnosis is inconsistent, High pressure to replace parts rather than diagnose wiring, Misdiagnoses the issue and suggests an unnecessary throttle body replacement (Typical cost: -10% vs. baseline)
When to Walk Away From the Repair
If the estimated repair cost for P2120 exceeds 40-50% of your car's private-party value, seriously consider selling it as-is or trading it in.
- Car worth $3500, fix is $450: Fix it. This repair is well below the threshold and restores critical vehicle function.
- Car worth $8000, fix is $700: Fix it. The repair cost is a small fraction of the car's value.
- Car worth $2000, fix is $850: Walk away. The repair cost is approaching half the car's value. This money is better put toward a replacement vehicle.
What Scan Tool You Need for This Code
Minimum: A scanner with Live Data streaming and graphing. You must be able to watch the APP sensor voltage change in real-time.
A basic $20 code reader only tells you the P2120 code exists. It cannot show the live voltage signal from the pedal, which is essential to determine if the sensor is faulty or if there's a wiring issue during a 'wiggle test'.
Budget: BlueDriver Pro (~$90) — Connects to your smartphone and provides excellent live data graphing, allowing you to watch the APP sensor voltages sweep as you press the pedal. Perfect for DIY diagnosis of P2120.
Mid-range: Foxwell NT510 Elite / Autel MaxiCOM MK808S (~$180-380) — These handheld units offer faster processing, detailed manufacturer-specific data, and bidirectional controls. They provide a robust platform for graphing multiple PIDs at once (e.g., APP1 vs APP2) for easier correlation diagnostics.
Professional: Autel MaxiSys MS906 Pro / Launch X431 Series (~$600-1200+) — Offers full bidirectional control, advanced ECU coding/programming functions, and professional-level data logging. Necessary if the fix requires a PCM software update or deep-level diagnostics on complex European vehicles.
Rent vs buy: For a one-time fix, some auto parts stores rent scanners for free with a deposit. Verify their rental tool supports live data graphing. If it doesn't, buying a budget pick like the BlueDriver is a better investment.
How to Clear the Code After You Fix It
- Reconnect the battery if disconnected during repair.
- Use an OBD-II scan tool to formally clear P2120 and related fault codes.
- Perform a throttle relearn procedure if specified by the manufacturer.
- Complete a full OBD-II drive cycle to allow readiness monitors to run and confirm the fix.
Drive cycle (~30 minutes): A generic drive cycle includes a cold start (engine off for 8+ hours), a 5-minute idle to warm up, 15-20 minutes of mixed city/highway driving including steady speeds (55 mph for 5 minutes) and several idle periods, followed by a cool-down.
Readiness monitors affected: Catalyst (CAT) monitor, Oxygen (O2) Sensor monitor, Evaporative (EVAP) System monitor, Comprehensive Component Monitor (CCM)
Before emissions retest: drive at least 100 miles to fully set monitors.
Watch out for:
- Disconnecting the battery does not guarantee readiness monitors reset or codes permanently clear.
- The code returns immediately upon startup if the root cause (e.g., bad wiring) remains unfixed.
- Failing to complete a varied drive cycle leaves key monitors in a 'Not Ready' state, causing an automatic emissions test failure.
Will This Fail Emissions / State Inspection?
Yes — this code typically fails an OBD-II emissions inspection.
- California: An active P2120 code is an automatic failure. After repair, all readiness monitors must be 'Ready' (except EVAP on specific model years) before passing a smog check. This requires 100+ miles of mixed driving.
- New York: The NYS DMV emissions inspection includes an OBD-II scan. An illuminated Check Engine Light and an active P2120 code result in an automatic failure.
- Texas: In emissions-testing counties, an illuminated Check Engine Light from P2120 is an automatic failure. After repair, Texas allows one monitor to be 'Not Ready' on 2001+ vehicles.
Most Commonly Affected Vehicles
- Chevrolet Silverado / Tahoe / Avalanche (2007-2014) — Extremely common. Prone to poor terminal tension in the APP sensor connector (TSB #PIP3783D) and broken ground wires on the intake manifold harness. Check wiring before replacing the pedal.
- GMC Sierra / Yukon / Yukon XL (2007-2014) — Identical to Chevrolet counterparts, highly susceptible to poor pin tension in the APP sensor connector (X115) and ground wire failures (G103/G107). Always perform a 'wiggle test'.
- Hyundai Sonata / Elantra / Santa Fe / Tucson (2010-2019) — The APP sensor is a frequent failure point. The issue is often the pedal assembly itself. After replacement, a throttle relearn procedure is required.
- Kia Optima / Sorento / Sportage / Forte (2010-2016) — Sharing the Hyundai pedal assembly design, Kias are prone to similar APP sensor failures. Replacement is straightforward, followed by a throttle relearn.
- BMW 3-Series (E90) / 5-Series / X3 (E83) / X5 (E70) (2006-2013) — The non-serviceable APP sensor within the gas pedal assembly is a known failure point causing intermittent throttle issues. The OEM part is costly compared to non-luxury brands.
- Chevrolet Impala (2006-2016) — The accelerator pedal position sensor is a very common failure item on these sedans, immediately causing 'Reduced Engine Power' mode.
- Chevrolet Malibu (2004-2012) — Frequently experience failures of the original accelerator pedal assembly. Aftermarket replacements feature an improved non-contact Hall-effect sensor design for longevity.
- Toyota Tacoma (2003-2005) — The APP sensor is uniquely mounted on the throttle body, connected to the pedal via a mechanical cable as a fail-safe. Water intrusion in the cabin causes electrical issues with this circuit.
Manufacturer-Specific Notes
- General Motors (Chevrolet, GMC): GM has well-known issues with poor terminal tension in the APP sensor connector (TSB #PIP3783D) and broken ground wires on the intake harness for 2007-2014 trucks/SUVs. TSB #07-06-04-019F notes water leaks corrode body harness connectors, causing this code.
- Toyota: On older models like the 2003-2005 Tacoma, the APP sensor is located on the throttle body. When a fault occurs, the ECM shuts down the electronic throttle motor, but the throttle operates mechanically via a physical cable as a fail-safe.
- Hyundai / Kia: Pedal assembly failure is very common. After replacing the pedal, a 'Throttle Relearn' procedure is necessary to ensure proper idle and throttle response, often done manually via a sequence of key turns and pedal presses.
- BMW: The accelerator pedal is sold only as a complete, non-serviceable assembly. A failure of the internal sensor requires replacement of the entire pedal unit, which is significantly more expensive than domestic brands.
Real Owner Stories
2008 Chevy Silverado, 115K miles - The Classic Ground Wire Failure
Intermittent 'Reduced Engine Power' message and P2120 code, especially when hitting bumps. Truck suddenly lost all throttle response.
What they tried:
- Replaced the accelerator pedal assembly ($120 part) - the problem returned the next day.
- Considered replacing the expensive throttle body but checked forums first.
Outcome: Found multiple reports of a broken ground wire. Located the small black ground wire on the passenger side of the intake manifold. The wire was broken inside the insulation near the eyelet connector. Repaired the wire with a new terminal for under $5. Problem solved permanently.
Lesson: On GMT900 trucks (2007-2014), always inspect the ground wire on the passenger side intake manifold (G103) and the pedal connector before replacing the pedal assembly.
2011 GMC Yukon, 95K miles - The Loose Connector Pin Misdiagnosis
Vehicle randomly entered limp mode. Clearing codes fixed it temporarily, but the issue became frequent.
What they tried:
- A mechanic diagnosed a bad APP sensor and replaced the entire pedal assembly.
- The code P2120 returned two days later.
Outcome: Returned to the shop. A technician performed a 'wiggle test' on the pedal connector while watching live data. The voltage signal dropped out, confirming a bad connection. The female terminals inside the connector lost tension (GM TSB #PIP3783D). Replacing the connector pigtail (ACDelco PT2712) provided a permanent fix.
Lesson: A 'wiggle test' is a crucial diagnostic step. Poor terminal tension is a very common cause on GMs; fixing the connector is cheaper than replacing the pedal assembly twice.
2007 Chevy HHR, 130K miles - The Unusual Water Leak
Car showed 'Reduced Power' and set P2120 after a heavy rainstorm. Throttle was completely unresponsive.
What they tried:
- Checked the APP sensor and its connector, which appeared clean and dry.
- Replaced the APP sensor assembly, but the code immediately returned.
Outcome: A technician found water stains on the carpet near the driver's side A-pillar. They removed the kick panel and discovered a large body harness connector full of green corrosion. A leaking windshield seal allowed water to drip onto the connector, shorting the APP sensor circuit. Cleaning the connector and repairing the leak resolved the issue.
Lesson: If an electrical fault appears after rain or a car wash, suspect water intrusion. Check major harness connectors in the kick panels and under the dash for corrosion.
How to Prevent This Code From Triggering
- Apply Dielectric Grease to Connectors (When servicing any related component) — Applying dielectric grease into the seal of electrical connectors keeps moisture and oxygen out, preventing the pin corrosion that causes circuit faults.
- Clean Key Engine and Chassis Grounds (Every 30,000-50,000 miles) — Ground points corrode over time, increasing resistance and causing sensors to send faulty data. Cleaning contact surfaces to bare metal ensures a stable electrical system.
- Inspect and Clear Cowl and Sunroof Drains (Annually (especially in the fall)) — Clogged drains cause water to overflow into the cabin, saturating and corroding critical harness connectors located in the kick panels or under the carpet.
- Secure Wiring Harnesses (During any under-dash or engine bay work) — Ensuring wiring harnesses are properly secured in their clips prevents wires from chafing through their insulation against sharp metal edges, avoiding shorts.
Frequently Asked Questions
What is the difference between a Throttle Position Sensor (TPS) and an Accelerator Pedal Position (APP) Sensor?
The APP sensor is part of the gas pedal assembly and acts as the driver's input to the computer. The TPS is on the throttle body in the engine bay and measures the actual opening of the throttle plate. Code P2120 strictly refers to the APP sensor in the pedal.
What is a common misdiagnosis for P2120?
A common mistake is replacing the throttle body. P2120 specifically isolates to the accelerator pedal's sensor circuit. Always diagnose the pedal and its wiring first to avoid wasting money on a $300+ throttle body.
What is the difference between P2120 and P2135?
P2120 indicates a circuit malfunction (high, low, or erratic voltage) in a single pedal sensor circuit ('D'). P2135 indicates a correlation error, meaning the signals from the two separate pedal sensors do not agree with each other.
Can I just clear the P2120 code?
You can clear the code with a scanner, but it returns almost immediately. This is a critical safety fault, and the PCM re-detects the circuit error as soon as the ignition cycles. The underlying mechanical or electrical problem must be fixed.
Is replacing the accelerator pedal assembly a difficult DIY job?
For most vehicles, this is a beginner-friendly DIY repair taking under an hour. The assembly is held by two or three easily accessible bolts and has one electrical connector. A manual 'throttle relearn' procedure is usually the only post-installation requirement.
How do I perform a throttle relearn procedure?
Turn the ignition ON (engine OFF), wait 10 seconds, slowly press the gas pedal to the floor and slowly release it 3-5 times, then turn the ignition OFF. Always consult a service manual for your specific vehicle, as some require a scan tool.
Can a bad battery cause code P2120?
Yes. A failing battery provides low or unstable voltage to the entire electrical system, including the PCM and its sensors. This causes modules to behave erratically and triggers codes like P2120, even if the pedal sensor is fine.
The shop quoted me over $700 to fix P2120. Is that reasonable?
Repair costs range from $150 for a domestic vehicle pedal swap to $700+ for luxury brands like BMW requiring expensive OEM parts and diagnostic labor. If the issue is a simple wiring fix, expect to pay $120-$250. Always ask for a detailed breakdown of parts, labor, and diagnostic time.
Key Takeaways
- Code P2120 triggers 'Reduced Engine Power' mode, limiting vehicle speed to 30-50 mph and creating an immediate safety hazard in traffic.
- Faulty electrical connections cause 70% of P2120 codes, not the sensor itself; always perform a 'wiggle test' on the pedal connector before buying parts.
- On 2007-2014 GM trucks and SUVs, a broken intake manifold ground wire (G103) or loose connector pins (TSB #PIP3783D) are the definitive root causes.
- Replacing a failed APP sensor requires swapping the entire $60-$300 gas pedal assembly, a simple 1-hour DIY job requiring only basic hand tools.
- Never replace the throttle body for a P2120 code; this fault isolates strictly to the accelerator pedal circuit and its wiring.
Helpful Videos

The information in this article is provided for general reference and educational purposes only. Vehicle specifications, procedures, and part compatibility can vary by production date, trim level, and region. Always consult your vehicle's factory service manual and verify part numbers before purchasing or performing repairs. Safety-critical components such as airbags, seat belts, and braking systems should be installed by a qualified professional.
- 🎬 Helpful Videos
- What Does P2120 Mean?
- Can I Drive With P2120?
- Common Causes
- Symptoms
- Diagnostic Flowchart
- Common Fixes & Costs
- DIY vs Professional
- Used vs. New Parts: Buying Guide
- What Happens If You Wait — Timeline
- Cost of Not Fixing It
- Diagnosis Steps
- When This Code Triggers (Freeze-Frame Conditions)
- Related Codes
- Climate & Environmental Factors
- How to Talk to a Mechanic About This Code
- Where to Take It: Dealer vs Independent vs Chain
- When to Walk Away From the Repair
- What Scan Tool You Need for This Code
- How to Clear the Code After You Fix It
- Will This Fail Emissions / State Inspection?
- Most Commonly Affected Vehicles
- Manufacturer-Specific Notes
- Real Owner Stories
- 2008 Chevy Silverado, 115K miles - The Classic Ground Wire Failure
- 2011 GMC Yukon, 95K miles - The Loose Connector Pin Misdiagnosis
- 2007 Chevy HHR, 130K miles - The Unusual Water Leak
- How to Prevent This Code From Triggering
- Frequently Asked Questions
- What is the difference between a Throttle Position Sensor (TPS) and an Accelerator Pedal Position (APP) Sensor?
- What is a common misdiagnosis for P2120?
- What is the difference between P2120 and P2135?
- Can I just clear the P2120 code?
- Is replacing the accelerator pedal assembly a difficult DIY job?
- How do I perform a throttle relearn procedure?
- Can a bad battery cause code P2120?
- The shop quoted me over $700 to fix P2120. Is that reasonable?
- Key Takeaways
- 🎟️ Get 5% Off