

OBD-II Code P2114: Throttle/Pedal Position Sensor Performance
The Ultimate Guide to P2114: What it means, why it triggers, and how to fix it for good.
- Stop driving immediately; P2114 triggers a sudden 'limp mode' that limits speed to under 30 mph and causes unpredictable stalling in traffic.
- Start diagnosis by checking for a dirty throttle body or frayed wiring, which account for over 70% of P2114 triggers before replacing expensive parts.
- Search for Technical Service Bulletins (TSBs) first, as Ford (Program 13N03), GM, and VW offer extended warranties for the exact factory defects causing this code.
- Look for companion codes like P2138 or P2135; P2138 isolates the fault to the $100 gas pedal, while P2135 points directly to the $300 throttle body.
- Perform a mandatory 'throttle relearn' procedure after any repair, or the vehicle will fail to idle correctly and immediately trigger new engine codes.
What Does P2114 Mean?
P2114 means your Powertrain Control Module (PCM) detects a problem with the electronic throttle system. A sensor monitoring the gas pedal or throttle plate is not reporting the correct 'at rest' voltage when your foot is off the gas. This conflict confuses the computer about your acceleration intent, forcing it into a protective 'limp mode'.
Technical definition: The SAE/OBD-II definition is 'Throttle/Pedal Position Sensor 'C' Minimum Stop Performance'. The PCM detects the 'C' sensor circuit signal in the drive-by-wire system is out of range when the throttle should be closed. The PCM cannot verify a closed throttle, creating a severe unintended acceleration risk.
Can I Drive With P2114?
No — Do Not Drive. Do not drive the vehicle. This code indicates a critical fault in the throttle control system that causes sudden and total power loss, unpredictable acceleration, or stalling in traffic, creating a major safety risk. Continuing to drive also causes secondary damage to the catalytic converter from unburnt fuel, a repair costing over $1,500.
Common Causes
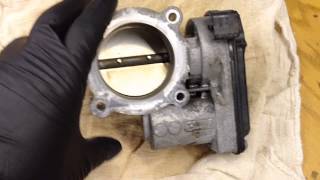
- Dirty or Failing Electronic Throttle Body (Very Common) — Carbon and oil gunk physically stop the throttle plate from closing completely. Alternatively, the internal electronics, actuator motor, or plastic gears fail mechanically. This is a notorious issue on many Ford and Volkswagen vehicles.
- Faulty Wiring or Connectors (Very Common) — Wiring to the throttle body or accelerator pedal degrades from heat, vibration, and moisture. Poor pin tension inside plastic connectors is a frequent failure point, especially on GM trucks. Applying dielectric grease during reassembly prevents moisture intrusion.
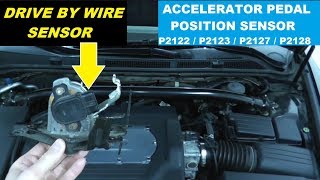
- Failed Accelerator Pedal Position (APP) Sensor (Common) — The sensor attached to the gas pedal wears out from millions of presses, sending erratic voltage signals to the computer. In modern cars, this sensor is integrated into the pedal assembly and requires replacing the entire unit.
- Low System Voltage (Common) — A weak battery (below 12.6V engine off), failing alternator, or corroded ground wires drops voltage across the vehicle. The sensitive electronic throttle system requires stable power (13.7V+ engine on); low voltage corrupts sensor readings and triggers this code.
- Aftermarket Part Incompatibility (Less Common) — Low-quality aftermarket throttle bodies or pedal sensors fail to meet the precise electronic specifications the PCM expects, triggering P2114 even if the part is brand new. Stick to OEM or high-quality OE-equivalent parts.
- Powertrain Control Module (PCM) Failure (Rare) — The vehicle's main computer fails due to internal circuit problems, software corruption, or cracked solder joints, preventing it from reading signals from perfectly good sensors.
Symptoms
- Reduced Power / 'Limp Mode' — The vehicle suddenly loses the ability to accelerate, limiting speed to under 30 mph. The engine runs, but the gas pedal has little or no effect.
- Check Engine Light and/or Wrench Light On — A solid or flashing Check Engine Light appears. Ford and VW vehicles often illuminate a wrench or 'EPC' (Electronic Power Control) light alongside it.
- Unstable Idle or Stalling — The engine idles very high, very low, or surges. It stalls completely when coming to a stop because the computer cannot control airflow.
- Poor, Delayed, or Unwanted Acceleration — Before entering full limp mode, you experience severe hesitation when pressing the gas pedal, or the car accelerates unexpectedly.
- Electronic Stability Control (ESC) and Cruise Control Disabled — A fault in the throttle system disables linked safety features, illuminating traction control warning lights and disabling cruise control.
Diagnostic Flowchart
Tap your situation to follow the diagnostic path that matches what you're seeing on this code.
Common Fixes & Costs
- Clean the Throttle Body — Parts: $10-$20, Labor: $75-$150, ~0.8 hr book time (DIY)
- Replace Electronic Throttle Body Assembly — Parts: $150-$450, Labor: $100-$250, ~1.2 hr book time (Intermediate)
- Replace Accelerator Pedal Assembly — Parts: $70-$200, Labor: $75-$150, ~0.7 hr book time (Intermediate)
- Repair Wiring Harness or Connector — Parts: $10-$50, Labor: $150-$500+, ~2.5 hr book time (Professional)
- Replace Powertrain Control Module (PCM) — Parts: $800-$1,500+, Labor: $150-$300, ~1.5 hr book time (Professional)
Used vs. New Parts: Buying Guide
When a used part is worth it: Buying a used accelerator pedal assembly from a salvage yard is a viable budget option for older vehicles (>100k miles). It is highly risky for electronic throttle bodies.
Donor-vehicle mileage cap: roughly under 80000 miles for the part to have meaningful remaining life.
Donor quality checklist:
- Verify the donor vehicle's mileage is low.
- Match the part number exactly; electronic components are year and trim-specific.
- Inspect the part for physical damage, connector corrosion, or excessive carbon.
Decision logic:
- If The part is for a Ford, VW, or make with a known high failure rate for that component. → Buy new OEM. A used part likely has the same inherent factory defect.
- If Vehicle is less than 10 years old and the part costs under $300 new. → Buy new for the warranty. Savings from a used part are not worth repeat labor costs.
- If The vehicle is over 150K miles and you are performing the repair yourself. → A used part is an acceptable risk, as your repeat labor cost is zero.
Warranty tradeoff: Used parts carry a 30-90 day warranty covering only the part. New aftermarket parts offer 1-year to lifetime warranties. New OEM parts carry a 1-2 year warranty.
Worst-case if a used part fails: $300-600 if a used part fails, requiring repeat labor and a new part.
What Happens If You Wait — Timeline
- Immediate: Check Engine Light illuminates, vehicle enters 'limp mode.' Engine power is severely restricted, and top speed is limited to 20-40 mph. The car is unsafe to drive in traffic. (MPG impact: N/A (drivability is the primary issue)% · Added cost: $75-$250 (for towing))
- 1-4 weeks of continued driving: Driving in limp mode causes the engine to run inefficiently, creating an overly rich fuel mixture that fouls spark plugs and sends unburnt fuel into the exhaust. (MPG impact: 15-30%% · Added cost: $50-$200 (wasted fuel and spark plug replacement))
- 1-3 months: Unburnt fuel overheats and damages the catalytic converter. The internal honeycomb substrate melts or breaks apart. (MPG impact: 20-40%% · Added cost: $1200-$2800 (catalytic converter replacement required))
- 3+ months: Complete catalytic converter failure causes a major exhaust blockage, dramatically reducing engine power and destroying oxygen sensors. Extreme backpressure causes internal engine damage. (MPG impact: 40-50%+% · Added cost: $2000-$4000+ (catalytic converter, O2 sensors, engine diagnostics))
Cost of Not Fixing It
- Immediate: Vehicle is unsafe to drive. It stalls in traffic or fails to accelerate, creating a high accident risk. You will likely require a tow. (Added cost: $75-$250 (for towing))
- 1-3 months: Continued driving in limp mode causes the engine to run rich, sending unburnt fuel into the exhaust. This overheats and destroys the catalytic converter. (Added cost: $1200-$2800)
- 3+ months: Prolonged issues cause secondary damage, including fouled spark plugs, destroyed oxygen sensors, and excessive carbon buildup throughout the engine. (Added cost: $300-$800)
Diagnosis Steps
- Scan for Codes & Analyze Freeze Frame Data
Use an OBD-II scanner to confirm P2114 and check for related codes (P2135 or P2138). Analyze the 'freeze frame' data to see the exact RPM, speed, and engine load when the fault occurred.
Tools: OBD-II Scanner (Beginner) - Check for Technical Service Bulletins (TSBs)
Search for TSBs for your specific make, model, and year. Manufacturers frequently release bulletins for known wiring problems or software updates that save hours of diagnostic time.
Tools: Internet access, VIN (Beginner) - Visually Inspect Wiring and Connectors
Inspect wiring harnesses to the electronic throttle body and accelerator pedal. Look for chafed or melted wires. Unplug connectors and check for corrosion, moisture, or loose pins.
Tools: Flashlight (Beginner) - Clean the Throttle Body
Remove the air intake tube. If heavy carbon buildup surrounds the throttle plate, clean it thoroughly with throttle body cleaner and a rag. Never spray cleaner directly into an electronic throttle body.
Tools: Screwdriver/ratchet set, throttle body cleaner, rags (Intermediate) - Analyze Live Data PIDs with a Scan Tool
Monitor 'Throttle Position (%)' and 'Accelerator Pedal Position (%)' PIDs. At idle, throttle position should be a low, stable percentage. As you press the pedal, both values must increase smoothly. Erratic jumps point to a sensor or wiring fault. Verify 'Control Module Voltage' is above 13.5V running.
Tools: OBD-II Scanner with Live Data (Advanced) - Test Sensor Voltages with a Multimeter
Back-probe the APP and throttle body connectors. With key on, engine off, verify a 5V reference signal (4.75V-5.25V) and good ground (<0.2 ohms). The signal wire voltage must sweep smoothly from ~0.5V at idle to ~4.5V at wide-open throttle. Jumps indicate a bad sensor.
Tools: Digital multimeter, wiring diagram, back-probe kit (Advanced) - Perform a 'Wiggle Test'
With the engine running and a scan tool displaying live data, gently wiggle the wiring harnesses for the throttle body and pedal sensor. If voltage readings jump or drop out, you have an intermittent short or open circuit in the harness.
Tools: OBD-II scanner with live data or multimeter (Advanced) - Perform a Sensor Resistance Test
With the component disconnected, use a multimeter to check the internal resistance of the APP or TPS sensor. Total resistance between the 5V reference and ground pins should be ~2.5 kOhms +/- 20%. An open loop or short confirms internal failure.
Tools: Digital multimeter, wiring diagram (Advanced) - Analyze Scope Patterns for Glitches
Use an oscilloscope to graph the sensor's signal voltage. Slowly press the pedal. A good sensor shows a smooth line. Sharp drops ('glitches') confirm an internal failure a multimeter misses. Dual-sensor signals must track perfectly.
Tools: Automotive oscilloscope (Professional) - Perform a Throttle Relearn Procedure
After cleaning or replacing any component, a 'relearn' procedure is mandatory to reset the PCM's learned throttle positions. This requires a specific sequence of key turns or a professional scan tool.
Tools: Vehicle-specific instructions or professional scan tool (Intermediate)
When This Code Triggers (Freeze-Frame Conditions)
- Engine Coolant Temp: 170-210°F (The fault often occurs once the engine is fully warmed up and enters closed-loop operation.)
- RPM: 700-1200 RPM (at or near idle) (Triggers when the PCM expects a minimum stop/idle value, such as coasting to a stop or immediately after startup.)
- Engine Load: Low (15-30%) (Sets under low engine load conditions, not during heavy acceleration, as it relates to the closed throttle position.)
- Vehicle Speed: 0-20 mph (Detected as the vehicle comes to a stop or idles, where the PCM actively checks for a stable closed-throttle signal.)
Related Codes
- P2135 — Indicates a disagreement between the two redundant sensors inside the throttle body. If paired with P2114, the throttle body assembly has failed.
- P2138 — Indicates a disagreement between sensors in the accelerator pedal assembly. Seeing P2138 with P2114 isolates the fault to the gas pedal or its wiring.
- P2111 / P2112 — Means the throttle actuator is mechanically stuck open (P2111) or closed (P2112) due to carbon buildup or broken gears, triggering P2114 as a secondary code.
- P2176 — Indicates 'Idle Position Not Learned'. Appears after a throttle body is cleaned or replaced but the mandatory relearn procedure was skipped.
Climate & Environmental Factors
- Cold Weather: In freezing temperatures, moisture in the intake freezes, causing 'throttle body icing.' This physically restricts the throttle plate, triggering P2114. Common on Dodge/Ram/Jeep Hemi engines.
- High Humidity / Moisture: High humidity accelerates corrosion of wiring and connector pins for the throttle body and pedal sensor. Corrosion increases circuit resistance, corrupting sensor signals.
How to Talk to a Mechanic About This Code
Say this: "I have a P2114 code and the car is in limp mode. Please check for any TSBs and test the accelerator pedal sensor, the throttle body, and the related wiring to pinpoint the failure before replacing any major parts."
Signals you understand the common failure points and expect a proper diagnostic process, not just replacing the most expensive part. Mentioning TSBs shows you've done your homework.
Avoid saying:
- 'Just fix whatever's wrong'
- 'My check engine light is on, can you look at it?'
- 'Whatever you recommend'
Questions to ask before authorizing the repair:
- How did you rule out the accelerator pedal and wiring before recommending a throttle body replacement?
- Did you perform a 'wiggle test' on the harnesses to check for intermittent shorts?
- Will the mandatory throttle relearn procedure be performed after the repair?
- Can you provide a printout of the freeze-frame data and any other codes you found?
- What is the warranty on the recommended parts and labor?
Where to Take It: Dealer vs Independent vs Chain
- Dealer:
Recommended if your vehicle is known for specific issues related to P2114 covered by the manufacturer.
Best for: Vehicles with known TSBs or warranty extensions (e.g., Ford, GM), Vehicles still under powertrain warranty, Complex diagnosis on German makes (VW, Audi)
Downsides: Highest labor and part costs, Defaults to replacing entire assemblies instead of smaller components (Typical cost: +50% vs. baseline) - Independent Shop:
Best overall fit for most out-of-warranty vehicles, provided you choose a reputable shop with strong diagnostic skills.
Best for: Out-of-warranty vehicles where cost is a major factor, Common vehicles with well-documented fixes for P2114
Downsides: Diagnostic capabilities vary widely; vet the shop's reviews for electrical work, May lack access to the latest manufacturer software updates (Typical cost: +0% vs. baseline) - Chain Shop:
Use with caution. Risky for initial diagnosis, but acceptable if you've already identified the specific part.
Best for: Simple, clear-cut part replacements (e.g., you already diagnosed a bad pedal sensor)
Downsides: High risk of misdiagnosis; technicians lack deep diagnostic experience for complex electrical faults, Pushes unnecessary part replacements instead of diagnosing wiring issues (Typical cost: -10% vs. baseline)
When to Walk Away From the Repair
If the estimated repair cost exceeds 50% of your car's private-party market value, seriously consider selling or trading it in.
- Car worth $7000, fix is $800: Fix it. This repair is well below the threshold and restores a critical safety system.
- Car worth $3500, fix is $750: Borderline, but likely worth fixing. The cost is 21% of the car's value. Get a second opinion to ensure the diagnosis is correct.
- Car worth $2000, fix is $1200: Walk away. The repair cost is 60% of the car's value. It is not an economically sound repair.
What Scan Tool You Need for This Code
Minimum: OBD-II scanner with the ability to display and graph live data for multiple PIDs at once.
A basic $20 code reader only shows the 'P2114' code. It cannot display live sensor data from the accelerator pedal and throttle body, which is essential to determine which part is failing.
Budget: BlueDriver Pro (~$100) — Connects to your smartphone and graphs live data for the accelerator pedal and throttle position sensors, helping you see glitches or non-responsive components.
Mid-range: Foxwell NT809 / Autel MaxiCOM MK808S (~$300-400) — Offers bidirectional control, allowing you to command the throttle motor to open and close. This 'active test' confirms if the throttle body responds correctly to commands.
Professional: Autel MaxiSys MS906 / Launch X431 Series (~$900-1500) — Provides full OEM-level diagnostics, including advanced coding functions, topology mapping, and high-speed data logging essential for capturing intermittent glitches.
Rent vs buy: AutoZone's 'Loan-A-Tool' program offers free rental scanners, but they are often basic code readers insufficient for this job. For P2114, you must buy a scanner with live data capability or pay a diagnostic fee at a shop.
How to Clear the Code After You Fix It
- Ensure the repair is complete and all connectors are secure.
- Use an OBD-II scan tool to erase the Diagnostic Trouble Codes (DTCs). Disconnecting the battery does not clear all modules.
- Perform the vehicle-specific throttle relearn procedure.
- Perform a complete OBD-II drive cycle to allow readiness monitors to complete.
Drive cycle (~20 minutes): A generic drive cycle includes: a cold start (engine temp below 122°F), 3 minutes of idling, 10 minutes of steady highway driving (55 mph), coasting down to 20 mph without braking, and 10 minutes of stop-and-go city driving.
Readiness monitors affected: Comprehensive Component Monitor, Catalyst Monitor, Oxygen (O2) Sensor Monitor
Before emissions retest: drive at least 100 miles to fully set monitors.
Watch out for:
- Clearing the code without fixing the hardware fault causes the code to return immediately.
- Taking the vehicle for an emissions test before readiness monitors complete results in a 'Not Ready' failure.
- Skipping the mandatory throttle relearn procedure causes new codes and poor idle.
Will This Fail Emissions / State Inspection?
Yes — this code typically fails an OBD-II emissions inspection.
- California: An illuminated Check Engine Light is an automatic failure. After repair, a full drive cycle must set all readiness monitors before re-testing.
- New York: Fails inspection if the Check Engine light is on. For 2001+ vehicles, fails if more than one readiness monitor is 'Not Ready'.
- Texas: In emissions-testing counties, the Check Engine Light is an automatic failure. Drive 50-100 miles after clearing the code to reset monitors before inspection.
Most Commonly Affected Vehicles
- Ford Focus (2012-2018) — Notorious for internal electronic throttle body failures causing sudden limp mode. Cleaning will not fix it. Ford issued Customer Satisfaction Program 13N03, extending the warranty to 10 years/150,000 miles.
- Chevrolet / GMC Silverado, Sierra, Tahoe, Suburban (2007-2014) — Commonly caused by poor terminal tension in the accelerator pedal connector. TSBs PIP4568E and PIP3783D advise correcting pin fit before replacing the pedal assembly.
- Ford Escape (2013-2016) — Shares throttle body issues with the Focus and is included in Program 13N03. A throttle relearn procedure is critical after replacement.
- Dodge / Ram / Jeep Various with Hemi V8 (e.g., Ram 1500) (2005-2014) — Prone to throttle body icing in cold climates. Check for PCM software updates addressing false codes before replacing parts.
- Nissan Altima, Sentra (2007-2013) — Suffers from failures of either the throttle body or accelerator pedal sensor. A throttle relearn procedure is always required after repair.
- Subaru Outback, Forester, Legacy (2010-2021) — Presents with a flashing cruise control light. A mandatory 'idle relearn' procedure is crucial after cleaning or replacing the throttle body (TSB 11-163-16R).
- Toyota Camry, Highlander, RAV4 (2.5L/2.7L) (2010-2018) — Frequently caused by significant carbon buildup inside the throttle body. A thorough cleaning is a highly effective first step.
- Hyundai / Kia Sonata, Optima, Sportage (2011-2016) — Known for electronic throttle body assembly failures. An advanced scan tool is needed to perform an 'active test' on the motor to confirm failure.
- Volkswagen Jetta, Tiguan, Passat (2006-2017) — Triggers the EPC light. Check TSB 01-16-12 for high resistance in the throttle body connector before replacing the part.
Manufacturer-Specific Notes
- Ford: On the Focus and Escape, P2114 is almost always an internal electronic failure of the throttle body. Ford extended the warranty via Program 13N03. Cleaning the unit does not work; replacement is mandatory.
- General Motors (Chevrolet/GMC): GM issued TSBs (PIP4568E) pointing to poor electrical contact in the accelerator pedal connector. The fix is improving terminal tension, not replacing the pedal.
- Volkswagen: The EPC light illuminates. Investigate TSB 01-16-12 for high resistance in the throttle body connector before replacing the part. A scan-tool 'Throttle Body Alignment' is mandatory after repair.
- Subaru: A flashing cruise control light accompanies the Check Engine Light. An idle relearn procedure is absolutely mandatory after any throttle body service.
Real Owner Stories
2014 Ford Focus with 85,000 miles
While driving on the highway, the car suddenly lost power, the wrench light came on, and the message 'Engine Malfunction, Service Now' appeared. The car would not exceed 20 mph.
What they tried:
- A breakdown service cleared the code, which worked for 10 minutes before returning.
- The owner replaced the throttle body three times with cheap aftermarket parts, but the problem persisted.
Outcome: The fix required addressing Ford's Customer Satisfaction Program 13N03. The issue was an internal electronic failure of the OEM throttle body. An OEM replacement part and a professional throttle relearn procedure resolved it permanently.
Lesson: For Fords with P2114, check for warranty extensions and TSBs first. Aftermarket parts fail to solve the problem if there is a known design flaw; use OEM parts for high-failure components.
2012 Chevy Sonic with P2138 and P2114
Check Engine Light illuminated, and the car entered limp mode. Codes P2138 and P2114 were present.
What they tried:
- Checked wiring to the throttle body and accelerator pedal for corrosion, a known issue from water leaks in the driver's side kick panel.
- Wiring was intact, so the owner replaced the Accelerator Pedal Position (APP) sensor assembly.
Outcome: Replacing the accelerator pedal assembly and clearing the codes fixed the problem completely.
Lesson: When P2114 pairs with P2138 (Pedal Position Sensor Correlation), the fault is the accelerator pedal assembly or its wiring, not the expensive throttle body. Start diagnosis at the pedal.
2007 Chevy Aveo with ~100,000 miles
Car hesitated severely from a stop, revved high but barely moved. Code P2135 was present alongside P2114.
What they tried:
- Removed the air intake hose and thoroughly cleaned the throttle body, which had significant black carbon buildup around the plate.
Outcome: Cleaning the throttle body restored normal performance. The inexpensive DIY fix resolved the symptoms and the codes.
Lesson: Before replacing expensive parts on older vehicles, thoroughly clean the throttle body. Carbon buildup physically prevents the plate from moving, triggering performance codes.
How to Prevent This Code From Triggering
- Clean the throttle body periodically. (Every 50,000-75,000 miles, or at the first sign of a rough idle.) — Removes carbon buildup that physically restricts the throttle plate, preventing it from closing fully and triggering P2114.
- Apply dielectric grease to key connectors. (Whenever a relevant connector is disconnected.) — Seals electrical connectors from moisture, preventing pin corrosion that increases resistance and corrupts sensor signals.
- Perform regular battery and charging system checks. (Annually, especially before winter.) — The electronic throttle system requires stable voltage. A weak battery or failing alternator provides unstable power, causing the PCM to receive erroneous data and trigger false codes.
- Check for manufacturer software updates. (During regular service visits at a dealership.) — Manufacturers release PCM software updates that adjust throttle control system sensitivity, preventing false codes from setting.
Frequently Asked Questions
Can I just clean the throttle body to fix P2114?
Sometimes. If carbon buildup prevents the throttle plate from closing, a $15 can of cleaner fixes it. However, vehicles like the Ford Focus suffer internal electronic failures where cleaning does nothing; replacement is mandatory.
What is 'limp mode'?
Limp mode is a safety feature programmed into your vehicle's computer. When it detects a critical fault like P2114, it intentionally limits engine power and speed to prevent an accident, allowing you to 'limp' to a safe location.
What is a 'throttle relearn' and is it always necessary?
A throttle relearn teaches the car's computer the new closed and wide-open positions of the throttle plate. It is mandatory after cleaning or replacing the throttle body to ensure proper idle.
What is the most common misdiagnosis for P2114?
The most common mistake is replacing the $300 throttle body without testing the accelerator pedal sensor. If code P2138 is present, the fault is the pedal, not the throttle body. Always verify wiring and grounds before buying parts.
Can a bad battery cause code P2114?
Yes. A weak battery provides unstable voltage to sensitive electronic throttle components. Voltage below 12.6V (engine off) or fluctuating outside 13.7V-14.7V (running) corrupts sensor readings and triggers P2114. Always test the battery first.
I replaced the throttle body and the code came back. What now?
First, ensure you completed the mandatory throttle relearn procedure. Second, perform a 'wiggle test' on the wiring harness to find intermittent shorts. Finally, re-check your diagnosis; the issue is likely the accelerator pedal sensor or a bad ground.
Why did my stability control and cruise control lights also come on?
Stability and cruise control systems rely on accurate data from the throttle control system. When the PCM detects a serious throttle fault, it disables these related systems as a precaution.
Can I just clear the P2114 code to fix it?
No. Clearing the code only turns off the light temporarily. Because P2114 stems from a hard electrical or mechanical fault, the PCM will detect it on the next drive cycle and force the car back into limp mode.
Key Takeaways
- Stop driving immediately; P2114 triggers a sudden 'limp mode' that limits speed to under 30 mph and causes unpredictable stalling in traffic.
- Start diagnosis by checking for a dirty throttle body or frayed wiring, which account for over 70% of P2114 triggers before replacing expensive parts.
- Search for Technical Service Bulletins (TSBs) first, as Ford (Program 13N03), GM, and VW offer extended warranties for the exact factory defects causing this code.
- Look for companion codes like P2138 or P2135; P2138 isolates the fault to the $100 gas pedal, while P2135 points directly to the $300 throttle body.
- Perform a mandatory 'throttle relearn' procedure after any repair, or the vehicle will fail to idle correctly and immediately trigger new engine codes.
Helpful Videos
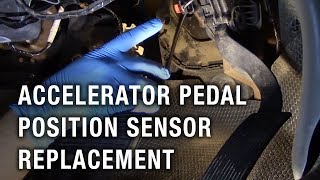
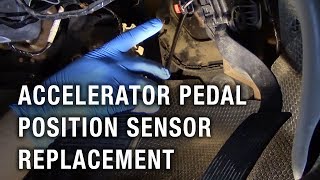
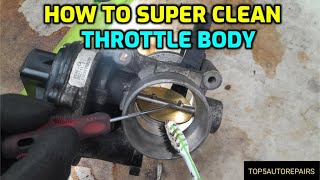

The information in this article is provided for general reference and educational purposes only. Vehicle specifications, procedures, and part compatibility can vary by production date, trim level, and region. Always consult your vehicle's factory service manual and verify part numbers before purchasing or performing repairs. Safety-critical components such as airbags, seat belts, and braking systems should be installed by a qualified professional.
- 🎬 Helpful Videos
- What Does P2114 Mean?
- Can I Drive With P2114?
- Common Causes
- Symptoms
- Diagnostic Flowchart
- Common Fixes & Costs
- Used vs. New Parts: Buying Guide
- What Happens If You Wait — Timeline
- Cost of Not Fixing It
- Diagnosis Steps
- When This Code Triggers (Freeze-Frame Conditions)
- Related Codes
- Climate & Environmental Factors
- How to Talk to a Mechanic About This Code
- Where to Take It: Dealer vs Independent vs Chain
- When to Walk Away From the Repair
- What Scan Tool You Need for This Code
- How to Clear the Code After You Fix It
- Will This Fail Emissions / State Inspection?
- Most Commonly Affected Vehicles
- Manufacturer-Specific Notes
- Real Owner Stories
- 2014 Ford Focus with 85,000 miles
- 2012 Chevy Sonic with P2138 and P2114
- 2007 Chevy Aveo with ~100,000 miles
- How to Prevent This Code From Triggering
- Frequently Asked Questions
- Can I just clean the throttle body to fix P2114?
- What is 'limp mode'?
- What is a 'throttle relearn' and is it always necessary?
- What is the most common misdiagnosis for P2114?
- Can a bad battery cause code P2114?
- I replaced the throttle body and the code came back. What now?
- Why did my stability control and cruise control lights also come on?
- Can I just clear the P2114 code to fix it?
- Key Takeaways
- 🎟️ Get 5% Off