

OBD-II Code P2109: Throttle/Pedal Position Sensor Minimum Stop Performance
The Ultimate Guide to Diagnosing and Fixing P2109
- Code P2109 indicates the engine's throttle plate is failing to close completely, triggering a dangerous 'limp mode' that caps speeds around 20 mph.
- Cleaning carbon buildup from the electronic throttle body resolves this code in over 50% of cases and costs under $20 in DIY supplies.
- Never replace or clean the throttle body without performing a mandatory electronic throttle relearn procedure using a bidirectional scan tool.
- Driving with an active P2109 code risks sudden engine stalling in traffic and destroys a $1,500 catalytic converter within 3 to 6 months due to unburnt fuel.
What Does P2109 Mean?

The Powertrain Control Module (PCM) runs a self-check on the electronic throttle system at startup. It expects the throttle plate to rest in a specific, fully closed position (the 'minimum stop'). Code P2109 triggers when the throttle position sensor reports the plate is resting outside this designated closed position.
Technical definition: SAE/OBD-II defines P2109 as 'Throttle/Pedal Position Sensor A Minimum Stop Performance'. The PCM detects the primary ('A') sensor's voltage at the closed throttle position is outside the manufacturer's specified threshold (typically 0.5V - 1.0V) during a self-test, indicating a mechanical blockage or electrical fault.
Can I Drive With P2109?
No — Do Not Drive. It is not safe to drive with this code. The engine loses power, stalls, or ignores throttle input, creating a serious safety risk in traffic. The vehicle enters a 'limp home mode,' capping speed at roughly 20 mph to protect the engine and force you to pull over.
Common Causes

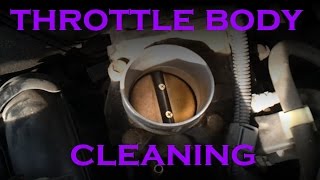
- Dirty or Sticking Throttle Body (Very Common) — Carbon, oil, and grime buildup inside the throttle body physically blocks the throttle plate from closing completely. This is the most frequent cause, especially on direct-injection engines. 🎬 Watch: Step-by-step guide on how to clean a throttle body.
- Failed Electronic Throttle Body Assembly (Common) — The internal electric motor (throttle actuator) or integrated position sensors have worn out, preventing the plate from returning to the fully closed position.
- Faulty Throttle Position Sensor (TPS) (Common) — On vehicles with a standalone TPS, the sensor measuring the throttle plate's angle fails and sends incorrect voltage signals to the computer, making it think the plate is open when it is actually closed.
- Damaged Wiring, Connectors, or Grounds (Common) — Frayed wires, loose pins, water intrusion, or a weak 5-volt reference signal disrupt the electrical connection between the throttle body and the PCM.
- Vacuum Leaks (Uncommon) — A significant vacuum leak from a cracked hose or faulty intake gasket alters air pressure, misleading the PCM and contributing to this code even if the throttle plate closes properly.
- Faulty Accelerator Pedal Position (APP) Sensor (Uncommon) — A failing accelerator pedal sensor sends conflicting signals to the PCM, which the computer misinterprets as a throttle body minimum stop issue.
- Faulty Powertrain Control Module (PCM) or Software (Rare) — The vehicle's main computer has an internal fault or requires a manufacturer software update to correctly interpret sensor signals.
Symptoms

- Reduced Power or 'Limp Mode' — The vehicle severely limits engine power and speed to prevent damage, making it impossible to accelerate beyond 20-30 mph.
- Engine Stalling — The engine stalls unexpectedly, especially when coming to a stop, immediately after starting, or while idling.
- Erratic Throttle Response — The engine hesitates when you press the gas pedal, or takes longer than usual to slow down when you release it.
- Rough or High Idle — Because the throttle fails to close properly, excess air enters the engine, causing the idle RPM to surge or stay abnormally high.
- Cruise Control Disabled — The PCM automatically disables the cruise control system as a safety precaution when a throttle fault is active.
- Check Engine Light On (also visible on scanner) — The Malfunction Indicator Lamp illuminates, often accompanied by a 'Reduced Power' or 'Throttle Fault' message on the dashboard.
Diagnostic Flowchart

Tap your situation to follow the diagnostic path that matches what you're seeing on this code.
Common Fixes & Costs
- Cleaning the Throttle Body — Parts: $10-$20, Labor: $75-$150, ~0.8 hr book time (DIY)
- Replacing the Electronic Throttle Body Assembly — Parts: $150-$400, Labor: $100-$200, ~1.5 hr book time (Intermediate)
- Replacing the Throttle Position Sensor (TPS) — Parts: $40-$150, Labor: $75-$150, ~0.7 hr book time (Intermediate)
- Repairing Wiring or Connectors — Parts: $5-$50, Labor: $100-$300, ~2 hr book time (Professional)
- Replacing the Accelerator Pedal Position Sensor (APPS) — Parts: $60-$250, Labor: $50-$150, ~1 hr book time (Intermediate)
- Reprogramming or Replacing the PCM — Parts: $500-$1500, Labor: $120-$250, ~1.5 hr book time (Professional)
Used vs. New Parts: Buying Guide
When a used part is worth it: For an older vehicle (>150k miles) where budget is the primary concern. A used OEM throttle body from a low-mileage donor car is often more reliable than a cheap aftermarket part.
Donor-vehicle mileage cap: roughly under 80000 miles for the part to have meaningful remaining life.
Donor quality checklist:
- Verify the donor vehicle was not scrapped for engine or electrical issues.
- Match the part number exactly; superseded numbers require PCM programming.
- Inspect the connector pins for corrosion or damage before purchasing.
Decision logic:
- If The part is an electronic throttle body and the vehicle is less than 10 years old. → Buy new OEM or a high-quality remanufactured unit. The risk of a used part failing is too high for this critical component.
- If Vehicle is high-mileage and the cost of a new OEM part is over 25% of the car's value. → A tested, used OEM part with a 90-day warranty is an acceptable risk to save money.
- If The vehicle manufacturer requires programming for a replacement throttle body. → Buy a new part, as some systems prevent the use of a used, previously-programmed component entirely.
Warranty tradeoff: Used parts offer a 30-90 day warranty on the part only. New aftermarket parts come with a 1-year warranty. New OEM parts carry a 1-2 year warranty but may require dealer installation.
Worst-case if a used part fails: $300-$600 if a used part fails after the warranty period, requiring repeat labor costs plus another replacement part.
What Happens If You Wait — Timeline
- 0-1 month: The Check Engine Light illuminates. You notice a slightly high idle or a brief hesitation when accelerating from a stop as the throttle plate begins to stick. (MPG impact: 0-5%% · Added cost: $0-$25 in wasted fuel)
- 1-3 months: The vehicle enters 'limp mode' intermittently. Stalling at idle becomes frequent. The incorrect air/fuel mixture begins straining the catalytic converter. (MPG impact: 5-10%% · Added cost: $50-$100 in wasted fuel)
- 3-6 months: The vehicle is unsafe to drive due to unpredictable throttle response. The constant rich or lean fuel mixture overheats and degrades the catalytic converter. (MPG impact: 10-20%% · Added cost: $300-$800 (catalytic converter damage begins))
- 6+ months: Complete failure of the throttle body occurs. The catalytic converter melts or clogs from the improper fuel mixture, requiring a massive repair bill. (MPG impact: 20-30%% · Added cost: $1500-$3000+)
Cost of Not Fixing It
- Immediate: Unpredictable stalling, surging, or lack of throttle response creates a serious safety hazard. Fuel economy drops by 5-15% due to an incorrect air/fuel mixture. (Added cost: $5-$15 per tank of gas)
- 1-6 months: Excess unburnt fuel enters the exhaust, causing the catalytic converter to overheat and degrade prematurely. (Added cost: $1200-$2800)
- 6+ months: Complete failure of the catalytic converter occurs. The engine suffers from severe carbon buildup on valves and pistons, requiring extensive engine repairs. (Added cost: $2000-$4000+)
Diagnosis Steps
- Read Trouble Codes & Freeze Frame Data
Use an OBD-II scanner to confirm P2109 and check for related codes (e.g., P2135, P0121). Note the freeze frame data to see the engine's RPM, speed, and temperature when the code triggered.
Tools: OBD-II Scanner (Beginner) - Inspect and Clean the Throttle Body
Remove the air intake hose. Look for heavy carbon buildup preventing the throttle plate from closing. Clean it thoroughly with throttle body cleaner and a soft cloth. Verify the plate moves smoothly and snaps closed.
Tools: Screwdriver/Socket Set, Throttle Body Cleaner, Rag (Intermediate) - Analyze Live Data
Monitor the live data stream for 'Commanded Throttle Position' and actual 'Throttle Position Sensor' percentage. With the key on and engine off, values must be nearly identical at 0% (or the specified minimum). A mismatch greater than 2-3% points to a failing actuator motor or sensor.
Tools: Advanced OBD-II Scanner with Live Data (Advanced) - Perform a Visual Wiring Inspection
Inspect the wiring harness and connectors at the electronic throttle body. Look for frayed wires, corrosion, loose pins, or water intrusion that disrupt the signal.
Tools: Flashlight (Beginner) - Test Sensor Voltage, Ground, and Resistance
Using a multimeter, verify the TPS receives a steady 5.0V reference and has a solid ground. Back-probe the signal wire; at the closed position, voltage must match manufacturer specs (typically 0.5V - 1.0V). Unplug the sensor and measure resistance across the signal and ground pins to ensure it falls within the specified range (often 0-2 kΩ).
Tools: Digital Multimeter, Back-probe Kit, Service Manual (Advanced) - Perform a Throttle Relearn Procedure
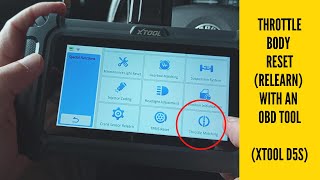
After cleaning or replacing the throttle body, execute a 'relearn' procedure to reset the PCM's minimum and maximum stop positions. This often requires a bidirectional scan tool.
Tools: Advanced OBD-II Scanner (Intermediate) - Check TSBs and Test the PCM
If all components and wiring pass testing, check for manufacturer Technical Service Bulletins (TSBs) regarding a PCM software update. If no update exists, the PCM requires replacement.
Tools: Professional Diagnostic Tools, Access to TSBs (Professional)
When This Code Triggers (Freeze-Frame Conditions)
- Engine State: Varies (Code sets during the PCM's self-test at key-on, or during deceleration when the throttle is commanded closed.)
- Engine Coolant Temp: 40-210°F (The fault is detected during a cold start self-test or after the engine is fully warmed up.)
- Throttle Position 'A': > 1-2% (at idle) (The actual throttle position is higher than the expected minimum (near 0%) when the accelerator pedal is released.)
- Vehicle Speed: 0 mph or decelerating (The fault logs when the throttle fails to return to its minimum stop, which is critical at idle or when slowing down.)
Related Codes
- P0120-P0124 — These codes relate to the Throttle Position Sensor 'A' circuit. While P2109 is specific to the minimum stop, these indicate a general range or performance fault in the sensor.
- P2135 — Indicates a voltage mismatch between throttle position sensors 'A' and 'B'. P2135 is a correlation fault between the two, whereas P2109 is a fault on only the 'A' sensor's minimum reading.
- P2138 — Points to a voltage correlation issue between the accelerator pedal position sensors, not the throttle body. If you have P2138, the problem is the gas pedal assembly.
- P0507 — Indicates 'Idle Air Control System RPM Higher Than Expected'. P2109 is the cause (throttle stuck open), and P0507 is the effect (high idle).
Climate & Environmental Factors
- High Humidity and Moisture: Prolonged exposure to water intrusion in the engine bay accelerates corrosion on electrical connectors, degrading the throttle body signal and triggering the code.
- Extreme Heat: Sustained high temperatures degrade wiring insulation over time, making it brittle and prone to cracking, which causes shorts in the throttle control harness.
- Cold Weather: Freezing temperatures exacerbate pre-existing carbon buildup, causing the throttle plate to bind and stick during the PCM's startup self-test.
How to Talk to a Mechanic About This Code
Say this: "I have a P2109 code and the car is stalling with poor throttle response. Please start by inspecting and cleaning the throttle body before quoting a full replacement. Also, please check the live data for the throttle position sensor voltage at idle."
This signals you know the most common cause (a dirty throttle body) and directs them to the cheapest first step. Asking for live data prevents them from immediately upselling you to an expensive new part without proper testing.
Avoid saying:
- 'Just fix my check engine light.'
- 'My car is acting weird, I think it's the throttle.'
- 'Replace the throttle body.'
Questions to ask before authorizing the repair:
- Did you clean the throttle body, and did the code return?
- What was the throttle position sensor voltage reading at idle, and was it within spec?
- If I need a new throttle body, does the repair include the required electronic throttle relearn procedure?
- What is the warranty on the part and the labor for this repair?
Where to Take It: Dealer vs Independent vs Chain
- Dealer:
Recommended only if a PCM update or specific relearn procedure is required; otherwise, an independent shop is more cost-effective.
Best for: Vehicles under warranty or covered by a special service campaign/TSB., Complex cases requiring a PCM software update., Vehicles requiring proprietary tools for the throttle relearn procedure.
Downsides: Highest labor rates., Defaults to full throttle body replacement instead of cleaning. (Typical cost: +50% vs. baseline) - Independent Shop:
Best fit for most P2109 scenarios, especially if the cause is carbon buildup or a failed throttle body on a domestic or Asian car.
Best for: Out-of-warranty vehicles where cost is a major factor., Straightforward diagnosis and repair, like throttle body cleaning or replacement.
Downsides: Diagnostic capabilities vary widely., May lack access to the latest TSBs or proprietary programming tools. (Typical cost: +0% vs. baseline) - Chain Shop:
Avoid for initial diagnosis. Acceptable only for a pre-diagnosed throttle body replacement.
Best for: Simple, clear-cut part replacements when the diagnosis is already certain.
Downsides: Technician skill varies dramatically; lacks experience in electrical diagnostics., High pressure to upsell services and replace parts unnecessarily. (Typical cost: -10% vs. baseline)
When to Walk Away From the Repair
If the estimated repair cost exceeds 40-50% of the car's private-party value, seriously consider selling or trading it in instead of repairing it.
- Car worth $4000, fix is $500: Fix it. A throttle body replacement is well below the 50% threshold and resolves a critical safety issue.
- Car worth $3000, fix is $1600: Walk away. A PCM replacement costs more than half the car's value. It is not a sound investment.
- Car worth $8000, fix is $600: Fix it. The repair cost is low relative to the car's value.
What Scan Tool You Need for This Code
Minimum: A scanner that reads codes, clears codes, and displays live sensor data, specifically 'Throttle Position'.
A basic $20 code reader only shows the P2109 code. It cannot show the live throttle position percentage, which is essential to confirm if the throttle plate is physically stuck. Without live data, you are guessing.
Budget: BlueDriver Pro (~$100) — Reads codes, provides repair reports, and streams live data (Throttle Position, Commanded Throttle) to your phone for a confident DIY diagnosis.
Mid-range: XTOOL D7 / Kingbolen Ediag Elite (~$300-400) — Offers full bidirectional control to command the throttle actuator open and closed. Includes the 'Throttle Relearn' special function required after cleaning or replacement.
Professional: Autel MaxiCOM MK808 / Foxwell NT809 (~$450-600) — Provides OEM-level functions, bidirectional control, comprehensive relearn procedures, and detailed vehicle-specific data for professional shops or serious DIYers.
How to Clear the Code After You Fix It
- Use an OBD-II scan tool to clear the P2109 code and any related fault codes.
- Ensure the fuel tank is between 25% and 75% full and the battery is fully charged.
- Perform a complete OBD-II drive cycle to allow the system's readiness monitors to run.
Drive cycle (~30 minutes): Start with a cold engine. Idle for 3 minutes with electrical loads on (A/C, defroster). Drive for 20 minutes with a mix of stop-and-go city traffic and highway speeds. Include 5 minutes of steady driving at 55-60 mph. Allow the vehicle to cool down completely.
Readiness monitors affected: Catalyst Monitor, Evaporative System Monitor, Oxygen (O2) Sensor Monitor, Oxygen Sensor Heater Monitor
Before emissions retest: drive at least 100 miles to fully set monitors.
Watch out for:
- Clearing the code resets readiness monitors to 'Not Ready', causing an immediate emissions test failure.
- The code returns immediately if you fail to perform the throttle relearn procedure after cleaning or replacing the throttle body.
Will This Fail Emissions / State Inspection?
Yes — this code typically fails an OBD-II emissions inspection.
- California: An active P2109 code results in an automatic smog check failure. After repair, a full drive cycle must be completed to set all OBD readiness monitors to 'Ready' before a re-test.
- New York: The NYS vehicle inspection includes an OBD-II scan. The Check Engine Light triggered by P2109 causes an automatic failure of the emissions portion.
- Texas: In counties requiring emissions testing, an illuminated Check Engine Light from code P2109 results in a failed inspection. Readiness monitors must be 'Ready' to pass.
Most Commonly Affected Vehicles
- Ford Fusion, Escape, F-150 (2010-2019) — Highly prone to electronic throttle body failure. Ford issued customer satisfaction program 13N03 extending warranties on these units. A PCM software update is also a common fix.
- Chevrolet Cruze, Malibu, Sonic (2011-2016) — Commonly caused by a faulty throttle body assembly or corroded wiring harnesses near the air intake. GM issued special coverage 14582 for throttle body issues on these models.
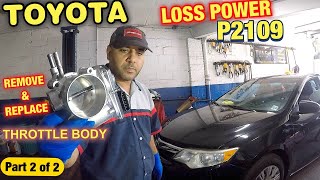
- Toyota Camry, RAV4, Yaris (2012-2021) — Frequently triggered by carbon binding the throttle plate. Cleaning is the first step, but a strict ETCS relearn procedure is mandatory afterward to keep the code from returning.
- Hyundai Elantra, Sonata (2009-2017) — Often traced to wiring problems between the throttle position sensor and the PCM. Inspect connector pins for corrosion before replacing parts.
- Honda Accord, Civic (2008-2015) — Requires a specific ETCS TEST using a bidirectional scan tool to properly diagnose. Honda procedures emphasize resolving other related DTCs (like P0221) before addressing P2109.
- Nissan Altima, Sentra, Rogue (2007-2018) — Linked to internal motor wear in the electronic throttle body assembly. Cleaning provides a temporary fix, but replacement is the long-term solution.
- Volkswagen Golf GTI, Jetta (2010-2017) — Carbon buildup is severe on these direct-injection engines, making throttle body cleaning the primary diagnostic step. Also prone to ECM communication errors.
- Subaru Legacy, Forester, Impreza (2005-2017) — Often appears alongside code P2138, pointing to a faulty accelerator pedal sensor or a poor ground connection on the engine block rather than the throttle body itself.
Manufacturer-Specific Notes
- Ford: A PCM software update is a common fix for false P2109 codes. Always check for TSBs like 13-6-15 or 14-0194 before replacing hardware.
- Toyota: After cleaning or replacing the throttle body, a specific 'relearn' procedure is mandatory to calibrate the new minimum stop position. Failure to do so guarantees the code returns.
- General Motors (Chevy/GMC): Frequently traced to corroded wiring harnesses in the engine bay. GM issued special coverage adjustment 14582 extending the warranty for throttle bodies on specific Cruze and Sonic models.
- Honda: Honda service procedures require checking for other DTCs first, as codes like P0221 must be addressed before diagnosing P2109. A specific ETCS TEST using a bidirectional scanner is required.
Real Owner Stories
2013 Toyota Tacoma with high/unstable idle
After cleaning the throttle body as preventative maintenance, the truck developed a high idle and threw codes P2109 and P0101.
What they tried:
- Resetting the throttle by removing the EFI and ETCS fuses.
- Checking for vacuum leaks around the air intake tube.
Outcome: The owner found a vacuum leak where the air intake tube connected. The P2109 code cleared after performing the fuse-pull throttle reset, and fixing the leak resolved the idle.
Lesson: If new codes appear after cleaning the throttle body, check for vacuum leaks from improperly reinstalled hoses. A throttle position relearn is always required.
2006 Subaru Legacy GT with sudden stalling
The car suddenly shuddered, lost power, and stalled, throwing code P2109 intermittently.
What they tried:
- Replaced the accelerator pedal and sensor assembly.
- Replaced the throttle relay and MAF sensor.
Outcome: Replacing the pedal and sensors failed. The root cause was an intermittent electrical fault inside the electronic throttle body motor, requiring full assembly replacement.
Lesson: Do not assume the accelerator pedal is the cause. If multiple external sensors test fine, the internal motor of the throttle body assembly is the culprit.
2016 Subaru BRZ post-turbo install
Immediately after installing an aftermarket turbo kit, the car threw P2109, entered limp mode, and capped RPM at 2,000.
What they tried:
- Resetting the battery.
- Performing a throttle body relearn procedure.
Outcome: The stock ECU could not manage the drastic change in airflow from the turbo. The vehicle required a custom engine tune to match the new hardware.
Lesson: Major hardware modifications alter airflow parameters beyond the PCM's factory limits. Flash a proper base tune before attempting mechanical diagnostics.
Toyota Vitz with rough running and hesitation
The vehicle experienced jerks and hesitation. A scan revealed P2109.
What they tried:
- Analyzed live data showing commanded throttle at 10% while actual sensor position was 78%.
Outcome: A thorough cleaning of the throttle body removed carbon blocking the plate. Post-cleaning live data showed the sensor position matching the command voltage perfectly.
Lesson: Live data is the fastest way to confirm this issue. A massive mismatch between 'Commanded' and 'Actual' throttle position proves the plate is physically stuck.
How to Prevent This Code From Triggering
- Clean the throttle body periodically (Every 30,000-60,000 miles) — Removes carbon and oil residue that causes the throttle plate to stick, preventing the most common trigger for P2109.
- Use high-quality, top-tier gasoline (Every fill-up) — Top-tier fuels contain higher concentrations of detergents that prevent carbon deposits from forming in the air intake system.
- Install an oil catch can (One-time installation) — Captures oil vapors from the PCV system before they recirculate into the intake manifold, drastically reducing carbon buildup on direct-injection engines.
- Ensure the battery and charging system are healthy (Check annually) — Low battery voltage causes glitches in the electronic throttle control system, leading to false codes or loss of learned calibration values.
Frequently Asked Questions
What is the most common misdiagnosis for P2109?
A common mistake is replacing the throttle body without first cleaning the carbon buildup inside it. Cleaning is the cheapest and easiest first step. Another pitfall is failing to perform the mandatory throttle relearn procedure after cleaning, which causes the code to return immediately.
Can I just replace the sensor to fix P2109?
Rarely. On most modern vehicles, the throttle position sensor is permanently integrated into the electronic throttle body assembly and cannot be purchased or replaced separately.
How much does it cost to fix code P2109?
Costs range from $20 for a DIY throttle body cleaning to $600 for a shop to replace the electronic throttle body assembly. A professional diagnosis typically costs $100 to $150.
Can a weak car battery cause a P2109 code?
Yes. A weak battery causes low voltage drops that disrupt communication between the PCM and throttle module, triggering false codes and erasing learned throttle calibration values.
What is the difference between the accelerator pedal sensor and the throttle position sensor?
The Accelerator Pedal Position Sensor (APPS) is on the gas pedal and tells the computer what your foot is doing. The Throttle Position Sensor (TPS) is on the engine and reports the actual opening angle of the throttle plate.
Will fixing P2109 make my car pass an emissions test?
Yes. While P2109 is a performance code, the active Check Engine Light it triggers results in an automatic failure of any state emissions or smog test.
What does 'Throttle/Pedal Position Sensor A' mean?
Modern drive-by-wire systems use multiple sensors (A, B, etc.) for redundancy and safety. The letter 'A' refers to the primary sensor circuit, and P2109 flags an issue specifically with this primary sensor's minimum reading.
Key Takeaways
- Code P2109 indicates the engine's throttle plate is failing to close completely, triggering a dangerous 'limp mode' that caps speeds around 20 mph.
- Cleaning carbon buildup from the electronic throttle body resolves this code in over 50% of cases and costs under $20 in DIY supplies.
- Never replace or clean the throttle body without performing a mandatory electronic throttle relearn procedure using a bidirectional scan tool.
- Driving with an active P2109 code risks sudden engine stalling in traffic and destroys a $1,500 catalytic converter within 3 to 6 months due to unburnt fuel.
Helpful Videos
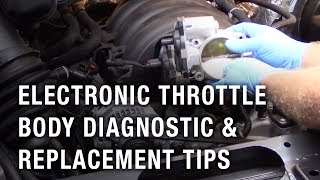

The information in this article is provided for general reference and educational purposes only. Vehicle specifications, procedures, and part compatibility can vary by production date, trim level, and region. Always consult your vehicle's factory service manual and verify part numbers before purchasing or performing repairs. Safety-critical components such as airbags, seat belts, and braking systems should be installed by a qualified professional.
- 🎬 Helpful Videos
- What Does P2109 Mean?
- Can I Drive With P2109?
- Common Causes
- Symptoms
- Diagnostic Flowchart
- Common Fixes & Costs
- Used vs. New Parts: Buying Guide
- What Happens If You Wait — Timeline
- Cost of Not Fixing It
- Diagnosis Steps
- When This Code Triggers (Freeze-Frame Conditions)
- Related Codes
- Climate & Environmental Factors
- How to Talk to a Mechanic About This Code
- Where to Take It: Dealer vs Independent vs Chain
- When to Walk Away From the Repair
- What Scan Tool You Need for This Code
- How to Clear the Code After You Fix It
- Will This Fail Emissions / State Inspection?
- Most Commonly Affected Vehicles
- Manufacturer-Specific Notes
- Real Owner Stories
- 2013 Toyota Tacoma with high/unstable idle
- 2006 Subaru Legacy GT with sudden stalling
- 2016 Subaru BRZ post-turbo install
- Toyota Vitz with rough running and hesitation
- How to Prevent This Code From Triggering
- Frequently Asked Questions
- What is the most common misdiagnosis for P2109?
- Can I just replace the sensor to fix P2109?
- How much does it cost to fix code P2109?
- Can a weak car battery cause a P2109 code?
- What is the difference between the accelerator pedal sensor and the throttle position sensor?
- Will fixing P2109 make my car pass an emissions test?
- What does 'Throttle/Pedal Position Sensor A' mean?
- Key Takeaways
- 🎟️ Get 5% Off