

OBD-II Code P2031: Exhaust Gas Temperature Sensor Circuit Malfunction
The Ultimate Guide to Diagnosing and Fixing P2031 — Causes, Pro-Level Fixes, and Costs
- Code P2031 flags a failing Exhaust Gas Temperature (EGT) sensor on Bank 1, Sensor 2, which immediately halts DPF regeneration in diesel engines.
- Fix this code within 100 miles to prevent a completely clogged Diesel Particulate Filter (DPF), which escalates a $300 sensor repair into a $3,000 replacement.
- Test the sensor's resistance with a multimeter before buying parts; a healthy EGT sensor reads roughly 200-250 Ohms at 70°F.
- Call your dealership with your VIN before paying out of pocket, as VW, Audi, Mercedes, and Ford frequently cover EGT sensors under extended emissions warranties.
What Does P2031 Mean?
Your Engine Control Module (ECM) detects a performance problem with the Exhaust Gas Temperature (EGT) sensor circuit for Bank 1, Sensor 2. The sensor is sending irrational temperature data from the exhaust system. The ECM relies on this data to control engine performance and emissions, making it critical in diesel vehicles to manage Diesel Particulate Filter (DPF) regeneration.
Technical definition: The SAE/OBD-II definition for P2031 is "Exhaust Gas Temperature (EGT) Sensor Circuit Bank 1 Sensor 2". This indicates the ECM detects the sensor's signal is outside the expected voltage range, is irrational, or fails to respond within a set timeframe during the post-start warm-up period.
Can I Drive With P2031?
Yes, But With Caution. You can drive to a repair shop, but avoid long trips or heavy towing. Ignoring P2031 blocks the DPF regeneration process, causing a clogged Diesel Particulate Filter (DPF) — a repair costing $2,500 to $10,000. Continued driving also damages the catalytic converter, adding $1,000 to $4,000 to the bill. Address the issue within 100 miles to prevent this expensive, cascading damage.
Common Causes
- Failed Exhaust Gas Temperature (EGT) sensor (Very Common) — Constant heating and cooling cycles (thermal cycling) in the harsh exhaust environment cause the sensor's internal thermistor to crack or break, resulting in an open or shorted internal circuit.
- Damaged wiring or connectors (Very Common) — EGT sensor wiring is exposed to extreme heat and vibration. Wires melt against the exhaust pipe, chafe against the chassis, or suffer from corroded and loose connector pins, disrupting the signal to the ECM.
- Soot or carbon buildup on the sensor (Common) — A heavy layer of soot or ash builds up on the sensor's tip, insulating it from the hot exhaust gases. This prevents accurate temperature readings and causes a slow response, known as a 'lazy sensor'.
- Exhaust leaks (Common) — A leak from a cracked manifold, loose flange, or bad gasket near the EGT sensor allows cooler outside air into the exhaust stream. The sensor reports a lower temperature than what is actually present, triggering the code.
- Aftermarket exhaust systems or tunes (Less Common) — Installing an aftermarket exhaust lacking the proper mounting location (bung) alters exhaust flow dynamics. Engine tunes (ECU remaps) that fail to account for EGT parameters also trigger false codes.
- Faulty Engine Control Module (ECM) or Software (Rare) — The ECM's internal circuit that reads the EGT signal fails, or the software calibration becomes corrupted. This sets the code even if the sensor and wiring are perfect. Consider this only after exhausting all other diagnostics.
Symptoms
- Check Engine Light is on — This is the first and most universal symptom of a P2031 code.
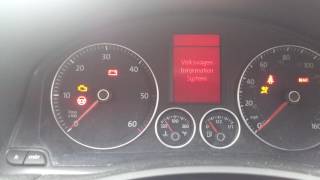
- Flashing glow plug light (on diesel vehicles) — Volkswagen and Audi diesel vehicles flash the glow plug indicator to signal a critical exhaust system fault. 🎬 Watch: See how a flashing glow plug light relates to EGT sensors.
- Decreased fuel efficiency — The ECM alters the fuel mixture to a richer state as a protective measure, significantly increasing fuel consumption.
- Failed emissions test — An active P2031 code automatically fails state OBD-II emissions inspections.
- DPF regeneration blocked / Limp mode (also visible on scanner) — The ECM prevents the DPF regeneration cycle from starting without accurate exhaust temperatures. This quickly clogs the DPF, forcing the vehicle into a reduced-power 'limp mode'.
Diagnostic Flowchart
Tap your situation to follow the diagnostic path that matches what you're seeing on this code.
Common Fixes & Costs
- Replacing the EGT sensor
— Parts: $120-$250, Labor: $100-$200, ~1.5 hr book time
(DIY)
: OEM
: OEM
: OEM - Repairing or replacing damaged wiring/connector — Parts: $20-$60, Labor: $100-$300, ~2 hr book time (Intermediate)
- Cleaning soot buildup from the sensor — Parts: $5-$15, Labor: $50-$100, ~0.8 hr book time (DIY)
- Repairing exhaust leaks — Parts: $20-$100, Labor: $150-$350, ~2.5 hr book time (Intermediate)
- Replacing a faulty ECM — Parts: $600-$1500, Labor: $150-$300, ~1.5 hr book time (Professional)
Used vs. New Parts: Buying Guide
When a used part is worth it: Buying a used EGT sensor is never recommended. They are high-wear items exposed to extreme temperatures. The low cost of a new aftermarket sensor does not justify the risk of installing a used part with an unknown lifespan.
Donor-vehicle mileage cap: roughly under 20000 miles for the part to have meaningful remaining life.
Donor quality checklist:
- Avoid sensors from rust-belt states due to corrosion.
- Ensure the part number matches exactly.
- Visually inspect for melting, corrosion, or physical damage to the probe.
Decision logic:
- If The part is an EGT sensor. → Buy a new OEM or reputable aftermarket part. The savings from a used sensor are negligible compared to the risk of premature failure.
- If Vehicle is older (>150k miles) and budget is the primary concern. → A used sensor is a high-risk gamble. Only consider it if you are doing the labor yourself and accept it will likely fail quickly.
Warranty tradeoff: Used parts have a 30-day warranty at best. New aftermarket sensors carry a 1-year to limited lifetime warranty. New OEM parts carry a 1-2 year warranty.
Worst-case if a used part fails: $200-$400 if a used sensor fails, requiring repeat labor and the purchase of a new part.
What Happens If You Wait — Timeline
- 0-1 month: Code P2031 sets. The ECM disables DPF regeneration. No drivability symptoms are noticeable yet. (MPG impact: 0-5%% · Added cost: $0-$50 in wasted fuel)
- 1-3 months: The DPF accumulates soot beyond normal capacity. The DPF warning light illuminates, and fuel economy drops as exhaust backpressure builds. (MPG impact: 5-10%% · Added cost: $50-$150 in wasted fuel)
- 3-6 months: The DPF becomes significantly clogged. The vehicle enters 'limp mode' with severe power loss. A forced regeneration at a shop is required. (MPG impact: 10-20%% · Added cost: $300-$800 for a forced regeneration or professional cleaning)
- 6+ months: The DPF is completely blocked with hardened soot. Extreme backpressure destroys the DPF and risks catastrophic turbocharger failure. (MPG impact: 20-30%+% · Added cost: $2,500-$10,000 for DPF and potential turbocharger replacement)
Cost of Not Fixing It
- 0-2 months: DPF regeneration is disabled. Fuel economy drops by 5-15% as the ECU runs rich to protect components. (Added cost: $50-$150 in wasted fuel.)
- 2-6 months: The DPF becomes clogged with soot and ash, triggering warning lights and limp mode. A professional forced regeneration is required. (Added cost: $300-$800)
- 6+ months: The DPF is completely blocked and damaged from excessive backpressure. This requires full DPF replacement and risks turbocharger failure. (Added cost: $2,500-$10,000+)
Diagnosis Steps
- Read Codes and Freeze Frame Data
Use an OBD-II scanner to confirm P2031. Note related codes (e.g., P2032, P2033, DPF codes). Analyze the freeze frame data to identify the exact engine conditions (RPM, speed, temperature) when the code triggered.
Tools: OBD-II scanner (Beginner) - Visually Inspect Sensor and Perform Wiggle Test
Locate EGT Bank 1, Sensor 2. Inspect the sensor, connector, and wiring harness for melting, chafing, or corrosion. With a scan tool displaying live EGT data, wiggle the wiring harness. If the temperature reading jumps or cuts out, you have an intermittent wiring break.
Tools: Flashlight, mirror, OBD-II scanner (Beginner) - Analyze Live Sensor Data (Cold and Hot)
Monitor the 'EGT Bank 1 Sensor 2' PID. On a cold engine, the reading must match ambient air temperature within 10°F. Start the engine; the temperature must rise smoothly to 300-500°F at idle. A reading stuck at -40°F or 1800°F confirms a hard circuit fault.
Tools: Advanced OBD-II scanner (Intermediate) - Test Sensor Resistance vs. Temperature
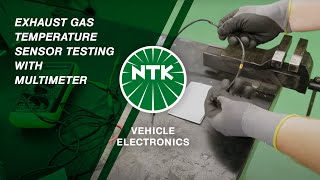
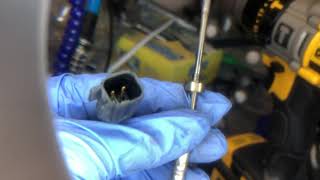
Disconnect the sensor. At room temperature (~70°F), a healthy EGT sensor reads 200-250 Ohms. Use a heat gun to warm the sensor tip; resistance must increase smoothly. An 'OL' (Open Loop) or zero ohm reading means the sensor is dead and requires replacement.
Tools: Digital multimeter, heat gun, vehicle-specific repair manual (Advanced) - Check for Voltage and Ground at the Connector
With the sensor disconnected and the key 'On' (engine off), test the harness-side connector. One pin must have a 5-volt reference signal from the ECM. The other must show a solid ground (near 0 volts, <100 ohms to chassis ground). Missing voltage points to a wiring or ECM fault.
Tools: Digital multimeter, vehicle-specific wiring diagram (Advanced) - Inspect the Sensor for Contamination
Remove the sensor and inspect the tip. Heavy soot or ash buildup insulates the sensor. Clean it with a wire brush and brake cleaner. If the sensor passes the resistance test in Step 4, cleaning restores function.
Tools: Wrenches, wire brush, brake cleaner (DIY) - Check for Exhaust Leaks
With the engine running, listen and feel for leaks around the EGT sensor mounting boss and nearby flanges. Look for visible soot streaks. A leak introduces cold air and skews the sensor's readings.
Tools: Soapy water, flashlight (Intermediate)
When This Code Triggers (Freeze-Frame Conditions)
- Engine Coolant Temp: 185-210°F (85-99°C) (Engine at full operating temperature.)
- RPM: 1800-2800 RPM (Steady state cruise or light acceleration.)
- Engine Load: 30-70% (Vehicle is under moderate load, not idling or at full throttle.)
- Vehicle Speed: 45-65 mph (72-105 kph) (Sustained highway or freeway driving.)
Related Codes
- P2032 — Indicates 'EGT Sensor Circuit Low', meaning the ECM detects a continuously low voltage (short to ground). Live data shows a temperature reading stuck at a bottomed-out value.
- P2033 — Indicates 'EGT Sensor Circuit High', meaning the ECM detects a continuously high voltage (open circuit). Live data shows a temperature reading stuck at a maxed-out value (e.g., 1800°F).
- P0420 — Indicates 'Catalyst System Efficiency Below Threshold'. Appears alongside P2031 if the faulty EGT sensor prevents DPF regeneration, degrading downstream catalytic converter performance.
- P2034 — The exact equivalent of P2031, but for Bank 2. Applies only to vehicles with V-style engines and dual exhaust systems.
Climate & Environmental Factors
- Cold Climates / Road Salt: Road salt accelerates corrosion on the sensor body and connector pins, rapidly degrading signal integrity and causing open circuits.
- High Humidity: Sustained moisture causes corrosion inside the electrical connector, shorting the 5-volt reference signal to ground.
- Extreme Off-Road / Vibration: High-frequency vibrations fatigue the sensor's internal thermistor and wiring harness, leading to intermittent faults and eventual failure.
How to Talk to a Mechanic About This Code
Say this: "I have an OBD-II code P2031 for the Exhaust Gas Temperature Sensor on Bank 1, Sensor 2. I'd like to schedule a diagnostic. Please check the sensor's live data, test the wiring harness for voltage, and inspect for exhaust leaks before recommending a part replacement."
This signals you understand the problem could be the sensor, wiring, or an exhaust leak. It encourages a thorough diagnosis instead of immediately replacing the most obvious part.
Avoid saying:
- 'My check engine light is on, can you look at it?' (Too vague; invites a costly, open-ended diagnostic).
- 'Just replace the EGT sensor.' (Prevents the mechanic from diagnosing the true root cause, like a cheap wiring fix).
- 'Do whatever you think is best.' (Gives up control and leads to upselling).
Questions to ask before authorizing the repair:
- What were the specific live data readings from the sensor when the engine was cold and hot?
- Did you perform a 'wiggle test' on the wiring harness?
- Did you find a 5-volt reference and good ground at the connector?
- If the sensor needs replacement, what is the warranty on the new part and your labor?
Where to Take It: Dealer vs Independent vs Chain
- Dealer:
The best first call IF your vehicle might be covered by an extended emissions warranty. Otherwise, they are a reliable but expensive option.
Best for: Vehicles under a manufacturer or extended emissions warranty (VW, Audi, Mercedes, Ford)., Complex, recurring issues requiring brand-specific software updates.
Downsides: Highest labor rates and part costs., May default to replacing expensive assemblies rather than performing specific wiring repairs. (Typical cost: +50% vs. baseline) - Independent Shop:
Excellent fit for out-of-warranty vehicles. A reputable independent diesel specialist offers the best balance of expertise and value.
Best for: Out-of-warranty vehicles where cost is a factor., Shops specializing in diesel or European vehicles.
Downsides: Quality varies widely; vetting the shop's reputation and ASE certifications is crucial., May lack immediate access to the latest manufacturer software updates. (Typical cost: +0% vs. baseline) - Chain Shop:
Avoid for initial diagnosis. Acceptable only if you have already diagnosed a failed sensor and need a simple replacement.
Best for: Simple, routine maintenance like oil changes and brake pads.
Downsides: Technician skill and diagnostic equipment are inconsistent., Business model pressures technicians to replace parts rather than perform in-depth wiring diagnostics. (Typical cost: -10% vs. baseline)
When to Walk Away From the Repair
If the estimated repair cost exceeds 40-50% of your car's private-party value, pause and reconsider the repair.
- Car worth $5000, fix is $600: Fix it. This repair is well below the threshold and prevents much costlier DPF damage.
- Car worth $8000, fix is $3500: Borderline. The initial P2031 fault was ignored, and now the DPF needs replacement. Get a second opinion before authorizing.
- Car worth $3000, fix is $2800: Walk away. The repair cost is nearly the entire value of the car. It is not economically viable.
What Scan Tool You Need for This Code
Minimum: An OBD-II scanner that reads and graphs live sensor data and retrieves freeze-frame data.
A $20 basic code reader only gives you the P2031 code. It won't show live EGT sensor temperatures, which are essential to know if the sensor is stuck, slow, or reading incorrectly.
Budget: BlueDriver Pro or Ancel BD310 (~$100) — These Bluetooth dongles pair with your smartphone to read codes, view freeze-frame data, and graph live EGT sensor temperatures.
Mid-range: Foxwell NT510 Elite or Autel MaxiCOM MK808 (~$150-500) — Provides manufacturer-specific diagnostics and bidirectional capability to initiate a forced DPF regeneration, which is often necessary after repairing the EGT sensor.
Professional: Autel MaxiCOM MK906BT or Launch X431 Series (~$1200+) — Offers full bidirectional control, advanced ECU coding, and detailed network topology views to diagnose complex wiring or module communication issues.
Rent vs buy: For a one-time diagnosis, use the free 'Loan-A-Tool' program at auto parts stores. Buy a scanner only if you plan to do your own diagnostics regularly.
How to Clear the Code After You Fix It
- Use an OBD-II scan tool to clear the diagnostic trouble codes (DTCs).
- Perform a complete drive cycle to allow the ECU to re-run its self-tests.
- Check for pending or current codes after the drive cycle to confirm the fix.
Drive cycle (~20 minutes): Cold start the vehicle and let it idle for 2-3 minutes. Drive in stop-and-go traffic for 5-10 minutes. Drive at a steady speed of 45-60 mph for 10-15 minutes. Allow the vehicle to cool down completely.
Readiness monitors affected: Catalyst Monitor, Exhaust Gas Sensor Monitor, DPF Monitor
Before emissions retest: drive at least 50 miles to fully set monitors.
Watch out for:
- Disconnecting the battery clears the code but resets all readiness monitors, guaranteeing an emissions test failure.
- The code returns immediately if the underlying wiring fault was not repaired.
- Failing to complete a full drive cycle leaves readiness monitors incomplete, preventing an emissions test.
Will This Fail Emissions / State Inspection?
Yes — this code typically fails an OBD-II emissions inspection.
- California: An active P2031 code causes an automatic smog check failure. All OBD-II readiness monitors must be 'Ready', which this fault blocks.
- New York: The NYS DMV inspection includes an OBD-II scan. A check engine light with code P2031 is an automatic failure.
- Texas: As of 2025, the 17 most populous counties still require an emissions test. An active P2031 code causes a failure in these counties.
Most Commonly Affected Vehicles
- Ford F-Super Duty (F-250, F-350, F-450) (2008-2016) — Extremely common on 6.4L and 6.7L Power Stroke engines. Ford issued TSBs 12-12-10 and 15-0054 for this exact issue.
- Volkswagen Jetta, Golf, Touareg (TDI models) (2009-2015) — Notorious for EGT sensor failures causing a flashing glow plug light. Often covered under extended 'Dieselgate' warranties.
- Mercedes-Benz Sprinter, E-Class (BlueTEC models) (2010-2016) — High failure rates on higher mileage models. Often covered under BlueTEC settlement extended warranties.
- Audi A3, Q7 (TDI models) (2009-2015) — Shares the same high failure rate and warranty extensions as Volkswagen TDI models.
- Chevrolet / GMC Silverado, Sierra (Duramax models) (2011-2016) — The LML Duramax engine frequently suffers EGT sensor issues, inhibiting DPF regeneration and triggering limp mode.
- BMW 335d, X5 xDrive35d (2009-2013) — EGT sensor failures prevent DPF regeneration, leading to severe exhaust backpressure issues.
- Ram 2500, 3500 (Cummins models) (2007-2018) — The multiple EGT sensors on Cummins engines are a frequent source of faults and owner complaints.
- Subaru Forester, Outback (Diesel models) (2008-2014) — Subaru's European-market 'Boxer' diesel engines are highly susceptible to EGT sensor faults.
Manufacturer-Specific Notes
- Ford: For 6.7L Power Stroke engines, Ford issued TSB 15-0054 and Customer Satisfaction Program 15M02, extending warranty coverage for EGT sensors due to exceptionally high failure rates.
- Volkswagen/Audi: On 2.0L and 3.0L TDI models, EGT sensors are frequently covered under the 'Dieselgate' extended emissions warranty (often 10 years/120,000 miles). Check your VIN with a dealer.
- Mercedes-Benz: Many BlueTEC models have an extended emissions warranty from a class-action settlement covering EGT sensors for up to 10 years/120,000 miles.
- GM (Chevrolet/GMC): On Duramax engines, a faulty EGT sensor causes the ECM to incorrectly calculate soot load, triggering unnecessary and failed DPF regeneration cycles.
Real Owner Stories
2012 VW Jetta TDI with 115K miles, P2031 and flashing glow plug light.
Check engine light and flashing glow plug light appeared during a morning commute. No other noticeable symptoms.
What they tried:
- Owner suspected a major engine issue due to the flashing light.
- Took the car to an independent VW specialist.
- Technician scanned the codes, confirming P2031.
- Visual inspection revealed no wiring damage.
Outcome: The technician diagnosed a failed EGT sensor. The sensor was replaced with an OEM part for $450. The code cleared and did not return.
Lesson: On VW/Audi TDI models, a flashing glow plug light usually indicates an emissions sensor fault, not catastrophic engine failure. Always check for extended emissions warranty coverage before paying.
2014 Ford F-350 6.7L Power Stroke at 80K miles, P2031 code returned after sensor replacement.
A local shop scanned P2031 and replaced the EGT sensor. The check engine light returned within 50 miles.
What they tried:
- Replaced the EGT sensor a second time with a different brand; code returned.
- Owner took the truck to a dealership.
- The dealer technician performed a 'wiggle test' on the wiring harness while monitoring live data.
Outcome: The wiggle test showed the EGT signal dropping out. The technician found the sensor wiring harness melted against the exhaust pipe in a hidden location. Repairing the harness cost $350 and permanently fixed the issue.
Lesson: If a code returns immediately after replacing a sensor, the root cause is the wiring. Always perform a visual inspection and wiggle test before buying parts.
2015 Mercedes-Benz Sprinter 2500 at 160K miles with intermittent P2031 and limp mode.
The van intermittently entered limp mode during uphill climbs, throwing code P2031.
What they tried:
- Owner cleaned the EGT sensor; code returned.
- Mechanic replaced the EGT sensor; intermittent limp mode continued.
- Further diagnosis found a hairline crack in the exhaust manifold near the sensor.
Outcome: The cracked manifold allowed cool air in under heavy load, skewing the sensor's readings. Replacing the exhaust manifold fixed the issue permanently for $1,200.
Lesson: Exhaust leaks cause false EGT codes. If a new sensor fails to fix the problem, inspect the exhaust manifold and flanges for leaks before suspecting the ECM.
How to Prevent This Code From Triggering
- Perform regular highway driving (At least once a week for 30+ minutes) — Sustained highway speeds allow the exhaust to reach temperatures needed for passive DPF regeneration, reducing soot buildup and thermal stress on EGT sensors.
- Use high-quality diesel fuel and 'Low-SAPS' engine oil (Every fill-up and oil change) — Low-ash (Low-SAPS) oil and premium fuel produce less soot, reducing the load on the DPF and minimizing forced regenerations that expose sensors to extreme heat.
- Avoid prolonged idling (Daily habit) — Idling cools the exhaust system, accelerating soot accumulation. This forces the vehicle into aggressive, high-heat active regenerations that shorten sensor lifespan.
- Address engine performance issues promptly (As needed) — Faulty injectors or boost leaks cause the engine to run rich, producing excessive soot that overloads the DPF and insulates EGT sensors.
Frequently Asked Questions
Can I clean an EGT sensor instead of replacing it?
Sometimes. If heavy soot buildup causes a slow response, cleaning the sensor tip with a wire brush and brake cleaner restores function. However, if the sensor fails internally, cleaning will not help and replacement is required.
What is 'Bank 1' and 'Sensor 2'?
'Bank 1' refers to the side of the engine containing cylinder #1. 'Sensor 2' indicates its position in the exhaust stream. It sits downstream of the catalytic converter but upstream of the Diesel Particulate Filter (DPF).
Will a P2031 code cause my DPF to clog?
Yes, it absolutely will. The ECM relies on accurate EGT data to initiate DPF regeneration. Without a valid temperature reading, the ECM blocks regeneration to prevent fire risks, leading directly to a clogged DPF.
I replaced the EGT sensor, but the code came back. What now?
If a new sensor didn't fix the problem, the issue is almost certainly in the wiring or the connector. Re-inspect the harness for hidden damage, like melted insulation near the exhaust pipe or a chafed wire. Perform a wiggle test while watching live data to pinpoint the break.
What's the most common mistake when diagnosing P2031?
The most common mistake is immediately replacing the EGT sensor without inspecting the wiring. Technicians recommend checking for melted connectors and testing the circuit with a multimeter first. Skipping these steps wastes money on unnecessary parts.
Is there a Bank 2 Sensor 2?
Yes, but only on engines with two separate exhaust banks like a V6 or V8. The corresponding code for Bank 2, Sensor 2 is P2034.
How much does it cost to fix P2031?
Replacing the EGT sensor typically costs between $250 and $500 for parts and labor. Simple wiring repairs or cleanings cost $100 to $300. Always check if your vehicle is covered by an extended emissions warranty from Ford, VW, Audi, or Mercedes-Benz before paying.
Key Takeaways
- Code P2031 flags a failing Exhaust Gas Temperature (EGT) sensor on Bank 1, Sensor 2, which immediately halts DPF regeneration in diesel engines.
- Fix this code within 100 miles to prevent a completely clogged Diesel Particulate Filter (DPF), which escalates a $300 sensor repair into a $3,000 replacement.
- Test the sensor's resistance with a multimeter before buying parts; a healthy EGT sensor reads roughly 200-250 Ohms at 70°F.
- Call your dealership with your VIN before paying out of pocket, as VW, Audi, Mercedes, and Ford frequently cover EGT sensors under extended emissions warranties.
Helpful Videos

The information in this article is provided for general reference and educational purposes only. Vehicle specifications, procedures, and part compatibility can vary by production date, trim level, and region. Always consult your vehicle's factory service manual and verify part numbers before purchasing or performing repairs. Safety-critical components such as airbags, seat belts, and braking systems should be installed by a qualified professional.
- 🎬 Helpful Videos
- What Does P2031 Mean?
- Can I Drive With P2031?
- Common Causes
- Symptoms
- Diagnostic Flowchart
- Common Fixes & Costs
- Used vs. New Parts: Buying Guide
- What Happens If You Wait — Timeline
- Cost of Not Fixing It
- Diagnosis Steps
- When This Code Triggers (Freeze-Frame Conditions)
- Related Codes
- Climate & Environmental Factors
- How to Talk to a Mechanic About This Code
- Where to Take It: Dealer vs Independent vs Chain
- When to Walk Away From the Repair
- What Scan Tool You Need for This Code
- How to Clear the Code After You Fix It
- Will This Fail Emissions / State Inspection?
- Most Commonly Affected Vehicles
- Manufacturer-Specific Notes
- Real Owner Stories
- 2012 VW Jetta TDI with 115K miles, P2031 and flashing glow plug light.
- 2014 Ford F-350 6.7L Power Stroke at 80K miles, P2031 code returned after sensor replacement.
- 2015 Mercedes-Benz Sprinter 2500 at 160K miles with intermittent P2031 and limp mode.
- How to Prevent This Code From Triggering
- Frequently Asked Questions
- Can I clean an EGT sensor instead of replacing it?
- What is 'Bank 1' and 'Sensor 2'?
- Will a P2031 code cause my DPF to clog?
- I replaced the EGT sensor, but the code came back. What now?
- What's the most common mistake when diagnosing P2031?
- Is there a Bank 2 Sensor 2?
- How much does it cost to fix P2031?
- Key Takeaways
- 🎟️ Get 5% Off