

P2014 on 2008-2015 Volkswagen Jetta: Intake Manifold Sensor Causes and Fixes
On a 2008-2015 VW Jetta with a TSI engine, code P2014 almost always points to a problem with the intake manifold runner system. The most common fix is replacing the entire intake manifold assembly due to internal failures of the plastic components or a faulty integrated sensor. VW issued a warranty extension for this part on many vehicles to 10 years/120,000 miles. Before paying for a repair, check with a dealer to see if your VIN is covered. Expect to pay $250-$500 for a new manifold if not cov
- P2014 on a TSI Jetta points directly to the intake manifold runner control system.
- The most common failures are a broken plastic linkage on the manifold or a faulty position sensor.
- While the sensor can be replaced separately, replacing the entire intake manifold assembly is a more robust, long-term solution that addresses all potential weak points.
- Before buying parts, check if your vehicle is covered under the 15-year/150,000-mile PZEV warranty, as this repair may be covered for free.
- A scan tool capable of performing a basic setting adaptation is highly recommended after the repair to ensure the new components are correctly calibrated.
What's Unique About the 2008-2015 Volkswagen JETTA

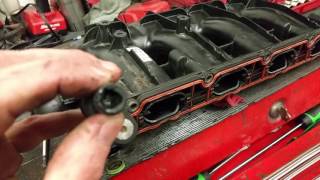
The 2.0T and 1.8T TSI engines (CCTA/CBFA) used in this generation of Jetta and its platform mates are notorious for intake manifold problems that trigger P2014 and the related P2015 code. The issue is so widespread that Volkswagen of America extended the warranty on the intake manifold for many affected vehicles to 10 years or 120,000 miles. Failures often stem from a broken plastic actuator linkage, internal flap separation, or the position sensor 🎬 Watch: VW 2.0T TSI intake manifold failure explained itself failing. Due to the integrated design and high failure rate of multiple components, the most common and lasting repair is to replace the entire manifold assembly with an updated version.
Diagnostic Flowchart

Tap your situation to follow the diagnostic path that matches what you're seeing on this vehicle.
Generation note: This issue affects both the Mk5 Jetta (2008-2010) and Mk6 Jetta (2011-2015) models equipped with the 2.0T TSI (CCTA/CBFA) and Gen 3 1.8T TSI engines. The failure mechanism is consistent across these generations and many other VW/Audi models using the same engine family.
Symptoms You May Notice
- Check Engine Light is on
- Reduced engine power and sluggish acceleration, particularly at low RPMs
- Rough or unstable idle
- Decreased fuel economy
- Engine misfires in some cases
- Engine hesitation or bucking
- Replacing only the position sensor when the manifold's internal linkage is broken or the flaps are sticking due to carbon. The code will return quickly.
- Replacing the runner motor when the flaps themselves are stuck with carbon or mechanically broken.
- Mistaking a large vacuum leak from a dislodged actuator arm for a failed PCV valve, as symptoms can be similar.
- Replacing the intake manifold for a P2014/P2015 code when the actual cause is a small, hard-to-see pinhole leak in the brake booster vacuum hose.
Most Likely Causes

- Failed or Broken Intake Manifold Assembly 🔴 High Probability The plastic linkage arm connecting the actuator motor to the runner flaps is a notorious weak point and often breaks or wears out. Additionally, the internal flaps can separate from their control rod. Carbon buildup from the direct injection system can also cause the flaps to stick, which puts excess stress on the plastic mechanism, leading to failure.
How to confirm: Visually inspect the actuator arm on the driver's side of the manifold for breakage or if it has popped out of its socket. Try to move the linkage by hand; excessive play indicates a problem. TSB V241704 / 2045138 provides a procedure to check if the internal flap carrier plate has separated by moving it axially.
Typical fix: Replace the entire intake manifold assembly with an updated OEM or quality aftermarket part. This is the most reliable long-term fix as it replaces the manifold, sensor, and actuator linkage all at once. The latest OEM part numbers feature design improvements.
Est. part cost: $250-$500 - Failed Intake Manifold Runner Position Sensor (G336) 🔴 High Probability The sensor is a potentiometer or Hall effect sensor that wears out or fails electrically, creating an out-of-spec signal. It is often integrated into the manifold assembly, but on some later Gen 3 1.8T engines, it is a separately replaceable part.
How to confirm: After removing the intake manifold, the sensor can be tested with a multimeter for correct voltage readings. A diagnostic scan tool (like VCDS) can also be used to graph the sensor's 'Actual' position vs. 'Specified' position in Measuring Block 142. A flat, erratic, or out-of-spec voltage signal confirms a bad sensor circuit.
Typical fix: If the sensor is confirmed faulty and the manifold is mechanically sound, replace the Intake Manifold Runner Position Sensor. However, due to the high rate of subsequent mechanical failure, replacing the entire manifold is often recommended. Note that VW TSB V241503 advises replacing only the sensor if diagnostics point to it.
Est. part cost: $50-$120 - Faulty Intake Manifold Runner Motor (V157) 🟡 Medium Probability The electric motor that drives the runner flaps can fail, though it's less common than the manifold's mechanical parts or the sensor. On this platform, the motor is typically integrated with the manifold and not sold separately by VW.
How to confirm: Using a capable scan tool (like VCDS), run an output test or basic setting adaptation for the intake runner flaps (e.g., Measuring Block 142). Listen for the motor actuating. If there is no movement or sound, and the wiring is confirmed good, the motor has likely failed.
Typical fix: Replace the entire intake manifold assembly, as the motor is not typically serviced separately from the manifold. Some aftermarket suppliers may offer the motor individually, but this is less common for this specific VW application.
Est. part cost: $150-$250 (if available separately), otherwise cost of full manifold
Rare But Worth Checking
- Clogged or Leaking Vacuum Lines: TSB 2045138 mentions that debris can clog the vacuum lines or 'T' fittings that control the actuator on CCTA/CBFA engines, leading to this fault. A user on the Ross-Tech forums noted that 99% of the time, it's a vacuum problem. It's a simple check worth performing before replacing expensive parts.
- Wiring or Connector Issue: Damage to the wiring harness for the position sensor or a corroded connector can interrupt the signal to the ECM, causing the P2014 code. Inspect the harness near the manifold for heat damage, chafing, or oil contamination in the plug. Applying dielectric grease to the connector pins can help ensure a good connection.
Diagnosis Steps
- Read the fault codes with an OBD-II scanner to confirm P2014 and any other related codes (e.g., P2015, P2004).
- Check for Warranty: Before any work, contact a VW dealer with your VIN to determine if the vehicle is covered under the 10-year/120,000-mile warranty extension for the intake manifold. Also check for PZEV 15yr/150k mile warranty if the car originated in a CA-emissions state.
- Visually inspect the driver's side of the intake manifold. Check the black plastic actuator arm for any visible cracks, breaks, or if it has popped out of its socket.
- Inspect the vacuum lines running to and from the intake manifold control solenoid for cracks, blockages, or disconnections, as noted in TSB 2045138. Pay special attention to the brake booster vacuum hose for hidden pinhole leaks.
- Using a diagnostic tool like VCDS, navigate to Engine -> Basic Settings -> Group 142 to run an adaptation of the intake runner flaps. Observe if the 'Actual' and 'Specified' values match and if you can hear the motor running. A failure to adapt or match values points to a failure in the system.
- If the adaptation fails, test the position sensor's wiring. Check for 5V reference voltage and a good ground at the sensor's connector. The sensor output (middle pin) should be around 4.5V when flaps are closed and ~1.2V when open.
- If wiring is good but the sensor signal is flat, erratic, or out of the specified voltage range during the output test, the sensor circuit has failed. This typically requires replacing the entire manifold, though on some 1.8T models the sensor is separately replaceable.
- If the sensor and motor seem to operate but the fault persists, the issue is likely a mechanical failure inside the manifold (broken flap or linkage), requiring manifold replacement.
Parts You'll Likely Need
- Intake Manifold Assembly
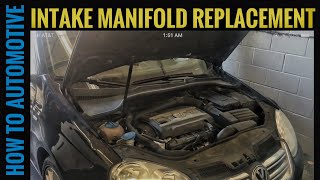
(OEM #06J133201BH)— This is the most common and comprehensive fix. 🎬 Watch: Step-by-step intake manifold replacement walkthrough It is the latest revised OEM part number, superseding older versions like 06J133201BD, AS, AL, and G. It replaces the manifold housing, runner flaps, position sensor, and actuator, addressing all common failure points at once.
Trusted brands: Volkswagen (OEM), Bosch, Dorman
OEM price range: $350-$500
Aftermarket price range: $250-$400 - Intake Manifold Runner Position Sensor
(OEM #07L907386B)— If diagnostics confirm the sensor itself has failed electrically but the manifold is mechanically sound, replacing just the sensor is a cost-effective repair. This is more common on later Gen 3 1.8T engines. However, this can be a temporary fix if the mechanical parts are aged or the manifold is clogged with carbon.
Trusted brands: Volkswagen (OEM), Bosch
OEM price range: $80-$120
Aftermarket price range: $50-$90
Related Codes That Often Appear With This One
- P2015 — P2015 ('Intake Manifold Runner Position Sensor/Switch Circuit Range/Performance') is extremely common with P2014. It indicates the sensor's signal is out of the expected range, pointing to the same set of common failures like a broken linkage stop.
- P2004 — P2004 ('Intake Manifold Flap for Air Flow Control Bank 1 Stuck Closed') can appear if the flaps are mechanically stuck due to carbon buildup or internal failure, which can lead to the P2014 sensor circuit fault.
- P030x (e.g., P0301, P0302) — Misfire codes can be triggered by the incorrect air/fuel mixture resulting from the malfunctioning runner flaps or a vacuum leak if the actuator arm pops off.
Technical Service Bulletins (TSBs) & Recalls
- V241709 / 2045138: Details diagnostic procedures for P2004, P2014, and P2015, including checking for vacuum line blockages and internal flap separation before replacing the manifold.
- V241503 / 2040179: Specifically addresses DTC P2014 and advises that if guided fault finding points to the sensor (G336), only the sensor should be replaced, not the entire manifold.
- V241501 / 2038161: An earlier TSB discussing the diagnosis for P2014 or P2015 intake manifold faults.
- VWP-20-03 (MC-10172985-0001): Details the Intake Manifold Limited Warranty Extension program.
Platform-Specific Known Issues
- Volkswagen Warranty Extension: VW extended the warranty on the intake manifold for many 2.0T TSI engines to 10 years or 120,000 miles from the original in-service date. This is transferable to subsequent owners. Always check with a dealer using your VIN before paying for repairs.
- PZEV Warranty Coverage: In states that have adopted California's PZEV (Partial Zero Emissions Vehicle) standards, the intake manifold may be covered under a 15-year/150,000-mile emissions warranty. Check your under-hood emissions label to see if your vehicle is a PZEV model.
- Post-Repair Adaptation: After replacing the intake manifold or sensor, an adaptation procedure using a compatible scan tool (like VCDS or ODIS) is required to calibrate the new sensor's range to the ECM. This is done via Basic Settings in Group 142.
- Carbon Cleaning Opportunity: Since the intake manifold must be removed for this repair, it is an ideal time to perform a carbon cleaning service on the intake valves, which is a common maintenance need on TSI direct-injection engines.
Mechanic-Grade Diagnostic Values
- Intake Manifold Runner Position Sensor (G336) Output Voltage — expected: Approximately 4.5V with flaps closed, decreasing to ~1.2V with flaps open.. Failure: Voltage is static, erratic, or significantly different from the expected values at either end of the travel. A bad sensor may still show movement but have out-of-spec voltage readings.
- VCDS Measuring Block 142 - Field 1 & 2 (Actual vs. Specified Position) — expected: The 'Actual' and 'Specified' percentage values should closely follow each other during an output test or basic settings adaptation.. Failure: Values do not match, or the 'Actual' value does not change while 'Specified' does, indicating a mechanical or electrical failure.
- VCDS Measuring Block 142 - Runner Flap B1 Position Offset — expected: This field reflects the sensor's output voltage. At engine start (flaps closed), it should be around 4.5V.. Failure: A value significantly different from 4.5V at startup can indicate a faulty sensor, even if it appears to function during tests.
Scan Tool Commands That Help

- VCDS (VAG-COM): Engine -> Basic Settings -> Group 142 -> Go! — This function runs the adaptation for the intake manifold flaps. It is required after replacing the intake manifold or sensor to teach the ECM the new component's position limits. An 'ERROR' result after running indicates a problem with the sensor, wiring, or mechanical parts.
- VCDS (VAG-COM): Engine -> Output Tests -> Intake Manifold Flap — This allows a technician to command the actuator motor to cycle on demand. It helps differentiate between a mechanical problem (stuck flaps, broken linkage) and an electrical one (bad sensor, motor, or wiring) by observing physical movement and listening for motor operation.
- ODIS (Dealer Tool): Guided Functions -> Adapting Engine Control Module (ECM) to intake manifold flap — This is the official dealer procedure for adapting a new intake manifold. A TSB notes that if this adaptation is not successful, the internal flap stop is worn, and the manifold must be replaced.
Wiring & Ground Locations
- G15 (or 15) — On top of the cylinder head.. This is a primary ground point for components on the cylinder head, including ignition coils. While not directly for the G336 sensor, a poor ground here can cause electrical noise and erratic behavior in nearby sensor circuits.
- G336 Sensor Connector — On the driver's side of the intake manifold, often near the oil filter housing on TSI engines.. This is the direct connection point for the position sensor. It's where voltage and signal tests are performed. The connector and its wiring are susceptible to heat damage and oil contamination.
- Main Engine Harness Ground — Typically found on the left side of the engine compartment, below the battery tray.. This is a critical ground connection for the entire engine management system. Corrosion or a loose connection here can cause a wide range of difficult-to-diagnose electrical faults, including sensor circuit codes like P2014.
Real Owner Repair Stories
- Ross-Tech Forums user (2014 Jetta SE 1.8T TSI (CPRA engine)) — P2006 (Intake Manifold Flap Stuck Closed) and P2015 (Implausible Signal).
❌ Tried (didn't work) Replaced the entire intake manifold with a new unit., Swapped the new position sensor with the old OEM one., Attempted basic settings adaptation in VCDS, which would not show up as an option.
✅ What actually fixed it Found a small, hidden pinhole on the underside of the brake booster vacuum hose. The vacuum leak was preventing the flaps from actuating correctly during the ECM's startup sweep, triggering the implausible signal code. Replacing the hose resolved all codes. - Reddit user r/GolfGTI (2015 Golf SEL 1.8T (Gen 3)) — P2014 code.
❌ Tried (didn't work) Received a quote for $1,500 to replace the entire intake manifold.
✅ What actually fixed it Replaced only the intake manifold runner position sensor (G336). On this later model, the sensor was separately replaceable. The repair involved removing the oil filter housing for access, breaking the clips off the old sensor, and installing the new one. The code cleared after driving. The user noted many mechanics are accustomed to replacing the whole manifold from older TSI generations and may not know the sensor is serviceable on later ones. - YouTube user Diesel Geek (2014 Jetta TDI (Diesel Engine)) — Intermittent P2015 code.
❌ Tried (didn't work) Clearing the code, which would eventually return.
✅ What actually fixed it Installed an aftermarket metal bracket (from DieselGeek.com) onto the actuator motor assembly. The problem on the TDI is that wear in the linkage allows the actuator arm to travel too far ('over-travel'), which the sensor reports as a range/performance fault. The bracket acts as a hard stop, preventing the arm from moving past its intended range. This is a common, low-cost fix specific to the TDI engines with this issue.
"I Checked Everything" — The Actual Cause
- A user on the Ross-Tech forums replaced their intake manifold to fix P2006 and P2015 codes but the issue persisted. Standard vacuum line checks revealed nothing. The final cause was a pinhole leak on the underside of the brake booster vacuum hose, which was not part of the manifold's immediate vacuum circuit and was missed during initial diagnosis. The leak was only found by physical inspection when grabbing the hose.
OEM Part Supersession History
06J133201G, 06J133201AL, 06J133201AS, 06J133201BD→06J133201BH— The original manifolds were prone to premature failure of the plastic runner flap mechanism and actuator linkage. The revised 'BH' part features design improvements to increase durability.
Heads up: The updated manifold may also require an updated 'fresh air' breather hose to be installed for maximum longevity, as the design was changed to better protect the flap actuation system.
Model Year Variations Within This Range
- approx. 2013.5+: On some later Gen 3 1.8T TSI engines (like the CPRA), the Intake Manifold Runner Position Sensor (G336) is a separately replaceable part, unlike the earlier Gen 1/2 2.0T TSI engines where it was permanently integrated into the manifold. This can make for a much cheaper repair if only the sensor has failed.
- All: The updated intake manifold (PN 06J133201BH) has visible vent holes that earlier versions lack. This can be a quick visual cue to see if the manifold has been previously replaced with the revised part.
Helpful Videos
Used OEM Parts in Stock


New Aftermarket Parts Available
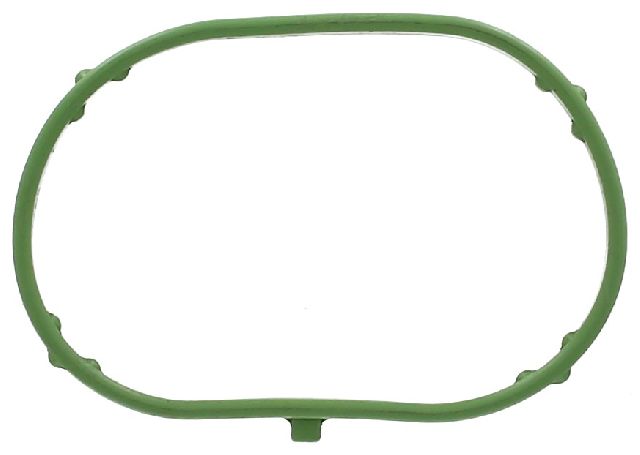


The information in this article is provided for general reference and educational purposes only. Vehicle specifications, procedures, and part compatibility can vary by production date, trim level, and region. Always consult your vehicle's factory service manual and verify part numbers before purchasing or performing repairs. Safety-critical components such as airbags, seat belts, and braking systems should be installed by a qualified professional.
- Volkswagen JETTA:
- 🎬 Helpful Videos
- 🛍️ Shop This Part
- What's Unique About the 2008-2015 Volkswagen JETTA
- Diagnostic Flowchart
- Symptoms You May Notice
- Most Likely Causes
- Rare But Worth Checking
- Diagnosis Steps
- Parts You'll Likely Need
- Related Codes That Often Appear With This One
- Technical Service Bulletins (TSBs) & Recalls
- Platform-Specific Known Issues
- Mechanic-Grade Diagnostic Values
- Scan Tool Commands That Help
- Wiring & Ground Locations
- Real Owner Repair Stories
- "I Checked Everything" — The Actual Cause
- OEM Part Supersession History
- Model Year Variations Within This Range
- 🎟️ Get 5% Off