

Ultimate Guide to OBD-II Code P1886: A Manufacturer-Specific Deep Dive
What P1886 means, why it triggers, and how to fix it for good
- P1886 indicates an electrical circuit failure, saving you from a $3,000+ mechanical transmission rebuild 90% of the time.
- Never use a generic diagnostic guide for P1886; it means a 3-2 shift solenoid failure on a GM, a CVT speed sensor fault on a Honda, and a 4x4 vacuum leak on a Ford.
- Inspect the main transmission wiring harness before buying parts, as chafed wires or corroded pins cause over 40% of P1886 codes.
- Pinpoint the exact failure by testing component specs: look for 20-40 ohms on a GM solenoid, a 5V reference on a Honda sensor, or 20-24 inHg of vacuum on a Ford IWE system.
- Check for manufacturer Technical Service Bulletins (TSBs) before repairing, such as Ford's TSB 22-2219 which requires a software reflash to permanently fix cold-weather 4x4 grinding.
What Does P1886 Mean?

P1886 is a manufacturer-specific diagnostic trouble code (DTC) signaling an electrical fault within the transmission or driveline systems. The vehicle's Powertrain Control Module (PCM) or Transmission Control Module (TCM) detected an unexpected voltage reading—an open circuit, a short to ground, or a short to power—in a specific circuit. Because its meaning changes drastically between brands, generic diagnosis is impossible. You must identify the code's specific definition for your exact vehicle before attempting any repair.
Technical definition: The official SAE/OBD-II definition for P1886 varies by manufacturer. For General Motors, it is '3-2 Shift Solenoid (SS) Valve Assembly Circuit Electrical Fault', where the control module detects an open or short in the solenoid's control circuit. For Honda, it is 'CVT Driven Pulley Speed Sensor Circuit Malfunction', indicating a problem with the sensor measuring the transmission's output pulley speed. For Ford, it indicates a '4X4 System Initialization Failure' or a fault in the vacuum-controlled Integrated Wheel End (IWE) system.
Can I Drive With P1886?
Yes, But With Caution. Driving is not recommended and should be limited to reaching a repair facility. Depending on the cause, you will likely get stuck in one gear (limp mode), lose the ability to move entirely, or cause expensive secondary damage. For GM vehicles in limp mode, extended driving overheats transmission fluid and destroys the torque converter. For Ford 4x4s, a grinding noise indicates the IWE hubs are actively being destroyed; continued driving turns a $100 vacuum repair into a $1,000 hub and bearing replacement. For Hondas, a failed speed sensor causes a sudden loss of power, creating a major safety risk in traffic.
Common Causes


- Damaged or Corroded Wiring/Connectors (Very Common) — The transmission wiring harness lives in a harsh environment. Constant exposure to heat, moisture, and road debris causes chafed wires, corroded connector pins, and melted plastic sheathing. This is the top cause across all manufacturers.
- Failed Shift Solenoid (GM) (Common) — The primary cause on GM vehicles with the 4L60E transmission. A shift solenoid is an electro-hydraulic valve directing fluid to shift gears. Its internal coil fails (creating an open or short circuit), or it gets clogged by debris in dirty fluid.
- Failed Transmission Speed Sensor (Honda) (Common) — A frequent failure on Honda vehicles equipped with CVT transmissions. The sensor is a critical input for the TCM to determine gear ratios. A failed sensor causes a total loss of signal, forcing the computer into a fail-safe mode.
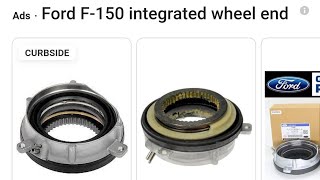
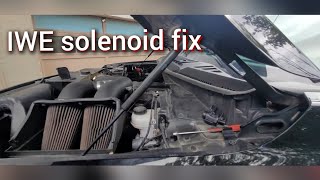
- Faulty 4x4 Actuator, Solenoid, or Vacuum Leak (Ford) (Common) — On Ford F-150s and other 4x4s, this code points to the IWE system. The solenoid controlling vacuum to the front hubs fails, or the vacuum lines crack and leak, causing the hubs to partially engage and create a grinding noise.
- Failed Transmission Range Switch (Hyundai/Kia) (Common) — On certain Hyundai and Kia models, a faulty transmission range switch is a known issue triggering electrical fault codes and symptoms (limp mode, no-start) that mimic P1886. This switch informs the TCM of the selected gear.
- Low System Voltage or Poor Grounds (Less Common) — The TCM requires stable voltage to operate correctly. A failing alternator, a weak battery, or a corroded main ground connection causes voltage drops that trick the module into incorrectly setting electrical fault codes.
- Internal Harness Fluid Contamination (Less Common) — On vehicles like MINIs with Aisin transmissions, fluid seeps past the internal harness connector seal. Capillary action wicks the fluid up the wiring harness, contaminating the TCM and causing bizarre electrical faults.
- Faulty Transmission Control Module (TCM) (Rare) — A failed TCM is the least likely cause. Consider it only after exhaustively testing wiring, connectors, sensors, solenoids, and power/ground integrity. Misdiagnosis here is an expensive mistake.
Symptoms
- Check Engine Light / Malfunction Indicator Lamp (MIL) is On — The PCM/TCM triggers the MIL to alert the driver immediately after the electrical fault is verified.
- Transmission Stuck in One Gear (Limp Mode) — To prevent mechanical damage, the TCM enters a fail-safe mode, locking the transmission into a single gear (usually 2nd or 3rd) to allow the vehicle to limp to a repair shop.
- Car Won't Move or Has No Power — A complete loss of signal from a critical speed sensor (common on Hondas) causes the TCM to refuse Drive or Reverse engagement, or the car feels completely gutless when accelerating.
- Harsh, Erratic, or Delayed Shifting — If not in full limp mode, shifts become rough, unpredictable, or slam into gear as the TCM struggles to calculate timing with incomplete data.
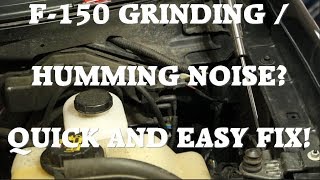
- Grinding or Clicking Noise from Front Wheels (Ford) — A vacuum leak in the Ford IWE system causes the hubs to partially engage, resulting in a distinct grinding or ratcheting sound from the front wheels during acceleration in 2WD.
- Blinking 'D' (Drive) Indicator Light (Honda) — On Honda vehicles, a flashing 'D' light on the instrument cluster specifically indicates a detected transmission fault, appearing alongside the Check Engine Light.
- 4x4 or Drivetrain Warning Light is On — On Ford and other 4x4s, a specific wrench or drivetrain warning light illuminates instead of, or in addition to, the standard Check Engine Light.
Diagnostic Flowchart
Tap your situation to follow the diagnostic path that matches what you're seeing on this code.
Common Fixes & Costs
- Repairing Damaged Wiring or Connectors — Parts: $10-$50, Labor: $150-$450, ~2.5 hr book time (Intermediate)
- Replacing a Transmission Shift Solenoid (GM) — Parts: $30-$100, Labor: $200-$450, ~2.5 hr book time (DIY)
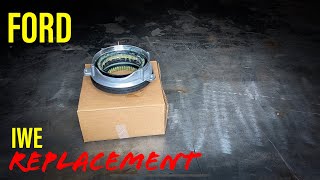
- Replacing Ford IWE Solenoid and/or Vacuum Lines — Parts: $30-$120, Labor: $100-$300, ~0.5 hr book time (DIY)
- Replacing a Transmission Speed Sensor (Honda) — Parts: $25-$100, Labor: $100-$250, ~1.2 hr book time (DIY)
- Replacing a Transmission Range (Inhibitor) Switch — Parts: $50-$150, Labor: $100-$300, ~1.5 hr book time (Intermediate)
- Replacing the Transmission Control Module (TCM) — Parts: $300-$1000, Labor: $150-$350, ~2.0 hr book time (Professional)
Used vs. New Parts: Buying Guide
When a used part is worth it: For electronic parts like solenoids and sensors, buying used is never recommended. The low cost of a new, quality part does not justify the risk of installing a used part with unknown history, which will likely fail quickly and require repeating the labor.
Donor-vehicle mileage cap: roughly under 40000 miles for the part to have meaningful remaining life.
Donor quality checklist:
- Only consider used electronics if pulled from a very low-mileage wrecked vehicle.
- Match part numbers exactly, including revision numbers.
- Avoid parts from vehicles that sat outdoors for a long time, as moisture destroys electronics.
Decision logic:
- If Part is an electronic sensor or solenoid → Buy new from an OEM or reputable aftermarket brand. The risk of premature failure is too high.
- If Vehicle is older (>10 years) and budget is the primary concern → A used part is a temporary solution, but expect a significantly shorter lifespan. Factor in doing the job twice.
- If The required part is a complete assembly (like a valve body) → A professionally remanufactured unit with a warranty is vastly superior to a junkyard pull.
Warranty tradeoff: Used parts from a salvage yard typically have a 30-90 day warranty on the part only. New aftermarket parts offer 1-year to limited lifetime warranties. New OEM parts carry a 1-2 year warranty, which includes labor if installed at a dealership.
Worst-case if a used part fails: 300-600. If a used solenoid fails, the primary cost is repeating the labor charge, effectively doubling the total cost of the repair.
What Happens If You Wait — Timeline
- Immediate: (GM): Transmission enters limp mode, stuck in 3rd gear. (Ford): Grinding noise from front wheels begins. (Honda): Blinking 'D' light, vehicle loses power or will not move. (MPG impact: 5-25%% · Added cost: $0)
- 0-1 Month: (Ford): The grinding noise confirms the IWE actuator gears are being actively destroyed. (GM): Driving in limp mode begins to overheat and break down the transmission fluid. (MPG impact: 5-25%% · Added cost: $50-$400)
- 1-6 Months: (Ford): Destroyed IWE actuators damage the splines on the wheel hub and CV axle, escalating the repair significantly. (GM): Burnt fluid leads to accelerated wear on internal clutches and damages the torque converter. (MPG impact: 10-30%% · Added cost: $800-$2500)
- 6+ Months: (GM): Slipping clutches generate excessive debris, clogging the valve body and leading to catastrophic transmission failure. (Ford): A failed wheel hub/bearing assembly becomes a severe safety issue. (MPG impact: 15-40%% · Added cost: $2000-$4500+)
Cost of Not Fixing It
- Immediate: For Honda, a sudden loss of power in traffic is a major safety risk. For all makes, the vehicle enters limp mode, leaving you stranded or unable to accelerate properly. (Added cost: 0)
- 0-1 Month (Ford 4x4): Continued driving with the IWE grinding noise destroys the plastic and metal gears inside the IWE actuators, turning a simple vacuum leak fix into a mandatory parts replacement. (Added cost: 200-400)
- 1-6 Months (Ford 4x4): Once the IWE actuators are destroyed, the grinding metal damages the splines on the wheel hub and CV axle. This escalates the repair to replacing the entire wheel hub and bearing assembly. (Added cost: 800-1500)
- 1-6 Months (GM): Repeatedly driving in limp mode overheats the transmission fluid, causing it to break down. This accelerates wear on clutches and damages the torque converter, risking a full transmission rebuild. (Added cost: 2000-4500)
Diagnosis Steps

- Scan for All Trouble Codes & Freeze Frame Data
Use a quality OBD-II scanner to read codes from all modules (ECU, TCM, BCM). P1886 rarely appears alone. Note any other codes and the freeze frame data, which shows the exact conditions when the fault occurred. This is the crucial first step.
Tools: OBD-II Scanner (Beginner) - Check Transmission Fluid Level and Condition
Low, burnt, or dirty fluid causes a host of issues, including solenoid failure. Check the fluid per the manufacturer's procedure. If it is dark, smells burnt, or has metal flakes, a severe mechanical issue is present.
Tools: Rag, Dipstick (if equipped) (Beginner) - Perform a Detailed Visual Inspection
Thoroughly inspect the entire transmission wiring harness and connectors. Look for obvious signs of damage: chafed wires near hot exhaust pipes, melted sheathing, and corroded or backed-out pins in the main transmission connector.
Tools: Flashlight, Inspection Mirror (Beginner) - Pro Tip (GM): Test Solenoid Resistance at the Connector
For GM 4L60E, disconnect the main transmission case connector. Using a multimeter and a wiring diagram, identify the pins for the 3-2 shift solenoid (typically Pin S and Pin E). Measure the resistance. A good solenoid reads between 20-40 ohms (for 1996+). An open circuit (OL) or zero ohms (short) indicates a failed solenoid or internal harness.
Tools: Digital Multimeter, Wiring Diagram (Intermediate) - Pro Tip (Ford): Perform a Definitive IWE Vacuum Test
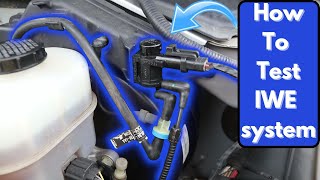
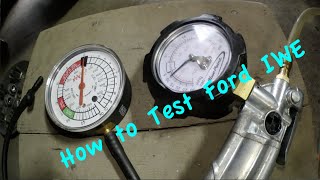
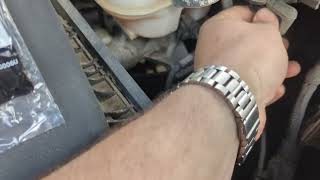
Start the engine in 2WD. Disconnect the vacuum line at the IWE solenoid; you should feel strong vacuum. Reconnect it and disconnect the lines at the wheel hubs. Check for vacuum there. It should hold at least 10 inHg, with a healthy system showing 20-24 inHg. If not, find the leak. Use a vacuum pump to test each IWE actuator directly; it should hold vacuum without bleeding down more than 1 inHg per minute.
Tools: Vacuum Pump/Gauge (Intermediate) - Pro Tip (Honda): Test Speed Sensor Circuit Voltage
For Honda CVTs, disconnect the driven pulley speed sensor connector. Turn the ignition ON (engine off). Use a multimeter to check for a 5V reference signal on one wire and a good ground on another. If power and ground are good, reconnect the sensor. Back-probe the signal wire at the PCM/TCM connector. With the engine idling in Park, the voltage should be around 1.5-3.5V. If it is stuck at 0V or 5V, the sensor failed.
Tools: Digital Multimeter, Back-Probe Kit, Wiring Diagram (Advanced) - Test the Specific Component's Circuit Integrity
If component tests pass, check the wiring itself. Disconnect the component and the TCM. Use a digital multimeter to check for continuity on each wire from end to end (should be <1 ohm). Then, check for a short to ground by testing for continuity between each wire and a chassis ground (should be OL). Finally, check for a short to power by testing for voltage on the wire with the key on (should be 0V).
Tools: Digital Multimeter, Vehicle-Specific Wiring Diagram (Intermediate) - Check for Fluid Intrusion at the TCM
Especially on European makes like MINI/BMW, physically inspect the TCM and its connector. Disconnect the harness and look for any signs of oil or transmission fluid. Fluid wicking up the harness shorts out the module and is a commonly missed point of failure.
Tools: Basic Hand Tools (Intermediate) - Advanced (GM): Check Solenoid Resistance vs. Temperature
For a definitive diagnosis of a GM 4L60E solenoid, compare its resistance to its temperature. A healthy 1996+ shift solenoid is 20-40 ohms at 68°F (20°C). Resistance increases with temperature. If a solenoid reads within spec when cold but the code sets when hot, re-test the resistance at operating temperature (e.g., 175°F). A significant deviation from the manual's temperature-resistance chart indicates an internal coil breaking down under heat.
Tools: ['Digital Multimeter', 'Infrared Thermometer', 'Service Manual'] (Advanced) - Advanced (Ford): Live Data PID Monitoring for IWE System
Using a scan tool, monitor the Transfer Case Control Module (TCCM) PIDs. Observe the '4WD_SYSTEM_STATUS' PID. In 2WD, it should read 'Normal'. Switch to 4H; it should change to 'Engaging' then 'Engaged'. Command the IWE solenoid on and off using bi-directional controls. You should hear a click, and the vacuum reading at the hubs should drop to zero when commanded 'on' (4WD) and return to >20 inHg when 'off' (2WD).
Tools: ['Advanced Bi-Directional Scan Tool'] (Advanced)
When This Code Triggers (Freeze-Frame Conditions)
- Vehicle Speed: 25-45 mph (During or immediately after a 3-2 downshift (GM) or during steady cruise (Honda/Ford).)
- Engine RPM: 1200-2500 RPM (Light to moderate throttle application, not during heavy acceleration or deceleration.)
- Engine Coolant Temp: 180-210°F (82-99°C) (Fault often appears after the vehicle reaches full operating temperature.)
- Gear Selector Position: Drive (D) (The fault is almost always triggered while actively driving, not in Park or Neutral.)
Related Codes
- P0758 — On a GM vehicle, this points to an electrical fault in the 2-3 Shift Solenoid circuit. If both P1886 and P0758 appear, it strongly suggests a problem with the shared power feed or the internal transmission wiring harness.
- P0700 — A generic 'Transmission Control System Malfunction' code. It is purely informational, set by the Engine Control Module (ECM) when it receives any fault signal from the TCM. It simply means 'check the TCM for more specific codes'.
- P1864 — On GM vehicles, this code for the Torque Converter Clutch (TCC) solenoid circuit often appears with P1886. Both solenoids share the same internal wiring harness and power supply; a harness failure triggers both codes.
- P0705 — Indicates a fault in the Transmission Range Sensor circuit. On modern cars like Hyundai/Kia, a failure here produces symptoms easily mistaken for a solenoid or speed sensor issue.
Climate & Environmental Factors
- High Humidity / Coastal & Salty Regions: Accelerates corrosion of wiring harnesses, connector pins, and ground points. Moisture gets past compromised weather seals and causes intermittent shorts or high resistance faults.
- Extreme Cold: On Ford F-150s, cold temperatures make plastic IWE vacuum lines brittle and prone to cracking, creating leaks. Newer Ford models are programmed to keep IWEs engaged on cold starts (below 32°F) to warm the front differential, which is normal operation.
- High Heat: Prolonged exposure to high ambient and under-hood temperatures causes electrical components to fail. Internal coil windings break down when hot, leading to an open circuit fault that only appears after driving.
How to Talk to a Mechanic About This Code
Say this: "I have a [Your Vehicle Year/Make/Model] with a P1886 code and [specific symptom, e.g., 'it is stuck in one gear,' 'a grinding noise from the front wheels']. I know on this vehicle this code often points to the [specific part, e.g., '3-2 shift solenoid,' 'IWE vacuum system']. I'd like to schedule a diagnostic appointment to confirm the fault in that specific circuit."
This signals to the shop that you are an informed customer. It directs the technician to the most likely point of failure, encouraging an efficient diagnostic process rather than an open-ended exploratory mission. It discourages upselling of unnecessary services.
Avoid saying:
- 'My check engine light is on, I don't know why.'
- 'Just fix whatever is wrong with the transmission.'
- 'Do whatever you think is best.'
Questions to ask before authorizing the repair:
- For GM: What was the ohm reading of the 3-2 solenoid when you tested it at the case connector?
- For Ford: Did the IWE solenoid click when you commanded it with a scan tool, and what were the vacuum readings at the hubs?
- For Honda: Did you confirm a 5-volt reference and good ground at the speed sensor connector?
- Can you show me the damaged wire or the failed part?
- What is the warranty on this specific repair, including both parts and labor?
Where to Take It: Dealer vs Independent vs Chain
- Dealer:
Recommended for in-warranty vehicles or Fords needing a software update. For most out-of-warranty GM and Honda repairs, it is not the most cost-effective choice.
Best for: Vehicles still under powertrain warranty., Complex manufacturer-specific issues, like a Ford F-150 requiring a TCCM reflash (TSB 22-2219)., When you suspect a rare TCM or software issue.
Downsides: Highest labor rates, often 1.5-2x more than independent shops., May prefer to replace larger assemblies rather than performing a targeted, cheaper repair. (Typical cost: +50% vs. baseline) - Independent Shop:
Best fit for most P1886 scenarios. An experienced independent technician specializing in transmissions will provide a cost-effective repair.
Best for: Out-of-warranty vehicles where cost is a major factor., Common, well-documented P1886 causes like a GM 4L60E solenoid or a Honda speed sensor., Finding a trusted, local mechanic for long-term vehicle care.
Downsides: Quality and expertise vary widely; look for ASE certifications and good reviews., May lack specialized tools or software subscriptions required for the newest vehicles. (Typical cost: +0% vs. baseline) - Chain Shop:
AVOID for P1886 diagnosis and repair. This code requires specific diagnostic paths that are beyond the scope of most chain shops.
Best for: Simple, routine maintenance like oil changes or tire rotations.
Downsides: Technicians are often less experienced and lack skills for complex electrical diagnostics., Business model pressures technicians to upsell services., Highly likely to misdiagnose a manufacturer-specific code like P1886. (Typical cost: -10% vs. baseline)
When to Walk Away From the Repair
If the estimated repair cost exceeds 40-50% of your car's private-party value, seriously consider selling or trading it in rather than repairing it.
- Car worth $4000, fix is $850: Fix it. The repair cost is well below the 50% threshold and is much cheaper than replacing the vehicle.
- Car worth $2500, fix is $1500: Walk away. The repair cost is 60% of the car's value. It is not a sound financial decision to proceed with this repair.
- Car worth $15000, fix is $2500: Fix it. While a significant expense, it is only about 17% of the vehicle's value and restores its full function.
What Scan Tool You Need for This Code
Minimum: A scanner that reads manufacturer-specific transmission codes (not just generic 'P' codes) and displays live data streams.
A basic $20 reader only shows a generic engine code and cannot access the transmission control module. To diagnose P1886, you need to see the specific fault from the TCM and watch live data from sensors or perform active tests.
Budget: BlueDriver Pro (~$119) — Connects to your smartphone via Bluetooth. It reads manufacturer-specific transmission codes and graphs live data, which is essential for seeing if a speed sensor is working.
Mid-range: Foxwell NT510 Elite / Autel MaxiCOM MK808 (~$150-350) — Introduces bi-directional control. This is critical for Ford IWE diagnosis, allowing you to command the solenoid on and off to test its function. Offers deeper access to manufacturer-specific systems.
Professional: Autel MaxiCheck MX808S / XTOOL D7 (~$450-600) — Offers extensive bi-directional controls, advanced service functions, and support for the latest vehicle protocols. For a Ford diagnosis, it commands every part of the IWE system and reads advanced TCCM data.
Rent vs buy: Free scanners available for rent at auto parts stores are typically basic code readers. They will NOT read the manufacturer-specific P1886 code or perform necessary live data tests. You must buy a capable scanner or pay for a professional diagnosis.
How to Clear the Code After You Fix It
- Perform the repair with the battery disconnected to prevent electrical shorts.
- Reconnect the battery.
- Use a quality OBD-II scan tool to erase the P1886 and any related fault codes from the TCM/PCM memory.
- Perform a complete drive cycle to allow the vehicle's readiness monitors to run their self-tests.
Drive cycle (~20 minutes): From a cold start, idle the engine for 2-3 minutes. Drive in mixed city/suburban traffic, including several smooth accelerations and decelerations. Finally, drive for 5-10 minutes at a steady highway speed between 50-60 mph. Allow the vehicle to cool down completely.
Readiness monitors affected: Comprehensive Component Monitor, Catalyst Monitor, Evaporative System Monitor
Watch out for:
- Simply clearing the code without performing a repair results in the code returning immediately.
- Disconnecting the battery clears the code but resets all readiness monitors to 'Not Ready', causing an automatic emissions test failure.
- Failing to complete a full drive cycle before an emissions test leads to a 'Not Ready' rejection.
Will This Fail Emissions / State Inspection?
Yes — this code typically fails an OBD-II emissions inspection.
- California: An active Check Engine Light results in an automatic smog check failure. After repairs, a full drive cycle must be completed to set all readiness monitors before a re-test is possible.
- New York: The NYS DMV inspection includes an OBD-II scan. An illuminated Malfunction Indicator Lamp (MIL) for any code, including P1886, causes an automatic failure.
- Texas: In the 17 counties requiring emissions testing, an illuminated Check Engine Light is an automatic failure. Clearing the code just before the test results in failure due to 'Not Ready' monitors.
Most Commonly Affected Vehicles
- Chevrolet / GMC Blazer, S10, Silverado, Tahoe, Sonoma, Sierra (1996-2006) — Almost always a 3-2 shift solenoid or internal wiring harness failure in the 4L60E transmission. For 1996+ models, the 1-2 and 2-3 shift solenoid resistance should be 20-40 ohms.
- Honda Fit, Jazz, Civic, City, Insight (2002-2008) — Highly prone to issues with the CVT driven pulley speed sensor circuit, causing a no-move condition and a blinking 'D' light.
- Ford F-150, Expedition (2004-2018) — Code is typically related to the 4x4 IWE system. TSB 22-2219 notes that a TCCM reprogram is required to change the IWE strategy in cold weather, alongside replacing leaking vacuum components.
- Ram 1500 (2008-2012) — Experiences shift solenoid pack failure, leading to the transmission being stuck in one gear.
- MINI Countryman (R60), Cooper (2010-2016) — Suffers from solenoid failure in the Aisin automatic transmission. A known issue is fluid wicking up the wiring harness from the transmission connector, shorting pins at the TCM.
- Hyundai / Kia Elantra, Sonata, Tucson, Santa Fe, Kona (2017-2021) — Widely affected by inhibitor switch failures that cause identical electrical symptoms (limp mode, no-start). This is a key differential diagnosis.
- Volkswagen Jetta (2002-2005) — Experiences issues with the output speed sensor, causing the transmission to fail to shift into higher gears.
- Isuzu Rodeo, Trooper (1998-2004) — These vehicles used GM-sourced transmissions like the 4L60E, making them susceptible to the same 3-2 shift solenoid and wiring harness issues as Chevrolet trucks.
Manufacturer-Specific Notes

- General Motors (Chevrolet, GMC): The code almost always points to the 3-2 shift solenoid or its wiring inside the transmission pan. Diagnosing with a multimeter at the case connector is the fastest way to confirm.
- Honda: This code is specific to models with a CVT and points to the driven pulley speed sensor circuit. It is often accompanied by a 'blinking D' indicator.
- Ford: On trucks and SUVs, P1886 is almost never an internal transmission problem. It is a failure in the 4x4 system's vacuum-operated Integrated Wheel Ends (IWE). Diagnosis must focus on checking for vacuum leaks.
- MINI / BMW: On models with Aisin transmissions, always suspect fluid wicking up the main harness connector if electrical issues seem intermittent. A visual inspection of the TCM connector for oil residue is a critical diagnostic step.
- Ford: Ford issued multiple Technical Service Bulletins (TSBs) for the IWE system. TSB 22-2219 advises reprogramming the TCCM to change IWE operation in cold weather to prevent grinding noises on startup.
Real Owner Stories
1996 Chevy Blazer - P1886 and stuck in 3rd gear
The owner experienced a check engine light and noticed the vehicle felt like it was starting in 3rd gear. A scan revealed code P1886.
What they tried:
- A parts store incorrectly sold them a TCC lock-up solenoid.
- The owner correctly identified the need for the 3-2 shift solenoid and purchased an OEM part from a dealership.
Outcome: The owner replaced the 3-2 shift solenoid by dropping the transmission pan, confirming the valve body did not need removal. The old solenoid showed melted plastic. The new solenoid fixed the problem completely.
Lesson: For GM P1886, the issue is almost always the 3-2 solenoid. Verify the exact part number and avoid generic parts store advice. The repair is DIY-friendly and only requires dropping the pan.
2018 Ford F-150 at 108k miles - Grinding noise from front wheels
The owner heard a frequent grinding noise from the front wheel area. Online research pointed towards the IWE system.
What they tried:
- Replaced the IWE check valve, but the noise persisted.
- A dealership performed a software update, which also failed to fix the issue.
Outcome: The owner was forced to replace the IWE actuators at the hubs. The initial, easy fixes didn't solve the root cause, which was a torn diaphragm inside the actuator itself.
Lesson: On Ford trucks, a grinding noise is the IWE system. While the check valve is an easy first step, you must perform a comprehensive vacuum test to pinpoint the exact leak instead of firing the parts cannon.
2004 Honda CR-V - Blinking 'D' light and shifting problems
The 'D' light on the dash began blinking. The owner retrieved a transmission fault code pointing to a faulty pressure switch.
What they tried:
- Replaced the faulty switch with a cheap $50 aftermarket part.
- This stopped the blinking light but introduced a severe RPM flare when shifting from 2nd to 3rd gear.
Outcome: Unsatisfied with the new shifting issue, the owner purchased and installed a genuine OEM pressure switch for $80. This resolved both the blinking 'D' light and the shifting problem.
Lesson: For transmission sensors and switches, cheap aftermarket parts are a false economy. They solve the code but introduce new performance issues. Always buy OEM for sensitive transmission electronics.
2003 Chevy Silverado - Multiple transmission codes after replacing parts
The vehicle had codes P0758 and P1886. A shop replaced four solenoids and the internal wiring harness, but the codes returned days later.
What they tried:
- First repair: Replaced 4 solenoids, filter, and fluid. Codes returned.
- Second repair: Replaced the transmission wiring harness. Codes returned.
Outcome: The owner spent significant money on internal parts that didn't fix the root cause. The actual issue was an electrical fault external to the transmission (a bad ground) that was never properly diagnosed.
Lesson: When multiple electrical codes appear simultaneously, the problem is usually in the circuit before the transmission. Always check for bad grounds, faulty ignition switches, or damaged external wiring before condemning internal components.
How to Prevent This Code From Triggering
- Perform regular transmission fluid and filter changes. (Every 30,000-50,000 miles for GM/Ford, every 25,000-30,000 for Honda CVT under severe use.) — Clean fluid prevents abrasive particles from damaging solenoid valves and prevents overheating, which breaks down electronic components and seals.
- Install an auxiliary transmission cooler. (Once, especially for GM/Ford trucks used for towing or heavy hauling.) — Heat is the number one killer of automatic transmissions. An external cooler keeps fluid temperatures stable, dramatically extending the life of solenoids, clutches, and seals.
- Periodically replace the Ford IWE check valve. (Every 30,000 miles or every 2 years.) — The small, inexpensive check valve in the IWE vacuum line is a known failure point. Proactively replacing it for under $20 prevents the loss of vacuum that destroys the entire IWE system.
- Engage 4WD periodically. (Once a month for a few miles.) — For Ford 4x4s, engaging the 4WD system cycles the IWE actuators and keeps the internal mechanisms lubricated and moving freely, preventing them from seizing up.
- Keep the vehicle's cooling system in top condition. (Per standard maintenance schedule.) — Transmission fluid is cooled by a heat exchanger in the radiator. A poorly performing engine cooling system leads to an overheating transmission, damaging electronic sensors and solenoids.
Frequently Asked Questions
Can I fix P1886 myself?
For many common causes, yes. Replacing an external speed sensor (Honda), the IWE solenoid (Ford), or a shift solenoid by dropping the pan (GM) are manageable DIY repairs. You need intermediate mechanical skill and basic hand tools.
What are common misdiagnosis mistakes for P1886?
The biggest mistake is replacing parts without testing the circuit first. Mechanics often replace a 'bad' TCM when the real issue is oil wicking up the harness, or condemn a transmission over a simple vacuum leak. Always diagnose the specific circuit indicated by the code for your vehicle's manufacturer.
Are cheap aftermarket solenoids a good idea?
It is a significant gamble that rarely pays off. Real-world owner experiences show cheap, non-OEM replacement solenoids fail quickly, sometimes within miles of installation. Pay the slight premium for an OEM or reputable aftermarket brand part to avoid doing the labor twice.
Will clearing the code fix the problem?
No, clearing the code only erases the fault from the computer's memory and turns off the check engine light. The underlying physical hardware or wiring fault still exists. The computer will re-run its diagnostic tests and the code will return almost immediately upon driving.
My mechanic wants to replace the whole transmission. Is that necessary?
For code P1886, a full transmission replacement is extremely unlikely. P1886 is an electrical fault code, not a major mechanical failure code. Unless the transmission fluid is full of metal shavings, the problem is almost always a much cheaper electrical component, connector, or wire.
Can a bad battery or low voltage cause P1886?
Yes, transmission control modules are highly sensitive to voltage fluctuations. If system voltage drops below 10 volts during cranking or operation, it causes communication errors and triggers false electrical codes. Always ensure your battery and charging system are healthy before diving into complex transmission diagnostics.
My Honda has a blinking 'D' light with P1886, what does that mean?
The blinking 'D' (Drive) indicator is Honda's specific way of signaling a fault within the automatic transmission system. When paired with a Check Engine Light for P1886, it confirms the issue is transmission-related. For this code, it specifically points to a failure in the CVT driven pulley speed sensor circuit.
Key Takeaways
- P1886 indicates an electrical circuit failure, saving you from a $3,000+ mechanical transmission rebuild 90% of the time.
- Never use a generic diagnostic guide for P1886; it means a 3-2 shift solenoid failure on a GM, a CVT speed sensor fault on a Honda, and a 4x4 vacuum leak on a Ford.
- Inspect the main transmission wiring harness before buying parts, as chafed wires or corroded pins cause over 40% of P1886 codes.
- Pinpoint the exact failure by testing component specs: look for 20-40 ohms on a GM solenoid, a 5V reference on a Honda sensor, or 20-24 inHg of vacuum on a Ford IWE system.
- Check for manufacturer Technical Service Bulletins (TSBs) before repairing, such as Ford's TSB 22-2219 which requires a software reflash to permanently fix cold-weather 4x4 grinding.
Helpful Videos



The information in this article is provided for general reference and educational purposes only. Vehicle specifications, procedures, and part compatibility can vary by production date, trim level, and region. Always consult your vehicle's factory service manual and verify part numbers before purchasing or performing repairs. Safety-critical components such as airbags, seat belts, and braking systems should be installed by a qualified professional.
- 🎬 Helpful Videos
- What Does P1886 Mean?
- Can I Drive With P1886?
- Common Causes
- Symptoms
- Diagnostic Flowchart
- Common Fixes & Costs
- Used vs. New Parts: Buying Guide
- What Happens If You Wait — Timeline
- Cost of Not Fixing It
- Diagnosis Steps
- When This Code Triggers (Freeze-Frame Conditions)
- Related Codes
- Climate & Environmental Factors
- How to Talk to a Mechanic About This Code
- Where to Take It: Dealer vs Independent vs Chain
- When to Walk Away From the Repair
- What Scan Tool You Need for This Code
- How to Clear the Code After You Fix It
- Will This Fail Emissions / State Inspection?
- Most Commonly Affected Vehicles
- Manufacturer-Specific Notes
- Real Owner Stories
- 1996 Chevy Blazer - P1886 and stuck in 3rd gear
- 2018 Ford F-150 at 108k miles - Grinding noise from front wheels
- 2004 Honda CR-V - Blinking 'D' light and shifting problems
- 2003 Chevy Silverado - Multiple transmission codes after replacing parts
- How to Prevent This Code From Triggering
- Frequently Asked Questions
- Can I fix P1886 myself?
- What are common misdiagnosis mistakes for P1886?
- Are cheap aftermarket solenoids a good idea?
- Will clearing the code fix the problem?
- My mechanic wants to replace the whole transmission. Is that necessary?
- Can a bad battery or low voltage cause P1886?
- My Honda has a blinking 'D' light with P1886, what does that mean?
- Key Takeaways
- 🎟️ Get 5% Off