

P1870 on 1998-2002 Chevrolet Express: Transmission Component Slippage Causes and Fixes
On a 1998-2002 Chevy Express with a 4L60E transmission, code P1870 almost always means the torque converter clutch (TCC) valve bore inside the transmission valve body is worn out. This wear causes hydraulic pressure loss, leading to TCC slippage. The computer detects this and commands maximum line pressure to protect the transmission, resulting in harsh, banging shifts. The fix is to repair or replace the valve body, which can cost between $200 and $800+ depending on the approach.
- P1870 on a 1998-2002 Express almost always points to a worn valve body, not a completely failed transmission.
- The most common symptom, besides the Check Engine Light, is a harsh 1-2 shift that appears after the vehicle has warmed up.
- Do not immediately agree to a full transmission rebuild. Insist on diagnosing the valve body and TCC circuit first.
- The most reliable fix is to have a professional install a valve body repair kit (like Sonnax) or a complete remanufactured valve body.
- Continuing to drive with this code will cause further stress and can eventually lead to catastrophic transmission failure.
What's Unique About the 1998-2002 Chevrolet EXPRESS
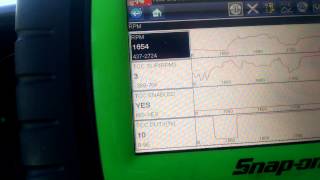
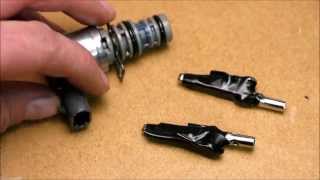
The Chevrolet Express vans from this era 🎬 Watch: Diagnosing the P1870 code on a Chevy Express primarily use the 4L60E or the heavier-duty 4L80E automatic transmission. The P1870 code is notoriously common on the 4L60E due to a specific design flaw. The aluminum valve body houses steel Torque Converter Clutch (TCC) regulator and isolator valves that constantly oscillate. Over time, the steel valves wear away the softer aluminum bore, creating an internal hydraulic leak. This leak prevents the TCC from applying with sufficient pressure, which the computer detects as slippage. The 4L80E is a different design and is not typically associated with this specific failure mode for P1870.
Diagnostic Flowchart
Tap your situation to follow the diagnostic path that matches what you're seeing on this vehicle.
Symptoms You May Notice
- Check Engine Light is on
- Harsh, banging 1-2 shift, which is most noticeable after the transmission warms up to operating temperature (around 180-200°F).
- Transmission may be prevented from shifting into 4th gear (Overdrive) by the PCM as a protective measure.
- Torque converter clutch fails to lock up at highway speeds, resulting in higher than normal RPMs for a given speed.
- A feeling of shudder or slippage when cruising at a steady speed, sometimes described as the RPMs fluctuating without driver input.
- The harsh shifting may disappear or be less noticeable when the transmission is cold.
- Replacing the entire transmission without first diagnosing the valve body. Many shops will quote a full rebuild for $2000+, when a $500 valve body repair would solve the issue.
- Replacing only the TCC solenoid without addressing the wear in the valve body bore. A new solenoid cannot fix the hydraulic leak from a worn bore, and the problem will return quickly.
- Blaming the torque converter itself when the hydraulic circuit controlling it (in the valve body) is the actual point of failure.
Most Likely Causes
- Worn TCC Regulator and Isolator Valve Bore in Valve Body 🔴 High Probability The steel TCC valves constantly move within the softer aluminum valve body bore, causing a channel to wear over many cycles. This wear allows critical hydraulic fluid for the TCC to leak past the valve, preventing proper TCC lockup, especially when the fluid is hot and thinner.
How to confirm: A technician can use a scan tool to monitor TCC slip RPM. If slip is excessive (well over 50-100 RPM, often in the hundreds) when the TCC is commanded on, it confirms a hydraulic leak in the TCC circuit. The problem is most evident when the transmission fluid is hot. Visual inspection of the valve body bore after removal is the ultimate confirmation, often revealing a visible ridge where the valve has worn the bore.
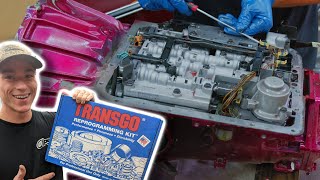
Typical fix: The valve body must be repaired or replaced. Repair involves reaming the worn bore and installing an oversized valve kit (e.g., Sonnax 77754-03K) or a drop-in kit with longer valves designed to seal in unworn portions of the bore (e.g., TransGo SK 4L60E). Alternatively, a remanufactured valve body with a sleeved and repaired bore can be installed.
Est. part cost: $50-$150 for a repair kit, $200-$500 for a remanufactured valve body. - Faulty TCC PWM Solenoid 🟡 Medium Probability This solenoid controls the application of the TCC. It can fail electrically, mechanically (cracked snout), or become clogged with debris, leading to improper TCC function.
How to confirm: The solenoid's resistance can be tested with a multimeter (should be 10-11 ohms at room temperature). A scan tool can also command the solenoid on and off to check its function. A faulty new solenoid has been known to cause issues, making diagnosis difficult.
Typical fix: Replace the TCC PWM solenoid, which is located on the valve body. It is highly recommended to replace this solenoid as a preventative measure any time the valve body is removed for P1870 service.
Est. part cost: $20-$60 - Low or Contaminated Transmission Fluid ⚪ Low Probability Low fluid can cause the pump to cavitate, leading to pressure loss and slippage. Fluid contaminated with coolant from a failed radiator cooler can destroy the friction materials of the clutches, causing slippage and a P1870 code.
How to confirm: Check the transmission fluid level and condition with the engine running and the transmission warm. If the fluid is dark brown/black, smells burnt, or appears milky (coolant contamination), internal damage is certain.
Typical fix: Perform a transmission fluid and filter change. If the fluid is badly burnt or contaminated, a transmission rebuild is almost always necessary as the friction materials are compromised.
Est. part cost: $50-$100 for fluid and a filter kit.
Rare But Worth Checking
- Failing Torque Converter: While the valve body is the most common culprit, the torque converter's internal clutch can fail mechanically, causing the same slippage symptoms. This is usually accompanied by a large amount of black, gritty debris in the transmission pan.
- Worn Internal Transmission Seals or Clutches: If other clutches (like the 3-4 clutch) or seals (like input drum seals) are failing, it can cause a loss of pressure and slippage that may trigger a P1870 code, though this is less common than the TCC issue.
- Cracked TCC Solenoid Snout: In one documented case, a shop replaced the valve body and other components but the problem persisted. The ultimate cause was a new TCC solenoid that had a hairline crack in its plastic snout, causing a pressure leak. This highlights the importance of inspecting even new parts.
Diagnosis Steps
- Verify the fluid level and condition. If low, top it off. If burnt or milky, inspect the pan for excessive metal debris. Coolant contamination requires a rebuild.
- Connect a professional scan tool capable of reading live transmission data, such as a GM Tech II.
- Warm the transmission to full operating temperature (above 180°F / 82°C), as the issue is often not present when cold.
- Drive the vehicle at a steady speed (above 45 mph) where lockup should occur.
- Monitor the 'TCC Slip Speed' data parameter. Observe if the slip speed drops to near zero (ideally under 50 RPM) when the TCC is commanded 'On'.
- If slip remains high (e.g., 200+ RPM) or fluctuates wildly, it confirms a slippage problem in the TCC circuit.
- Drop the transmission pan and inspect for excessive clutch material (looks like black mud) or metal shavings, which would indicate a more severe internal failure requiring a rebuild.
- If the pan is relatively clean, the next step is to remove the valve body to inspect the TCC regulator valve bore for a visible wear ridge. This is the most likely culprit.
- While the valve body is out, test the resistance of the TCC PWM solenoid (should be 10-11 ohms at 68°F/20°C) and inspect its snout for cracks.
Parts You'll Likely Need
- Valve Body TCC Repair Kit — This is the most common and cost-effective fix. Contains components to repair the worn TCC valve bore. Some kits require reaming (Sonnax), while others use longer valves to bypass the worn area (TransGo).
Trusted brands: Sonnax (P/N: 77754-03K - requires reaming tool), TransGo (P/N: SK 4L60E - no reaming required)
Aftermarket price range: $50-$150 - Remanufactured Valve Body — A direct replacement for the original, typically with the TCC bore already sleeved or repaired. This is a faster but more expensive option than a repair kit, recommended by GM in TSB 01-07-30-023B.
Trusted brands: ACDelco (Genuine GM), Sonnax
OEM price range: $400-$600
Aftermarket price range: $250-$450 - TCC PWM Solenoid
(OEM #24227792 (Supersedes 24212690))— Often replaced as a preventative measure while the valve body is being serviced, or if it tests out of spec. It is a critical component for TCC operation.
Trusted brands: ACDelco, Rostra, Bosch
OEM price range: $30-$50
Aftermarket price range: $20-$40
Related Codes That Often Appear With This One
- P0894 — This code also means 'Transmission Component Slipping' and is often set alongside P1870, as they both detect a deviation in expected gear ratios. GM Technical Service Bulletins often group them together.
- P0741 — This code specifically indicates 'Torque Converter Clutch Circuit Performance or Stuck Off'. It points more directly to the TCC system and can appear with P1870 if the slippage is severe enough or if the PCM's diagnostic logic focuses on the TCC circuit specifically.
Technical Service Bulletins (TSBs) & Recalls
- PIP5340 / PIP5340A: Instructs technicians to contact GM Technical Assistance for P1870/P0894, indicating the known complexity of the issue.
- TSB 01-07-30-023B: Addresses customer complaints of a harsh 1-2 shift ('1-2 bump') when hot, accompanied by DTC P1870. The bulletin acknowledges the valve body wear and recommends replacing the control valve body assembly.
- TSB from March 22, 2002: A GM bulletin advised technicians to replace the valve body with a revised part to fix the TCC valve bore wear issue, confirming the manufacturer's awareness of the design flaw.
Platform-Specific Known Issues
- GM issued multiple Technical Service Bulletins regarding this code. TSB #01-07-30-023B specifically addresses the harsh 1-2 shift and P1870, recommending the replacement of the valve body.
- The PCM's reaction to set max line pressure is what causes the noticeable 'bang' shift that alarms drivers. This is a programmed protective measure, not a separate failure.
- The problem is significantly more pronounced when the transmission fluid is hot and its viscosity is lower, allowing fluid to more easily bypass the worn valve bore.
Mechanic-Grade Diagnostic Values
- TCC PWM Solenoid Resistance — expected: 10 - 11 Ohms at 68°F (20°C). Failure: A reading outside this range indicates an electrically failed solenoid.
- TCC Slip Speed (Scan Tool PID) — expected: 50 RPM or less under light throttle when TCC is commanded ON.. Failure: Sustained slip well over 100 RPM (e.g., 200-400 RPM) when lockup is commanded indicates a hydraulic leak or mechanical slippage.
- TCC PWM Duty Cycle (Scan Tool PID) — expected: Ramps up to approximately 40-50% to hold a steady, minimal slip.. Failure: The PCM may command maximum duty cycle (e.g., 96%) in an attempt to overcome a leak, while TCC slip remains high.
Scan Tool Commands That Help
- GM Tech II: TCC Control / TCC Enable — Use this bidirectional command to manually turn the TCC ON and OFF while driving to verify PCM control and monitor TCC slip speed in real-time. Cycling it multiple times can help identify a sticking valve in the valve body.
- GM Tech II: Output Controls > TCC Solenoid — This function allows a technician to test the electrical integrity of the TCC solenoid circuit from the PCM to the transmission connector. The scan tool will display the status of the driver (e.g., OK, Open, Short to Ground).
Wiring & Ground Locations
- Transmission Main Connector (13-pin) — On the passenger side of the transmission case.. Pin E is the 12V+ ignition power feed for all solenoids, including the TCC PWM solenoid. A poor connection here can cause multiple issues. The PCM provides a ground signal to the TCC solenoid to activate it.
- Engine to Frame Ground Strap — Typically runs from the back of the cylinder head or engine block to the firewall or frame rail.. A corroded or broken main ground strap is a common issue on GMT400 trucks and can cause a host of electrical problems, including erratic sensor readings and improper solenoid function, which could potentially mimic transmission issues.
Real Owner Repair Stories
- Automatic Transmission YouTube Channel (1998 Chevrolet Tahoe with 4L60E) — P1870 code, no TCC engagement, TCC slip speed of 370 RPM.
❌ Tried (didn't work) Torque converter was replaced., An isolator spring was installed in the valve body.
✅ What actually fixed it The new TCC solenoid (part of a replacement internal harness) had a hairline crack in its plastic snout, causing a pressure leak. Replacing just the faulty solenoid with another new one resolved the issue. - GMTNation Forum User (1998 Chevrolet Camaro with 4L60E) — Extremely hard 1-2 shifts (no code mentioned initially), TCC failing to lock or cycling on/off when warm.
❌ Tried (didn't work) Initial diagnosis was inconclusive.
✅ What actually fixed it Installed a Transgo SK-4L60E shift kit. This kit alters the TCC apply from a modulated slip to a firmer on/off engagement, which bypasses the hydraulic leak from the worn valve body bore and provides a durable fix. - PerformanceTrucks.net Forum User (4L60E, year/model not specified but symptoms match) — P1870 code immediately after a transmission rebuild that included a Transgo-HD2 kit.
❌ Tried (didn't work) Full transmission rebuild with new clutches, band, and a Transgo HD2 shift kit.
✅ What actually fixed it The owner concluded, based on expert advice, that an O-ring was likely missing from the input shaft, causing a pressure loss in the TCC apply circuit.
OEM Part Supersession History
24212690→24227792— Updated design for the TCC PWM Solenoid.
Heads up: The parts are physically interchangeable. Some GM documentation notes that the replacement part may require 'special setup procedures,' though this is not typically an issue on this vehicle generation.
Model Year Variations Within This Range
- 1998-2002: All 1998 and later 4L60E transmissions, including those in the Express van, use a two-piece case design with a bolt-on bellhousing, differing from the earlier one-piece case design.
- 1998-2002: Express vans in this year range with the original Vortec V8 engines use the 298mm style input shaft and torque converter. Starting in 1998, some truck platforms with new Gen III LS-based engines began using a different 300mm input shaft and converter. It is critical to verify engine type when sourcing a replacement transmission or converter.
Helpful Videos

We Have This Part in Stock


The information in this article is provided for general reference and educational purposes only. Vehicle specifications, procedures, and part compatibility can vary by production date, trim level, and region. Always consult your vehicle's factory service manual and verify part numbers before purchasing or performing repairs. Safety-critical components such as airbags, seat belts, and braking systems should be installed by a qualified professional.
- Chevrolet EXPRESS:
- 🎬 Helpful Videos
- 🛍️ Shop This Part
- What's Unique About the 1998-2002 Chevrolet EXPRESS
- Diagnostic Flowchart
- Symptoms You May Notice
- Most Likely Causes
- Rare But Worth Checking
- Diagnosis Steps
- Parts You'll Likely Need
- Related Codes That Often Appear With This One
- Technical Service Bulletins (TSBs) & Recalls
- Platform-Specific Known Issues
- Mechanic-Grade Diagnostic Values
- Scan Tool Commands That Help
- Wiring & Ground Locations
- Real Owner Repair Stories
- OEM Part Supersession History
- Model Year Variations Within This Range
- 🎟️ Get 5% Off