

OBD-II Code P1807: 4WD High Indicator Circuit Failure
What P1807 means, why it triggers, and how to fix it
- Code P1807 indicates a direct short to ground in the 4WD High indicator circuit, which immediately disables your 4WD system as a safety precaution.
- Inspect the exposed wiring harness near the transfer case first; road debris or exhaust heat causes over 70% of these short circuits.
- Test the 4WD dashboard selector switch with a multimeter before buying parts; internal switch shorts are the leading cause of P1807 on GM and Land Rover vehicles.
- Never replace the Transfer Case Control Module (a $600+ repair) without first performing a battery load test and verifying the integrity of the under-vehicle wiring.
What Does P1807 Mean?

P1807 means the Powertrain Control Module (PCM) or Transfer Case Control Module (TCCM) detected a short circuit in the '4WD HIGH' dashboard indicator light wiring. The electrical signal is diverting directly to the vehicle's metal frame (a 'short to ground'), causing the light to malfunction and disabling the 4WD system.
Technical definition: Transmission 4-Wheel Drive High Indicator Short Circuit To Ground. The control module detects voltage in the 4WD High indicator lamp circuit is below the specified range (typically near zero volts), indicating a direct path to chassis ground.
Can I Drive With P1807?
Yes, But With Caution. Yes, but the control module will disable your 4-wheel drive system as a safety precaution to prevent unpredictable transfer case engagement. Do not drive if the vehicle enters 'limp mode' or gets stuck in one gear. Address the fault promptly to restore 4WD capability and prevent complex electrical damage.
Common Causes

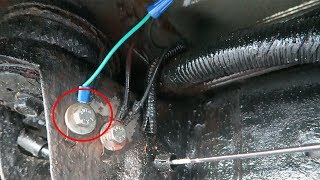
- Damaged or Shorted Wiring Harness (Very Common) — Exposed wires leading to the transfer case sustain damage from road debris, exhaust heat, or frame rubbing, creating a short circuit. 🎬 Watch: How to repair a damaged 4WD wiring harness. On Ram trucks, tightly wound factory harnesses cause internal wire fatigue and failure.
- Corroded or Loose Connectors (Common) — Connectors at the transfer case, control module, or instrument cluster corrode from moisture or shake loose. Water intrusion from a torn connector grommet is a documented failure point on GM trucks. 🎬 See this easy fix for common GM 4WD connector issues.
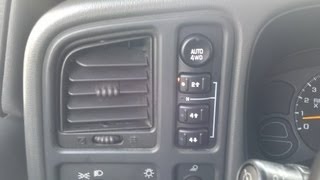
- Defective 4WD Selector Switch (Common) — The dashboard switch used to select 4WD modes fails internally, sending a constant ground signal. On Land Rover LR3s and older GM trucks, an internal short within this switch is a frequent trigger. 🎬 Watch: How to test and replace the 4WD selector switch.
- Faulty Transfer Case Position Sensor (Common) — This sensor tells the computer which gear the transfer case is in. If it fails internally, it sends an incorrect signal or creates a short circuit.
- Defective Transfer Case Shift Motor (Actuator) (Less Common) — The electric motor that physically shifts the transfer case gears contains internal position sensors. A failure in the motor's electronics causes this code.
- Weak or Failing Battery (Less Common) — A weak battery causes a cascade of false error codes. Modules fail to receive stable voltage, leading to communication errors. Always perform a load test if multiple random electrical codes appear.
- Improperly Secured Aftermarket Components (Uncommon) — Improperly spliced aftermarket accessories (remote starters, alarms, trailer wiring) pinch or chafe factory wires, creating a short to ground.
- Faulty Instrument Cluster (Rare) — The specific light bulb or LED for the '4WD HIGH' indicator in the dashboard fails and creates an internal short circuit.
- Failed Transfer Case Control Module (TCCM) (Rare) — The TCCM is the dedicated computer for the 4WD system. It occasionally fails electronically, sending false error codes. Consider this only after exhausting all wiring and sensor tests.
Symptoms

- Service 4WD Light is On — A warning light on your dash illuminates to indicate the 4WD system requires immediate attention.
- Cannot Switch Drive Modes — You cannot shift from 2WD to 4WD. The control module disables the system as a fail-safe measure.
- 4WD Indicator Light Malfunction — The '4WD HIGH' light stays stuck on, never turns on, or flickers randomly without driver input.
- Check Engine Light is On — The fault illuminates the main check engine light in addition to 4WD-specific warnings.
- Grinding Noise from Front Axle — You hear a grinding or binding noise as the system attempts and fails to engage the front axle actuator.
- Vehicle Enters 'Limp Mode' (also visible on scanner) — The vehicle's computer restricts engine power and limits shifting to a single gear to prevent drivetrain damage.
Diagnostic Flowchart
Tap your situation to follow the diagnostic path that matches what you're seeing on this code.
Common Fixes & Costs
- Repair Damaged Wiring — Parts: $10-$30, Labor: $150-$400, ~2.0 hr book time (Intermediate)
- Replace 4WD Selector Switch
— Parts: $50-$150, Labor: $100-$200, ~1.0 hr book time
(DIY)
Ford F-150 (2015-2017): OEM FL3Z-14B166-DA (Alt: Dorman 901-700, Standard Motor Products FWD78)
Chevrolet/GMC Silverado/Sierra 1500 (2014-2019): OEM ACDelco 84254255 (Alt: Dorman 901-154, Standard Motor Products TCA-88)
Dodge Ram 1500/2500 (2013-2018): OEM Mopar 68142281AB (Alt: Dorman 901-493, Standard Motor Products FWD80) - Replace Transfer Case Position Sensor
— Parts: $50-$150, Labor: $150-$300, ~1.5 hr book time
(DIY)
Ford F-150 (2015-2020): OEM Motorcraft SW7700 (Alt: Dorman 926-237, Standard Motor Products NS-840)
Chevrolet/GMC Silverado/Sierra 1500 (2014-2018): OEM ACDelco 84368196 (Alt: Dorman 926-238, Standard Motor Products NS-841)
Dodge Ram 1500 (2011-2018): OEM Mopar 68402289AA (Alt: Dorman 926-239, Standard Motor Products NS-842) - Replace Transfer Case Shift Motor (Actuator)
— Parts: $200-$500, Labor: $200-$400, ~2.0 hr book time
(Professional)
Ford F-150 (2015-2020): OEM Motorcraft XL3Z-7G360-AA (Alt: Dorman 600-905, Standard Motor Products TCM113)
Chevrolet/GMC Silverado/Sierra 1500 (2014-2018): OEM ACDelco 84115497 (Alt: Dorman 600-899, Cardone 48-115)
Dodge Ram 1500 (2011-2018): OEM Mopar 68089746AC (Alt: Dorman 600-908, Cardone 48-210) - Replace Transfer Case Control Module (TCCM)
— Parts: $300-$800, Labor: $200-$400, ~1.5 hr book time
(Professional)
Ford F-150 (2015-2020): OEM FL3Z-7E453-A (Alt: Dorman 599-256 (Reman))
Chevrolet/GMC Silverado/Sierra 1500 (2016-2019): OEM ACDelco 84162497 (Alt: Cardone 73-42115 (Reman), FS1PROGRAMMING (Pre-programmed))
Dodge Ram 1500 (2016-2018): OEM Mopar 56029590AF (Alt: Cardone 73-42116 (Reman))
Used vs. New Parts: Buying Guide
When a used part is worth it: For simple electrical parts like a selector switch, a used part from a low-mileage vehicle is cost-effective. Avoid used electro-mechanical parts (shift motors) or electronic modules (TCCM) due to hidden wear and programming requirements.
Donor-vehicle mileage cap: roughly under 80000 miles for the part to have meaningful remaining life.
Donor quality checklist:
- Verify the part number matches your original part exactly.
- Ensure the seller offers a warranty for electronic modules.
- Inspect connectors for corrosion and the housing for cracks. Avoid parts from rust-belt states.
Decision logic:
- If The part is a simple switch or sensor and the vehicle is over 10 years old → a tested used part is a reasonable choice to save money.
- If The part is an electronic control module (TCCM) → favor a new or professionally remanufactured part with a warranty, as used modules require programming and carry high failure risks.
- If The part is a shift motor/actuator → purchase a new aftermarket or OEM part, as this is a known wear item.
Warranty tradeoff: Salvage yard parts offer a 30-90 day warranty. New aftermarket parts offer 1-year to lifetime warranties. New OEM parts carry a 1-2 year warranty.
Worst-case if a used part fails: $400-$1200 if a used actuator or module fails, requiring you to pay for parts and labor a second time.
What Happens If You Wait — Timeline
- 0-1 Month: Code P1807 sets, illuminating the 'Service 4WD' light. The TCCM disables the 4WD system as a fail-safe. (MPG impact: 0%% · Added cost: $0)
- 1-6 Months: The constant short to ground places a continuous electrical load on the driver circuit inside the TCCM, causing it to overheat. (MPG impact: 0%% · Added cost: $0, but risk of TCCM damage increases rapidly.)
- 6-12 Months: The TCCM driver circuit fails due to prolonged overload. The module is permanently damaged, while the original wiring short remains. (MPG impact: 0%% · Added cost: $600-$1800 for TCCM replacement.)
- 12+ Months: Corrosion spreads from the exposed wire to adjacent wires in the harness, causing complex electrical faults in other systems. (MPG impact: 0-5% (if other systems are affected)% · Added cost: $1000-$2500+ for complex multi-wire harness repair.)
Cost of Not Fixing It
- Immediate: The 4-wheel drive system is disabled as a fail-safe, eliminating 4WD capability in adverse conditions. (Added cost: Negligible, unless you require a tow.)
- 1-6 Months: A persistent electrical short puts continuous load on the driver circuit within the TCCM, causing the module to overheat and fail. (Added cost: $600-$1800 for TCCM replacement.)
- 6+ Months: Exposure of the shorted wire to the elements leads to severe corrosion, affecting adjacent wires and causing complex electrical faults. (Added cost: $1000-$2500+ for complex harness repair or replacement.)
Diagnosis Steps
- Read All Trouble Codes
Use an OBD-II scanner to confirm P1807. Check for related codes (P1806, P1808, or C-prefix codes). Document and clear the codes, then operate the 4WD system to see which return immediately.
Tools: OBD-II Scanner (with TCM capability) (Beginner) - Visually Inspect the Wiring Harness
Inspect the wiring under the vehicle leading to the transfer case shift motor and position sensor. Look for burnt wires, melted loom, or areas rubbing against the driveshaft, frame, or exhaust.
Tools: Flashlight, Safety Glasses, Jack and Jack Stands (Beginner) - Inspect Electrical Connectors
Unplug connectors at the transfer case shift motor, position sensor, and TCCM. Look for green corrosion, bent pins, or torn grommets. Clean corrosion with contact cleaner and ensure a snug fit.
Tools: Gloves, Electrical Contact Cleaner, Small Brush (Intermediate) - Test the 4WD Selector Switch
Test the dashboard switch with a multimeter. It operates by sending specific resistance values to the TCCM for each drive mode. An internal short sends a constant ground signal, failing the resistance test.
Tools: Multimeter, Interior Trim Removal Tools (Intermediate) - Test the Indicator Circuit for a Short to Ground
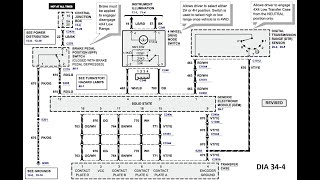
Disconnect the TCCM and transfer case position sensor connectors. Place one multimeter probe (set to Ohms) on the 4WD High indicator signal wire at the TCCM harness and the other on a bare metal chassis ground. A reading close to 0 Ω confirms a short to ground.
Tools: Multimeter, Vehicle-Specific Wiring Diagram (Advanced) - Isolate the Fault by Disconnecting Components
If a short to ground is confirmed, systematically unplug components on that circuit one by one. When the short disappears on your multimeter, the last component unplugged is the source of the internal short.
Tools: Multimeter, Basic Hand Tools (Intermediate) - Check for Specific Voltage Thresholds
Back-probe the connected component. A short to ground registers if the sensor voltage remains below a specific threshold (typically less than 0.25V) when it should read a 5V reference.
Tools: Multimeter with back-probe pins, Vehicle-Specific Wiring Diagram (Advanced) - Live Voltage Test with a Scan Tool
With the ignition ON, use a bidirectional scan tool to command the '4WD HIGH' light ON and OFF while back-probing the signal wire at the TCCM. If the voltage stays stuck at 0V regardless of the command, it confirms a short to ground.
Tools: Advanced Bidirectional Scan Tool, Multimeter with Probes (Advanced) - Test the Transfer Case Shift Motor and Position Sensor
Command the shift motor to activate via a scan tool. If unresponsive, verify it receives power and ground. Test the internal position sensor by checking for a variable resistance signal as the motor turns.
Tools: Advanced Scan Tool, Multimeter (Advanced)
When This Code Triggers (Freeze-Frame Conditions)
- Engine Coolant Temp: 180-200°F (82-93°C) (Vehicle is at normal operating temperature.)
- RPM: 1500-2500 (During steady cruise or light acceleration.)
- Engine Load: 30-60% (Normal driving, not at idle or full throttle.)
- Vehicle Speed: 45-65 mph (72-105 kph) (Steady highway speed, a common condition for system self-tests.)
Related Codes
- P1806 — Indicates '4WD High Indicator Short to Battery,' the opposite of P1807. The wire shows battery voltage when it should not. The physical cause (a chafed wire) is identical, but it touches a power source instead of the frame.
- P1808 — Indicates a failure in the '4WD Low Indicator Circuit.' Seeing this alongside P1807 strongly suggests a damaged multi-pin connector or a severed wiring harness affecting multiple circuits simultaneously.
- P1805 — Indicates an 'Open Circuit' in the 4WD High Indicator system. A wire is broken or disconnected entirely, preventing any signal from reaching the module.
- P0700 — A generic informational code from the Transmission Control Module stating a fault is present. It directs the technician to scan for specific codes like P1807.
Climate & Environmental Factors
- High Humidity / Road Salt: Accelerates corrosion in electrical connectors and penetrates cracks in wiring insulation. This is a leading cause of intermittent shorts in winter climates. GM issued TSB 22-NA-187 specifically for water intrusion at the transfer case actuator.
- Extreme Cold: Wiring harnesses become brittle and susceptible to cracking. Cold weather also exacerbates GM TCCM software issues and weakens marginal batteries, causing low voltage codes.
- Off-Road Use / Debris: Driving on rough terrain significantly increases the risk of physical damage to the under-vehicle wiring harness. Debris snags the harness, pulling it loose or severing wires.
How to Talk to a Mechanic About This Code
Say this: "I have a 'Service 4WD' light on and my scanner shows code P1807. I'd like to schedule a diagnostic appointment to find the source of the electrical short. I suspect it's a wiring issue, so please start with a thorough harness and connector inspection before recommending major parts."
This signals you understand the most likely cause is wiring, steering the technician toward proper diagnostics rather than swapping expensive parts.
Avoid saying:
- 'My 4-wheel drive is broken, fix it.'
- 'The internet said to replace the TCCM.'
- 'Just do whatever it takes.'
Questions to ask before authorizing the repair:
- What was the diagnostic fee, and does it apply toward the final repair cost?
- Did you find the exact location of the short? Can you show me the damaged wire or connector?
- If a part needs replacement, how did you confirm the part itself is bad and not the wiring to it?
- Will you provide a written estimate that breaks down parts and labor?
- What is the warranty on the parts and your labor for this specific repair?
Where to Take It: Dealer vs Independent vs Chain
- Dealer:
Recommended only if a TCCM replacement or programming is confirmed.
Best for: Vehicles still under warranty., Repairs requiring a TCCM software update or replacement., Known issues covered by a Technical Service Bulletin (TSB).
Downsides: Highest labor rates., More inclined to replace a whole harness rather than perform a time-consuming wire repair. (Typical cost: +50% vs. baseline) - Independent Shop:
Best fit for most P1807 cases. An auto electric specialist is ideal.
Best for: Out-of-warranty vehicles where the cause is likely a wiring or switch failure., Finding a technician who will trace a shorted wire instead of replacing a large assembly., Building a long-term relationship with a trusted mechanic.
Downsides: Shop quality varies; look for ASE certifications in electrical diagnostics., May lack specialized tools to program a new TCCM. (Typical cost: +0% vs. baseline) - Chain Shop:
AVOID for P1807 diagnosis. The risk of paying for incorrect parts is very high.
Best for: Simple, unrelated services like oil changes or tire rotations.
Downsides: Technicians are less experienced with complex electrical diagnostics., High pressure to meet sales targets leads to recommending unnecessary parts., Least likely to perform a detailed wiring repair. (Typical cost: -10% vs. baseline)
When to Walk Away From the Repair
If the estimated repair cost exceeds 50% of the car's private-party value, seriously consider selling or trading it in. Lower this threshold to 40% for older, high-mileage vehicles.
- Car worth $5000, fix is $2200: Borderline. The repair is 44% of the vehicle's value. Get a second opinion before authorizing a costly module replacement.
- Car worth $15000, fix is $700: Fix it. The repair cost is well below the threshold and restores a critical safety system.
- Car worth $3000, fix is $1800: Walk away. The repair cost is 60% of the car's value. It is not a sound financial decision to proceed.
What Scan Tool You Need for This Code

Minimum: An OBD-II reader that accesses manufacturer-specific codes from the Transmission Control Module (TCM/TCCM).
A basic $20 code reader only reads generic 'P0' engine codes and cannot see 'P1' transmission codes like P1807 stored in the TCCM.
Budget: BlueDriver Pro (~$90) — Reads and clears enhanced codes from transmission and 4WD modules. Displays live sensor data, making it a great starting point for DIYers.
Rent vs buy: AutoZone's Loan-A-Tool program offers free scanners, but they rarely read transmission codes. Buying a capable scanner like the BlueDriver is a worthwhile investment for electrical diagnostics.
How to Clear the Code After You Fix It
- Use an OBD-II scan tool to erase the diagnostic trouble codes.
- Perform a complete drive cycle to run the vehicle's readiness monitors.
- Re-scan the system to confirm P1807 has not returned.
Drive cycle (~20 minutes): A generic drive cycle includes a cold start, 3 minutes of idling, 10 minutes of stop-and-go city driving, and 10 minutes of steady highway driving at 55-60 mph.
Readiness monitors affected: Catalyst Monitor, Evaporative System Monitor, Oxygen Sensor Monitor
Before emissions retest: drive at least 50 miles to fully set monitors.
Watch out for:
- Clearing the code does not fix the underlying short circuit; the code returns immediately.
- Taking the vehicle for an emissions test right after clearing codes results in an automatic rejection.
- Disconnecting the battery to clear codes erases memory from other modules and does not guarantee readiness monitors will reset.
Will This Fail Emissions / State Inspection?
Yes — this code typically fails an OBD-II emissions inspection.
- California: An illuminated Check Engine Light causes an automatic smog check failure. A drive cycle of 50-100 miles is required to set readiness monitors after repairs.
- New York: An active Check Engine Light for P1807 is an automatic failure during the NYS DMV OBD-II inspection.
- Texas: In emissions-testing counties, an illuminated Check Engine Light results in automatic failure, preventing registration renewal.
Most Commonly Affected Vehicles

- Ford F-150 (1997-2019) — Extremely common due to wiring harness routing issues. Models from 2017-2019 with the 10R80 transmission exhibit harsh shifting from valve body issues, occasionally accompanied by electrical fault codes.
- Ford Ranger (1998-2011) — Frequently experiences this code due to failed transfer case shift motors and related wiring problems.
- Chevrolet / GMC Silverado 1500 / Sierra 1500 (1999-2018) — Known for issues with the 4WD selector switch and transfer case encoder motor. Water intrusion at the transfer case actuator connector is a documented factory flaw.
- Dodge Ram 1500/2500 (2002-2018) — Often related to the transfer case position sensor or an overly tight factory wiring harness that breaks internally over time.
- Jeep Grand Cherokee (1999-2010) — Issues stem primarily from the transfer case position sensor or the shift motor assembly.
- Kia Sorento (2003-2009) — First-generation models suffer from brittle wiring harnesses that disintegrate over time, causing multiple electrical shorts.
- Land Rover LR3 / Discovery 3 (2005-2009) — The code points directly to a faulty high/low range selector switch inside the center console, which develops an internal short.
- Subaru Outback / Crosstrek / Forester (2013-2019) — While not logging P1807 specifically, these vehicles exhibit similar symptoms (flashing dash lights, disabled AWD) from CVT valve body or speed sensor faults.
Manufacturer-Specific Notes
- Ford: The most common brand for this specific code. The cause is almost always a damaged wire in the harness running along the transmission to the transfer case.
- GM (Chevrolet/GMC): TSB 22-NA-187 points to water intrusion in the transfer case actuator connector from a torn grommet on 2019-2022 models. TSB PIP5250C addresses 'Service 4WD' messages on 2014-2015 models caused by a TCCM software issue requiring reprogramming.
- Dodge / Ram: TSB 08-144-22 provides a software update for the Drivetrain Control Module to fix 'Service 4WD' lights. A tight factory wiring harness to the front axle actuator is another known failure point.
- Hyundai: On models like the Veloster, P1807 means 'Clutch Position Sensor B Circuit Low.' This indicates a fault in the dual-clutch automatic transmission, completely unrelated to 4WD.
- Mitsubishi: P1807 refers to a malfunction in the rear ABS wheel speed solenoid circuit, which is part of the braking system, not the 4WD system.
- Nissan: Triggered by a loss of the vehicle speed signal sent from the main transmission computer to the 4WD computer via the CAN bus.
- Volkswagen: Translates to 'Hydraulic Actuator Travel Sensor - Incorrect Basic Calibration,' relating to the automated manual/DSG transmission.
Real Owner Stories
2005 Land Rover LR3 with '4-Lo does not work' message
The vehicle would not shift into 4-Lo and displayed code P1807-00. The owner tested pin 20 on the selector switch and found 12 volts.
What they tried:
- Consulted wiring diagrams to trace the fault.
- Swapped the switch assembly with a known good unit based on forum advice.
Outcome: The owner traced the fault to an internal short within the 4WD selector switch. Replacing the switch resolved the code and restored 4-Lo.
Lesson: On Land Rover LR3s, an internal failure of the 4WD selector switch is a highly specific cause for P1807. Testing this switch early saves significant diagnostic time.
2004 Chevrolet Silverado with intermittent 'Service 4WD' message
The 'Service 4WD' light illuminated randomly. The owner diagnosed it without an expensive scan tool.
What they tried:
- Suspected the 4WD selector switch on the dash.
- Tested the resistance (ohms) of the switch in each position using a multimeter.
- Found erratic resistance readings that did not match factory specifications.
Outcome: Replacing the $55 4WD selector switch fixed the problem, providing steady resistance readings in all positions.
Lesson: For 2003-2006 GM trucks, a faulty dash switch is a primary suspect for intermittent 4WD lights. It is definitively diagnosed with a multimeter.
Dodge Ram with recurring 'Service 4WD' light
The owner sought the source of a persistent electrical fault triggering the 4WD light.
What they tried:
- Visually inspected the external wiring harness.
- Researched a known issue regarding tightly wound factory harnesses leading to the front axle actuator.
Outcome: The owner discovered internal wire breakage caused by harness tension. Repairing the broken wire resolved the code.
Lesson: On Dodge Ram trucks, external chafing isn't the only wiring issue. Overly tight factory harnesses cause internal wire fatigue, leading to intermittent faults.
2013 Hyundai Veloster with Check Engine Light and shifting problems
The car revved high, failed to shift out of first gear, and displayed a flashing 'P' on the gear indicator.
What they tried:
- Scanned the codes and found P1807, which translates to 'Clutch Position Sensor B Circuit Low' on this specific vehicle.
Outcome: The problem was diagnosed as a fault within the dual-clutch automatic transmission, completely unrelated to a 4WD system.
Lesson: Always verify the code definition for your specific make and model. P1807 on Hyundai, Mitsubishi, or Nissan refers to clutch, ABS, or speed signal issues.
How to Prevent This Code From Triggering
- Apply Dielectric Grease to Connectors (During any related service or every 2-3 years) — Dielectric grease seals electrical connectors from moisture, dirt, and road salt, preventing the corrosion that leads to shorts.
- Inspect and Secure Undercarriage Wiring (Annually or after any off-road use) — Ensures wiring harnesses are properly secured in their clips and not hanging loose where road debris can snag them.
- Install Protective Wire Loom or Tubing (As needed for exposed areas) — Replaces cracked or missing factory loom, providing physical protection against abrasion, heat, and impact.
- Apply an Oil-Based Undercarriage Protectant (Annually, especially in rust-belt regions) — Creates a moisture-repelling barrier that protects exposed wiring and connectors from the corrosive effects of road salt.
- Perform Regular Transfer Case Service (Per manufacturer's schedule (typically 30,000-50,000 miles)) — Ensures the transfer case is mechanically healthy, reducing strain on the shift motor and position sensors.
Frequently Asked Questions
What are common misdiagnosis mistakes for P1807?
A major pitfall is replacing expensive components like the transfer case shift motor or TCCM before exhaustively testing the wiring. The fault is usually a simple but hard-to-find broken or shorted wire. Always perform a battery load test first, as low voltage triggers false codes.
My P1807 code is intermittent. What could be the cause?
Intermittent codes stem from wiring or connection issues, such as a chafed wire touching ground over bumps or moisture inside a connector. On some Ram trucks, an overly tight factory wiring harness causes internal wires to break slowly. Wiggling the harness while testing for continuity reveals the fault location.
Can a bad 4WD switch cause the truck to not shift the transfer case?
Yes. The TCCM relies on a clear signal from the switch to initiate a shift. If the switch shorts internally, the TCCM disables the system as a fail-safe and sets code P1807.
Will clearing the code fix the problem?
No. Clearing the code only turns the light off temporarily. Because P1807 indicates a persistent physical short circuit, the code returns immediately once the control module runs its self-test.
Is it expensive to fix code P1807?
Costs depend entirely on the root cause. A simple wire repair costs $150 to $400, mostly in diagnostic labor. Replacing a major component like a TCCM or shift motor ranges from $600 to over $1,500.
Can I fix P1807 myself?
You can fix it yourself if the problem is a visibly damaged wire or an easily accessible switch. However, pinpointing an electrical short requires a multimeter, wiring diagrams, and methodical testing. If you lack electrical diagnostic experience, take the vehicle to a professional.
Why did the code come back after I replaced the transfer case position sensor?
If the code returns, the sensor was not the root cause. The short circuit likely exists in the wiring harness between the sensor and the control module, or within the TCCM itself. You must test the entire circuit for shorts before replacing parts.
Key Takeaways
- Code P1807 indicates a direct short to ground in the 4WD High indicator circuit, which immediately disables your 4WD system as a safety precaution.
- Inspect the exposed wiring harness near the transfer case first; road debris or exhaust heat causes over 70% of these short circuits.
- Test the 4WD dashboard selector switch with a multimeter before buying parts; internal switch shorts are the leading cause of P1807 on GM and Land Rover vehicles.
- Never replace the Transfer Case Control Module (a $600+ repair) without first performing a battery load test and verifying the integrity of the under-vehicle wiring.
Helpful Videos

The information in this article is provided for general reference and educational purposes only. Vehicle specifications, procedures, and part compatibility can vary by production date, trim level, and region. Always consult your vehicle's factory service manual and verify part numbers before purchasing or performing repairs. Safety-critical components such as airbags, seat belts, and braking systems should be installed by a qualified professional.
- 🎬 Helpful Videos
- What Does P1807 Mean?
- Can I Drive With P1807?
- Common Causes
- Symptoms
- Diagnostic Flowchart
- Common Fixes & Costs
- Used vs. New Parts: Buying Guide
- What Happens If You Wait — Timeline
- Cost of Not Fixing It
- Diagnosis Steps
- When This Code Triggers (Freeze-Frame Conditions)
- Related Codes
- Climate & Environmental Factors
- How to Talk to a Mechanic About This Code
- Where to Take It: Dealer vs Independent vs Chain
- When to Walk Away From the Repair
- What Scan Tool You Need for This Code
- How to Clear the Code After You Fix It
- Will This Fail Emissions / State Inspection?
- Most Commonly Affected Vehicles
- Manufacturer-Specific Notes
- Real Owner Stories
- 2005 Land Rover LR3 with '4-Lo does not work' message
- 2004 Chevrolet Silverado with intermittent 'Service 4WD' message
- Dodge Ram with recurring 'Service 4WD' light
- 2013 Hyundai Veloster with Check Engine Light and shifting problems
- How to Prevent This Code From Triggering
- Frequently Asked Questions
- What are common misdiagnosis mistakes for P1807?
- My P1807 code is intermittent. What could be the cause?
- Can a bad 4WD switch cause the truck to not shift the transfer case?
- Will clearing the code fix the problem?
- Is it expensive to fix code P1807?
- Can I fix P1807 myself?
- Why did the code come back after I replaced the transfer case position sensor?
- Key Takeaways
- 🎟️ Get 5% Off