

OBD-II Code P1684: Comprehensive Guide to Battery Power Interruption
The Definitive Guide to Understanding, Diagnosing, and Fixing P1684
- On Chrysler, Dodge, and Jeep vehicles, P1684 acts as an informational record that the battery lost power within the last 50 engine starts.
- If P1684 appears without a recent battery disconnect, test your battery voltage immediately; a drop below 9.6V during cranking confirms a failing battery.
- Stop driving immediately if P1684 appears on a Honda (throttle body fault) or Mazda RX-8 (oil pump failure), as these manufacturer-specific definitions indicate severe safety or engine risks.
- Clear the code with an OBD-II scanner; if it returns despite a healthy battery and alternator, perform a parasitic draw test to find the component draining the system.
- The P1684 code automatically clears itself from the engine computer's memory after 50 consecutive successful starts without a power interruption.
What Does P1684 Mean?

The P1684 code signifies the Powertrain Control Module (PCM) lost its constant battery power supply within the last 50 engine starts. On Chrysler, Dodge, and Jeep vehicles, it is an informational code often appearing after routine service. On Honda, Mazda, or GM, this specific code points to severe internal module or mechanical faults.
Technical definition: The PCM's internal Keep Alive Memory (KAM) checksum does not match the stored value upon startup, indicating a memory wipe from a power interruption. This voltage drop can occur in less than 7 milliseconds during engine cranking.
Can I Drive With P1684?
Yes, But With Caution. On Chrysler, Dodge, and Jeep vehicles, you can continue driving. The code is informational and does not indicate immediate mechanical failure. However, if it appears without a known battery disconnection, it warns of a failing battery or alternator that will eventually leave you stranded. On Honda or Mazda, this code signifies a critical failure (throttle body or oil pump) requiring immediate towing to prevent engine damage.
Common Causes

- Battery recently disconnected or replaced (Very Common) — This is the most frequent and benign reason for the code. If you recently changed the battery, jump-started the car, or disconnected the battery for a repair, this code appears as a normal historical record.
- Weak or failing battery (Very Common) — An aging battery drops below the PCM's required threshold (typically 9.6 volts) during the high-load event of engine cranking. This momentary power loss triggers the code and indicates a battery nearing the end of its life.
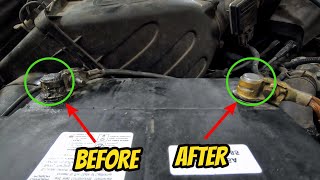
- Loose or corroded battery terminals (Common) — Corrosion on the battery posts or loose terminal clamps creates high electrical resistance, interrupting the flow of electricity to the vehicle's electronics and causing the P1684 code to set.
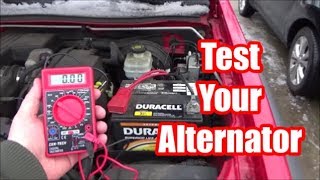
- Failing alternator (Common) — If the alternator fails to produce adequate voltage (13.5-14.5V), the battery will not 🎬 Watch: How to test your alternator and battery at home recharge. The resulting voltage drop triggers the P1684 code and will eventually stall the vehicle.
- Parasitic battery drain (Less Common) — A component, such as a stuck relay or aftermarket accessory, fails to shut down when the vehicle is off. This slowly drains the battery, lowering the voltage enough to trigger P1684 on the next startup.
- Faulty Ignition Switch (Less Common) — A worn ignition switch causes a momentary interruption of power to the PCM during startup or while driving, which is sufficient to trigger the code.
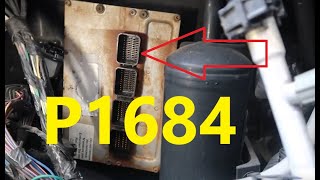
- Faulty wiring, fuses, or TIPM relay (Rare) — An open circuit, high resistance in the PCM constant power wiring, a blown fuse, or a failing Totally Integrated Power Module (TIPM) relay cuts power to the computer and sets the code.
- Faulty PCM (Very Rare) — The Powertrain Control Module itself has an internal fault, such as a bad solder joint, causing it to lose memory. This is the absolute last consideration after exhaustively testing all power and ground circuits.
Symptoms

- Check Engine Light only (No noticeable symptoms) — In most cases, especially after a known battery disconnection, the vehicle starts and drives perfectly. The light simply indicates a historical record.
- Slow or labored engine crank — If a weak battery or poor connection is the cause, the engine turns over more slowly than usual during startup, particularly in cold weather.
- Battery warning light illuminated — If a failing alternator is the root cause, the red battery discharge warning light illuminates on the dashboard alongside the Check Engine Light.
- Erratic transmission shifting — A power loss resets the transmission control module's (TCM) adaptive learn memory. This causes temporary harsh shifting or delayed engagement until the module relearns your driving patterns.
- Odometer and speedometer malfunction (also visible on scanner) — On older Dodge/Chrysler minivans, a power interruption issue manifests with bizarre electrical symptoms, such as the odometer accumulating miles while stationary.
Common Fixes & Costs
- Clear the code (No fix needed) — Parts: $0, Labor: $0, ~0.1 hr book time (DIY)
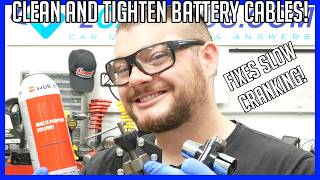
- Clean and tighten battery terminals — Parts: $0 - $15, Labor: $0, ~0.2 hr book time (DIY)
- Replace car battery — Parts: $150 - $250, Labor: $30 - $100, ~0.5 hr book time (DIY)
- Replace alternator — Parts: $200 - $400, Labor: $150 - $350, ~2.0 hr book time (Professional)
- Replace faulty TIPM or fuse box — Parts: $400 - $900, Labor: $100 - $300, ~1.5 hr book time (Professional)
DIY vs Professional
- Clean and tighten battery terminals — Beginner:
Tools: Wrench, terminal brush, safety glasses. - Replace car battery — Beginner:
Tools: Wrench, terminal brush. - Replace alternator — Beginner:
Tools: Socket set, wrenches, serpentine belt tool. - Replace faulty TIPM or fuse box — Beginner:
Tools: Socket set, trim tools, scan tool for configuration.
Used vs. New Parts: Buying Guide
When a used part is worth it: For alternators and TIPMs, a quality remanufactured unit provides the best balance of cost and reliability. Never buy a used battery.
Donor-vehicle mileage cap: roughly under 70000 miles for the part to have meaningful remaining life.
Donor quality checklist:
- Favor remanufactured alternators over used for better warranties.
- Match TIPM part numbers exactly; specialized rebuilders offer pre-programmed units.
- Verify the warranty period; remanufactured parts typically offer 1 year or more.
Decision logic:
- If The part is a car battery → always buy new — used batteries are unreliable.
- If The part is an alternator → a remanufactured unit with a long-term warranty is a good choice.
- If The part is a TIPM → a rebuilt unit from a specialist is more reliable than a junkyard part.
Warranty tradeoff: Used parts offer the lowest initial cost but minimal warranty. Remanufactured parts balance cost with a solid warranty. New OEM parts offer the best guarantee at the highest price.
Worst-case if a used part fails: $300-800 if a poorly remanufactured part fails, requiring repeat labor costs.
Cost of Not Fixing It
- Immediate: If the cause is a weak battery or alternator, you risk being stranded without warning. (Added cost: $75 - $250 (for towing))
- 1-3 months: Driving with a failing alternator destroys the battery by repeatedly deep-discharging it. (Added cost: $150 - $250 (for a new battery on top of alternator repairs))
- 3+ months: Ignoring an underlying electrical issue or driving with inconsistent voltage damages sensitive electronic modules like the TIPM. (Added cost: $500 - $2000 (for additional module replacement))
Diagnosis Steps

- Verify Recent Battery Disconnect
Determine if the battery was disconnected, replaced, or jump-started in the last 50 key cycles. If so, the code is expected. Clear it with a scanner or wait for it to self-clear.
Tools: None (Beginner) - Clear the Code and Drive
Use an OBD-II scanner to erase the code. Drive the vehicle for several days through multiple start/stop cycles. If the code does not return, it was a one-time event.
Tools: OBD-II Scanner (Beginner) - Inspect Battery Terminals
Visually inspect the battery terminals for corrosion. Ensure the cable clamps are tight and cannot be wiggled by hand. Follow the main negative cable to the chassis to check for a tight, clean ground.
Tools: Safety glasses, gloves, wrench, terminal brush (Beginner) - Test Battery Static and Load Voltage
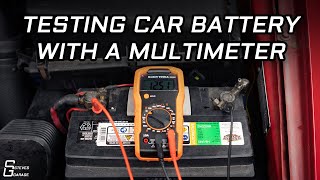
With the engine off, test the battery voltage; it should read at least 12.4 volts. Have a helper crank the engine while you observe the multimeter. If the voltage drops below 9.6 volts during cranking, replace the battery.
Tools: Multimeter or Electronic Battery Tester (Beginner) - Test Alternator Output
Start the engine and measure the voltage across the battery terminals. A healthy alternator produces between 13.5 and 14.5 volts. If the voltage is below 13.2V or above 14.8V, the alternator is faulty.
Tools: Multimeter (Intermediate) - Check PCM Fuses and Relays
Locate the main fuse box (TIPM). Find the fuses and relays providing constant power to the PCM. Test for power on both sides of the fuses. Swap the PCM relay with an identical non-critical relay (like the horn) to test for a relay failure.
Tools: Owner's manual, fuse puller, test light (Intermediate) - [PRO TIP] Perform a Parasitic Draw Test
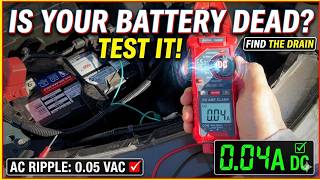
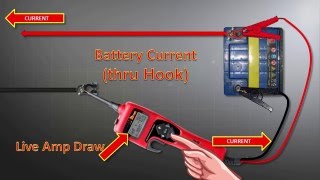
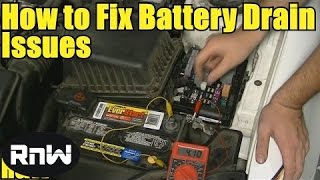
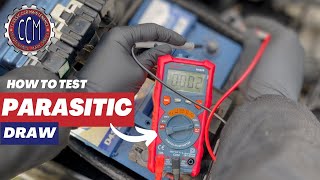
Disconnect the negative battery terminal. Connect a multimeter in series (set to 10A DC) between the terminal and the cable. Wait 30 minutes for modules to sleep. A draw over 50 milliamps (0.05A) indicates a parasitic drain. Pull fuses one by one until the draw drops to identify the culprit.
Tools: Multimeter with 10A DC capability (Advanced) - [PRO TIP] Perform a Voltage Drop Test
Set your multimeter to a low DC volts scale. Connect the negative lead to the negative battery post and back-probe the PCM ground pin with the positive lead while the key is on. A reading higher than 0.1V indicates a poor ground connection requiring repair.
Tools: Multimeter, wiring diagram (Advanced)
When This Code Triggers (Freeze-Frame Conditions)
- RPM: 0 or >500 (At key-on, before start, or during cranking)
- Vehicle Speed: 0 mph (Vehicle is stationary when the code is logged at startup)
- Module Voltage: < 9.6V (Voltage momentarily dropped below the PCM's threshold during a previous event)
- Engine Coolant Temp: Varies (Reflects the engine temperature at the time of startup)
Related Codes
- P0562 — Means 'System Voltage Low.' P0562 indicates actively low voltage while running, pointing to a failing alternator. Seeing them together confirms a charging system problem.
- P0622 — Means 'Alternator Field Control Circuit Malfunction.' If both codes are present, the alternator is definitively the root cause of the power loss.
- P1698 — Means 'No CCD/J1850 Message From TCM.' A power loss to the TCM prevents communication. Diagnose all power and ground circuits for the TCM first.
- P0601 — Means 'Internal Control Module Memory Check Sum Error.' This is a fatal PCM internal error confirming the PCM has failed and requires replacement.
Climate & Environmental Factors
- Cold Weather: Cold temperatures reduce a battery's chemical efficiency. At 0°F (-18°C), capacity drops to 40%, making it highly likely for voltage to dip below the PCM's threshold during a cold start, triggering P1684.
- Hot Weather: High ambient temperatures accelerate internal battery degradation through corrosion and fluid evaporation. This cumulative damage often leads to unexpected failure during the first cold snap.
- High Humidity: Humidity accelerates corrosion on battery terminals and ground points, increasing electrical resistance and causing intermittent voltage drops.
How to Clear the Code After You Fix It
- Reconnect battery terminals securely
- Use an OBD-II scan tool to clear the P1684 code
- Perform a comprehensive drive cycle to allow emissions readiness monitors to run
Drive cycle (~20 minutes): Start with a cold soak (engine off for 8+ hours). Idle for 5 minutes. Drive at a steady 40-60 mph for 8 minutes. Stop and idle for 3 minutes. Drive above 20 mph for 2 minutes. Turn the key off and leave it off for 10 minutes.
Readiness monitors affected: Catalyst Monitor, Evaporative System Monitor, O2 Sensor Monitor, O2 Sensor Heater Monitor
Before emissions retest: drive at least 50 miles to fully set monitors.
Watch out for:
- Simply clearing the code does not set the readiness monitors; a full drive cycle is required.
- The EVAP monitor requires the fuel tank to be between 15% and 85% full.
- The code returns if the underlying cause (e.g., weak battery) is not fixed.
Will This Fail Emissions / State Inspection?
Yes — this code typically fails an OBD-II emissions inspection.
- California: An illuminated Check Engine Light is an automatic failure. After a power loss, all OBD readiness monitors are reset and require a drive cycle to run.
- New York: For 2001 and newer vehicles, only one non-continuous monitor can be 'Not Ready' to pass.
- Texas: A recent battery disconnect causes a failure due to unset monitors. One monitor can be 'Not Ready' for 2001+ vehicles.
Most Commonly Affected Vehicles
- Dodge Ram 1500 (2002-2018) — Extremely common. On 2006-2014 models, if the code returns with other electrical issues, suspect a failing TIPM before condemning the PCM.
- Jeep Wrangler (TJ, JK) (1997-2018) — Frequently appears after battery work or the installation of aftermarket electrical accessories (winches, lights) that strain the system.
- Chrysler Town & Country / Dodge Grand Caravan (2001-2016) — Often appears with transmission shifting problems as the power loss resets the TCM's adaptive memory.
- Honda Civic, Accord, CR-V (2006-2017) — CRITICAL: On these Honda models, P1684 means 'Throttle Valve Return Spring Performance Problem.' This is a serious safety issue unrelated to the battery.
- Chevrolet / GM Silverado, Cobalt, Impala (2004-2014) — Indicates an internal module fault ('Driver 5 Line 4') or TCM temperature sensor issue, requiring manufacturer-specific diagnosis.
- Mazda RX-8 (2004-2011) — CRITICAL: Indicates a 'Metering Oil Pump Position Sensor Circuit Malfunction.' This severe fault leads to catastrophic engine failure if not addressed immediately.
Manufacturer-Specific Notes
- Chrysler/Dodge/Jeep/Ram: P1684 is an informational code designed to self-clear after 50 key cycles without a recurrence of power loss. A faulty TIPM is a well-known cause of this code (NHTSA Campaign 14V-530).
- Honda: P1684 points to a 'Throttle Valve Return Spring Performance Problem,' requiring immediate diagnosis of the electronic throttle body.
- Mazda: On rotary engines, P1684 indicates a 'Metering Oil Pump Position Sensor Circuit Malfunction.' Failure to lubricate the apex seals leads to rapid engine destruction.
- General Motors: This code relates to an internal PCM driver fault or a TCM temperature sensor issue, not a battery code.
Frequently Asked Questions
Will the P1684 code clear itself?
Yes, on Chrysler, Dodge, and Jeep vehicles, the code is stored in memory but extinguishes the Check Engine Light after a few successful starts. The code fully clears from memory after 50 engine starts if power remains stable.
I just replaced my battery and now I have this code. Is it a problem?
No, this is completely normal on a Chrysler-family vehicle. The code simply records that the computer lost power during the battery change. Clear it with a scanner, or let it clear itself.
Can a jump-start cause the P1684 code?
Yes. The low battery voltage that required the jump-start is a common trigger. Connecting and disconnecting jumper cables also causes voltage spikes that the PCM logs as a P1684.
My battery is new but the P1684 code keeps coming back. What should I do?
First, perform a parasitic draw test to check for components draining the battery when off. Next, test the alternator's charging output to ensure it properly recharges the battery. Finally, perform a voltage drop test on the battery cables to locate hidden corrosion.
Can P1684 cause my transmission to shift hard?
Yes, indirectly. When the PCM loses power, it erases the adaptive memory that stores learned shift pressures. The transmission reverts to base settings, causing harsh shifts until the module relearns your driving habits over a few days.
Will P1684 cause me to fail an emissions test?
Yes. An active Check Engine Light causes an automatic failure of a state emissions inspection. The power loss event also resets the vehicle's emissions readiness monitors, which must be completed to pass.
What are the most common misdiagnosis mistakes for P1684?
The biggest mistake is assuming P1684 is a battery code on a Honda, Mazda, or GM vehicle, where it signifies a severe mechanical problem. The second mistake is replacing the PCM on a Chrysler product without ruling out a bad battery, failing alternator, or faulty TIPM.
Key Takeaways
- On Chrysler, Dodge, and Jeep vehicles, P1684 acts as an informational record that the battery lost power within the last 50 engine starts.
- If P1684 appears without a recent battery disconnect, test your battery voltage immediately; a drop below 9.6V during cranking confirms a failing battery.
- Stop driving immediately if P1684 appears on a Honda (throttle body fault) or Mazda RX-8 (oil pump failure), as these manufacturer-specific definitions indicate severe safety or engine risks.
- Clear the code with an OBD-II scanner; if it returns despite a healthy battery and alternator, perform a parasitic draw test to find the component draining the system.
- The P1684 code automatically clears itself from the engine computer's memory after 50 consecutive successful starts without a power interruption.
Helpful Videos


The information in this article is provided for general reference and educational purposes only. Vehicle specifications, procedures, and part compatibility can vary by production date, trim level, and region. Always consult your vehicle's factory service manual and verify part numbers before purchasing or performing repairs. Safety-critical components such as airbags, seat belts, and braking systems should be installed by a qualified professional.
- 🎬 Helpful Videos
- What Does P1684 Mean?
- Can I Drive With P1684?
- Common Causes
- Symptoms
- Common Fixes & Costs
- DIY vs Professional
- Used vs. New Parts: Buying Guide
- Cost of Not Fixing It
- Diagnosis Steps
- When This Code Triggers (Freeze-Frame Conditions)
- Related Codes
- Climate & Environmental Factors
- How to Clear the Code After You Fix It
- Will This Fail Emissions / State Inspection?
- Most Commonly Affected Vehicles
- Manufacturer-Specific Notes
- Frequently Asked Questions
- Will the P1684 code clear itself?
- I just replaced my battery and now I have this code. Is it a problem?
- Can a jump-start cause the P1684 code?
- My battery is new but the P1684 code keeps coming back. What should I do?
- Can P1684 cause my transmission to shift hard?
- Will P1684 cause me to fail an emissions test?
- What are the most common misdiagnosis mistakes for P1684?
- Key Takeaways
- 🎟️ Get 5% Off