

OBD-II Code P1604: Startability Malfunction
What P1604 means, why it triggers, and how to fix it
- P1604 indicates a severe starting failure; do not drive the vehicle, as it carries a 100% risk of unexpected stalling or leaving you stranded.
- Over 70% of P1604 codes stem from a weak battery dropping below 9.6V during cranking or a failing fuel pump.
- Manufacturer definitions vary wildly: Toyota defines P1604 as a mechanical 'Startability Malfunction,' while Hyundai and GM use it to flag CAN bus communication errors.
- Always analyze freeze frame data first; an engine RPM reading of 0 during cranking instantly isolates the fault to the starter or crankshaft position sensor.
What Does P1604 Mean?

P1604 indicates the Engine Control Module (ECM) detected a starting failure. The engine either cranks for 15-30 seconds without firing, or starts and immediately stalls. This is a symptom-based code detailing *what* happened, not *why*. It rarely appears alone.
Technical definition: SAE/ISO defines P1604 as 'Startability Malfunction.' The ECM stores this DTC when the engine fails to achieve a stable running state after cranking, or if cranking time exceeds a pre-determined threshold. Exact trigger conditions vary significantly by manufacturer.
Can I Drive With P1604?
No — Do Not Drive. Do not drive with this code. The underlying issue causes unexpected stalling or complete failure to start. This poses a severe safety risk in traffic and leaves you stranded. The immediate threat is reliability and safety, not mechanical damage.
Common Causes

- Weak or Failing Battery (Very Common) — The battery lacks the amperage to turn the engine over quickly. Corroded or loose terminals prevent a solid electrical connection, dropping voltage below the 9.6V threshold required for the ECM to fire injectors.
- Fuel Delivery System Failure (Common) — The engine starves for fuel. This stems from a failing fuel pump, clogged fuel filter, faulty pressure regulator, or simply an empty gas tank.
- Ignition System Faults (Common) — The spark is absent or too weak to ignite the fuel. Worn spark plugs, failed ignition coils, or damaged wiring harnesses interrupt the combustion cycle.
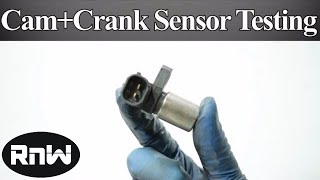
- Faulty Crankshaft/Camshaft Sensors (Less Common) — A failed crankshaft position (CKP) sensor prevents the ECM from detecting engine rotation, halting fuel and spark delivery. 🎬 See how to test your crankshaft and camshaft sensors. Faulty camshaft or mass airflow (MAF) sensors also disrupt startup.
- Poor ECM/PCM Ground Connection (Less Common) — A corroded ground wire causes a severe voltage drop during cranking. This shuts down the ECM mid-crank, triggering P1604 despite a healthy battery.
- Immobilizer System Fault (Less Common) — The anti-theft system fails to recognize the key transponder. The immobilizer module actively disables the fuel injectors and ignition coils.
- Internal Mechanical Engine Failure (Rare) — Severe internal damage, such as low compression from worn piston rings or a jumped timing chain, prevents the engine from achieving a stable idle.
- Faulty Engine Control Module (ECM) (Rare) — The ECM suffers internal hardware failure or requires a software update. This is a last-resort diagnosis after ruling out all electrical and mechanical faults.
Symptoms
- Engine cranks but won't start — The starter engages and turns the engine, but combustion never occurs.
- Extended cranking time — The engine cranks for 5 to 15 seconds before finally starting.
- Engine starts and immediately stalls — The engine fires up, runs for 1 to 3 seconds, and dies.
- Check Engine Light is illuminated — The malfunction indicator lamp (MIL) turns on, though Toyota and Subaru vehicles sometimes store P1604 without illuminating the light.
- Intermittent stalling while driving — The root cause (e.g., a failing fuel pump) causes the engine to stall unexpectedly at idle or while driving.
Diagnostic Flowchart

Tap your situation to follow the diagnostic path that matches what you're seeing on this code.
Common Fixes & Costs
- Replace Battery — Parts: $150-$300, Labor: $20-$100, ~0.5 hr book time (DIY)
- Replace Fuel Pump Assembly — Parts: $300-$500, Labor: $250-$600, ~3 hr book time (Professional)
- Replace Crankshaft Position Sensor — Parts: $50-$210, Labor: $105-$228, ~1.5 hr book time (Intermediate)
- Clean or Replace Throttle Body — Parts: $10-$20, Labor: $75-$234, ~1 hr book time (DIY)
- Repair ECM Ground Wire — Parts: $5-$20, Labor: $100-$200, ~1.2 hr book time (Intermediate)
- Replace ECM/PCM — Parts: $500-$1500, Labor: $150-$300, ~1.5 hr book time (Professional)
DIY vs Professional
- Replace Battery — Beginner:
Tools: Socket set (10mm, 12mm), terminal brush, battery terminal protector. - Replace Fuel Pump — Beginner:
Tools: Floor jack, jack stands, socket set, fuel line disconnect tools, drift punch, fire extinguisher. - Replace Crankshaft Position Sensor — Beginner:
Tools: Socket set, extensions, flashlight. - Clean Throttle Body — Beginner:
Tools: Socket set, throttle body cleaner, rags, old toothbrush. - Repair Ground Wire — Beginner:
Tools: Socket set, wire brush/sandpaper, dielectric grease. - Replace ECM/PCM — Beginner:
Tools: Socket set, professional-level scan tool for programming.
Used vs. New Parts: Buying Guide
When a used part is worth it: For high-cost components like a fuel pump assembly, a used OEM part from a low-mileage donor vehicle (under 80K miles) is a viable budget option.
Donor-vehicle mileage cap: roughly under 80000 miles for the part to have meaningful remaining life.
Donor quality checklist:
- Verify the donor vehicle's mileage and salvage reason (avoid flood or fire damage).
- Match the OEM part number exactly.
- Inspect for corrosion, melted connectors, or brittle plastic lines.
Decision logic:
- If The part is a battery or a critical sensor (like the crankshaft position sensor) → Always buy new. Savings are minimal and the risk of premature failure is high.
- If The part is an expensive fuel pump assembly for an older, high-mileage vehicle → Buy a used OEM part to save money, accepting a shorter remaining lifespan.
- If The part is available from a reputable aftermarket brand (Denso, Bosch) → Buy the new aftermarket part for the warranty and guaranteed quality.
Warranty tradeoff: Used parts carry a 30-90 day part-only warranty. New aftermarket parts offer 1-year to lifetime warranties. New OEM parts carry a 1-year manufacturer warranty.
Worst-case if a used part fails: $400-$800 if a used fuel pump fails, requiring repeat labor and a second replacement part.
What Happens If You Wait — Timeline
- 0-1 month: Intermittent hard starts (cranks for 5-10 seconds). Engine starts and immediately stalls occasionally. (MPG impact: 3-5%% · Added cost: $0-$50 in wasted fuel)
- 1-3 months: Hard starts become frequent. Repeated, extended cranking puts severe thermal stress on the starter motor, accelerating wear. (MPG impact: 5-10%% · Added cost: $300-$700 (impending starter motor failure))
- 3-6 months: A failing fuel pump creates a consistent lean condition, increasing combustion temperatures and damaging spark plugs. (MPG impact: 10-15%% · Added cost: $400-$1500 (starter replacement + spark plug damage))
- 6+ months: Catastrophic failure. The vehicle fails to start entirely. Persistent lean/rich conditions melt the catalytic converter. (MPG impact: 15-25%% · Added cost: $1500-$3000+ (catalytic converter replacement))
Cost of Not Fixing It
- Immediate: Vehicle fails to start or stalls unexpectedly in traffic, creating a major safety hazard. (Added cost: Towing costs ($75-$250))
- 0-1 month: Repeatedly cranking the engine for extended periods overheats the starter motor, causing premature failure. (Added cost: $300-$700 (starter motor replacement))
- 1-3 months: A persistent lean or rich condition damages spark plugs and degrades the catalytic converter. (Added cost: $1200-$2800+ (catalytic converter replacement))
Diagnosis Steps

- Scan for Additional Codes and Analyze Freeze Frame Data
Use a professional OBD-II scanner to read all stored codes. P1604 rarely appears alone. Immediately analyze the freeze frame data. If RPM reads 0 during cranking, it isolates a crank sensor or starter issue. If fuel system status reads 'Open Loop - Fault,' it isolates a fuel delivery problem.
Tools: Professional OBD-II Scanner (Beginner) - Check the Battery and Connections
Inspect battery terminals for corrosion and ensure clamps are tight. Use a multimeter to test battery voltage. A healthy battery reads 12.6V resting and must not drop below 9.6V during cranking.
Tools: Multimeter, Wire Brush, Socket Set (Beginner) - Verify Fuel Level and Listen for the Fuel Pump
Turn the key to the 'ON' position without starting. Listen for a faint 2-second hum from the rear of the vehicle. Silence indicates a failed fuel pump, blown fuse, or bad relay.
Tools: None (Beginner) - Analyze Live Scan Tool Data
Observe live Parameter IDs (PIDs) while cranking. 'Engine Speed' must show 100-250 RPM. 'Mass Air Flow' (MAF) should read 2-7 g/s at idle. Values outside these ranges pinpoint sensor failures.
Tools: Professional OBD-II Scanner (Advanced) - Perform a Voltage Drop Test on Starting/Charging Circuit
Set a multimeter to a low DC volts scale. Measure the voltage drop across the main cables during cranking. A reading above 0.5V on the positive side or 0.3V on the negative side confirms high cable resistance.
Tools: Multimeter (with long leads), Assistant (Advanced) - Test the Fuel System Pressure
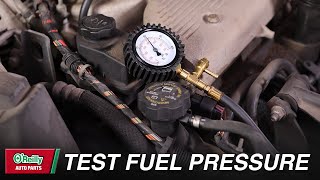
Connect a fuel pressure gauge to the fuel rail test port. Turn the key on (engine off). Pressure must jump to the manufacturer's spec (typically 35-55 PSI) and hold steady. Rapid drops indicate a leaking injector or failed check valve.
Tools: Fuel Pressure Gauge (Intermediate) - Test the Crankshaft Position Sensor (CKP) Signal
Test the internal resistance of a two-wire inductive CKP sensor (typically 200-1,000 Ohms). For a three-wire Hall-effect sensor, verify the 5-volt reference. Use an oscilloscope to confirm a clean square or sine wave output during cranking.
Tools: Oscilloscope, Multimeter, Vehicle-specific Repair Manual (Advanced) - Inspect the Air Intake System
Inspect the engine air filter and throttle body for heavy carbon buildup restricting airflow. Clean the Mass Airflow (MAF) sensor wires with dedicated MAF cleaner.
Tools: Screwdriver/Socket Set, MAF Cleaner (Intermediate) - Check for Immobilizer System Communication
Check the dashboard for a flashing security light during cranking. A flashing light confirms the immobilizer is active and blocking the start sequence. Use a scanner to verify key registration.
Tools: Professional OBD-II Scanner (Intermediate)
When This Code Triggers (Freeze-Frame Conditions)
- Engine RPM: 0-200 RPM (Recorded during extended engine cranking without starting.)
- Vehicle Speed: 0 mph (The vehicle is stationary during the start attempt.)
- Engine Coolant Temp: <100°F or >180°F (Occurs during a cold start or when attempting to restart a heat-soaked engine.)
- Fuel System Status: Open Loop (The fault occurs before the engine warms up enough to enter closed-loop fuel control.)
Related Codes
- P0335 — Crankshaft Position Sensor circuit malfunction. P1604 reports the no-start symptom, while P0335 identifies the specific electronic fault causing it.
- P1605 — Rough Idling. P1604 triggers during the start attempt, while P1605 triggers after the engine starts but fails to maintain a smooth idle.
- P0300-P0308 — Cylinder misfire codes. Severe misfires during startup cause stalling, logging P1604 as the effect of the misfire.
- P0171, P0172, P0174, P0175 — Fuel system lean/rich codes. A lean condition from a weak fuel pump makes an engine difficult to start, triggering P1604.
Climate & Environmental Factors
- Cold Weather: Cold temperatures reduce battery cranking amperage and thicken engine oil. This combined strain drops system voltage below the ECM's operating threshold, triggering the code.
- High Humidity: High humidity accelerates corrosion on battery terminals and ground connections, adding electrical resistance that causes severe voltage drops during cranking.
- High Altitude: Less dense air requires the ECM to adjust the air-fuel mixture. This exacerbates existing issues with dirty MAF sensors or weak fuel pumps, making hard-starts more likely.
How to Talk to a Mechanic About This Code
Say this: "My vehicle logged a P1604 'Startability Malfunction' code and exhibits extended cranking. Please pull all codes and freeze frame data first, then perform a battery load test and fuel pressure test before diagnosing the ECM or sensors."
This directs the mechanic to check the most common and cheapest-to-fix causes first, preventing them from jumping to an expensive conclusion like replacing the fuel pump without proper testing.
Avoid saying:
- 'Just fix whatever's wrong'
- 'My check engine light is on, can you look at it?'
- 'My car won't start, I think it's the fuel pump'
Questions to ask before authorizing the repair:
- What were the results of the battery load test and charging system check?
- If you're recommending a fuel pump, what was the measured fuel pressure, and did it hold steady?
- If you're recommending a crankshaft sensor, did you confirm there was no RPM signal on the scan tool during cranking?
- Can you provide a printout or photo of the freeze-frame data and any other codes you found?
- What is the warranty on this specific repair, covering both parts and labor?
Where to Take It: Dealer vs Independent vs Chain
- Dealer:
Recommended if a known manufacturer-specific TSB or communication issue is suspected, or if the vehicle is under warranty. Otherwise, an independent shop is more cost-effective.
Best for: Vehicles still under powertrain or emissions warranty, Known manufacturer-specific quirks (e.g., Toyota Flex-Fuel TSB, Hyundai/GM communication issues), Complex electrical issues where factory diagnostic tools are superior
Downsides: Highest labor rates ($150-$250/hour), typically 1.5-2x more than independent shops, May recommend replacing a whole assembly when only a smaller part has failed (Typical cost: +50% vs. baseline) - Independent Shop:
Best overall fit for most P1604 situations. A good independent shop effectively diagnoses the root cause without the dealer price tag.
Best for: Out-of-warranty vehicles where cost is a major factor, Diagnosing common causes like battery, starter, fuel pump, or sensor failures
Downsides: Quality and diagnostic capabilities vary widely. Vet shops based on reviews and ASE certifications., May not have access to the very latest manufacturer software updates or TSBs. (Typical cost: +0% vs. baseline) - Chain Shop:
Use with caution. Acceptable for a straightforward battery replacement, but AVOID for the initial, complex diagnosis of a P1604 code.
Best for: Simple, clear-cut parts replacement like a battery or starter *after* a proper diagnosis has already been made.
Downsides: Diagnostic capabilities are limited. High pressure to sell parts leads to replacing components without a thorough diagnosis., Technician skill varies dramatically store-to-store. (Typical cost: -10% vs. baseline)
When to Walk Away From the Repair
If the estimated repair cost exceeds 50% of the vehicle's current private-party value, sell or trade it in.
- Car worth $3000, fix is $1800: Walk away. The repair cost is 60% of the car's value. It's not a sound financial decision.
- Car worth $9000, fix is $1200: Fix it. The repair cost is only 13% of the car's value, which is well within a reasonable limit.
- Car worth $5000, fix is $2200: Borderline. At 44% of the car's value, get a second opinion and carefully consider the car's overall condition before proceeding.
What Scan Tool You Need for This Code
Minimum: An OBD-II scanner capable of displaying live data streams and freeze frame data.
A $20 reader just shows 'P1604'. It cannot show critical live data, such as 'Engine RPM' during cranking or fuel system status, leaving you guessing at the problem.
Budget: BlueDriver Pro or Ancel BD310 (~$90) — These Bluetooth scanners connect to your phone and provide access to freeze frame data and live data graphing. You can watch the RPM signal as you crank the engine to diagnose a crankshaft position sensor failure.
Mid-range: Foxwell NT510 Elite (~$180) — Adds manufacturer-specific diagnostics and bidirectional controls. This allows you to command components directly, such as activating the fuel pump to test it.
Professional: Autel MaxiCOM MK808S (~$400) — Offers full bidirectional control, all-system scanning, and service functions. It performs special functions like the 'Alcohol Fuel Density Reset' needed for Toyota TSBs.
Rent vs buy: For a one-time diagnosis, auto parts stores like AutoZone offer a 'Loan-A-Tool' program. You pay a deposit for a scanner, use it to read codes and data, and get a full refund upon return.
How to Clear the Code After You Fix It
- Fix the underlying cause of the no-start condition
- Use a compatible OBD-II scan tool to erase the DTCs
- Perform a complete drive cycle to reset readiness monitors
Drive cycle (~30 minutes): A generic drive cycle requires a cold start, 3 minutes of idling, 15 minutes of mixed city/highway driving at steady speeds around 55 mph, and a 10-minute cool-down period.
Readiness monitors affected: Catalyst Monitor, EVAP System Monitor, O2 Sensor Monitor
Before emissions retest: drive at least 100 miles to fully set monitors.
Watch out for:
- Disconnecting the battery clears the code but resets all readiness monitors to 'Not Ready,' causing an automatic emissions failure.
- The code returns immediately if the root cause of the starting problem remains unfixed.
- Failing to drive at steady highway speeds prevents the Catalyst and EVAP monitors from running.
Will This Fail Emissions / State Inspection?
Yes — this code typically fails an OBD-II emissions inspection.
- California: An illuminated Check Engine Light causes an automatic smog check failure. A full drive cycle must set readiness monitors before a retest.
- New York: Active Check Engine Lights automatically fail the emissions portion of the NYS inspection.
- Texas: In emissions-testing counties, an active Check Engine Light is an automatic failure. All required readiness monitors must read 'Ready'.
Manufacturer-Specific Notes

- Toyota/Lexus: For 2009-2019 Tundra and Sequoia Flex-Fuel models, TSB-0166-19 addresses P1604 paired with fuel trim codes. The fix involves reprogramming the ECM and is often covered under the 8-year/80,000-mile Federal Emissions Warranty.
- Subaru: On 2008-2021 WRX and Forester models, this code appears without symptoms as a 'ghost' code. If it returns after clearing, an ECM software update from the dealer is often required.
- Hyundai/Kia: On 2011-2019 Sonata and Optima models, P1604 signifies a CAN bus communication failure with the Transmission Control Module (TCM), not a mechanical starting issue.
- GM/Chevrolet: On 2010-2020 Equinox and Malibu models, P1604 points to a serial data communication problem with the Instrument Panel Cluster (IPC).
Real Owner Stories
2013 Toyota Tundra 5.7L Flex Fuel at 67K miles
Owner experienced extended cranking and a crank-no-start condition, logging P1604 and fuel trim codes (P0171/P0174).
Outcome: A technician used a scan tool to perform an 'Alcohol Fuel Density Reset.' This solved the problem without replacing parts. The repair is covered by Toyota's TSB-0166-19.
Lesson: On Flex Fuel Toyotas, P1604 with fuel trim codes points to an ECM software issue. Always check for TSBs before replacing expensive parts.
2008 Toyota Highlander at 150K miles
Car would crank but not start, logging P1604.
Outcome: The owner replaced the $30 fuel pump relay (labeled 'EFI'). The car started perfectly.
Lesson: A no-start condition is not always the fuel pump itself. Check cheap related parts like fuses and relays first.
2010 Subaru Forester
Vehicle had an intermittent P1604 code with no noticeable starting symptoms.
Outcome: The owner cleaned the Mass Airflow (MAF) sensor and throttle body. The code did not return.
Lesson: For intermittent 'ghost' P1604 codes on Subarus, start with simple maintenance like cleaning the MAF sensor.
2012 Hyundai Sonata
Vehicle would not start and displayed a P1604 code.
Outcome: Research revealed that on Hyundai vehicles, P1604 means 'TCM Communication Error'. The actual problem was a faulty ground wire for the Transmission Control Module.
Lesson: P1604 definitions are manufacturer-specific. For Hyundai/Kia, P1604 points to a CAN bus communication network problem, not a mechanical starting issue.
How to Prevent This Code From Triggering
- Keep the fuel tank at least 1/4 full at all times (Daily habit) — Fuel cools and lubricates the electric fuel pump. Consistently running on a low tank forces the pump to overheat, leading to premature failure.
- Use a quality PEA-based fuel system cleaner (Every 3,000-5,000 miles) — Cleaners with Polyetheramine (PEA) remove carbon deposits from fuel injectors, ensuring a proper spray pattern and preventing lean conditions.
- Replace the fuel filter at recommended intervals (Per owner's manual (typically 30k-60k miles)) — A clogged fuel filter restricts fuel flow, forcing the fuel pump to work harder and preventing adequate pressure from reaching the engine.
- Periodically clean main battery and engine ground connections (Every 2-3 years or as needed) — Corrosion creates high resistance, causing significant voltage drops during cranking that trick the ECM into logging a P1604.
- Pause for 2-3 seconds in the 'ON' position before cranking (Every startup) — This allows the fuel pump to fully prime the system and lets electronic modules complete their self-checks.
Frequently Asked Questions
What are the most common mistakes when diagnosing P1604?
The biggest mistake is replacing expensive parts like the fuel pump without testing the battery and grounds first. Always verify battery voltage under load and check for accompanying DTCs. P1604 is a symptom code, so other codes usually pinpoint the exact failure.
Can I just clear the P1604 code and keep driving?
Clearing the code does not fix the underlying problem. The code returns immediately upon the next failed start attempt. Diagnose the issue promptly to avoid stalling in traffic.
My car starts fine now, but the code is stored. What should I do?
A temporary voltage drop, like a dead battery that required a jump-start, easily triggers this code. If the vehicle starts and runs perfectly now, clear the code. If it returns, you have an intermittent electrical or fuel issue.
Can a bad ground wire cause a P1604 code?
Yes. A corroded engine or ECM ground connection creates high electrical resistance. This causes severe voltage drops during cranking, tricking the ECM into logging a starting malfunction.
Why did my car throw a P1604 after running out of gas?
Running out of fuel forces the engine to crank for an extended period without firing. The ECM detects this prolonged cranking as a startability failure and logs P1604. Clear the code after refueling.
Why doesn't P1604 tell me exactly what part is broken?
P1604 is a symptom-based code indicating a starting failure, not a specific component failure. It alerts you to the condition, but requires freeze frame data and secondary codes to isolate the root cause. This prevents the ECM from guessing incorrectly.
Can cold weather cause a P1604 code?
Yes. Cold weather drastically reduces battery cranking amperage and thickens engine oil, increasing starter resistance. This combined strain drops system voltage below the ECM's operating threshold, triggering the code.
Will disconnecting the battery clear the P1604 code?
Disconnecting the battery clears the code from temporary memory but resets all emissions readiness monitors. It does not fix the mechanical or electrical fault. The code returns as soon as the engine struggles to start again.
Key Takeaways
- P1604 indicates a severe starting failure; do not drive the vehicle, as it carries a 100% risk of unexpected stalling or leaving you stranded.
- Over 70% of P1604 codes stem from a weak battery dropping below 9.6V during cranking or a failing fuel pump.
- Manufacturer definitions vary wildly: Toyota defines P1604 as a mechanical 'Startability Malfunction,' while Hyundai and GM use it to flag CAN bus communication errors.
- Always analyze freeze frame data first; an engine RPM reading of 0 during cranking instantly isolates the fault to the starter or crankshaft position sensor.
Helpful Videos

The information in this article is provided for general reference and educational purposes only. Vehicle specifications, procedures, and part compatibility can vary by production date, trim level, and region. Always consult your vehicle's factory service manual and verify part numbers before purchasing or performing repairs. Safety-critical components such as airbags, seat belts, and braking systems should be installed by a qualified professional.
- 🎬 Helpful Videos
- What Does P1604 Mean?
- Can I Drive With P1604?
- Common Causes
- Symptoms
- Diagnostic Flowchart
- Common Fixes & Costs
- DIY vs Professional
- Used vs. New Parts: Buying Guide
- What Happens If You Wait — Timeline
- Cost of Not Fixing It
- Diagnosis Steps
- When This Code Triggers (Freeze-Frame Conditions)
- Related Codes
- Climate & Environmental Factors
- How to Talk to a Mechanic About This Code
- Where to Take It: Dealer vs Independent vs Chain
- When to Walk Away From the Repair
- What Scan Tool You Need for This Code
- How to Clear the Code After You Fix It
- Will This Fail Emissions / State Inspection?
- Manufacturer-Specific Notes
- Real Owner Stories
- 2013 Toyota Tundra 5.7L Flex Fuel at 67K miles
- 2008 Toyota Highlander at 150K miles
- 2010 Subaru Forester
- 2012 Hyundai Sonata
- How to Prevent This Code From Triggering
- Frequently Asked Questions
- What are the most common mistakes when diagnosing P1604?
- Can I just clear the P1604 code and keep driving?
- My car starts fine now, but the code is stored. What should I do?
- Can a bad ground wire cause a P1604 code?
- Why did my car throw a P1604 after running out of gas?
- Why doesn't P1604 tell me exactly what part is broken?
- Can cold weather cause a P1604 code?
- Will disconnecting the battery clear the P1604 code?
- Key Takeaways
- 🎟️ Get 5% Off