

P1456 on 2001-2004 Acura RL: EVAP Fuel Tank Leak Causes and Fixes
For a 2001-2004 Acura RL, code P1456 almost always points to a loose or faulty gas cap. Before buying any parts, tighten the cap until it clicks at least three times and clear the code. If the light returns, a new OEM gas cap is the most likely and affordable fix, costing around $25-$40. Do not use a cheap aftermarket cap, as they are known to fail.
- P1456 specifically means the leak is on the fuel tank side of the EVAP system.
- Always start by tightening the gas cap (3+ clicks) and clearing the code.
- If the code returns, the most probable fix is a new OEM gas cap. Aftermarket caps are not recommended.
- If a new gas cap doesn't solve it, inspect the fuel filler neck for rust before checking other, less common components.
- This code will not affect how your car drives but will cause it to fail an emissions test.
What's Unique About the 2001-2004 Acura RL
On Honda and Acura vehicles of this era, the EVAP diagnostic system is specifically designed to distinguish between leaks on the fuel tank side versus the charcoal canister side. P1456 points directly to the fuel tank, filler neck, and gas cap area. A different code, P1457, typically indicates a leak in the EVAP canister system, which includes components like the charcoal canister and vent solenoid located under the car. This distinction is very helpful for narrowing down the source of the problem.
Diagnostic Flowchart
Tap your situation to follow the diagnostic path that matches what you're seeing on this vehicle.
Symptoms You May Notice
- Check Engine Light is on.
- A faint smell of gasoline may be noticeable, especially after refueling.
- In rare cases, if the issue is related to other EVAP components, rough idle or hesitation on acceleration may be observed.
- Replacing the O2 sensor. An O2 sensor was incorrectly suggested in one forum thread, but it is unrelated to the EVAP system.
- Replacing the EVAP Purge Solenoid. While part of the EVAP system, the purge solenoid (in the engine bay) is far less likely to cause a P1456 code than the gas cap or a leak at the tank/filler neck. It is more commonly associated with other EVAP codes.
Most Likely Causes
- Loose or Incorrectly Installed Gas Cap 🔴 High Probability This is the most common reason for a P1456 code across all Honda/Acura models of this period. Owners may not tighten the cap sufficiently after refueling, or the cap's ratchet mechanism can wear, giving a false 'click' before it's fully sealed.
How to confirm: Remove and reinstall the gas cap, ensuring it clicks at least three times. Clear the code and drive for a few days to see if it returns.
Typical fix: Tighten the gas cap correctly. If the light comes back, replace the gas cap with a genuine OEM part.
Est. part cost: $25-$50 - Faulty Gas Cap Seal 🔴 High Probability The rubber O-ring on the original gas cap can become dry, cracked, or brittle over time, preventing a proper seal. This is a very common failure point.
How to confirm: Visually inspect the rubber gasket on the gas cap for any cracks, deformities, or signs of drying out. A cracked seal is a definitive sign the cap is bad.
Typical fix: Replace the gas cap with a new OEM part. Forum users strongly advise against aftermarket caps, which often fail to seal properly.
Est. part cost: $25-$50 - Rusted or Corroded Fuel Filler Neck 🟡 Medium Probability In areas with high humidity or road salt usage (the "rust belt"), the metal lip of the fuel filler neck where the gas cap seals can rust. This creates an uneven, pitted surface that prevents a tight seal, even with a new gas cap.
How to confirm: Remove the gas cap and visually inspect the rim of the filler neck for rust, pitting, or corrosion. Run your finger along the sealing surface to feel for imperfections.
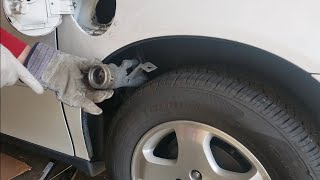
Typical fix: Clean the filler neck surface with a wire brush or emery cloth to remove light rust. For heavier rust, some owners have had success applying a thin layer of polyurethane sealant to the filler neck to create a new sealing surface. 🎬 See how to apply sealant to a rusted filler neck If corrosion is severe, the fuel filler neck must be replaced.
Est. part cost: $70-$150 - Faulty EVAP Canister Vent Solenoid (CVS Valve) ⚪ Low Probability While more commonly associated with code P1457, a stuck CVS valve can sometimes contribute to a P1456. The vent solenoid, located near the charcoal canister under the car, can get stuck due to dirt, rust, or age, preventing the system from sealing properly for the test.
How to confirm: The valve can be tested with a hand-held vacuum pump and by applying 12v power to see if it actuates correctly. This is often best left to a mechanic unless you are comfortable with automotive electrical diagnosis.
Typical fix: Replace the EVAP canister vent solenoid.
Est. part cost: $40-$120
Rare But Worth Checking
- Cracked or Disconnected EVAP Hose: Rubber hoses connected to the fuel tank or filler neck can become brittle and crack over time, causing a leak. A visual inspection or a smoke test is needed to find the specific leak. A video on a similar Acura TL showed a disconnected hose on top of the vapor canister causing the code.
- Cracked Fuel Tank: While uncommon, a crack or rust pinhole in the fuel tank itself will cause a P1456 code and often a noticeable fuel leak or strong gas smell. This is a serious issue that requires immediate attention and fuel tank replacement. One owner on a forum confirmed this was the ultimate cause after replacing many other parts.
- Faulty Fuel Tank Pressure Sensor: The sensor that monitors the pressure in the tank can fail, sending incorrect data to the computer and tricking it into thinking there is a leak. This is a less common cause and should be considered after other possibilities are exhausted.
Diagnosis Steps
- Check the Gas Cap: Ensure the gas cap is tight. Unscrew it and screw it back on until you hear at least three clicks.
- Reset and Drive: Clear the Check Engine Light with an OBD-II scanner or by disconnecting the battery for 15 minutes. Drive the vehicle for a few days to see if the code returns. The EVAP monitor may only run when the fuel level is between 1/4 and 3/4 full.
- Inspect the Gas Cap: If the light returns, remove the cap and carefully inspect the rubber seal for any cracks, stiffness, or damage. Any visible defect means it needs replacement.
- Replace the Gas Cap: If the seal looks bad or as a low-cost next step, replace the gas cap with a new OEM part. This is the most common fix. Many forum users report that aftermarket caps do not work.
- Inspect the Fuel Filler Neck: Check the metal rim of the filler neck for any rust or corrosion that could prevent a good seal. Clean any minor corrosion with a wire brush or emery cloth.
- Perform a Visual Inspection: Look for any obviously cracked or disconnected rubber hoses around the fuel tank and filler neck area. A video for a similar model showed a hose had simply popped off a nipple on the vapor canister. 🎬 Watch this video to find common disconnected EVAP hoses
- Professional Smoke Test: If the cause is still not found, the next step is to have a mechanic perform a smoke test. This involves injecting harmless, vaporous smoke into the EVAP system to quickly and accurately pinpoint the location of the leak.
Parts You'll Likely Need
- Fuel Filler Cap
(OEM #17670-S84-A01)— This is the most frequent cause of a P1456 code. The original cap's seal fails over time, or the cap is not tightened properly.
Trusted brands: Acura (OEM)
OEM price range: $25-$40
Aftermarket price range: $15-$30 - Fuel Tank Filler Neck
(OEM #17660-SZ3-A50)— The sealing surface can rust, preventing the gas cap from creating an airtight seal. This is common in regions that use road salt.
Trusted brands: Acura (OEM), Spectra Premium, Dorman
OEM price range: $150-$250
Aftermarket price range: $70-$150 - EVAP Canister Vent Solenoid
(OEM #17310-SZ3-A51)— This valve can fail or get stuck, preventing the system from sealing during its self-test. While more common for P1457, it can be a factor in P1456.
Trusted brands: Acura (OEM), Standard Motor Products, Dorman
OEM price range: $90-$150
Aftermarket price range: $40-$85
Related Codes That Often Appear With This One
- P0401 (EGR Insufficient Flow)
- P0132 (O2 Sensor Circuit High Voltage)
Technical Service Bulletins (TSBs) & Recalls
- B99-040: Updates the troubleshooting procedures for DTC P1456 (EVAP Control System Leakage [Fuel Tank System]) and DTC P1457 (EVAP Control System Leakage [EVAP Canister System]).
- Honda TSB 03-001 (for other models): Addresses P1456 caused by a loose fuel cap and advises dealers to first instruct customers on proper tightening (3 clicks) before replacing parts.
Platform-Specific Known Issues
- False Clicks from Worn Gas Cap: An owner on AcuraZine reported that their original cap would make the 'clicking' sound before it was actually tight, leading to repeated P1456 codes. A new OEM cap resolved the issue.
- Fuel Level Dependency: A forum member with a similar Acura TL battled P1456 for years, discovering the code would only set when the fuel tank was filled above 3/4 full. This is because the EVAP self-test runs under specific conditions, including fuel level, and a full tank can change the system's pressure dynamics.
Mechanic-Grade Diagnostic Values
- EVAP Canister Purge Valve Resistance — expected: 30 to 38 ohms at room temperature. Failure: A reading outside this range indicates a faulty valve.
- EVAP Bypass Solenoid Resistance — expected: Approximately 35 ohms. Failure: An open circuit (infinite resistance) or a reading far from the specification suggests the solenoid coil is bad.
- Fuel Tank Pressure (FTP) Sensor Voltage (Key On, Engine Off) — expected: Approximately 2.5V - 2.9V (varies slightly by atmospheric pressure). Failure: Voltage stuck at 0V, 5V, or a reading that doesn't change when vacuum is applied to the sensor indicates a failure.
- EVAP Canister Vent Solenoid Voltage (Key On) — expected: Should have battery voltage (approx. 12V) at the power pin.. Failure: No voltage suggests a blown fuse or wiring issue before the solenoid.
Hidden / Shadow Codes Worth Checking
- Mode $06, TID:$26, CID:$01: This refers to the onboard diagnostic monitor for the 0.040" (large) EVAP leak test. A 'FAIL' result for this Test ID (TID) and Component ID (CID) on a professional scan tool can confirm the leak detection that leads to codes like P1456 before the check engine light even sets. (see via A professional scan tool capable of displaying Mode $06 data. The exact TID/CID may vary, so consulting the vehicle's service manual for specific Mode $06 definitions is recommended.)
Scan Tool Commands That Help
- Honda Diagnostic System (HDS) or equivalent professional scanner: EVAP System Leak Test — This is a guided, automated test that commands the various EVAP solenoids (purge, vent) to close and then monitors the Fuel Tank Pressure sensor to verify the system can hold a vacuum. It's the dealership-level method to confirm a leak exists after checking the gas cap.
- Professional bidirectional scan tool: EVAP Canister Vent Solenoid ON/OFF — To manually test the vent solenoid. The vent valve is normally open, so you must command it 'CLOSED' to test if it seals properly with a vacuum pump. If it doesn't hold vacuum when commanded closed, the valve is faulty.
Wiring & Ground Locations
- G101 — On the top left of the engine.. This is a primary engine ground. A poor connection here can cause erratic behavior in various engine sensors and solenoids, including those in the EVAP system.
- G652 — Located in the left front corner of the trunk.. This ground is critical for components located at the rear of the vehicle, including the fuel pump assembly and potentially rear-mounted EVAP components like the Fuel Tank Pressure sensor.
- EVAP Bypass Solenoid Valve Connector — Under the left rear of the vehicle, near the EVAP canister.. This is the connector for the bypass solenoid. Technicians test for battery voltage here with the key on to ensure the circuit is powered before condemning the solenoid itself.
- Fuel Tank Pressure (FTP) Sensor Connector — Under the left rear of the vehicle, on the EVAP canister assembly.. This 3-wire connector provides the FTP sensor with a 5V reference, ground, and returns a signal voltage to the PCM. Testing voltage at these pins is a key diagnostic step.
Real Owner Repair Stories
- AcuraZine user 'passmaster16' (2002 Acura RL with 130k miles) — Check Engine Light with code P1456.
❌ Tried (didn't work) Retightening the original OEM gas cap (3+ clicks)., Resetting the ECU by pulling the radio fuse.
✅ What actually fixed it Replacing the original gas cap with a new OEM replacement cap resolved the issue after the light came back on. - AcuraZine user 'wannaramble' (2002 Acura RL) — Repeatedly triggering P1456 after filling up with gas.
❌ Tried (didn't work) Tightening the cap until it clicked, which gave a false sense of being sealed.
✅ What actually fixed it The user discovered their original cap was worn and would 'click' before it was fully tight. A new replacement cap from the dealer fixed the problem permanently. - Reddit user 'Own-Management9831' (2005 Acura RSX Type-S (similar Honda/Acura EVAP system)) — P1456 code, strong smell of gas.
❌ Tried (didn't work) Replacing the gas cap with a non-OEM part.
✅ What actually fixed it Changing the fuel cap to a new OEM one solved the problem.
OEM Part Supersession History
17670-S84-A01→17670-T3W-A01— Standard part evolution and consolidation by the manufacturer.
Heads up: The new part number (17670-T3W-A01) is the correct current replacement and is fully compatible.17310-S0X-A01→17310-S84-A02— Part design update.
Heads up: For the EVAP Canister Vent Solenoid, multiple part numbers have been used. 17310-S84-A02 is a common replacement for earlier versions. Always verify the part number with a VIN before purchasing.
Helpful Videos
We Have This Part in Stock


The information in this article is provided for general reference and educational purposes only. Vehicle specifications, procedures, and part compatibility can vary by production date, trim level, and region. Always consult your vehicle's factory service manual and verify part numbers before purchasing or performing repairs. Safety-critical components such as airbags, seat belts, and braking systems should be installed by a qualified professional.
- Acura RL:
- 🎬 Helpful Videos
- 🛍️ Shop This Part
- What's Unique About the 2001-2004 Acura RL
- Diagnostic Flowchart
- Symptoms You May Notice
- Most Likely Causes
- Rare But Worth Checking
- Diagnosis Steps
- Parts You'll Likely Need
- Related Codes That Often Appear With This One
- Technical Service Bulletins (TSBs) & Recalls
- Platform-Specific Known Issues
- Mechanic-Grade Diagnostic Values
- Hidden / Shadow Codes Worth Checking
- Scan Tool Commands That Help
- Wiring & Ground Locations
- Real Owner Repair Stories
- OEM Part Supersession History
- 🎟️ Get 5% Off