

OBD-II Code P1456: Evaporative System Leak (Fuel Tank)
What P1456 means, why it triggers, and how to fix it
- Tightening or replacing the gas cap with an OEM part fixes code P1456 in over 70% of cases.
- Code P1456 isolates the EVAP leak specifically to the fuel tank side, distinguishing it from canister-side leaks like P1457.
- A rusted fuel filler neck is the second most common cause, requiring a $250 to $550 repair at a shop.
- You can safely drive with this code indefinitely, but the vehicle will automatically fail state emissions testing.
What Does P1456 Mean?

Code P1456 means your car's computer detected a very small leak in the Evaporative (EVAP) Emission Control System on the fuel tank side. This system traps gasoline vapors to prevent them from escaping into the atmosphere. The computer runs a pressure test, and if the system fails to hold pressure, it triggers the Check Engine Light.
Technical definition: Evaporative Emissions (EVAP) Control System Leakage Detected (Fuel Tank System). The powertrain control module (PCM) detected a leak between the fuel tank and the EVAP canister. For Honda/Acura, this isolates the leak to the gas cap, fuel filler neck, or fuel tank, distinct from the canister side (P1457).
🎬 Watch: A complete breakdown of Honda P1456 causes and solutions.Can I Drive With P1456?
Yes, But With Caution. It is safe to drive with a P1456 code. It does not affect how the car runs or its reliability. However, your car will automatically fail an emissions test. On rare Ford models where this code indicates a fuel temperature sensor issue, it contributes to rough idling. Ignoring the code prevents you from knowing if a more serious engine issue arises.
Common Causes


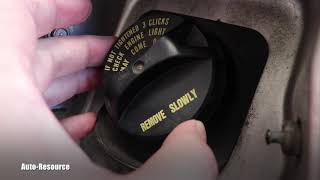
- Loose, Incorrect, or Faulty Gas Cap (Very Common) — The rubber seal wears out, or the cap is not tightened properly (it must click three times). Using a non-OEM aftermarket cap is the primary reason this code returns after a repair.
- Rusted or Damaged Fuel Filler Neck (Common) — The metal pipe where you insert the gas nozzle rusts or cracks, especially in regions using road salt. This rust creates an uneven surface that prevents even a new gas cap from sealing. 🎬 See how to replace a rusted fuel filler neck step-by-step.
- Cracked or Disconnected EVAP Hoses (Common) — Rubber and plastic hoses carrying fuel vapors become brittle, crack, or disconnect over time. A hairline crack anywhere in these lines triggers the code.
- Faulty EVAP Canister Vent Valve/Solenoid (Less Common) — This valve seals the EVAP system during the computer's pressure test. Internal rust or electrical failure sticks it open, preventing the system from holding pressure.
- Saturated Charcoal Canister (Less Common) — Habitually 'topping off' the fuel tank forces liquid gasoline into the charcoal canister. This saturates the charcoal, ruining its ability to store vapors and causing pressure anomalies.
- Leaking Fuel Tank or Fuel Pump Gasket (Rare) — The large gasket sealing the fuel pump to the tank fails, or the tank develops pinhole rust spots. This causes a small leak requiring a smoke test to locate.
- Faulty Fuel Tank Pressure (FTP) Sensor (Rare) — This sensor monitors pressure inside the fuel tank. A bad sensor sends incorrect data, tricking the computer into detecting a non-existent leak.
Symptoms
- Check Engine Light is On — This is the only symptom you will notice in 90% of cases. The computer stores the P1456 trouble code.
- Failing an Emissions Test — The car automatically fails a smog check because the Check Engine Light is active and the EVAP system readiness monitor reads 'incomplete'.
- Slight Fuel Smell — You will notice a faint gasoline odor near the rear of the car or the gas cap as fuel vapors escape the unsealed system.
- No 'Whoosh' Sound from Gas Cap — A healthy EVAP system builds a slight vacuum in the tank, causing a 'whoosh' sound when opening the cap. The absence of this sound confirms a leak.
Diagnostic Flowchart
Tap your situation to follow the diagnostic path that matches what you're seeing on this code.
Common Fixes & Costs
- Tighten or Replace Gas Cap — Parts: $25-$50, Labor: $0, ~0.1 hr book time (DIY)
- Replace Cracked EVAP Hose — Parts: $10-$30, Labor: $80-$150, ~0.8 hr book time (DIY)
- Replace Fuel Filler Neck — Parts: $100-$250, Labor: $150-$300, ~1.5 hr book time (Intermediate)
- Replace EVAP Vent Control Valve/Solenoid — Parts: $50-$150, Labor: $100-$200, ~1.2 hr book time (Professional)
- Smoke Test and Diagnostic Fee — Parts: $0, Labor: $120-$200, ~1.0 hr book time (Professional)
DIY vs Professional
- Tighten or Replace Gas Cap — Beginner: True
Tools: None - Replace Cracked EVAP Hose — Beginner: True
Tools: Pliers, hose cutters. - Replace Fuel Filler Neck — Beginner: False
Tools: Socket set, screwdrivers, hose clamp pliers, jack and jack stands. - Replace EVAP Vent Control Valve/Solenoid — Beginner: False
Tools: Socket set, pliers, trim removal tool. - Smoke Test — Beginner: False
Tools: EVAP-specific smoke machine with a low-pressure regulator.
Used vs. New Parts: Buying Guide
When a used part is worth it: Buy used for expensive hard parts like a fuel filler neck from a rust-free donor. Never buy a used gas cap or rubber EVAP hose.
Donor-vehicle mileage cap: roughly under 80000 miles for the part to have meaningful remaining life.
Donor quality checklist:
- Inspect fuel filler necks for rust around the gas cap sealing surface.
- Verify the exact part number, as EVAP valves change frequently between model years.
- Ensure electrical connector pins on solenoids are free of green corrosion.
Decision logic:
- If The part is a gas cap → Always buy a new OEM part. Aftermarket or used caps guarantee the code returns.
- If The part is a fuel filler neck and the vehicle is over 10 years old → Buy used from a rust-free donor if the new OEM part exceeds $200.
- If The part is an electronic solenoid (vent/purge valve) → Buy new. Used solenoids are prone to the same internal failures.
Warranty tradeoff: Used parts from salvage yards typically have a 30-90 day warranty. New aftermarket parts often carry a 1-year to limited lifetime warranty. New OEM parts have a 1-year warranty.
Worst-case if a used part fails: $200-400 if a used part fails after installation, primarily due to repeated labor costs for diagnosis and replacement.
What Happens If You Wait — Timeline
- 0-1 month: Code P1456 stores and the Check Engine Light illuminates. Drivability remains perfect. (MPG impact: 0-1%% · Added cost: $0)
- 1-6 months: The vehicle fails state emissions inspections. A faint gasoline odor appears near the rear tire. (MPG impact: 0-1%% · Added cost: $0)
- 6-12 months: The active Check Engine Light masks new, critical engine codes. No mechanical damage occurs. (MPG impact: 0-1%% · Added cost: $0)
- 12+ months: Continued environmental pollution and inspection failures. The EVAP leak does not cause cascading mechanical failures. (MPG impact: 0-1%% · Added cost: $0)
Cost of Not Fixing It
- 0-6 months: You will fail emissions tests. The Check Engine Light remains on, masking new, potentially catastrophic engine codes. (Added cost: $0)
- 6-12 months: Continued release of fuel vapors. No mechanical damage occurs to the vehicle. (Added cost: $0)
- 12+ months: P1456 does not cause escalating mechanical damage. The only cost is the inability to pass state inspections. (Added cost: $0)
Diagnosis Steps

- Check the Gas Cap
Remove the gas cap and inspect the rubber seal for cracks. Reinstall it, turning until it clicks at least three times. If the cap looks worn, replace it with an OEM part.
Tools: None (Beginner) - Clear the Code and Drive
Use an OBD-II scanner to clear the code. Drive the vehicle for a few days. The EVAP monitor only runs when the fuel level is between 15-85% at a steady speed. If the light returns, continue diagnosing.
Tools: OBD-II Scanner (Beginner) - Visually Inspect the Fuel Filler Neck
With the gas cap off, use a flashlight to inspect the metal opening. Check for rust, pitting, or debris preventing a seal. Clean the area with a rag. Significant rust requires neck replacement.
Tools: Flashlight, Rag (Beginner) - Visually Inspect EVAP Hoses
Look for cracks, breaks, or loose connections in the hoses connected to the fuel tank and EVAP canister. Pay close attention to hoses near the rear wheels, which are prone to dry rot.
Tools: Flashlight (Intermediate) - Perform a Smoke Test
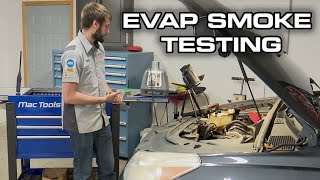
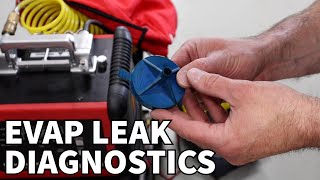
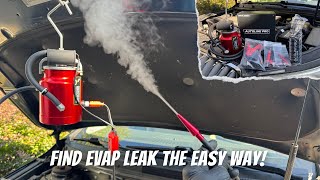
A smoke machine pumps harmless, visible smoke into the EVAP system via a service port. Smoke escapes exactly where the leak is located. This is the definitive way to find hidden leaks.
Tools: EVAP Smoke Machine (Advanced) - Test the EVAP Vent Control Valve/Solenoid
Locate the vent valve near the charcoal canister. Apply 12V power to its terminals; you will hear a sharp click as it opens or closes. Replace it if it fails to operate.
Tools: Multimeter, 12V Power Source (Advanced) - Pro Tip: Check FTP Sensor Baseline Voltage
Turn the ignition to ON (II) without starting the engine. Remove the gas cap. Using a live-data scan tool, check the Fuel Tank Pressure (FTP) sensor voltage. A healthy Honda sensor reads a steady 2.45V to 2.55V. Readings outside this range indicate a faulty sensor.
Tools: Advanced OBD-II Scan Tool (Professional) - Pro Tip: Test EVAP Solenoid Resistance
Disconnect the electrical connector from the suspect solenoid. Measure resistance across the terminals using a multimeter. A healthy Honda vent solenoid reads between 12 and 130 Ohms. Infinite or zero resistance means the solenoid is dead.
Tools: Multimeter (Advanced)
When This Code Triggers (Freeze-Frame Conditions)
- Engine Coolant Temp: Below 122°F (at start) (Engine must be started from cold.)
- Fuel Level: 25-75% (The EVAP monitor aborts the test on a full or nearly empty tank.)
- Vehicle Speed: 40-60 mph (Steady cruising speed is required for several minutes.)
- Ambient Air Temp: 45-85°F (The test aborts in extreme heat or freezing temperatures.)
Related Codes
- P1457 — On Honda/Acura, P1457 indicates a leak on the canister side. P1456 is the fuel tank side. Tightening the gas cap will never fix a P1457 code.
- P0455 — Indicates a massive EVAP leak. Seeing P1456 and P0455 together points to a completely disconnected hose or a severely cracked fuel filler neck.
- P0442 — The generic OBD-II code for a small EVAP leak. P1456 is the manufacturer-specific version that isolates the leak to the fuel tank side.
- P0457 — Generic code for a loose fuel cap. Functionally identical to P1456 on Honda/Acura vehicles.
Climate & Environmental Factors
- Cold Weather: Cold temperatures cause rubber seals and plastic hoses to contract and harden. This shrinkage creates microscopic gaps that trigger the code during overnight self-tests.
- Road Salt (Rust Belt): Road salt aggressively corrodes the steel fuel filler neck. This creates a pitted, uneven surface that prevents the gas cap's O-ring from sealing.
- High Humidity: Prolonged high humidity saturates the activated charcoal in the EVAP canister with water vapor, disrupting system pressure management.
How to Talk to a Mechanic About This Code
Say this: "I have a P1456 code indicating a tank-side EVAP leak. I already installed a new OEM gas cap. I need a smoke test to pinpoint the leak."
Proves you are informed, specifies the exact diagnostic procedure needed, and prevents the shop from charging you for another gas cap.
Avoid saying:
- My check engine light is on.
- My car failed emissions.
- Just fix whatever is wrong.
Questions to ask before authorizing the repair:
- Did the smoke test reveal the exact leak location? Can I see a photo?
- Is the leak coming from the filler neck itself, or just the hose connection?
- What is the warranty on this specific EVAP repair?
Where to Take It: Dealer vs Independent vs Chain
- Dealer:
Use only if under warranty. Dealers charge the highest rates and often replace entire EVAP assemblies instead of individual failed valves.
Best for: Vehicles under an emissions or powertrain warranty., Complex, persistent P1456 issues on newer cars where multiple TSBs exist.
Downsides: Highest labor rates and part costs., May recommend replacing a larger assembly (e.g., entire canister) when a smaller component has failed. (Typical cost: +50% vs. baseline) - Independent Shop:
Best choice. A reputable indie shop has the required smoke machine and fixes P1456 for a fraction of the dealer cost.
Best for: Out-of-warranty vehicles, especially common models like Honda/Acura., Standard smoke test diagnostics and part replacements (filler neck, hoses).
Downsides: Quality is variable; ensure they have an EVAP smoke machine and good reviews. (Typical cost: +0% vs. baseline) - Chain Shop:
Acceptable only for buying a replacement gas cap. Avoid for diagnostics, as they lack specialized EVAP experience.
Best for: Selling you a gas cap.
Downsides: Technician skill varies widely., High pressure to upsell services; may not have the experience to diagnose beyond the gas cap., Less likely to have advanced diagnostic tools or experience with manufacturer-specific EVAP quirks. (Typical cost: -10% vs. baseline)
When to Walk Away From the Repair
If the repair cost for this emissions-only code exceeds 25% of the car's value, sell it as-is (if your state allows).
- Car worth $4000, fix is $450: Fix it. This covers a fuel filler neck replacement and keeps the car roadworthy.
- Car worth $2500, fix is $1200: Walk away. The repair is 50% of the car's value for an issue that does not affect driving.
- Car worth $8000, fix is $150: Fix it. This covers a diagnostic fee and a simple hose replacement.
What Scan Tool You Need for This Code
Minimum: An OBD-II scanner that reads codes, clears codes, and displays live data.
A $20 reader clears the code, but you need live data to monitor the Fuel Tank Pressure (FTP) sensor voltage for advanced diagnostics.
Budget: BlueDriver Bluetooth Pro (~$100) — Pairs with your phone to read codes and display live FTP sensor data.
Mid-range: Innova 5610 or XTOOL D7 (~$350) — Offers bi-directional control to manually open and close EVAP solenoids for rapid testing.
Professional: Autel MaxiCOM MK808Z / MK900 (~$500-700) — Provides full bi-directional control and manufacturer-specific EVAP testing procedures.
Rent vs buy: Borrow a basic scanner from AutoZone for free to clear the code after a gas cap replacement. Buy a live-data scanner if the code returns.
How to Clear the Code After You Fix It
- Fix the underlying mechanical issue (e.g., replace gas cap).
- Use an OBD-II scan tool to clear the trouble codes.
- Perform a specific drive cycle to run the EVAP readiness monitor.
Drive cycle (~20 minutes): From a cold start, idle for 3 minutes. Drive at a steady 55 mph for 5 minutes. Perform mixed stop-and-go city driving for 10 minutes. Coast to a stop without using brakes when possible.
Readiness monitors affected: Evaporative System (EVAP), Catalyst (CAT), Oxygen Sensor (O2S)
Before emissions retest: drive at least 50 miles to fully set monitors.
Watch out for:
- Clearing the code with a scanner does not pass an emissions test; the EVAP monitor must read 'Ready'.
- Failing to meet the strict fuel level (25-75%) or cold start requirements prevents the test from running.
- The code returns within three drive cycles if the physical leak remains.
Will This Fail Emissions / State Inspection?
Yes — this code typically fails an OBD-II emissions inspection.
- California: An active P1456 is an automatic failure. After repair, you must drive 50-100 miles to set the EVAP readiness monitor to 'Complete'.
- New York: The OBD-II scan detects P1456 and immediately fails the vehicle for emissions.
- Texas: In the 17 emissions-testing counties, the Check Engine Light must be off and monitors set to pass.
Most Commonly Affected Vehicles
- Honda Accord (1998-2002) — Extremely common code for this generation, often caused by a faulty gas cap or rusted fuel filler neck. Honda TSB 99-075 addresses diagnosis for this issue.
- Honda Civic (1996-2005) — The gas cap is the primary suspect, but filler neck rust and vent solenoid failure are also frequent causes.
- Acura TL (1999-2003) — Owners frequently battle this code, which is almost always resolved by an OEM gas cap (Part #17670-SDA-A01).
- Acura Integra (1996-2001) — For these models, P1456 almost always means a bad gas cap or a rusted fuel filler neck.
- Honda Odyssey (1999-2004) — Like other Hondas of the era, the gas cap and EVAP vent valve are common failure points.
- Nissan Xterra / Pathfinder (2000-2004) — On these SUVs, P1456 is common and often caused by rotted rubber EVAP hoses in the rear of the vehicle, near the spare tire.
- Ford Fiesta (2012-2016) — On the Fiesta, P1456 is often accompanied by P1450 and points to a stuck-open canister purge valve located in the engine bay.
- Volkswagen Jetta / Golf (2010-2016) — On these German models, P1456 often indicates a very small leak from hairline cracks in the plastic EVAP hoses and lines.
Manufacturer-Specific Notes

- Honda / Acura: P1456 specifically isolates the leak to the fuel tank side. Using an OEM gas cap is mandatory, as aftermarket caps consistently trigger this code. TSB 99-075 outlines the exact diagnostic procedure.
- Ford: On some Fords, P1456 means 'Fuel Tank Temperature Sensor Circuit Malfunction', a completely different electrical issue. On the Fiesta, it points to a stuck purge valve.
- Volkswagen / Audi: On modern TDI models, P1456 refers to Exhaust Gas Temperature Sensor 2. This critical issue prevents DPF regeneration and requires immediate repair.
- Nissan / Infiniti: Indicates a small EVAP leak, almost always caused by rotted rubber hoses near the rear spare tire.
Real Owner Stories
2001 Honda Civic - The Simple Fix
Check Engine Light came on. No other symptoms. A scan at an auto parts store revealed code P1456.
What they tried:
- Initially ignored the light for a few weeks.
- Tightened the gas cap after refueling, ensuring it clicked multiple times.
Outcome: Tightened the gas cap until it clicked three times. After 50 miles of mixed driving, the light turned off permanently.
Lesson: Always try the $0 fix first. For P1456 on a Honda, this is always checking the gas cap.
2003 Honda Pilot at 150K miles - The Misdiagnosis
Persistent P1456 code that would return weeks after being cleared. Owner noticed a faint fuel smell near the driver's side rear tire.
What they tried:
- Replaced the gas cap with a new OEM part, but the code returned.
- Replaced the EVAP purge control solenoid valve in the engine bay, but the code returned.
Outcome: Found a degraded O-ring where the fuel filler neck meets the body. Sealed it with polyurethane. The code did not return.
Lesson: P1456 is strictly the tank side; replacing canister-side parts is a waste of money. If a new OEM cap fails, the leak is likely the filler neck.
2002 Nissan Xterra - The Hard-to-Find Leak
P1456 code appeared intermittently, mostly during colder months. No fuel smell or other symptoms were present.
What they tried:
- Replaced the gas cap; code returned.
- Visually inspected hoses in the engine bay, but found no obvious cracks.
Outcome: Intermittent code in cold weather. A smoke test revealed a dry-rotted EVAP hose hidden above the spare tire. Replacing the $15 hose resolved the code.
Lesson: Exposed undercarriage hoses degrade faster than engine bay hoses. For persistent leaks, a smoke test is mandatory.
How to Prevent This Code From Triggering
- Stop fueling at the first click (Every fill-up) — Topping off forces liquid fuel into the vapor-only charcoal canister, destroying it.
- Tighten gas cap until it clicks 3 times (Every fill-up) — Ensures the ratchet mechanism engages and compresses the rubber seal.
- Periodically clean and lubricate the gas cap seal (Once per year) — Wipe the O-ring and apply a dab of silicone grease to prevent dry rot and ensure a tight seal in winter.
- Inspect undercarriage EVAP hoses (During tire rotations or oil changes) — Check rubber lines near the fuel tank for cracks or brittleness.
- Apply undercoating in Rust Belt regions (Every 1-2 years) — Protects the steel fuel filler neck from road salt, preventing rust-induced leaks.
Frequently Asked Questions
Can I fix P1456 myself?
Yes. The most common fix is tightening or replacing the gas cap. If that fails, finding the leak requires a specialized smoke machine.
Will replacing the gas cap make the Check Engine Light go away immediately?
No. You must clear the code with a scanner or drive the car for several days. The computer needs to run its self-test under specific conditions to confirm the leak is gone.
Why did the code come back after I replaced the gas cap?
The new cap is faulty (common with aftermarket parts), or the leak is elsewhere. The next most likely causes are a rusted fuel filler neck or a cracked EVAP hose.
What are the most common misdiagnosis mistakes for P1456?
On Honda/Acura vehicles, mechanics often confuse P1456 (tank side) with P1457 (canister side) and replace the wrong parts. Another mistake is using a cheap aftermarket gas cap that fails to seal.
Why does the P1456 code sometimes appear only after I fill up the gas tank?
The EVAP self-test only runs when the fuel level is between 1/4 and 3/4 full. Filling the tank delays the test until the fuel level drops, at which point the computer detects the leak and triggers the light. This creates the illusion that refueling caused the problem.
How much does it cost to fix P1456 at a shop?
A shop charges $120-$200 for a diagnostic smoke test. Replacing an OEM gas cap costs under $50, while replacing a rusted fuel filler neck or vent valve costs $300-$600.
What happens if I don't fix a P1456 code?
Your car will fail emissions tests and release fuel vapors into the environment. It will not cause mechanical damage or affect drivability. However, the active Check Engine Light masks new, potentially serious problems.
Is it dangerous to drive with a P1456 code?
No. Your car's performance remains unaffected, though you will fail an emissions test. For rare diesel versions of this code (related to the DPF), fix it immediately to prevent exhaust system damage.
Key Takeaways
- Tightening or replacing the gas cap with an OEM part fixes code P1456 in over 70% of cases.
- Code P1456 isolates the EVAP leak specifically to the fuel tank side, distinguishing it from canister-side leaks like P1457.
- A rusted fuel filler neck is the second most common cause, requiring a $250 to $550 repair at a shop.
- You can safely drive with this code indefinitely, but the vehicle will automatically fail state emissions testing.
Helpful Videos

The information in this article is provided for general reference and educational purposes only. Vehicle specifications, procedures, and part compatibility can vary by production date, trim level, and region. Always consult your vehicle's factory service manual and verify part numbers before purchasing or performing repairs. Safety-critical components such as airbags, seat belts, and braking systems should be installed by a qualified professional.
- 🎬 Helpful Videos
- What Does P1456 Mean?
- Can I Drive With P1456?
- Common Causes
- Symptoms
- Diagnostic Flowchart
- Common Fixes & Costs
- DIY vs Professional
- Used vs. New Parts: Buying Guide
- What Happens If You Wait — Timeline
- Cost of Not Fixing It
- Diagnosis Steps
- When This Code Triggers (Freeze-Frame Conditions)
- Related Codes
- Climate & Environmental Factors
- How to Talk to a Mechanic About This Code
- Where to Take It: Dealer vs Independent vs Chain
- When to Walk Away From the Repair
- What Scan Tool You Need for This Code
- How to Clear the Code After You Fix It
- Will This Fail Emissions / State Inspection?
- Most Commonly Affected Vehicles
- Manufacturer-Specific Notes
- Real Owner Stories
- 2001 Honda Civic - The Simple Fix
- 2003 Honda Pilot at 150K miles - The Misdiagnosis
- 2002 Nissan Xterra - The Hard-to-Find Leak
- How to Prevent This Code From Triggering
- Frequently Asked Questions
- Can I fix P1456 myself?
- Will replacing the gas cap make the Check Engine Light go away immediately?
- Why did the code come back after I replaced the gas cap?
- What are the most common misdiagnosis mistakes for P1456?
- Why does the P1456 code sometimes appear only after I fill up the gas tank?
- How much does it cost to fix P1456 at a shop?
- What happens if I don't fix a P1456 code?
- Is it dangerous to drive with a P1456 code?
- Key Takeaways
- 🎟️ Get 5% Off