

P1451 on 1997-2014 Ford E-150 4.6L: EVAP Vent Solenoid Circuit Causes & Fixes
This code points to an electrical problem with the EVAP canister vent solenoid circuit, not a leak. The most likely cause is a broken or corroded wire near the solenoid at the rear of the van. Inspect wiring thoroughly before replacing the solenoid, which costs about $25-$75.
- P1451 is an electrical circuit code, not a system leak code. Do not use a smoke machine or replace the gas cap first.
- The most common fix is repairing a damaged wire or connector for the vent solenoid, located near the spare tire.
- Before replacing any parts, test the solenoid with a multimeter. It should read between 48 and 65 ohms.
- Do NOT confuse the Canister Vent Solenoid (at the rear) with the Purge Solenoid (in the engine bay).
What's Unique About the 1997-2014 Ford E-150
On Ford E-Series vans, like their F-Series truck counterparts, the long chassis and exposed underbody wiring make the harness for the rear-mounted EVAP components susceptible to damage from road debris, moisture, and corrosion over time. The P1451 code on these vehicles is very frequently a simple wiring failure rather than a component failure. Owners often mistakenly replace the purge solenoid in the engine bay, when the issue is almost always with the vent solenoid circuit 🎬 Watch: A quick overview of P1451 causes and fixes. near the spare tire.
Generation note: The 1997-2014 model years span the fourth generation of the Ford E-Series, which received a significant facelift in 2008. While the fundamental meaning of P1451 and the location of the EVAP components remain consistent, wiring harness routing and specific part numbers for the solenoid may differ between the 1997-2007 and 2008-2014 models. Always verify parts with your vehicle's VIN.
Symptoms You May Notice
- Check Engine Light is on.
- No noticeable drivability issues in most cases.
- Potential difficulty filling the fuel tank (fuel nozzle clicks off prematurely) if the vent is stuck closed.
- Possible fuel odor in rare cases.
- Replacing the gas cap. A bad gas cap causes EVAP leak codes (like P0442 or P0455), not a circuit code like P1451.
- Replacing the EVAP Purge Solenoid/Valve. This part is located in the engine bay and is controlled by a different circuit (P0443). P1451 specifically refers to the vent solenoid circuit at the rear of the vehicle.
Most Likely Causes
- Damaged, Corroded, or Broken Wiring/Connector 🔴 High Probability The wiring harness to the vent solenoid is routed along the frame rail to the rear of the van, making it vulnerable to moisture, road salt, and physical damage, leading to corrosion and breaks. The connector pins themselves can also corrode and break off.
How to confirm: Visually inspect the entire length of the wiring harness leading to the canister vent solenoid, paying close attention to the connector itself and any areas where the harness is secured to the frame. Check for 12V power at the connector's power wire (typically Red) with the key on. Also inspect the harness where it passes over a bracket under the air filter housing, as chafing can cause a break there as well.
Typical fix: Repair the broken wire or replace the connector pigtail. This often involves cutting out the damaged section, splicing in a new piece of wire, and protecting the repair with heat-shrink butt connectors.
Est. part cost: $5-$25 - Failed Canister Vent Solenoid 🟡 Medium Probability The solenoid is exposed to the elements at the rear of the vehicle, and internal coil failure can occur from age, vibration, and corrosion.
How to confirm: Disconnect the solenoid's electrical connector and measure the resistance between its two pins using a multimeter. A good solenoid should measure between 48 and 65 ohms. A reading of infinity (open circuit) or near zero (short circuit) indicates a failed solenoid.
Typical fix: Replace the canister vent solenoid. It is typically mounted on or near the charcoal canister assembly.
Est. part cost: $25-$75
Rare But Worth Checking
- Failed Powertrain Control Module (PCM): This is extremely rare. The PCM should only be considered after all wiring and the solenoid itself have been thoroughly tested and confirmed to be in good working order.
Diagnosis Steps
- Retrieve the P1451 code using an OBD-II scanner.
- Locate the EVAP charcoal canister and the attached vent solenoid. On an E-150, this is in the rear, under the vehicle, typically in front of the spare tire.
- Perform a thorough visual inspection of the vent solenoid's electrical connector and wiring harness for any signs of corrosion, chafing, or breaks. Pay special attention to the last few feet of wiring near the solenoid.
- If a wiring issue is found, repair it. Clear the codes and see if P1451 returns.
- If wiring appears intact, disconnect the solenoid. Use a multimeter to test the resistance across the two pins on the solenoid itself. The reading should be between 48-65 ohms.
- If the solenoid resistance is out of spec, replace the canister vent solenoid.
- If the solenoid tests good, check for power at the harness connector. With the key on, one wire (usually Red) should have approximately 12 volts to ground.
- If there is no power, trace the power wire (Red) back towards the engine bay. A known, but less common, break point is under the air filter housing where the harness can rub on a bracket. If power is present and the solenoid is good, the fault lies in the control wire (usually Violet/White) to the PCM or the PCM itself.
Parts You'll Likely Need
- EVAP Canister Vent Solenoid
(OEM #F75Z-9F945-CA (for 1997-2004 models), 9U5Z-9F945-C (for later models, VIN verification recommended))— This is the component controlled by the circuit that has faulted. It can fail internally, causing an open or short in its coil.
Trusted brands: Motorcraft, Dorman, Standard Motor Products (SMP)
OEM price range: $50-$100
Aftermarket price range: $25-$75 - EVAP Vent Solenoid Connector Pigtail — The original connector often becomes brittle and corrodes, leading to a poor connection or broken wires right at the connector. A user on f150forum.com noted a previous improper repair with twisted wires failed; using weatherproof butt splices is critical.
Trusted brands: Motorcraft, Dorman
OEM price range: $20-$40
Aftermarket price range: $10-$25
Platform-Specific Known Issues
- Wire Break Under Air Filter Housing: A user on f150forum.com with a '99 F-150 4.2L V6 (platform mate) traced a no-voltage condition at the solenoid all the way to the engine bay. They found the red power wire was severed where the main harness passes over a bracket directly below the air filter housing. Repairing this wire solved the P1451 code. This is a possible, though less common, failure point to check if no power is found at the rear connector.
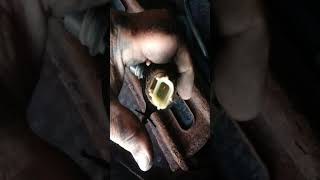
- Corroded Connector Pin: A YouTube video by 'SpanishGuyGarage' on a 1997 F-150 5.4L showed the P1451 was caused by a completely corroded and broken pin inside the electrical connector for the vent solenoid. The solenoid itself tested good, but the connector was no longer making electrical contact, necessitating a new pigtail. 🎬 Watch: See how a corroded connector pin causes code P1451.
- Improper Previous Repair: An owner on f150forum.com found their P1451 issue persisted because of a previous, incorrect repair. The wires had been twisted together and not properly weatherproofed, leading to a failed connection over time. A proper repair with heat-shrink butt splices was required to finally resolve the code.
Mechanic-Grade Diagnostic Values
- Canister Vent Solenoid Resistance — expected: 48 - 65 Ohms. Failure: A reading of infinity (open) or near zero (short) indicates a failed solenoid.
- Scan Tool PID 'EVAPCV' (Canister Vent Duty Cycle) — expected: 0% when open, 100% when commanded closed.. Failure: Value does not change when commanded by scan tool.
- Voltage at PCM control side of vent solenoid circuit — expected: Approximately battery voltage when valve is open (EVAPCV at 0%). A minimum voltage drop of 4 volts when valve is commanded fully closed (EVAPCV at 100%).. Failure: Voltage does not match commanded state or does not drop when solenoid is activated, indicating a wiring issue or bad PCM driver.
Scan Tool Commands That Help
- Ford IDS (or equivalent bidirectional scanner): Output Test Mode / Manual EVAP Test — Use this to command the canister vent solenoid on and off (or open/closed) to verify its mechanical and electrical operation. You should hear an audible click from the solenoid and see a corresponding change in the EVAPCV PID and circuit voltage.
Wiring & Ground Locations
- G401 — Under left rear of vehicle, along the frame rail.. This is a primary ground point for components at the rear of the vehicle. Since the EVAP canister and vent solenoid are located in this area, a corroded or loose G401 ground could cause an intermittent or total failure of the vent solenoid circuit, triggering a P1451 code.
- Canister Vent Solenoid Connector — At the EVAP canister vent solenoid, under the vehicle near the spare tire.. The two pins are for power (VPWR, typically Red) and PCM control (typically Violet/White). Power should be ~12V with key on. The PCM grounds the control wire to activate the solenoid. Corrosion or breaks at these pins are a primary cause of P1451.
Real Owner Repair Stories
- YouTube user 'Gabriel's Auto Tech' (2001 Lincoln Town Car 4.6L) — Check Engine Light with code P1451.
❌ Tried (didn't work) Initial diagnosis pointed to the vent solenoid circuit.
✅ What actually fixed it The vent solenoid itself tested good (correct resistance). The problem was a corroded terminal pin inside the connector. The final fix was to remove the bad terminal and solder the wire directly to restore a solid connection.
"I Checked Everything" — The Actual Cause
- A smoke test is not a valid diagnostic procedure for a P1451 code. This is an electrical circuit malfunction code, not an EVAP system leak code (like P0442 or P0455). A smoke test will yield no useful information for diagnosing the root cause of P1451.
OEM Part Supersession History
F75Z-9F945-BA→F75Z-9F945-CA— Standard part revision by the manufacturer.
Model Year Variations Within This Range
- 1997-~2005: The canister vent solenoid part number is often F75Z-9F945-CA, which has specific production date cutoffs (e.g., 'To 04/18/2005' for midship fuel tanks).
- ~2008-2014: After the 2008 model year refresh, a different part number (9U5Z-9F945-C) is commonly used. While the function is identical, the physical housing and connector may differ slightly. Always verify by VIN.
Diagnostic Flowchart
Other Known Issues on This Vehicle
Issues unrelated to this code that are worth knowing about as an owner of this generation:
- Spark Plug Ejection (Blowout) 🔴 High — Common on 2-valve Triton engines, particularly those from 1997-2003. It can happen at any mileage, often without warning. The issue stems from cylinder heads having too few threads to securely hold the spark plugs. (Ref: TSB 07-21-2014 (Acknowledges issue but doesn't cover out-of-warranty repairs))
- Cracked Plastic Intake Manifold 🟠 Medium — A very common failure on 1996-2001 4.6L engines, leading to sudden and massive coolant loss. The front coolant crossover section is the typical failure point. Later models with an aluminum crossover can still leak at the gasket seam. (Ref: A class-action lawsuit resulted in an extended warranty program, but it has long since expired.)
- Fuel Pump Driver Module (FPDM) Corrosion 🔴 High — Extremely common on 2004-2014 models, especially in the rust belt. The aluminum module is mounted directly to the steel frame rail, causing galvanic corrosion that cracks the housing and allows water intrusion, leading to a no-start or stalling condition. Failure is a matter of 'when,' not 'if.'
- Broken Exhaust Manifold Studs 🟠 Medium — The cast iron exhaust manifolds and steel studs expand and contract at different rates, causing the studs to break, leading to an exhaust leak (ticking noise) when the engine is cold.
Used vs. New Parts: Buying Guide for This Vehicle
When a used part is the smart pick: A used part is generally NOT recommended for the solenoid itself due to high failure rates from internal coil failure and corrosion. However, sourcing a used connector pigtail from a dry, rust-free donor vehicle can be a smart move if you only need the connector and a few inches of wire.
Donor-vehicle mileage cap: roughly under 100000 miles for the part to have meaningful remaining life.
What to inspect on the donor part:
- For a pigtail: Check for flexible, uncracked wire insulation.
- For a pigtail: Ensure the connector body is not brittle and the locking tab is intact.
- For a pigtail: Look inside the connector for clean, non-corroded metal pins.
- Avoid parts from vehicles in the 'salt belt' or areas with high humidity.
OEM-only on this vehicle (don't cheap out):
- While not strictly required, using an OEM Motorcraft solenoid is highly recommended by many technicians for electrical components to ensure proper fit, function, and longevity.
Aftermarket brands forum-validated for this vehicle:
- Standard Motor Products (SMP) is generally regarded as a high-quality aftermarket alternative.
- Dorman is a common option and often works, but some forum users report mixed results with fitment and longevity on electrical parts.
Brands owners have reported issues with on this vehicle:
- Avoid unbranded, 'white-box' parts from online marketplaces, as quality control is often non-existent.
Real Owner Stories
Aggregated from forums and TSBs cited above. Mileages and costs reflect what owners reported in those sources.
1999 Ford F-150 4.2L V6
Symptoms: No voltage condition at the solenoid at the rear of the vehicle.
What fixed it: Traced the red power wire to the engine bay and repaired a severed section where the main harness passed over a bracket directly below the air filter housing.
Source hint: vehicle_specific_issues: Wire Break Under Air Filter Housing (f150forum.com)
1997 Ford F-150 5.4L V8
Symptoms: P1451 code; solenoid itself tested good but the system was not functioning.
What fixed it: Replaced the electrical connector pigtail because a pin inside the connector had completely corroded and broken off.
Source hint: vehicle_specific_issues: Corroded Connector Pin (YouTube video by 'SpanishGuyGarage')
2001 Ford F-150
Symptoms: P1451 issue persisted even after a previous attempt to fix the wiring.
What fixed it: Removed an improper repair where wires were merely twisted together and performed a proper repair using weatherproof heat-shrink butt splices.
Source hint: Ford F150 Forum - Thread: 'PLEASE HELP DTC p1451'
1999 Ford F-150
Symptoms: Check engine light with P1451; confirmed 12V+ at the red wire and 60 ohms at the solenoid.
What fixed it: The user identified the issue within the vent solenoid circuit rather than the purge solenoid on the firewall.
Source hint: Ford Truck Enthusiasts Forums - Thread: 'P1451 Code, yes I have been searching!!'
2001 Lincoln Town Car 4.6L V8
Symptoms: P1451 code triggered.
What fixed it: Repaired a corroded wire terminal at the vent solenoid connector located above the rear axle.
Source hint: platform_mates: 2001 Lincoln Town Car (4.6L V8)
Related OBD-II Codes
Frequently Asked Questions
Where is the canister vent solenoid located on my Ford E-150?
What resistance should I look for when testing the vent solenoid on my 4.6L Triton?
Does TSB 07-21-2014 relate to my P1451 code?
I have no power at the rear connector; where else should I check on my Ford van?
What color wires should I be looking for when inspecting the vent solenoid circuit?
Why does my fuel nozzle click off early when I try to fill up my E-150?
Helpful Videos

We Have This Part in Stock



The information in this article is provided for general reference and educational purposes only. Vehicle specifications, procedures, and part compatibility can vary by production date, trim level, and region. Always consult your vehicle's factory service manual and verify part numbers before purchasing or performing repairs. Safety-critical components such as airbags, seat belts, and braking systems should be installed by a qualified professional.
- Ford E-150:
- 🎬 Helpful Videos
- 🛍️ Shop This Part
- What's Unique About the 1997-2014 Ford E-150
- Symptoms You May Notice
- Most Likely Causes
- Rare But Worth Checking
- Diagnosis Steps
- Parts You'll Likely Need
- Platform-Specific Known Issues
- Mechanic-Grade Diagnostic Values
- Scan Tool Commands That Help
- Wiring & Ground Locations
- Real Owner Repair Stories
- "I Checked Everything" — The Actual Cause
- OEM Part Supersession History
- Model Year Variations Within This Range
- Diagnostic Flowchart
- Other Known Issues on This Vehicle
- Used vs. New Parts: Buying Guide for This Vehicle
- Real Owner Stories
- 1999 Ford F-150 4.2L V6
- 1997 Ford F-150 5.4L V8
- 2001 Ford F-150
- 1999 Ford F-150
- 2001 Lincoln Town Car 4.6L V8
- Related OBD-II Codes
- Frequently Asked Questions
- 🎟️ Get 5% Off