

OBD-II Code P1391: Intermittent Cam or Crank Sensor Signal
The Ultimate Guide to Diagnosing and Fixing P1391
- P1391 on Chrysler, Dodge, and Jeep vehicles almost always indicates a failing camshaft or crankshaft position sensor, or a degraded wiring harness.
- An immediate safety risk exists: the engine stalls without warning at any speed, causing a total loss of power steering and power brakes.
- Never use aftermarket sensors for this repair; install only genuine OEM (Mopar) sensors costing $50-$130 to prevent the code from returning immediately.
- Always inspect the flexplate and tone wheels for physical damage before replacing the PCM, as a cracked $50 flexplate perfectly mimics a $500 computer failure.
- Use a live-data scanner or oscilloscope to monitor the 'Cam/Crank Sync' PID; a toggle from 'Yes' to 'No' definitively proves signal loss.
What Does P1391 Mean?

P1391 means the Powertrain Control Module (PCM) temporarily loses the signal from the Camshaft Position Sensor (CMP) or Crankshaft Position Sensor (CKP). These sensors dictate engine timing. When the signal drops, even for a millisecond, the PCM loses synchronization, causing immediate stalling, misfiring, or a no-start condition.
Technical definition: The PCM detects a brief interruption or loss of synchronization in the data stream from the CMP or CKP sensors. The PCM expects a consistent, alternating signal; breaking this pattern sets the code.
Can I Drive With P1391?
Yes, But With Caution. You can drive, but it is a significant gamble. The engine stalls without warning at any speed, causing a total loss of power steering and brakes. Continuing to drive with misfires dumps unburnt fuel into the exhaust, destroying the catalytic converter and turning a $150 sensor repair into a $2,000 replacement.
Common Causes

- Faulty Crankshaft Position Sensor (CKP) (Very Common) — The crankshaft sensor is the most frequent failure point. Internal electronics develop an open circuit when hot, causing the signal to drop out until it cools down.
- Faulty Camshaft Position Sensor (CMP) (Very Common) — The camshaft sensor fails intermittently due to heat and age. On older Jeep 4.0L engines (1997-2001), this sensor is a 'pickup coil' inside the distributor, a known high-failure item.
- Use of Aftermarket Sensors (Common) — Chrysler, Jeep, and Dodge vehicles are notoriously sensitive to cam and crank sensor quality. Using non-OEM (aftermarket) parts is the leading cause of the code returning immediately after a repair.
- Damaged Wiring or Connectors (Common) — Wiring harnesses live in intense heat and vibration, leading to chafed insulation, frayed wires, and corroded connectors. A signal wire grounding out against the engine block causes intermittent faults.
- Poor Ground Connection (Common) — A corroded ground wire for the sensors or PCM introduces electrical noise, causing intermittent signal loss. Cleaning main engine-to-chassis grounds is a critical diagnostic step.
- Stretched Timing Chain or Incorrect Timing (Less Common) — If the timing chain stretches or jumps a tooth, cam and crank signals lose synchronization. The PCM detects this mismatch as a fault. This also occurs if a distributor is mis-indexed.
- Damaged Tone Wheel or Cracked Flexplate (Less Common) — Sensors read a notched tone wheel or flexplate to determine position. If this wheel is bent, missing teeth, or cracked (common on Jeep 4.0L flexplates), the sensor cannot get a clean reading. This mechanical damage perfectly mimics an electronic sensor failure.
- Failing Powertrain Control Module (PCM) (Rare) — The PCM's internal driver circuits processing sensor signals can fail, causing the computer to falsely detect a signal loss. Consider this only after exhausting all other possibilities.
Symptoms

- Engine Stalls Unexpectedly — The engine cuts out while driving, idling, or coming to a stop. This highly dangerous symptom usually occurs after the engine warms up.
- No-Start or Long Cranking Time — The engine takes much longer to start or cranks without firing. The PCM lacks the timing signals needed to initiate spark and fuel.
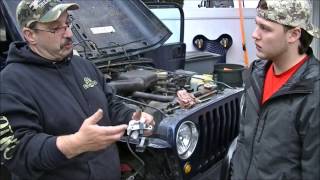
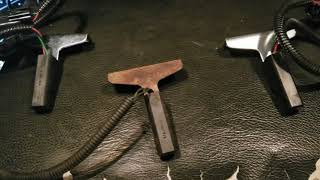
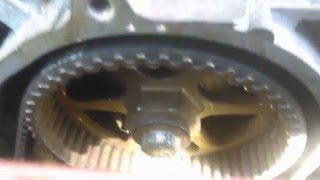
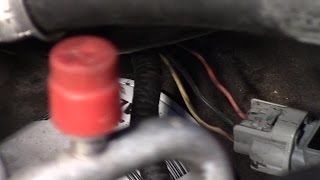
- Tachometer Drops to Zero — The RPM gauge suddenly drops to zero and bounces back while driving. 🎬 See this walkthrough on fixing P1391 for Jeep Wrangler and Cherokee. This definitively isolates the fault to the crankshaft position sensor circuit.
- Rough Idle, Misfiring, or Bucking — The engine runs poorly, shakes, or bucks under light acceleration as the PCM struggles with incorrect timing data.
- Reduced Fuel Economy — Inefficient engine timing causes a noticeable 5-15% drop in average miles per gallon (MPG).
- Check Engine Light On (also visible on scanner) — The Malfunction Indicator Lamp (MIL) illuminates. The code often appears after the second start-up cycle following a fault.
Diagnostic Flowchart

Tap your situation to follow the diagnostic path that matches what you're seeing on this code.
Common Fixes & Costs
- Replace Crankshaft Position Sensor — Parts: $50-$130, Labor: $120-$250, ~1.5 hr book time (Intermediate)
- Replace Camshaft Position Sensor — Parts: $40-$150, Labor: $80-$150, ~1 hr book time (DIY)
- Repair Damaged Wiring or Connector — Parts: $10-$50, Labor: $150-$300, ~2 hr book time (Intermediate)
- Replace Distributor Pickup Coil (Older Jeeps) — Parts: $40-$70, Labor: $100-$200, ~1.5 hr book time (Intermediate)
- Clean or Repair Main Engine Ground Connections — Parts: $5-$20, Labor: $50-$150, ~0.8 hr book time (DIY)
DIY vs Professional
- Replace Camshaft Position Sensor — Beginner: Yes.
Tools: Basic socket/wrench set. - Replace Crankshaft Position Sensor — Beginner: No.
Tools: Long extensions (24-36 inches), universal/swivel sockets, socket set. - Repair Damaged Wiring or Connector — Beginner: Maybe. Depends on the location and extent of damage.
Tools: Multimeter, wire strippers, soldering iron or quality crimp connectors, heat shrink tubing. - Replace Distributor Pickup Coil — Beginner: No.
Tools: Socket set, screwdrivers, timing light.
Used vs. New Parts: Buying Guide
When a used part is worth it: Never buy used camshaft or crankshaft position sensors. These inexpensive electronic parts fail from heat and age; a used sensor guarantees a repeat failure.
Donor-vehicle mileage cap: roughly under 20000 miles for the part to have meaningful remaining life.
Donor quality checklist:
- Electronic sensors offer no reliable external cues for quality.
- If buying a larger assembly (like a used distributor), verify the donor vehicle's mileage.
- Always match the OEM part number exactly; aftermarket equivalents cause repeat P1391 codes.
Decision logic:
- If The part is a cam or crank sensor → Buy a new OEM (Mopar) part. Cost savings from used or cheap aftermarket parts do not justify the high risk of repeat failure.
- If The part is a mechanical component like a tone wheel or flexplate → A used part from a low-mileage, non-accident vehicle is a reasonable option.
Warranty tradeoff: Used sensors carry a 30-day warranty at best. An OEM part provides a 1-year warranty and the most reliable fix.
Worst-case if a used part fails: 200-500 if a cheap sensor fails, requiring repeat labor costs plus the price of an OEM sensor.
What Happens If You Wait — Timeline
- 0-2 weeks: Check Engine Light illuminates after the second start. No noticeable symptoms, or a slight idle stumble. (MPG impact: 0-2%% · Added cost: $0)
- 2 weeks - 3 months: Symptoms become frequent. Engine has a long cranking time. Noticeable hesitation or bucking under light throttle. Stalling when coming to a stop when fully warmed up. (MPG impact: 5-10%% · Added cost: $50-150 in wasted fuel)
- 3-6 months: The vehicle is unreliable. Stalling in traffic is regular. The engine enters 'limp mode' with reduced power. Misfires begin to overheat the catalytic converter. (MPG impact: 10-15%% · Added cost: $200-400 (risk of being stranded, potential tow bill))
- 6+ months: Catastrophic failure. The engine becomes a crank-no-start. The catalytic converter substrate melts from raw fuel, leading to a major exhaust blockage. (MPG impact: 15-25%% · Added cost: $1200-3500 (catalytic converter replacement + original repair))
Cost of Not Fixing It
- Immediate: Engine stalls in traffic, causing loss of power steering and brakes. Unpredictable no-start conditions leave you stranded. (Added cost: 0)
- 0-3 Months: Fuel economy drops 5-15% due to inefficient engine timing. Increased stress on ignition components. (Added cost: 50-150 in wasted fuel)
- 3-12 Months: Catastrophic catalytic converter failure. Misfires dump raw fuel into the exhaust, superheating and melting the converter's internal structure. (Added cost: 1200-3500)
Diagnosis Steps
- Read Codes and Review Freeze Frame Data
Use an OBD-II scanner to confirm P1391. Look for related codes like P0340 (Cam Sensor), P0320 (Crank Sensor), or misfires (P0300-P0308). Freeze frame data reveals engine temperature and RPM when the fault occurred.
Tools: OBD-II Scanner (Beginner) - Check Live Data for RPM and Sync
Monitor the RPM signal while cranking with a live-data scanner. If it reads 0, the crankshaft sensor circuit is the suspect. Check the 'Cam/Crank Sync' PID; if it toggles to 'No', you have a confirmed timing or signal problem.
Tools: Advanced OBD-II Scanner (Intermediate) - Thorough Visual Inspection
Locate both sensors and follow their wiring harnesses. Look for wires rubbing against sharp metal, melted insulation near the exhaust, or green corrosion inside connectors.
Tools: Flashlight, Inspection Mirror (Beginner) - Perform a 'Wiggle Test'
With the engine idling, carefully wiggle the wiring and connectors for both sensors and the main PCM harness. If the engine stumbles or stalls, you found an intermittent open or short in the circuit.
Tools: Mechanic's Gloves (Intermediate) - Test Sensor Voltage at the Connector
Disconnect the sensor and turn the key 'ON'. Use a multimeter to verify a 5V/8V reference wire, a solid ground, and a 5V signal wire from the PCM. Missing voltage indicates a wiring or PCM issue.
Tools: Multimeter, Back-probe Pins, Service Manual (Advanced) - [PRO TIP] Test Crankshaft Sensor Resistance (Jeep 4.0L)
For 1997-2001 Jeep 4.0L engines, disconnect the crank sensor and probe terminals B and C with a multimeter set to ohms (20k). The reading must be open/infinite. Low resistance means the sensor is internally shorted.
Tools: Multimeter (Advanced) - [PRO TIP] Test Sensor Signal Output with Multimeter
Back-probe the signal and ground wires of a connected Hall-effect sensor with the key on. Slowly rotate the engine by hand. The DC voltage must switch cleanly between 5V and 0V. If it doesn't, the sensor is dead.
Tools: Multimeter, Back-probe Pins, Socket Set (Advanced) - Analyze with an Oscilloscope
Back-probe the signal wires at the PCM. A good sensor produces a sharp square wave (0V to 5V). Look for dropouts, noise, or a misshapen pattern. Comparing both signals instantly reveals synchronization loss.
Tools: Automotive Oscilloscope, Back-probe Pins (Advanced) - Inspect the Timing System and Tone Wheels
Remove engine covers to visually inspect the timing chain/belt for proper alignment and tension. Inspect the sensor tone wheels and flexplate for damage, debris, or excessive wobble.
Tools: Socket Set, Wrenches, Service Manual (Advanced) - Check Distributor Indexing (If Applicable)
On older engines with a distributor, mis-indexing causes P1391. Follow the service manual procedure to align the distributor with the engine at Top Dead Center (TDC).
Tools: Socket Set, Service Manual (Intermediate) - Check Fuel Pressure and Alternator Output
Test the alternator for excessive AC ripple (above 0.5V AC), which interferes with sensor signals. Verify fuel pressure (typically 49 PSI) to rule out fuel delivery issues mimicking a stall.
Tools: Fuel Pressure Gauge, Multimeter with AC Volts function (Advanced)
When This Code Triggers (Freeze-Frame Conditions)
- Engine Coolant Temp: 180-210°F (The fault most commonly occurs after the engine is fully warmed up and heat soaks into the failing component.)
- RPM: 1500-2500 RPM (Triggers under light load or at a steady cruise, not necessarily during hard acceleration.)
- Engine Load: 20-50% (Corresponds to steady-state driving or light acceleration when intermittent signal loss becomes apparent.)
- Vehicle Speed: 25-55 mph (Frequently sets during in-town or highway cruise conditions rather than at idle.)
Related Codes
- P0340 — Points directly to a Camshaft Position Sensor circuit fault. If paired with P1391, focus entirely on the cam sensor, its wiring, or the distributor pickup coil.
- P0320 — Indicates a fault in the ignition/distributor engine speed input circuit (Crankshaft Position Sensor). Seeing it with P1391 points strongly toward a crank sensor issue.
- P0300-P0308 — Misfire codes are a direct symptom of incorrect timing caused by the loss of a cam or crank signal. Fixing the P1391 issue almost always resolves the misfires.
- P1398 — Means 'Crankshaft Position Sensor Target Not Learned'. Sets if the PCM cannot learn the unique signature of the reluctor wheel due to excessive play or damage.
Climate & Environmental Factors
- Engine Heat / Heat Soak: Engine heat is the primary trigger. As the sensor reaches operating temperature, internal electronics expand, opening a micro-fracture that kills the signal. After cooling for 20 minutes, the circuit reconnects.
- Cold Weather: Cold weather causes wiring insulation to become brittle and crack, or moisture to freeze in a connector, causing a poor connection.
- High Humidity / Moisture: Sustained high humidity accelerates corrosion on wiring connectors and engine ground points, increasing resistance and causing intermittent signal loss.
- Altitude: Altitude does not directly cause P1391, but changes in air density affect engine load, making symptoms of a failing sensor more noticeable.
How to Talk to a Mechanic About This Code
Say this: "I have a P1391 code and the engine stalls when hot. Please use an oscilloscope to find the signal dropout rather than just replacing parts. If a sensor is needed, use only a genuine Mopar replacement."
This signals you understand the intermittent nature of the problem and the common aftermarket parts issue. It encourages the shop to perform a proper diagnosis to find the true cause, saving you money on unnecessary parts.
Avoid saying:
- 'Just fix whatever's wrong'
- 'My check engine light is on, can you look at it?'
- 'My car is stalling, I think it's the battery'
Questions to ask before authorizing the repair:
- How did you confirm the failure? Did you see the signal drop out on a scan tool or oscilloscope?
- Are you planning to use a Mopar/OEM sensor or an aftermarket brand?
- If the problem is wiring, can you describe the damage and how you plan to repair it?
- What is your warranty on this specific repair, including labor, if the P1391 code comes back?
Where to Take It: Dealer vs Independent vs Chain
- Dealer:
Best for: Vehicles still under a powertrain or emissions warranty., Complex cases where a PCM reflash or access to manufacturer-specific TSBs is needed., When you want a guaranteed OEM (Mopar) part without having to ask.
Downsides: Labor rates are $150-$250/hour., May be quicker to replace multiple components rather than perform a detailed wiring diagnosis. (Typical cost: +50% vs. baseline) - Independent Shop:
Best fit. A reputable independent shop solving domestic vehicle issues understands the critical need for OEM sensors and proper diagnosis.
Best for: Out-of-warranty Chrysler, Dodge, or Jeep vehicles., Owners who want to have a direct conversation with the technician., Getting a good balance of expertise and value.
Downsides: Quality varies greatly; you must find a shop with ASE certifications and experience with domestic vehicles., May not have access to the very latest TSBs. (Typical cost: +0% vs. baseline) - Chain Shop:
Use with caution. Acceptable if you have already diagnosed the problem yourself and confirm they will use an OEM part. AVOID for initial diagnosis of an intermittent P1391.
Best for: Simple, pre-diagnosed repairs where you specify the exact part to be used., Tire changes and oil services.
Downsides: Technician skill and diagnostic equipment vary dramatically., High pressure to upsell and a tendency to use cheaper aftermarket parts., Least likely to have the advanced tools (oscilloscope) to diagnose tricky intermittent wiring faults. (Typical cost: -10% vs. baseline)
When to Walk Away From the Repair
If the repair cost exceeds 50% of the vehicle's private-party value, reconsider the investment.
- Car worth $4000, fix is $2000: Borderline. The repair is 50% of the car's value. Get a second opinion before authorizing.
- Car worth $12000, fix is $1800: Fix it. The repair cost is well below the threshold and is a reasonable investment.
- Car worth $2500, fix is $1500: Walk away. The repair cost is 60% of the car's value. It is not a sound financial decision.
What Scan Tool You Need for This Code
Minimum: A scanner that reads and graphs live data, specifically Engine RPM (CKP signal) and Cam/Crank Sync status.
A $20 code reader only confirms the code. You need live data to watch the crank signal drop to zero during a stall to avoid guessing and replacing good parts.
Budget: BlueDriver Pro Scan Tool (~$90) — Connects to your smartphone via Bluetooth and graphs live data, including RPM. This is critical for watching the crank signal erratically drop to zero while driving.
Mid-range: Foxwell NT510 Elite for Chrysler (~$180) — Provides access to manufacturer-specific PIDs for Chrysler/Jeep/Dodge, including a dedicated 'Cam/Crank in Sync' status. Offers detailed live data and system tests.
Professional: Autel MaxiCOM MK808S (~$500) — A professional-level tablet scanner providing full bidirectional control and extensive live data graphing to definitively distinguish between a sensor, wiring, or mechanical timing problem.
Rent vs buy: Buy. The fault is intermittent, so you must drive with the scanner connected to capture the event. A parts store rental is not practical for this.
How to Clear the Code After You Fix It
- Reconnect the battery if disconnected for the repair.
- Use an OBD-II scan tool to erase the P1391 trouble code from the PCM's memory.
- Perform the specific drive cycle for the vehicle to allow readiness monitors to complete.
Drive cycle (~20 minutes): A general Chrysler drive cycle includes: 1. Cold start and idle for 5 minutes. 2. Drive at a steady 40-60 mph for 8 minutes. 3. Stop and idle for 3 minutes. 4. Drive above 20 mph for 2 minutes. 5. Turn the engine off and let it sit for 10 minutes.
Readiness monitors affected: Catalyst (CAT) monitor, Oxygen (O2) Sensor monitor, Evaporative (EVAP) System monitor
Before emissions retest: drive at least 50 miles to fully set monitors.
Watch out for:
- Disconnecting the battery clears the code but resets all readiness monitors to 'Not Ready', causing an immediate emissions test failure.
- The code returns within two drive cycles if the root cause of the intermittent signal loss remains unfixed.
- Fuel tank levels outside the 15% to 85% range prevent the EVAP monitor from running.
Will This Fail Emissions / State Inspection?
Yes — this code typically fails an OBD-II emissions inspection.
- California: An illuminated Check Engine Light is an automatic failure. After repair, all readiness monitors must be 'Complete'. Older vehicles (1996-2000) allow one 'Incomplete' monitor.
- New York: Fails the mandatory OBD-II inspection if the Check Engine Light is on. You must complete the drive cycle to set readiness monitors before a re-test.
- Texas: In the 17 counties requiring emissions testing, an illuminated Check Engine Light results in an automatic failure. Registration renewal is blocked until repaired.
Most Commonly Affected Vehicles
- Jeep Cherokee (XJ) (1996-2001) — Extremely common on the 4.0L inline-6. Crank sensor wiring is vulnerable to exhaust heat. The cam sensor is inside the distributor.
- Jeep Grand Cherokee (WJ, ZJ) (1996-2004) — Affects 4.0L inline-6 and V8 engines (4.7L, 5.2L, 5.9L). The 4.7L V8 crank sensor is on the right side of the block; the 4.0L is on the bell housing.
- Jeep Wrangler (TJ) (1997-2006) — The 4.0L engine frequently experiences this code. The cam sensor (pickup coil) inside the distributor is a common failure point.
- Dodge Ram 1500 (1996-2002) — Common on 5.2L and 5.9L Magnum V8 engines. Wiring harness issues and aftermarket sensor incompatibility are frequent complaints.
- Dodge Dakota (1997-2004) — Reported across 2.5L, 3.9L, and 5.2L engines. Check for corroded grounds and wiring damage near the PCM connectors.
- Chrysler 300M / LHS / Concorde (1999-2004) — Known to occur on the 3.5L engine. Issues range from a failed cam sensor to a bent tone wheel on the cam gear following a timing belt service.
- Dodge/Chrysler Minivans (Caravan, Town & Country) (1998-2007) — Affects 3.3L and 3.8L V6 engines. Cracked flexplates causing crank signal issues are a known mechanical cause.
- Volkswagen Various (1999-2015) — P1391 specifically means 'Camshaft Position Sensor Bank 2: Short to Ground,' pointing directly to a wiring or sensor fault on one side of the engine.
- Chevrolet Spark (2013-2015) — Indicates an intermittent signal from the cam or crank sensors, similar to the Chrysler definition.
Manufacturer-Specific Notes
- Chrysler/Dodge/Jeep: These vehicles are notoriously sensitive to aftermarket sensors. Using genuine Mopar parts is mandatory for a lasting repair. Check for Technical Service Bulletins (TSBs) regarding PCM software updates.
- Ford/Lincoln/Mazda (Diesel): On Ford diesel engines (e.g., 7.3L Power Stroke), P1391 means 'Glow Plug Circuit Low Input (Bank #1)'. This is a completely different problem related to cold starts.
- General Motors/Honda/Acura: P1391 refers to a 'Wheel Speed Sensor G-Sensor Circuit Performance' issue related to the ABS and stability control systems, entirely unrelated to engine timing.
- Volkswagen/Audi: P1391 is highly specific: 'Camshaft Position Sensor (G163) Bank 2: Short to Ground'. This eliminates guesswork, pointing directly to Bank 2.
Real Owner Stories
2000 Jeep Cherokee 4.0L with 175k miles – The Endless Parts Cannon
Owner fought an intermittent spark issue with P1391, P0340, and ignition coil codes for a year. Symptoms included hard starts and a 50/50 chance of the engine running terribly.
What they tried:
- Replaced cam synchronizer/oil pump drive with a Mopar part.
- Replaced cam sensor (NAPA, then Mopar).
- Replaced crank sensor with a Mopar part.
- Checked wiring from both sensors to the PCM with a multimeter.
Outcome: After replacing nearly every related part, the problem persisted. The owner suspected a failing PCM or a hidden wiring short undetectable with a simple multimeter.
Lesson: Even with quality OEM parts, a persistent P1391 points to a difficult-to-find intermittent wiring short or a failing PCM. An oscilloscope is necessary to see the signal dropout in real-time.
1998 Dodge Ram 5.9L – The Misleading Aftermarket Part
Truck developed a rough idle and a P1391 code after replacing head gaskets.
What they tried:
- Replaced the camshaft position sensor, cap, rotor, plugs, and wires.
- Replaced the crankshaft position sensor with an aftermarket part from a local auto parts store. The problem remained.
- Bought a genuine Mopar crankshaft position sensor from the dealer.
Outcome: Visually comparing the Mopar sensor to the aftermarket one revealed a physical difference in the sensor's tip. Installing the Mopar sensor instantly resolved the rough idle and the code.
Lesson: On Chrysler/Dodge/Jeep vehicles, aftermarket sensors are a notorious cause of repeat failures. Always use OEM (Mopar) sensors to avoid diagnostic headaches.
1999 Chrysler 300M 3.5L – The Mechanical Imposter
Vehicle had a P1391 code after a DIY timing belt replacement that resulted in bent valves and a head rebuild.
What they tried:
- Suspected the camshaft position sensor.
- Inspected the timing components closely before replacing parts.
- Discovered the tone wheel on the cam gear was bent.
Outcome: The tone wheel was damaged during the initial failed timing belt attempt. The bent wheel produced an erratic signal. Replacing the cam gear fixed the issue.
Lesson: If P1391 appears immediately after major engine repair, suspect mechanical damage. A bent tone wheel perfectly mimics a failed electronic sensor.
2000 Dodge Dakota 4.7L - The Simple Fix
Truck had a crank-no-start condition and code P1391. Owner spent days troubleshooting.
What they tried:
- Replaced the crankshaft position sensor, but the no-start continued.
- Physically checked the camshaft position sensor.
Outcome: The camshaft position sensor was extremely loose, with the retaining bolt backed almost all the way out. Tightening a new sensor down properly fixed the truck immediately.
Lesson: Always start with a thorough visual inspection. Vibration causes bolts to back out, leading to a poor signal and a frustrating, but simple, problem.
How to Prevent This Code From Triggering
- Install Heat Shielding on Sensor Wiring (Once, especially for Jeep 4.0L) — Install high-temperature heat shield sleeves on crankshaft sensor wiring routed near the exhaust manifold to prevent insulation meltdown and shorts.
- Use Only OEM (Mopar) Cam/Crank Sensors (Every time a sensor is replaced) — Chrysler/Dodge/Jeep PCMs are highly sensitive to signal quality. Aftermarket sensors have slight differences in internal resistance that the PCM flags as a fault. Mopar parts prevent this incompatibility.
- Periodically Clean Key Engine Ground Points (Every 30,000 miles or 2 years) — Sensors rely on a clean ground path. Corrosion on ground straps introduces electrical noise that causes intermittent signal loss. Cleaning these grounds is a cheap, effective preventative measure.
- Apply Dielectric Grease to Sensor Connectors (When replacing a sensor or inspecting wiring) — Applying dielectric grease inside the sensor connector seals it from moisture, preventing pin corrosion and signal dropouts caused by water intrusion.
Frequently Asked Questions
Is the problem my cam sensor or my crank sensor?
It can be either. A faulty crank sensor typically causes stalling, no-starts, and a dead tachometer, while a faulty cam sensor causes rough idling and misfires. Check for companion codes (P0340 for cam, P0320 for crank) or test the circuits with an oscilloscope to be sure.
Why does my car only stall when it gets hot?
As the cam or crank sensor heats up, its internal circuits expand, causing a temporary open circuit that kills the signal. Once the sensor cools down, the connection is restored and the engine restarts. This heat-soak failure is the most common cause of P1391.
I replaced the sensor but the P1391 code came back. What now?
First, verify you used a genuine OEM (Mopar) sensor, as aftermarket parts frequently cause immediate repeat failures. If the sensor is OEM, meticulously inspect the wiring harness for hidden damage and clean all engine ground points. Finally, verify the timing chain hasn't stretched or jumped a tooth.
Can a bad battery or alternator cause a P1391 code?
Yes. The PCM and sensors require stable voltage to operate correctly. A failing battery or an alternator creating excessive electrical noise (AC ripple) interferes with sensitive cam and crank signals, triggering the code.
What is a 'tone wheel' and could it be the problem?
A tone wheel is a notched metal ring that spins past the sensor to measure engine speed and position. If the wheel is bent, missing teeth, or covered in debris, the sensor cannot read it correctly. This damage often occurs accidentally during transmission or timing belt replacements.
What are the most common misdiagnoses for P1391?
The most common mistake is repeatedly installing cheap aftermarket sensors that are faulty out of the box. Another pitfall is replacing the crank sensor when the actual fault is the cam sensor pickup coil inside the distributor on older Jeeps. Mechanics also frequently overlook stretched timing chains or cracked flexplates.
My Jeep has P1391 but runs perfectly fine. What should I do?
The signal loss is sometimes so brief it doesn't cause noticeable symptoms, often appearing consistently after the second start-up cycle. However, the underlying failing sensor or frayed wire will inevitably worsen. Diagnose and fix it immediately to avoid a dangerous stalling situation in traffic.
How do I clear the P1391 code?
Clear the code using an OBD-II scanner. However, if the intermittent fault remains, the code returns within one or two driving cycles. Disconnecting the battery temporarily resets the PCM but does not fix the root cause.
Key Takeaways
- P1391 on Chrysler, Dodge, and Jeep vehicles almost always indicates a failing camshaft or crankshaft position sensor, or a degraded wiring harness.
- An immediate safety risk exists: the engine stalls without warning at any speed, causing a total loss of power steering and power brakes.
- Never use aftermarket sensors for this repair; install only genuine OEM (Mopar) sensors costing $50-$130 to prevent the code from returning immediately.
- Always inspect the flexplate and tone wheels for physical damage before replacing the PCM, as a cracked $50 flexplate perfectly mimics a $500 computer failure.
- Use a live-data scanner or oscilloscope to monitor the 'Cam/Crank Sync' PID; a toggle from 'Yes' to 'No' definitively proves signal loss.
Helpful Videos


The information in this article is provided for general reference and educational purposes only. Vehicle specifications, procedures, and part compatibility can vary by production date, trim level, and region. Always consult your vehicle's factory service manual and verify part numbers before purchasing or performing repairs. Safety-critical components such as airbags, seat belts, and braking systems should be installed by a qualified professional.
- 🎬 Helpful Videos
- What Does P1391 Mean?
- Can I Drive With P1391?
- Common Causes
- Symptoms
- Diagnostic Flowchart
- Common Fixes & Costs
- DIY vs Professional
- Used vs. New Parts: Buying Guide
- What Happens If You Wait — Timeline
- Cost of Not Fixing It
- Diagnosis Steps
- When This Code Triggers (Freeze-Frame Conditions)
- Related Codes
- Climate & Environmental Factors
- How to Talk to a Mechanic About This Code
- Where to Take It: Dealer vs Independent vs Chain
- When to Walk Away From the Repair
- What Scan Tool You Need for This Code
- How to Clear the Code After You Fix It
- Will This Fail Emissions / State Inspection?
- Most Commonly Affected Vehicles
- Manufacturer-Specific Notes
- Real Owner Stories
- 2000 Jeep Cherokee 4.0L with 175k miles – The Endless Parts Cannon
- 1998 Dodge Ram 5.9L – The Misleading Aftermarket Part
- 1999 Chrysler 300M 3.5L – The Mechanical Imposter
- 2000 Dodge Dakota 4.7L - The Simple Fix
- How to Prevent This Code From Triggering
- Frequently Asked Questions
- Is the problem my cam sensor or my crank sensor?
- Why does my car only stall when it gets hot?
- I replaced the sensor but the P1391 code came back. What now?
- Can a bad battery or alternator cause a P1391 code?
- What is a 'tone wheel' and could it be the problem?
- What are the most common misdiagnoses for P1391?
- My Jeep has P1391 but runs perfectly fine. What should I do?
- How do I clear the P1391 code?
- Key Takeaways
- 🎟️ Get 5% Off