

P1289 on 2011-2019 Ford Explorer 3.5L V6: CHT Sensor Failure Causes and Fixes
This code almost always means the Cylinder Head Temperature (CHT) sensor has failed. On the 3.5L V6, this sensor is buried under the intake manifold, making replacement a labor-intensive job. Expect a shop repair to cost between $300 and $550, mostly in labor.
- P1289 on your Explorer almost certainly means the Cylinder Head Temperature (CHT) sensor or its wiring has failed.
- Symptoms are alarming but are part of a fail-safe mode: you'll see an overheat warning on a cold engine, the temperature gauge won't work, the A/C will be disabled, and the cooling fans will run constantly.
- The repair is labor-intensive because the sensor is located under the intake manifold. This is not a simple DIY fix for most owners.
- When the sensor is replaced, the intake manifold gaskets must also be replaced to prevent future leaks.
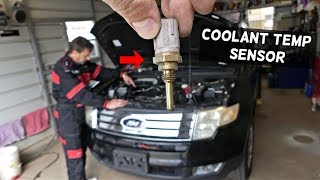
- Do not confuse the CHT sensor with an Engine Coolant Temperature (ECT) sensor; they are different parts.
What's Unique About the 2011-2019 Ford Explorer

On the Ford Explorer with the 3.5L V6 engine, the P1289 code is a well-documented issue. The primary challenge isn't the part itself, which is relatively inexpensive, but its location. The CHT sensor is positioned deep in the engine valley, underneath the upper and lower intake manifolds. This design choice turns a simple sensor swap into a multi-hour job requiring significant disassembly, which is why most of the repair cost is labor.
Symptoms You May Notice
- Check Engine Light is on.
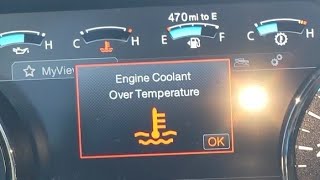
- "Engine Coolant Overtemperature" message on the dashboard, even when the engine is cold.
- Temperature gauge reads cold or does not move at all.
- Cooling fans run constantly at high speed.
- Air conditioning (A/C) does not work.
- Reduced engine power or 'limp mode'.
- Poor fuel economy.
- Difficulty starting the engine or extended cranking time.
- Replacing the Engine Coolant Temperature (ECT) sensor. The Explorer uses a CHT sensor for its primary temperature reading, not a traditional ECT sensor. Replacing the wrong sensor will not fix the issue.
Most Likely Causes

- Faulty Cylinder Head Temperature (CHT) Sensor 🔴 High Probability The sensor is a common failure point due to its electronic nature and exposure to high heat cycles within the engine valley. The internal electronics fail, creating an open circuit.
How to confirm: With a scan tool, observe the CHT sensor data with the engine cold. If it shows an illogical value (like -40°F) or a very high temperature, the sensor is bad. The voltage can also be tested; a reading over 4.6V points to a failed sensor or open circuit. Resistance across the sensor's pins should be ~37 kΩ at 68°F (20°C); an infinite reading (OL) confirms an internal open circuit.
Typical fix: Replace the CHT sensor. This requires removing the upper and lower intake manifolds to gain access. It is highly recommended to replace the intake manifold gaskets at the same time.
Est. part cost: $20-$40 - Damaged Wiring or Connector 🟡 Medium Probability The wiring harness runs through the hot engine valley and can become brittle or damaged over time. Rodents are also known to chew on wires in this area, causing an open circuit.
How to confirm: After accessing the sensor, visually inspect the wiring harness and connector for any signs of melting, corrosion, fraying, or chew marks. Perform a 'wiggle test' on the harness while monitoring the sensor voltage to see if it changes. With the sensor unplugged and ignition on, one pin of the connector should have a 5-volt reference from the PCM, and the other should be a ground.
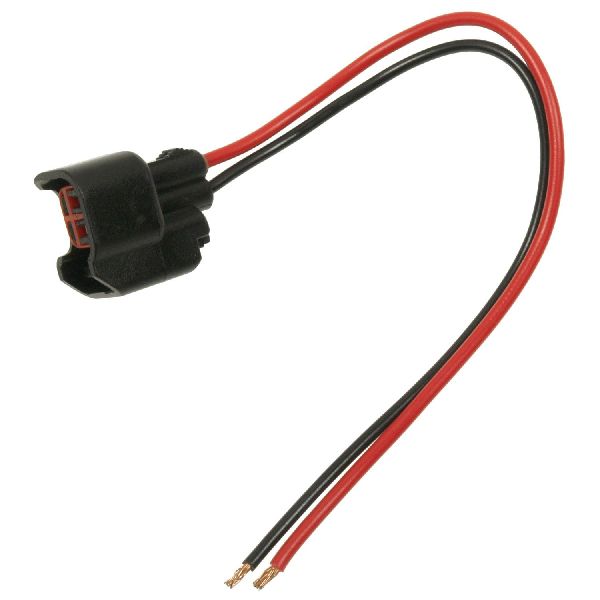
Typical fix: Repair the damaged section of the wiring harness or replace the pigtail connector. The Motorcraft pigtail is often part number WPT-1120 or WPT-338.
Est. part cost: $15-$30 for a pigtail connector
Rare But Worth Checking
- Faulty Powertrain Control Module (PCM): This is extremely rare. Before condemning the PCM, all other possibilities, including the sensor and its entire wiring circuit, must be exhaustively tested and ruled out. A faulty PCM is the cause in less than 1% of cases.
Diagnosis Steps

- Connect an OBD-II scanner to confirm the P1289 code is present.
- View live data from the CHT sensor. If the engine is cold and the scanner shows a reading of -40°F or an extremely high temperature, the sensor or its circuit is faulty.
- If you have access, turn the ignition to 'ON' (engine off) and measure the voltage at the CHT sensor connector. A reading above 4.6V confirms the 'Circuit High' condition.
- Visually inspect the wiring harness leading to the CHT sensor for any obvious damage, such as melting, chafing, or signs of rodent activity. This is difficult as the sensor is under the intake manifold.
- If the wiring appears intact and voltage tests point to a sensor failure, the most likely cause is a bad CHT sensor.
- Due to the location, the next step is to remove the upper and lower intake manifolds to access and replace the sensor.
- While the intake is off, perform a thorough inspection of the wiring and connector. Repair if necessary.
- Replace the CHT sensor and the intake manifold gaskets.
- Reassemble all components, clear the diagnostic trouble codes, and perform a test drive to ensure the issue is resolved.
Parts You'll Likely Need

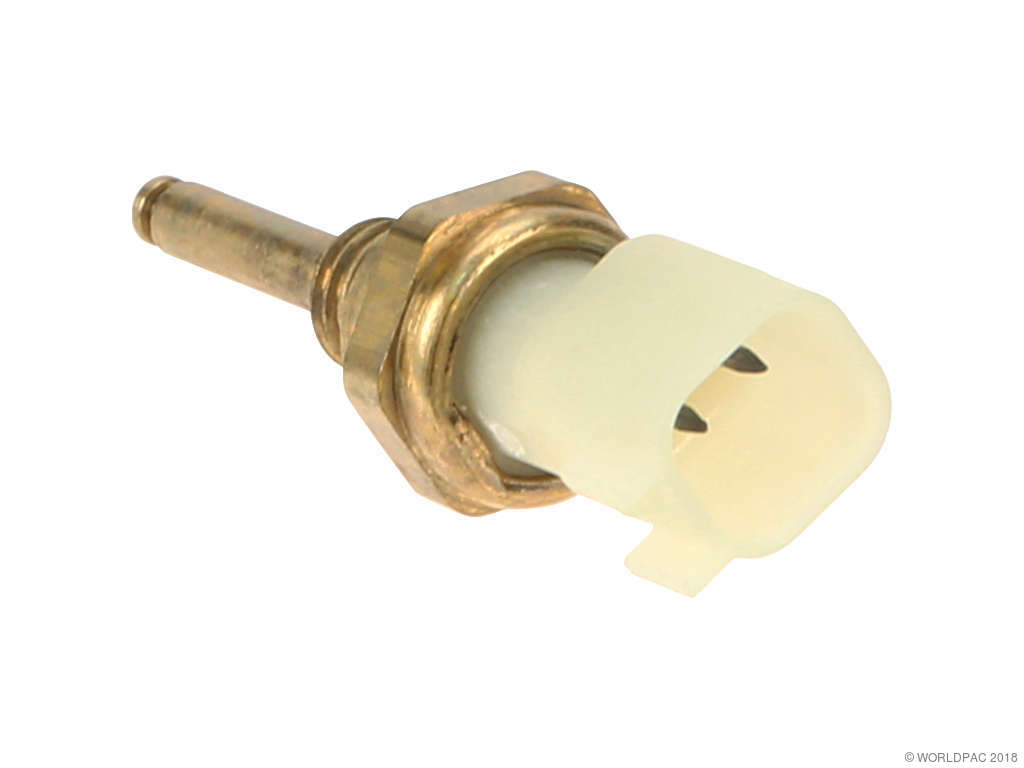
- Cylinder Head Temperature (CHT) Sensor
(OEM #Motorcraft 9L8Z-6G004-F (replaces 9L8Z-6G004-A, 9L8Z-6G004-D))— This is the most common failure point for code P1289. The sensor's internal electronics fail, causing an open circuit.
Trusted brands: Motorcraft, Standard Motor Products (SMP), Dorman
OEM price range: $20-$40
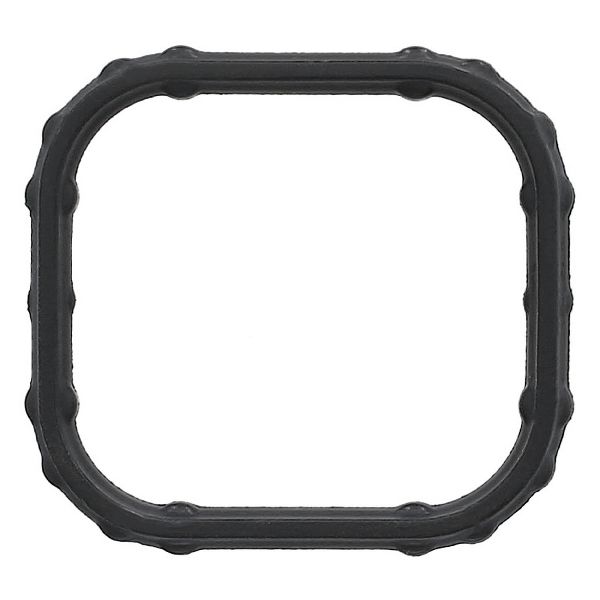
Aftermarket price range: $15-$35 - Upper and Lower Intake Manifold Gaskets — These gaskets must be replaced whenever the intake manifold is removed to prevent vacuum or coolant leaks upon reassembly.
Trusted brands: Motorcraft, Fel-Pro, Mahle
OEM price range: $30-$60
Aftermarket price range: $20-$40 - CHT Sensor Connector Pigtail
(OEM #Motorcraft WPT-1120 / WPT-338)— Needed if the original connector is brittle, melted, or damaged, which is a common secondary failure point due to engine heat.
Trusted brands: Motorcraft, Dorman, Michigan Motorsports
OEM price range: $25-$40
Aftermarket price range: $15-$25
Related Codes That Often Appear With This One
- P1299 — P1299 ('Cylinder Head Over-Temperature Protection Active') is a direct result of the condition causing P1289. The PCM logs P1289 when it detects the sensor fault, and then logs P1299 when it activates the engine protection/limp mode.
Technical Service Bulletins (TSBs) & Recalls
- TSB 19-2049: While this TSB is officially for the 2019 F-150/Mustang 5.0L engine, it is highly relevant as it addresses the exact same P1289 code. It confirms the cause is a faulty CHT sensor and the recommended fix is to replace the sensor and inspect wiring. This shows a known pattern of failure for this sensor type across Ford engines.
- TSB 16-0163: This manufacturer bulletin notes that P1289 and P1299 may appear alongside a wide range of other codes, including misfire and throttle body codes, and instructs technicians to follow specific service steps to correct the condition.
Platform-Specific Known Issues
- A user on f150forum.com with a 2015 5.0L (which shares the CHT strategy) experienced the exact symptoms: an overheat warning appeared, but the temperature gauge dropped to cold, and OBD-II monitoring showed actual temps were normal. Clearing the P1289 code temporarily restored gauge function, confirming a sensor circuit fault. 🎬 See how this sensor causes sudden overheating warnings on F-150s.
- A post on Ford Truck Enthusiasts Forums for an E-150 with P1289 highlights how a faulty CHT sensor can cause severe hard-starting issues, taking 10 or more attempts to get the engine to idle, because the PCM is receiving incorrect temperature data for fuel calculations.
Mechanic-Grade Diagnostic Values
- CHT Sensor Resistance vs. Temperature — expected: ~37 kΩ @ 68°F (20°C); ~9.5 kΩ @ 122°F (50°C); ~2.4 kΩ @ 176°F (80°C); ~1.1 kΩ @ 212°F (100°C).. Failure: An infinite resistance reading (OL - Open Loop) at any temperature indicates the sensor's internal circuit is broken and it needs replacement.
- CHT Sensor Signal Voltage (at PCM or connector) — expected: Voltage decreases as temperature increases. Normal operating temp (~195-210°F) should be between 1.6V and 2.1V. With the sensor disconnected (Key On, Engine Off), the signal wire should read ~5V (reference voltage).. Failure: A voltage reading greater than 4.6V with the sensor connected indicates an open circuit, which triggers code P1289.
- CHT Sensor Ground Wire Voltage (at connector) — expected: With the key on, the ground wire at the connector should have less than 100mV (0.1V) when measured against a known good chassis ground.. Failure: Voltage significantly higher than 100mV indicates a poor ground connection, which can cause incorrect sensor readings.
Scan Tool Commands That Help
- Ford IDS / FORScan: KOEO (Key On, Engine Off) and KOER (Key On, Engine Running) Self-Tests — These built-in PCM self-tests can flag circuit faults like P1289 for CHT circuit high. Running these tests can help confirm if the fault is currently active before starting major disassembly.
- High-end OBD-II Scanner (e.g., Autel, Snap-on): Live Data Graphing - CHT Parameter — Use this to watch the CHT sensor reading from a cold start. A faulty sensor will often show an immediate, vertical jump to a maximum or minimum illogical temperature (-40°F or 250°F+), while a genuine overheat will show a plausible, albeit rapid, temperature climb.
Wiring & Ground Locations

- CHT Sensor Connector — On the 3.5L V6, the sensor is located in the engine valley between the cylinder heads, under the lower intake manifold.. This is the primary connection point. It can be damaged by heat or rodents, causing an open circuit and triggering P1289.
- G104 / G105 — G104 is on the right side of the engine compartment. G105 is on the top right side of the engine.. These are primary engine and PCM ground points. A corroded or loose connection at these locations can cause erratic voltage and faulty signals for various sensors, including the CHT sensor, leading to incorrect readings and fault codes.
- PCM Connector C175B / C1551B — The Powertrain Control Module (PCM) is located at the center rear of the engine compartment.. The CHT sensor wires terminate here. For a 2013 Explorer, the CHT signal is on Pin 51 (VT-BN wire) and the Signal Return (ground) is on Pin 52 (GY-YE wire) of connector C175B. This is the final test point to condemn the PCM vs. a wiring issue.
Real Owner Repair Stories
- F150online Forums user (2010 Ford F-150 5.4L) — P1289 code present.
❌ Tried (didn't work) Replaced the CHT sensor.
✅ What actually fixed it The P1289 code returned immediately after sensor replacement. Upon removing the intake manifold again, the owner discovered that a squirrel had chewed through a large chunk of the CHT sensor's pigtail harness, causing the open circuit. Repairing the harness resolved the code. - YouTube video by 'Matthew Jo' (2015 Ford F-150 with 55,000 miles) — Hard starting, "Engine Coolant Overtemperature" message, and code P1289.
✅ What actually fixed it Using a light and camera, the mechanic discovered that a rodent had chewed the CHT sensor wires bare in the engine valley. The fix was to remove the intake manifold and repair the damaged wiring harness, not replace the sensor itself. - Ford Edge Forum user (Ford Edge 3.5L) — P1289 code, overheating message on dash.
❌ Tried (didn't work) Took vehicle to a dealership, which misdiagnosed it as a camshaft sensor issue and quoted $1200.
✅ What actually fixed it The owner retrieved the vehicle from the dealership after confirming the technician's notes actually said "CHT sensor". They took it to an independent mechanic who replaced the correct CHT sensor for a much lower price, which fixed the problem. This highlights the importance of confirming the diagnosis.
Documented NHTSA Reports
- NHTSA ODI #10484858 describes a situation where a vehicle exhibited a P1289 code for Cylinder Head Temp Sensor High Input alongside P0303 (misfire) and P0353 (ignition coil circuit) codes. The owner performed a Key-On/Engine-Off (KOEO) check with an OBDII scanner to begin the diagnostic process.
Diagnostic Flowchart
Other Known Issues on This Vehicle
Issues unrelated to this code that are worth knowing about as an owner of this generation:
- Internal Water Pump Failure 🔴 High — Common after 80,000-120,000 miles. Failure can cause coolant to mix with engine oil, leading to catastrophic engine damage if not caught immediately.
- Power Transfer Unit (PTU) Overheating/Failure 🔴 High — Common on AWD models. The PTU is located near the hot exhaust, causing its 'lifetime' fluid to break down, leading to bearing/gear failure. Symptoms include a burning gear oil smell and whining/grinding noises.
- Cracked Exhaust Manifold / Broken Studs 🟠 Medium — Often presents as a ticking noise from the engine bay, especially when cold, which may disappear as the engine warms up. This was part of a NHTSA investigation for exhaust fumes entering the cabin.
- A-Pillar Trim Detachment / Rattle 🟡 Low — Common on 2011-2013 models. The exterior trim piece can become loose and fly off at highway speeds. Interior A-pillar trim can also rattle due to vibrating clips.
Used vs. New Parts: Buying Guide for This Vehicle
When a used part is the smart pick: For this repair, using used parts is generally not recommended. The primary failure is a small, relatively inexpensive electronic sensor that is subjected to high heat cycles. The main cost of the repair is the significant labor to access it. Therefore, saving a few dollars on a used sensor with unknown remaining life is a poor risk.
What to inspect on the donor part:
- Not applicable, as a used CHT sensor is not advised.
OEM-only on this vehicle (don't cheap out):
- Cylinder Head Temperature (CHT) Sensor: Given the high labor cost to access this part, using a genuine Motorcraft sensor is strongly recommended to ensure reliability and avoid a repeat repair.
- Intake Manifold Gaskets: These are single-use items and must always be replaced with new ones to prevent vacuum and coolant leaks.
Aftermarket brands forum-validated for this vehicle:
- Standard Motor Products (SMP)
Brands owners have reported issues with on this vehicle:
- No specific brands are consistently cited as problematic, but ultra-cheap, unbranded sensors from online marketplaces carry a higher risk of premature failure.
Real Owner Stories
Aggregated from forums and TSBs cited above. Mileages and costs reflect what owners reported in those sources.
2015 Ford Explorer 3.5L
Symptoms: The owner reported the classic 'engine coolant overtemperature' message appearing on the dashboard even when the engine was cold.
What fixed it: The community confirmed the likely cause was a faulty CHT sensor or its associated wiring.
Source hint: 2carpros.com: 'Code P1289 - 2015 ford explorer'
2015 Ford F-150 5.0L V8
Symptoms: An 'Engine Coolant Over Temp' alarm appeared, but the temperature gauge simultaneously dropped to cold. Monitoring the live data showed that the actual engine temperatures were normal.
What fixed it: The owner confirmed the CHT sensor was the cause. Clearing the codes after the repair was essential to restore normal gauge function.
Source hint: f150forum.com: '2015 F150 5.0l V8 P1299 and P1289 error Cylinder Head Temp Sensor Fix'
Ford E-150
Symptoms: The vehicle experienced severe hard-starting issues, requiring 10 or more attempts to get the engine to finally idle.
What fixed it: The problem was traced to a faulty CHT sensor providing incorrect temperature data to the computer, which was disrupting the fuel calculations needed for starting.
Source hint: Ford Truck Enthusiasts Forums
Ford F-150
Symptoms: The P1289 code returned shortly after the CHT sensor was replaced.
What fixed it: The new sensor did not solve the problem, leading to the conclusion that the wiring harness itself was the likely culprit and required further troubleshooting.
Source hint: reddit.com/r/MechanicAdvice: 'Looking For A Little Advice (P1289)'
Related OBD-II Codes
Frequently Asked Questions
I have a P1289 code and an 'Engine Coolant Overtemperature' warning, but my engine is completely cold. What's happening?
Why did my air conditioning stop working and the cooling fans turn on high at the same time I got the P1289 check engine light?
Is it true that the intake manifold has to be removed to replace the CHT sensor on my 3.5L Explorer?
My Explorer is very hard to start and has a P1289 code. Are these two issues related?
I replaced the CHT sensor but the P1289 code came back. What should I check next?
I need to replace the CHT sensor connector. Does the context mention a specific part number?
Helpful Videos
Used OEM Parts in Stock


New Aftermarket Parts Available


The information in this article is provided for general reference and educational purposes only. Vehicle specifications, procedures, and part compatibility can vary by production date, trim level, and region. Always consult your vehicle's factory service manual and verify part numbers before purchasing or performing repairs. Safety-critical components such as airbags, seat belts, and braking systems should be installed by a qualified professional.
- Ford Explorer:
- 🎬 Helpful Videos
- 🛍️ Shop This Part
- What's Unique About the 2011-2019 Ford Explorer
- Symptoms You May Notice
- Most Likely Causes
- Rare But Worth Checking
- Diagnosis Steps
- Parts You'll Likely Need
- Related Codes That Often Appear With This One
- Technical Service Bulletins (TSBs) & Recalls
- Platform-Specific Known Issues
- Mechanic-Grade Diagnostic Values
- Scan Tool Commands That Help
- Wiring & Ground Locations
- Real Owner Repair Stories
- Documented NHTSA Reports
- Diagnostic Flowchart
- Other Known Issues on This Vehicle
- Used vs. New Parts: Buying Guide for This Vehicle
- Real Owner Stories
- 2015 Ford Explorer 3.5L
- 2015 Ford F-150 5.0L V8
- Ford E-150
- Ford F-150
- Related OBD-II Codes
- Frequently Asked Questions
- 🎟️ Get 5% Off