

OBD-II Code P1167: Air/Fuel Ratio Sensor Heater Circuit Malfunction
The Ultimate Guide to Diagnosing and Fixing P1167
- On Honda and Acura vehicles, P1167 indicates a failure in the primary Air/Fuel Ratio Sensor (Bank 1, Sensor 1) heater circuit, requiring a resistance test before replacement.
- Check the 15A or 20A A/F heater fuse and perform a voltage drop test on the engine ground strap before spending $150+ on a new sensor.
- Install only exact-fit OEM-equivalent Denso or NTK sensors; generic or 'universal' Bosch sensors frequently fail to clear the P1167 code on Hondas.
- Verify your vehicle's specific P1167 definition, as it means an A/F heater fault on Hondas, a Mass Air Flow (MAF) sensor error on Volkswagens, and a fuel trim limit on Hyundais.
- Fixing P1167 within 1 month prevents the engine's rich-running default mode from destroying the catalytic converter, avoiding a secondary $1,200 to $2,500 repair bill.
What Does P1167 Mean?

P1167 is a manufacturer-specific code that, for Honda and Acura, indicates the Powertrain Control Module (PCM) detected a malfunction in the heater circuit of the primary Air/Fuel Ratio (A/F) Sensor. This sensor (Bank 1, Sensor 1) must reach an operating temperature of 1,200°F to provide accurate readings. A built-in heating element gets it to this temperature quickly during cold starts. When the PCM commands the heater on, it monitors the circuit's current and resistance. If the sensor's resistance fails to drop to a specific level in time, or the current draw falls out of range, the PCM flags a fault and triggers P1167.
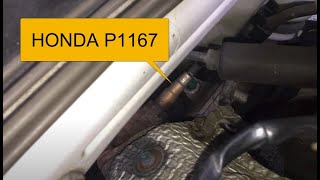
🎬 Watch: How to diagnose and fix the P1167 heater malfunction.Technical definition: Air/Fuel Ratio (A/F) Sensor (Bank 1, Sensor 1) Heater System Malfunction. The PCM monitors the internal resistance and current draw of the A/F sensor's heating element. The code sets when the sensor's resistance does not fall to a specified value within a set period after the heater is commanded ON, or if the current draw falls outside the expected range.
Can I Drive With P1167?
Yes, But With Caution. You can drive temporarily, but doing so reduces fuel economy and increases emissions. Continuing to drive with P1167 forces the engine into a rich-running default mode. The most serious risk is long-term damage to the catalytic converter from this incorrect air-fuel mixture. Replacing a catalytic converter costs between $1,200 and $2,500. Address the issue within a few hundred miles to prevent this costly secondary failure.
Common Causes

- Defective Air/Fuel Ratio Sensor (Sensor 1) (Very Common) — The internal heating element burns out over time from extreme exhaust temperatures, making it the primary cause of P1167.
- Blown Fuse or Faulty A/F Heater Relay (Common) — A short circuit blows the dedicated heater fuse, or the control relay fails, cutting power to the element. Always check these before replacing the sensor.
- Poor ECU or Chassis Ground Connection (Common) — A corroded or broken ground strap on the engine block introduces resistance. The PCM misinterprets this voltage drop as a faulty heater, causing the code to return after sensor replacement.
- Damaged Wiring or Corroded Connector (Common) — Exposed to heat and road debris, wires melt on the exhaust, chafe against the chassis, or connector pins corrode, creating an open or short circuit.
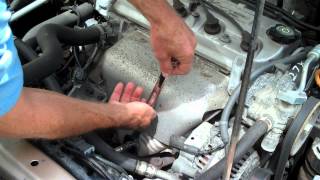
- Using an Incorrect (Non-OEM) Sensor (Less Common) — Honda and Acura ULEV models require precise A/F sensor resistance. Installing a generic 'universal' sensor guarantees the code returns immediately. 🎬 See this walkthrough on replacing the sensor with the correct part.
- Exhaust Leak (Less Common) — A cracked exhaust manifold or leaking gasket introduces ambient air into the exhaust stream, skewing readings and triggering a heater performance code.
- Contamination from Engine Fluids (Oil/Coolant) (Less Common) — Oil or coolant leaking from a valve cover gasket drips onto the sensor, fouling the element and destroying the internal heater.
- Rich Running Condition (Fuel System Issue) (Rare) — On Hyundai/Kia vehicles, a leaking fuel injector or faulty pressure regulator creates an uncorrectable rich condition, triggering this code when fuel trims reach their adaptive limit.
- Faulty Powertrain Control Module (PCM) (Rare) — The PCM's internal heater driver circuit fails in rare cases. Consider this only after exhaustively ruling out all wiring and sensor faults.
Symptoms
- Check Engine Light On — This is the most common and often the only symptom the driver notices initially.
- Decreased Fuel Economy — The engine defaults to a less efficient 'open-loop' mode, causing a noticeable increase in fuel consumption.
- Rough Idle or Engine Hesitation — An improper air-fuel mixture causes the engine to run erratically, stumble on acceleration, or idle roughly.
- Reduced Engine Power — The vehicle feels sluggish and unresponsive because the PCM cannot optimize the fuel mixture.
- Failed Emissions Test — An inoperative A/F sensor heater produces excess hydrocarbons (HC) and carbon monoxide (CO), guaranteeing an emissions failure.
- Black, Sooty Exhaust Smoke — The default rich fuel mixture produces visible black smoke from the tailpipe.
- Engine Pinging or Knocking (also visible on scanner) — An incorrect air-fuel ratio causes detonation, sounding like a metallic pinging or knocking during acceleration.
Diagnostic Flowchart
Tap your situation to follow the diagnostic path that matches what you're seeing on this code.
Common Fixes & Costs
- Replace the Air/Fuel Ratio Sensor (Bank 1, Sensor 1) — Parts: $120-$250, Labor: $100-$180, ~1.2 hr book time (DIY)
- Replace Blown A/F Heater Fuse or Relay — Parts: $5-$35, Labor: $25-$75, ~0.5 hr book time (DIY)
- Clean or Repair Engine/Chassis Ground Connections — Parts: $5-$25, Labor: $75-$150, ~1 hr book time (Intermediate)
- Repair Damaged Wiring or Replace Connector Pigtail — Parts: $15-$50, Labor: $120-$250, ~1.8 hr book time (Intermediate)
- Repair Exhaust Manifold Gasket Leak — Parts: $20-$70, Labor: $200-$400, ~2.5 hr book time (Professional)
Used vs. New Parts: Buying Guide
When a used part is worth it: Buying a used Air/Fuel ratio sensor is strongly discouraged. If P1167 caused catalytic converter failure, a used converter from a low-mileage donor (under 80K miles) scrapped for non-emissions reasons is a cost-effective option.
Donor-vehicle mileage cap: roughly under 80000 miles for the part to have meaningful remaining life.
Donor quality checklist:
- Verify donor vehicle was not scrapped for engine failure.
- Avoid parts from rust-belt states.
- Match the part number exactly to ensure compatibility.
Decision logic:
- If The part is an electronic sensor like an A/F sensor → Always buy new from an OEM supplier (Denso, NTK). The risk of a used part failing quickly is too high.
- If The part is a catalytic converter and the vehicle is >150K miles with a tight budget → A verified low-mileage used part is acceptable, but expect a shorter remaining lifespan.
- If The part is a catalytic converter and the vehicle is newer or you plan to keep it long-term → Buy a new OEM or high-quality aftermarket part for maximum longevity and warranty.
Warranty tradeoff: Used parts typically have a 30-90 day warranty, often for part replacement only (no labor). New aftermarket parts usually offer a 1-3 year warranty. New OEM parts carry the manufacturer's warranty.
Worst-case if a used part fails: $400-$1500 if a used catalytic converter fails after installation, requiring repeat labor costs and another replacement part.
What Happens If You Wait — Timeline
- 0-2 weeks: Code P1167 is set, Check Engine Light is on. The heater fails to bring the sensor to temperature quickly on startup. No other symptoms may be noticeable to the driver. (MPG impact: 0-5%% · Added cost: $0)
- 2 weeks - 3 months: The vehicle consistently runs in open-loop mode until the exhaust heats up naturally. Fuel economy drops noticeably, accompanied by slight hesitation or rough idle when cold. (MPG impact: 5-15%% · Added cost: $50-$150 in wasted fuel)
- 3-8 months: The default rich fuel mixture overheats the catalytic converter. The internal ceramic substrate cracks or coats with soot, reducing efficiency and triggering a P0420 code. (MPG impact: 10-20%% · Added cost: $1200-$2500 (catalytic converter replacement is now likely required))
- 8+ months: The catalytic converter clogs or melts completely. Excessive exhaust backpressure severely reduces engine power, causing poor running conditions and potential stalling. (MPG impact: 20-35%+% · Added cost: $1500-$3500+ (cost of catalytic converter plus potential for additional engine or exhaust repairs))
Cost of Not Fixing It
- 0-1 month: Noticeable drop in fuel economy (5-15%). Vehicle will fail an emissions test. (Added cost: $20-$60 per month in extra fuel costs)
- 1-6 months: An uncorrected air-fuel mixture overheats and degrades the catalytic converter, leading to failure and a P0420 code. (Added cost: $1200-$2800)
- 6+ months: Severe catalytic converter damage is highly likely. Potential for engine performance issues due to excessive carbon buildup on valves and spark plugs. (Added cost: $1500-$3500+)
Diagnosis Steps

- Scan for Codes and Review Freeze Frame Data
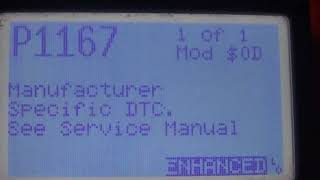
Use an OBD-II scanner to confirm P1167. Note codes like P1166, P0171, or P1298 for diagnostic clues. Review freeze frame data to identify engine conditions when the code set.
Tools: OBD-II Scanner (Beginner) - Check the A/F Heater Fuse and Relay
Locate the A/F sensor heater fuse (often Fuse #6, 15A/20A on Hondas). Visually inspect it. If intact, swap the A/F heater relay with an identical one (like the horn relay) to test functionality.
Tools: Owner's Manual, Fuse Puller or Pliers (Beginner) - Test the Sensor's Heater Resistance
Disconnect the A/F sensor. Set a multimeter to Ohms (Ω). Measure resistance between the two heater pins (typically same-colored wires). Honda ULEV sensors read 1.0-1.3 ohms cold. An 'OL' reading confirms a burned-out heater.
Tools: Multimeter (Intermediate) - Test for Power and Ground at the Harness Connector
With the sensor disconnected and ignition ON (engine off), test the vehicle-side harness. Check for battery voltage (11.5V-14.5V) on the power wire. Verify a solid ground signal on the ground wire using a multimeter or test light.
Tools: Multimeter or 12V Test Light, Vehicle-Specific Wiring Diagram (Intermediate) - PRO TIP: Perform a Voltage Drop Test on Ground Circuit
Set a multimeter to DC Volts. Connect the red lead to the negative battery terminal and the black lead to the engine block near the sensor. With the engine running, readings above 0.1V indicate high ground resistance requiring repair.
Tools: Multimeter (Advanced) - Visually Inspect the Sensor and Wiring
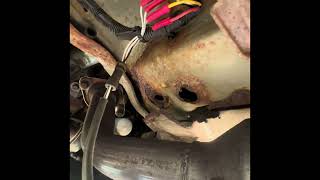
Safely raise the vehicle. Inspect Bank 1 Sensor 1 wiring for melting, chafing, or breaks. Ensure the connector latches securely and check pins for green or white corrosion.
Tools: Jack and Jack Stands, Flashlight (Beginner) - PRO TIP: Analyze Live Heater Circuit Data
Use a bi-directional scan tool to monitor A/F sensor heater amperage. On a cold start, the PCM commands the heater ON, drawing 0.5-2.0A before tapering off. Zero current indicates an open circuit; excessive current indicates a short.
Tools: Advanced Bi-Directional Scan Tool (Advanced) - Check for Exhaust Leaks
With the engine running, listen for ticking sounds near the exhaust manifold using a mechanic's stethoscope. Alternatively, use a smoke machine to pinpoint leaks around the manifold gasket and sensor bung.
Tools: Mechanic's Stethoscope, Smoke Machine (optional) (Advanced) - Check Fuel Pressure
Connect a fuel pressure gauge to the service port. With the key ON, engine OFF, verify pressure meets manufacturer specs (e.g., 40-47 PSI for 98-02 Accords). Abnormal readings indicate fuel pump or regulator issues.
Tools: Fuel Pressure Gauge (Advanced)
When This Code Triggers (Freeze-Frame Conditions)
- Engine Coolant Temp: 180-200°F (Fully warmed up)
- RPM: 1500-2500 (Cruise / steady throttle)
- Engine Load: 30-60% (Steady state driving, not heavy acceleration)
- Vehicle Speed: 45-60 mph (Highway driving)
Related Codes
- P1166 — The direct sister code to P1167 on Hondas, pointing to the same primary A/F sensor heater circuit fault. Diagnosed identically; seeing both confirms a sensor or wiring failure.
- P0171 / P0172 — Effect codes caused by P1167. A non-functional A/F sensor provides bad data, triggering false lean (P0171) or rich (P0172) codes. Fixing P1167 resolves these.
- P1298 — A shorted alternator circuit blows a shared fuse, triggering P1167 and P1298 (Electrical Load Detector Circuit High Voltage) simultaneously. Repair the short and replace the fuse.
- P1162 — Another Honda A/F sensor code. Technical service bulletins advise resolving P1162 faults before addressing P1167.
Climate & Environmental Factors
- High Humidity / Rain: Moisture penetrates wiring connectors, accelerating pin corrosion. This increased resistance or short circuit triggers a heater fault code.
- Cold Climates / Road Salt: Road salt creates a corrosive environment that destroys under-vehicle components. Salt slush degrades O2 sensor wiring and connectors.
- Extreme Cold Starts: The heater works hardest during extreme cold starts. Repeated high-stress thermal cycling burns out the filament over time.
How to Talk to a Mechanic About This Code
Say this: "I have a P1167 code on my Honda/Acura. I know this is for the primary A/F sensor heater circuit. Please check the fuse, relay, and test the sensor's heater resistance and ground connection before recommending a new sensor."
This signals you understand the issue involves more than just the sensor. It guides the technician toward a logical diagnostic path (fuse, relay, ground, then sensor) and prevents them from simply replacing the most expensive part first.
Avoid saying:
- 'My check engine light is on, can you look at it?' (This is too vague and invites a broad, potentially expensive diagnostic process).
- 'Just fix whatever is wrong.' (This gives the shop a blank check).
- 'My car is running weird, I think it's the O2 sensor.' (Don't diagnose for them; describe the symptoms and provide the code).
Questions to ask before authorizing the repair:
- What was the ohm reading on the sensor's heater circuit? (A good Honda sensor is often 1-10 ohms; 'OL' means it's bad).
- If the sensor needs to be replaced, are you using an OEM-spec part from Denso or NTK?
- Did you check the main engine-to-chassis ground straps for corrosion or high resistance?
- What is the warranty on the parts and labor for this repair?
Where to Take It: Dealer vs Independent vs Chain
- Dealer:
A safe but expensive option. Best used as a last resort if a trusted independent shop cannot solve the problem.
Best for: Vehicles under an emissions or powertrain warranty., Complex electrical issues where other shops have failed to find the root cause.
Downsides: Highest labor rates, often 1.5-2x more than an independent shop., May be less willing to diagnose and repair wiring; might prefer to replace larger, more expensive components. (Typical cost: +50% vs. baseline) - Independent Shop:
Best fit. A competent independent mechanic will have encountered P1167 many times and will know the proper diagnostic steps, including checking grounds and using the correct OEM-spec sensor.
Best for: Out-of-warranty vehicles, especially common models like Honda/Acura., Owners who want a balance of expertise and fair pricing.
Downsides: Quality varies greatly; it's crucial to find a shop with good reviews and experience with Japanese vehicles. (Typical cost: +0% vs. baseline) - Chain Shop:
Use with caution. Acceptable for a simple sensor replacement if you are certain that is the problem. Avoid them for diagnosing a persistent P1167 code that returns after a part replacement.
Best for: Simple, straightforward repairs where the diagnosis is already certain (e.g., you've tested the sensor and know it's bad).
Downsides: Technician skill and diagnostic ability can be inconsistent., High pressure to meet sales targets can lead to upselling unnecessary services or misdiagnosis. (Typical cost: -10% vs. baseline)
When to Walk Away From the Repair
If the total estimated repair cost exceeds 50% of the car's private-party value (e.g., from Kelley Blue Book), it's time to seriously consider selling or trading in the vehicle.
- Car worth $3000, fix is $450: Fix it. The repair cost is well below the 50% threshold.
- Car worth $3000, fix is $1900: Walk away. The repair cost (e.g., for a sensor and a damaged catalytic converter) is over 60% of the car's value. It is not an economically sound repair.
- Car worth $2500, fix is $1500: Walk away. The repair cost is 60% of the vehicle's value.
What Scan Tool You Need for This Code

Minimum: A tool that can read and graph live sensor data. A basic code reader that only shows the P-code is not sufficient for proper diagnosis.
A $20 code reader only tells you the P1167 code is present. It cannot show live A/F sensor heater current, which is crucial for determining if the circuit is open (no current) or shorted (high current).
Budget: BlueDriver Pro / Autel AP200 (~$60-120) — These Bluetooth dongles pair with a smartphone app to provide live data graphing for the A/F sensor heater circuit. This verifies if the heater is commanded on and drawing current.
Mid-range: Foxwell NT510 Elite / Innova 5610 (~$150-350) — Handheld scanners offer robust features and manufacturer-specific diagnostics for Honda/Acura. They provide fast live data access and bidirectional controls for deeper testing.
Professional: Autel MaxiCOM MK808S (~$400-550) — A full-featured diagnostic tablet provides OEM-level functions. It offers comprehensive live data and full bidirectional control to command circuits on and off.
How to Clear the Code After You Fix It
- Use an OBD-II scan tool to clear active and pending codes
- Ensure fuel tank is between 1/4 and 3/4 full
- Perform a complete drive cycle to set readiness monitors
Drive cycle (~30 minutes): Start engine cold and idle for 3 minutes. Accelerate to 55 mph and hold steady for 10 minutes. Coast down to 20 mph without braking, then accelerate back to 55 mph for 5 minutes.
Readiness monitors affected: Catalyst monitor, O2 sensor monitor, O2 sensor heater monitor
Before emissions retest: drive at least 100 miles to fully set monitors.
Watch out for:
- Disconnecting the battery clears codes but resets all readiness monitors, requiring a full drive cycle.
- The code returns within two trips if the root cause remains.
- Incorrect fuel levels prevent the EVAP monitor from running, blocking the O2 monitor.
Will This Fail Emissions / State Inspection?
Yes — this code typically fails an OBD-II emissions inspection.
- California: An active P1167 code is an automatic smog check failure. All OBD readiness monitors must be 'Ready', requiring 50-100 miles of driving after the repair.
- New York: The NYS DMV vehicle inspection includes an OBD-II scan. An illuminated Check Engine Light and P1167 code result in an automatic failure.
- Texas: In the 17 Texas counties requiring emissions testing, a vehicle with code P1167 will fail the OBD portion of the inspection.
Most Commonly Affected Vehicles

- Honda Accord (1998-2002) — Extremely common on 2.3L F23A4 ULEV engines. Requires a specific 5-wire wideband A/F sensor (Denso 234-9025). Generic sensors fail immediately.
- Honda CR-V (2002-2004) — Frequently throws P1166 and P1167 together, indicating a failed upstream A/F sensor heater.
- Acura TL (1999-2003) — Common code on aging models, pointing directly to primary A/F sensor heater failure.
- Honda Odyssey (1999-2004) — V6 engines are prone to A/F sensor heater failure, triggering P1167.
- Honda Civic (2001-2005) — Common on ULEV models. Requires exact OEM-equivalent Denso or NTK sensors for a lasting repair.
- Hyundai Sonata (2000-2005) — Indicates 'Lambda Controller Adaptive Diagnosis Fault' (fuel trim issue). Diagnose fuel delivery and vacuum leaks, not the heater.
- Kia Optima (2001-2006) — Points to a fuel control adaptation limit. Investigate fuel system performance before replacing the O2 sensor.
- Nissan Frontier (2001-2004) — Refers to a fault with the downstream oxygen sensor (Bank 2, Sensor 2) on V6 models, or a climate control communication error on others.
- Volkswagen Golf / Jetta (1999-2005) — Indicates a 'Mass Air Flow (MAF) Sensor, Bank 2 - Range/Performance Problem.' Diagnosing O2 sensors is incorrect.
Manufacturer-Specific Notes
- Honda / Acura: Notoriously picky about replacement sensors. Generic brands fail to fix the code. Technicians reference Honda TSB 00-086 for this specific issue.
- Hyundai / Kia: Means 'HO2S Lambda Controller Adaptive Diagnosis Fault.' Points to fuel trims reaching adaptive limits, requiring diagnosis of injectors and vacuum leaks.
- Nissan: Varies by model. Points to the downstream oxygen sensor (Bank 2, Sensor 2) on V6 engines, or indicates a climate control module communication failure.
- Volkswagen / Audi: Indicates a 'Mass air flow (MAF) sensor, bank 2 - range / performance problem.' Diagnosing an oxygen sensor is a complete misdiagnosis.
Real Owner Stories
2002 Honda CR-V with P1166 & P1167
Check Engine Light came on. Owner attempted to save money by purchasing a universal O2 sensor from a parts store.
What they tried:
- Installed a Bosch Universal O2 sensor. The car ran rough, and the P1167 code persisted.
- Tried a second aftermarket sensor with the same result.
Outcome: Purchased the correct A/F sensor directly from a Honda dealership. After installing the genuine OEM part, the car ran smoothly and the code cleared.
Lesson: On Honda/Acura vehicles, using a generic or 'universal' A/F sensor fails to fix P1167. Purchase the specific OEM part or a direct-fit from Denso/NTK.
2002 Honda Accord with persistent P1167 after sensor replacement
Owner had P1166 and P1167. They replaced the upstream A/F sensor, which cleared P1166, but P1167 came right back.
What they tried:
- Replaced the upstream A/F sensor.
- Checked fuse #6, which was good.
- Used a multimeter to test ground continuity from the negative battery terminal to the engine block and got an 'Open Loop' reading.
Outcome: Identified severely rusted ground straps on the engine block and chassis. Replacing the main ground cables restored the proper ground path and fixed the code.
Lesson: If a new, correct sensor doesn't fix the code, suspect the circuit itself. A bad ground is a common culprit diagnosed by checking for high resistance between the engine and the battery's negative terminal.
2002 Honda Accord money pit diagnosis
Bought a used Accord with P1167. A national chain shop replaced the O2 sensor, but the code did not clear.
What they tried:
- A shop replaced the O2 sensor, but the code returned immediately.
- A specialist shop diagnosed a bad ECU and replaced it, but P1167 persisted.
Outcome: The owner spent heavily on an ECU but still had the original fault, requiring further diagnosis of the wiring harness.
Lesson: Do not jump to replacing the ECU. If a new OEM-spec sensor and a confirmed good ground connection do not resolve the code, the problem is in the wiring harness between the sensor and the ECU.
How to Prevent This Code From Triggering
- Replace upstream A/F (O2) sensors as a maintenance item (Every 80,000-100,000 miles) — As sensors age, response time slows. This 'lazy' sensor provides delayed information to the ECU, causing inefficient fuel mixtures that stress the catalytic converter before triggering a code.
- Use Top Tier certified gasoline (Every fill-up) — Top Tier fuels contain detergents that prevent carbon buildup. This ensures cleaner combustion, reducing unburnt fuel that fouls the A/F sensor and damages the catalytic converter.
- Perform regular engine maintenance (plugs, filters, oil) (Per manufacturer's schedule) — Worn spark plugs cause misfires, and clogged air filters create a rich condition. Both send unburnt fuel into the exhaust. Oil or coolant leaks contaminate the sensor with deposits.
- Address engine oil and coolant leaks promptly (As needed) — Antifreeze and silicone sealants poison A/F sensors. Leaking head or valve cover gaskets allow contaminants into the exhaust, destroying the sensor's ability to read oxygen levels.
Frequently Asked Questions
I replaced the sensor, but the P1167 code came back. What now?
First, confirm you used an exact-fit OEM-spec sensor (Denso/NTK), as generic parts frequently fail on Hondas. Next, verify the A/F heater fuse and relay are intact. Finally, perform a voltage drop test on the main engine-to-chassis ground straps, as a corroded ground mimics a bad sensor.
What is the difference between P1166 and P1167 on a Honda?
They are sister codes pointing to the same problem: a fault in the primary A/F sensor heater circuit. They are diagnosed and fixed identically. Seeing both codes strongly suggests a failed sensor.
Can a bad ground connection really cause a P1167 code?
Yes. The PCM monitors the heater circuit's voltage and current. A poor ground adds unwanted resistance, causing a voltage drop that the PCM misinterprets as a failed heater element.
Can I just clear the P1167 code and keep driving?
You can clear the code, but it returns within one or two drive cycles. The code indicates a persistent hardware or electrical fault requiring physical repair.
Do I really need to buy an expensive OEM sensor?
For Honda and Acura vehicles, it is mandatory. Aftermarket 'universal' sensors lack the correct internal resistance and cause the P1167 code to return immediately. Use an OEM-equivalent brand like Denso or NTK for a successful repair.
What is the difference between an Air/Fuel Ratio Sensor and an Oxygen Sensor?
An Air/Fuel (A/F) Ratio Sensor is a sophisticated 'wideband' sensor providing precise, variable air-fuel ratio readings. A traditional oxygen sensor is a simpler 'narrowband' sensor that only switches between 'rich' or 'lean'. A/F sensors are used upstream for precise fuel control.
Where is Bank 1, Sensor 1 located?
Bank 1 is the side of the engine containing cylinder #1. Sensor 1 is the 'upstream' sensor located in the exhaust system before the catalytic converter, usually directly on the exhaust manifold.
Can a vacuum leak cause a P1167 code?
Generally, no. A vacuum leak introduces unmetered air and typically causes a P0171 (System Too Lean) code. A vacuum leak on the intake side will not directly cause a heater circuit malfunction code.
Key Takeaways
- On Honda and Acura vehicles, P1167 indicates a failure in the primary Air/Fuel Ratio Sensor (Bank 1, Sensor 1) heater circuit, requiring a resistance test before replacement.
- Check the 15A or 20A A/F heater fuse and perform a voltage drop test on the engine ground strap before spending $150+ on a new sensor.
- Install only exact-fit OEM-equivalent Denso or NTK sensors; generic or 'universal' Bosch sensors frequently fail to clear the P1167 code on Hondas.
- Verify your vehicle's specific P1167 definition, as it means an A/F heater fault on Hondas, a Mass Air Flow (MAF) sensor error on Volkswagens, and a fuel trim limit on Hyundais.
- Fixing P1167 within 1 month prevents the engine's rich-running default mode from destroying the catalytic converter, avoiding a secondary $1,200 to $2,500 repair bill.
Helpful Videos


The information in this article is provided for general reference and educational purposes only. Vehicle specifications, procedures, and part compatibility can vary by production date, trim level, and region. Always consult your vehicle's factory service manual and verify part numbers before purchasing or performing repairs. Safety-critical components such as airbags, seat belts, and braking systems should be installed by a qualified professional.
- 🎬 Helpful Videos
- What Does P1167 Mean?
- Can I Drive With P1167?
- Common Causes
- Symptoms
- Diagnostic Flowchart
- Common Fixes & Costs
- Used vs. New Parts: Buying Guide
- What Happens If You Wait — Timeline
- Cost of Not Fixing It
- Diagnosis Steps
- When This Code Triggers (Freeze-Frame Conditions)
- Related Codes
- Climate & Environmental Factors
- How to Talk to a Mechanic About This Code
- Where to Take It: Dealer vs Independent vs Chain
- When to Walk Away From the Repair
- What Scan Tool You Need for This Code
- How to Clear the Code After You Fix It
- Will This Fail Emissions / State Inspection?
- Most Commonly Affected Vehicles
- Manufacturer-Specific Notes
- Real Owner Stories
- 2002 Honda CR-V with P1166 & P1167
- 2002 Honda Accord with persistent P1167 after sensor replacement
- 2002 Honda Accord money pit diagnosis
- How to Prevent This Code From Triggering
- Frequently Asked Questions
- I replaced the sensor, but the P1167 code came back. What now?
- What is the difference between P1166 and P1167 on a Honda?
- Can a bad ground connection really cause a P1167 code?
- Can I just clear the P1167 code and keep driving?
- Do I really need to buy an expensive OEM sensor?
- What is the difference between an Air/Fuel Ratio Sensor and an Oxygen Sensor?
- Where is Bank 1, Sensor 1 located?
- Can a vacuum leak cause a P1167 code?
- Key Takeaways
- 🎟️ Get 5% Off