

OBD-II Code P1155: Air/Fuel Ratio Sensor Heater Circuit Malfunction
The Ultimate Guide to Understanding, Diagnosing, and Fixing P1155
- P1155 indicates a burned-out heater element inside the Bank 2, Sensor 1 Air/Fuel Ratio sensor, preventing it from reaching its 1200°F operating temperature.
- Always check the 15A or 20A 'A/F HEATER' fuse in the engine bay before buying parts, especially if code P1135 is also present.
- Replace the faulty sensor exclusively with an OEM Denso part (typically $120-$160); aftermarket brands frequently cause the P1155 code to return immediately.
- Driving with an active P1155 code drops fuel economy by 5-15% and causes irreversible catalytic converter damage (a $1,500+ repair) if ignored for more than a few months.
What Does P1155 Mean?

The Engine Control Module (ECM) detected a problem with the Air/Fuel Ratio Sensor on 'Bank 2' (the engine side without cylinder #1). Specifically, the sensor's built-in heater failed, preventing it from reaching its 1200°F operating temperature immediately after startup.
Technical definition: Air/Fuel Ratio (A/F) Sensor Heater Circuit Malfunction (Bank 2, Sensor 1). The ECM monitors the heater circuit's current and voltage, triggering P1155 when values fall outside the specified range. 🎬 Watch: A breakdown of P1155 causes and common fixes. On Toyota systems, this code sets if the heater current drops below 0.8 amps or exceeds 10 amps.
Can I Drive With P1155?

Yes, But With Caution. Yes, but driving for more than a few weeks causes carbon buildup on the unheated sensor. The resulting prolonged rich fuel condition overheats and damages the catalytic converter, a secondary repair costing between $1,000 and $4,000.
Common Causes

- Faulty Air/Fuel Ratio Sensor (Bank 2, Sensor 1) (Very Common) — The internal heater element burns out or develops an open circuit over time, acting like a blown light bulb filament. This is the primary cause of a P1155 code.
- Blown A/F Heater Fuse or Relay (Common) — A short circuit blows the dedicated 'A/F HEATER' or 'EFI' fuse, cutting power to the sensor. This is highly likely if code P1135 is also present.
- Damaged Wiring or Electrical Connector (Common) — Road debris, exhaust heat, or rodents damage the exposed wiring harness under the vehicle. Corroded or loose connector pins also create high electrical resistance.
- Aftermarket Sensor Incompatibility (Common) — Toyota and Lexus ECMs require specific electrical resistance and warm-up times. Universal or non-OEM sensors frequently trigger a recurring P1155 code.
- Exhaust Leak (Less Common) — A cracked exhaust manifold or blown gasket introduces outside air, cooling the sensor and forcing the ECM to misinterpret the data as a heater fault.
- Contaminated Sensor Tip (Rare) — Coolant or oil leaks traveling down the exhaust insulate the sensor tip, altering its thermal properties and triggering heater codes.
- Poor Engine or Body Ground (Rare) — A corroded main engine ground strap introduces electrical resistance, mimicking a heater circuit failure.
- Faulty Engine Control Module (ECM) (Very Rare) — The computer controlling the sensor fails. Consider this only after exhaustively ruling out wiring, fuses, and the sensor itself.
Symptoms
- Check Engine Light is On — The ECM illuminates the check engine light and often the Vehicle Stability Control (VSC) or traction control lights as a secondary warning.
- Rough or Unsteady Idle — The engine runs unevenly or hesitates at stops because the ECM cannot precisely control the open-loop fuel mixture.
- Reduced Engine Power — The vehicle feels sluggish and hesitates during acceleration due to the incorrect air-fuel ratio.
- Failed Emissions Test — The inactive heater prevents the sensor from entering closed-loop operation, causing an automatic smog check failure.
- Exhaust Odor — The rich fuel mixture pushes unburned gasoline through the exhaust, creating a strong fuel smell.
- Worse Gas Mileage (also visible on scanner) — The ECM defaults to a 'safe' rich fuel mixture, increasing fuel consumption and noticeably dropping MPG. 🎬 See more symptoms and typical sensor replacement costs.
Diagnostic Flowchart

Tap your situation to follow the diagnostic path that matches what you're seeing on this code.
Common Fixes & Costs
- Replace Air/Fuel Ratio Sensor (Bank 2, Sensor 1)
— Parts: $120-$160, Labor: $100-$180, ~0.8 hr book time
(DIY)
Toyota Camry V6 (2002-2006): OEM
Lexus RX330 (2004-2006): OEM
Toyota Sienna (2004-2006, 3.3L V6): OEM - Replace Blown A/F Heater Fuse — Parts: $1-$10, Labor: $50-$100, ~0.5 hr book time (DIY)
- Repair Damaged Wiring or Connector — Parts: $10-$50, Labor: $150-$250, ~1.5 hr book time (Intermediate)
- Clean or Secure Engine Ground Connection — Parts: $5-$15, Labor: $50-$120, ~0.7 hr book time (DIY)
- Repair Exhaust Manifold Gasket Leak — Parts: $20-$50, Labor: $200-$400, ~3 hr book time (Professional)
DIY vs Professional
- Replace Blown A/F Heater Fuse — Beginner: Yes
Tools: Owner's Manual, Fuse Puller - Replace Air/Fuel Ratio Sensor — Beginner: Yes, with caution.
Tools: 22mm (7/8") Oxygen Sensor Socket, Ratchet, Penetrating Oil - Repair Damaged Wiring or Connector — Beginner: No
Tools: Multimeter, Wire Strippers, Crimpers, Heat Shrink Tubing - Repair Exhaust Manifold Gasket Leak — Beginner: No
Tools: Full socket set, Torque Wrench, Gasket Scraper
Used vs. New Parts: Buying Guide
When a used part is worth it: Never buy a used A/F sensor. They are wear items with finite lifespans, and a used part is likely near failure.
Donor-vehicle mileage cap: roughly under 50000 miles for the part to have meaningful remaining life.
Donor quality checklist:
- Avoid parts from regions with heavy road salt use, as corrosion damages the sensor and connector.
- Buying used electrical sensors is a high-risk gamble; you may be installing the exact problem you are trying to fix.
Decision logic:
- If The part is an Air/Fuel Ratio Sensor. → Buy a new, OEM-specification part. The savings from a used part are not worth the high risk of premature failure.
- If Vehicle is a Toyota or Lexus. → Buy a new Denso sensor. Aftermarket sensors are a common cause for the code to return.
- If Budget is extremely tight. → A new budget-brand sensor is a better choice than a used OEM one.
Warranty tradeoff: Used parts typically have a 30-day warranty at best. A new quality aftermarket or OEM sensor carries a warranty of 1 year or longer.
Worst-case if a used part fails: $200-$400. This includes paying for labor a second time plus the cost of the new sensor that should have been installed initially.
What Happens If You Wait — Timeline
- 0-1 month: Check Engine Light is on. The ECM enters 'open loop' mode, using a default rich fuel map. The car automatically fails an emissions test. (MPG impact: 5-10%% · Added cost: $20-$50 in wasted fuel.)
- 1-4 months: Noticeable drop in fuel economy. The constant rich fuel mixture causes the catalytic converter to operate above its design limit, slowly degrading the precious metals. (MPG impact: 10-15%% · Added cost: $50-$200 in wasted fuel. Minor, reversible catalyst efficiency loss.)
- 4-8 months: Sustained overheating physically damages the catalytic converter. A faint 'rotten egg' smell appears. A P0430 (Catalyst Efficiency) code triggers intermittently. (MPG impact: 10-20%% · Added cost: $800 - $2,500. The catalytic converter is permanently damaged and requires replacement.)
- 8+ months: Catastrophic converter failure. The internal substrate melts into a blockage. The engine feels severely underpowered at high RPMs and is undrivable. (MPG impact: >25%% · Added cost: $1,500 - $3,000+. Includes a new catalytic converter and potentially a new downstream O2 sensor.)
Cost of Not Fixing It
- 0-1 Month: Immediate 5-15% fuel economy drop and guaranteed emissions test failure. (Added cost: $20-$60 per month in wasted fuel.)
- 1-6 Months: The default rich mixture overheats the catalytic converter, degrading its internal precious metals. (Added cost: Potential for irreversible damage to the catalytic converter.)
- 6+ Months: Complete catalytic converter failure on Bank 2, triggering a P0430 code and requiring replacement. (Added cost: $1200-$2800 for a new catalytic converter and labor.)
Diagnosis Steps
- Read and Analyze Trouble Codes
Use an OBD-II scanner to confirm P1155. If P1135 is present, diagnose the shared A/F heater fuse first. If P0174 is present, fix P1155 first, as the dead heater causes the lean reading.
Tools: OBD-II Scanner (Beginner) - Check the A/F Heater Fuse and Relay
Locate the engine bay fuse box and pull the 'A/F HEATER', 'A/F HTR', or 'EFI' fuse. Replace it if the internal metal strip is broken. Swap the relay with an identical non-critical relay (like the horn) to test it.
Tools: Fuse Puller or Pliers (Beginner) - Pro Tip: Test the Sensor's Heater Circuit Resistance
Unplug the Bank 2 Sensor 1. Use a multimeter set to Ohms (Ω) to measure resistance between the two same-colored heater pins (usually black). A healthy Denso sensor reads 1.8-3.4 Ohms at 68°F; an infinite (OL) reading confirms a burned-out heater requiring replacement.
Tools: Multimeter (Intermediate) - Visually Inspect the Sensor and Wiring
Examine the Bank 2 upstream sensor harness for melted insulation, chewed wires, or severe corrosion on the connector pins.
Tools: Flashlight, Safety Glasses (Beginner) - Pro Tip: Check for Power and Ground at the Harness Connector
With the key on and engine off (KOEO), use a multimeter on the harness-side connector. Verify 12-volt battery power from the A/F fuse and a solid ground connection. Missing power indicates an upstream wiring or fuse issue.
Tools: Multimeter (Intermediate) - Advanced: Check Live Data with a Scan Tool
Start a cold engine and monitor the B2S1 A/F sensor voltage/current on an advanced scanner. A working heater draws current immediately; a flatline confirms the fault.
Tools: Advanced OBD-II Scan Tool (Professional) - Advanced: Check Heater Current Draw
Clamp a low-amp current probe around the heater power wire. A healthy Toyota heater draws 5-8 amps for the first 20 seconds after a cold start.
Tools: Low-amp DC Current Probe (Advanced) - Advanced: Perform a Voltage Drop Test
Back-probe the power and ground pins with the engine running. Readings above 0.5V on the power side or 0.2V on the ground side indicate excessive circuit resistance.
Tools: Multimeter with back-probe pins (Professional) - Inspect for Exhaust Leaks
Listen for ticking noises or look for black soot around the Bank 2 exhaust manifold gasket, indicating a leak.
Tools: Mechanic's Stethoscope (optional) (Intermediate)
When This Code Triggers (Freeze-Frame Conditions)
- Engine Coolant Temp: 176-210°F (80-99°C) (The heater monitor runs only after the engine reaches full operating temperature.)
- RPM: 1500-3000 (The diagnostic test requires steady off-idle throttle and does not run at a standstill.)
- Vehicle Speed: 25-62 mph (40-100 kph) (The code typically sets during stable cruising.)
- Time Since Start: > 140 seconds (The ECM waits several minutes after startup to evaluate the heater's performance.)
Related Codes
- P1135 — Identical fault for Bank 1, Sensor 1. Seeing both simultaneously guarantees a shared power failure, usually the A/F HEATER fuse.
- P0155 — The generic SAE equivalent of P1155. Toyota/Lexus use P1155 for stricter diagnostic criteria, but the repair is identical.
- P0174 — System Too Lean (Bank 2). The dead heater makes the sensor unresponsive, tricking the ECM into reading a lean condition. Fix P1155 first.
- P0430 — Catalyst Efficiency Below Threshold. Ignoring P1155 forces a rich fuel mixture that eventually melts the catalytic converter, triggering this code.
Climate & Environmental Factors
- Cold Climates: Cold weather exacerbates weak heaters, as the ECM detects the sensor failing to reach operating temperature within the required timeframe.
- Road Salt (De-icing): Salt and moisture accelerate corrosion on the sensor body, connector pins, and wiring harness, directly causing electrical open circuits.
How to Talk to a Mechanic About This Code
Say this: "I have a P1155 code on my vehicle. I'd like to schedule a diagnostic to confirm the cause. Please check the A/F heater fuse, wiring, and sensor resistance before recommending a replacement part."
This directs the mechanic to confirm the failure (bad sensor, wiring, or fuse) instead of just replacing the most common part, saving you money if the sensor isn't the problem.
Avoid saying:
- 'My check engine light is on, can you look at it?' (Too vague, invites a costly diagnostic process).
- 'I think I need a new oxygen sensor.' (Leads to replacing the part without proper diagnosis, missing wiring faults).
- 'Just fix whatever is wrong.'
Questions to ask before authorizing the repair:
- What was the resistance reading on the sensor's heater circuit? (An open circuit/infinite reading confirms it's bad).
- Did you verify there is 12-volt power and a good ground at the sensor's connector?
- If the sensor needs replacement, are you using an OEM-spec part, like Denso for a Toyota?
- What is the warranty on the part and the labor for this repair?
Where to Take It: Dealer vs Independent vs Chain
- Dealer:
Recommended only if the vehicle is under warranty. Otherwise, an independent shop is more cost-effective.
Best for: Vehicles still under the 8-year/80,000-mile federal emissions warranty., Complex diagnostic situations where a previous repair at another shop failed.
Downsides: Highest labor rates, often 1.5x to 2x an independent shop., Less willing to perform component-level diagnostics (e.g., wiring repair). (Typical cost: +50% vs. baseline) - Independent Shop:
Best fit. A reputable independent shop knows to check fuses and wiring, and understands the importance of using OEM-quality (Denso) sensors.
Best for: Out-of-warranty vehicles, especially common ones like Toyota and Lexus., Cost-conscious owners who want a balance of quality and value.
Downsides: Quality and expertise vary. Choose a shop with good reviews and ASE-certified technicians. (Typical cost: +0% vs. baseline) - Chain Shop:
Use with caution. Acceptable for a simple sensor swap if you confirm they will install a Denso part. AVOID for diagnosis.
Best for: Emergency situations where other options are unavailable., Simple part replacements if you specify the exact part brand to use.
Downsides: High risk of using a low-quality or incorrect brand of sensor, leading to the code returning., Technician skill is inconsistent, with high pressure to upsell services. (Typical cost: -10% vs. baseline)
When to Walk Away From the Repair
If the estimated repair cost exceeds 40-50% of the car's private-party value, pause and evaluate. For P1155, this rule usually only applies if the catalytic converter has also failed.
- Car worth $4000, fix is $350: Fix it. The repair cost is less than 10% of the car's value and prevents much costlier future damage.
- Car worth $4000, fix is $2000: Borderline. This implies the catalytic converter (P0430) has also failed. Get a second opinion before authorizing.
- Car worth $2500, fix is $1800: Walk away. The repair cost is over 70% of the car's value. It is not economically sensible to proceed.
What Scan Tool You Need for This Code
Minimum: A basic code reader that can read and clear engine fault codes. This confirms the P1155 code but offers no diagnostic help.
A basic reader cannot show live data. To properly diagnose P1155, you need to see the A/F sensor's live voltage and warm-up time to confirm the heater isn't working.
Budget: BlueDriver Pro (~$90) — Connects to your smartphone via Bluetooth. It graphs live data for the A/F sensors, allowing you to visually confirm that the Bank 2 sensor is slow to respond compared to Bank 1.
Mid-range: Innova 5610 or Foxwell NT604 Elite (~$140) — These handheld scanners offer robust live data graphing and read manufacturer-specific codes beyond the engine. They are faster and more self-contained than Bluetooth dongles.
Professional: Autel MaxiCOM MK808 / MK900 (~$350) — Tablet-based professional scan tools providing full bidirectional control and access to every system in the vehicle. Overkill for P1155, but ideal for frequent DIYers.
Rent vs buy: You can borrow a basic code reader for free from stores like AutoZone. This is fine for reading the code, but lacks the live data function needed for diagnosis. Buying a budget pick like the BlueDriver is a worthwhile investment.
How to Clear the Code After You Fix It
- Use an OBD-II scan tool to clear the P1155 code.
- Perform a complete drive cycle to allow the vehicle's readiness monitors to run.
- Rescan the vehicle to confirm no codes have returned and that the O2 sensor and Catalyst monitors show 'Ready'.
Drive cycle (~20 minutes): Idle a cold engine for 5-9 minutes to run the heater monitor. Drive steadily at 40-60 mph for 10 minutes, followed by stop-and-go city driving.
Readiness monitors affected: Oxygen Sensor Heater Monitor, Oxygen Sensor Monitor, Catalyst Monitor
Before emissions retest: drive at least 100 miles to fully set monitors.
Watch out for:
- Disconnecting the battery clears the code but resets all readiness monitors, guaranteeing an emissions test failure until the drive cycle completes.
- The code returns immediately if the underlying problem (bad sensor, wiring, fuse) was not correctly repaired.
- Not driving long enough or under the correct conditions leaves monitors 'Not Ready'.
Will This Fail Emissions / State Inspection?
Yes — this code typically fails an OBD-II emissions inspection.
- California: Active P1155 is an automatic failure. All readiness monitors must be 'Ready' before retesting.
- New York: Fails the OBD-II emissions inspection immediately.
- Texas: Illuminated Check Engine Light results in automatic failure in emissions-testing counties.
Most Commonly Affected Vehicles

- Toyota Camry (2001-2015) — Extremely common on V6 models (1MZ-FE and 2GR-FE engines). Bank 2 is the front bank, closer to the radiator, making access relatively easy.
- Lexus RX300 / RX330 / RX350 (2001-2009) — Shares powertrains with Toyota. On the RX300/330, Bank 2 Sensor 1 is on the firewall side, making it more difficult to access than on a Camry.
- Toyota Sienna (2004-2015) — The Bank 2 sensor on the 3.3L and 3.5L V6 engines is a very frequent failure item. Bank 2 is the front bank, near the radiator.
- Toyota Highlander (2001-2013) — Another popular Toyota V6 model where this code is frequently reported as the vehicle ages.
- Lexus ES300 / ES330 (2001-2006) — This code is a common maintenance issue, almost always solved by replacing the sensor with a Denso part. The VSC light often illuminates alongside the Check Engine Light.
- Toyota RAV4 (2001-2005) — On the 4-cylinder 2AZ-FE engine, there are two upstream sensors. P1155 refers to the sensor for cylinders 2 and 3, physically located near the firewall.
- Subaru Legacy, Outback, Forester (2003-2009) — Some Subaru models use P1155 for a malfunction in the Bank 2, Sensor 1 oxygen sensor heater circuit. Bank 2 is the driver's side on H6 engines.
Manufacturer-Specific Notes
- Toyota / Lexus: Highly sensitive to sensor resistance. Installing non-Denso aftermarket sensors frequently causes P1155 to return immediately.
- Warranty Coverage: A/F sensors fall under the Federal Emissions Performance Warranty (8 years/80,000 miles). Verify dealer coverage before paying out of pocket.
- General Motors (GM): General Motors uses the generic P0155 code instead of P1155 for this exact fault.
- Hyundai: On older models (e.g., XG350), P1155 indicates an Idle Air Control (IAC) malfunction, completely unrelated to the oxygen sensor.
- BMW: BMW uses P1155 to indicate a heater fault on Bank 2, Sensor 2 (downstream), requiring a completely different sensor replacement.
Real Owner Stories
2004 Toyota Sienna at ~150K miles - The Aftermarket Parts Trap
Owner experienced a P1155 code and purchased a cheap aftermarket A/F sensor for $46 to save money.
What they tried:
- Replaced the Bank 2 Sensor 1 with the aftermarket part. The Check Engine Light and P1155 code returned immediately.
Outcome: The owner purchased the correct OEM Denso sensor for over $100. After installation, the code resolved permanently.
Lesson: For Toyota/Lexus vehicles, using non-OEM sensors is a false economy. The ECM is calibrated to the specific resistance of the Denso part, and aftermarket alternatives waste time and money.
2001 Toyota Avalon at 190K miles - The Straightforward DIY Fix
Check Engine Light and VSC light illuminated with codes P1155 and P1130.
What they tried:
- Tested the resistance of the heater circuit on the original sensor and found an open circuit (infinite resistance).
- Compared this to a new Denso sensor (part 234-9021), which showed a healthy resistance of 1.4 Ohms.
Outcome: Replaced the front-facing Bank 2 sensor with the Denso part. The Check Engine Light stayed off, confirming the fix.
Lesson: A simple multimeter test definitively confirms a failed heater circuit before spending money. If the resistance between the two heater pins is infinite ('OL'), the sensor is bad.
2000 Lexus ES300 at ~100K miles - The Misdiagnosis
Codes P1135 and P1155 appeared shortly after a shop replaced the valve cover gaskets.
What they tried:
- Replaced both upstream A/F sensors with new Denso parts, but the codes returned.
- Checked the A/F heater fuse and swapped the relay, which were both okay.
Outcome: The shop failed to reconnect a wiring harness connector during the valve cover job. The owner paid for unnecessary sensors on top of the original repair.
Lesson: If a code appears immediately after a different repair, suspect a workmanship error. Always verify connectors are plugged in before throwing parts at a new code.
How to Prevent This Code From Triggering
- Replace upstream A/F sensors proactively (Every 80,000-100,000 miles) — A/F sensors are wear items. As they age, their response time slows, degrading fuel economy and stressing the catalytic converter before setting a code.
- Use Top Tier certified gasoline (Every fill-up) — Top Tier gasolines contain detergents that prevent carbon buildup, reducing contaminants that foul the A/F sensor tip.
- Address engine oil leaks promptly (As needed) — Leaking valve cover gaskets drip oil onto the exhaust manifold and A/F sensor wiring, damaging the connector and causing heater circuit faults.
- Fix engine misfires immediately (As needed) — Misfires dump raw fuel into the exhaust, igniting inside the catalytic converter and destroying both the A/F sensor and the converter.
Frequently Asked Questions
What is 'Bank 2, Sensor 1' and where is it?
On a V-shaped engine, 'Bank 1' is the side with cylinder #1, and 'Bank 2' is the opposite side. On transverse engines like a Toyota Camry, Bank 2 is the cylinder bank closer to the radiator. 'Sensor 1' is the upstream sensor located on the exhaust manifold before the catalytic converter.
Can I just clean the sensor instead of replacing it?
No. This code indicates a failure of the internal heater circuit, which is a sealed electrical component. Cleaning the outside of the sensor will not fix a burned-out internal heater. The sensor must be replaced.
I replaced the sensor, but the code came back. What went wrong?
This is a common issue with three main causes. First, using a non-OEM sensor (like Bosch instead of Denso on a Toyota) often triggers a rejection by the ECM. Second, you may have replaced the wrong sensor (Bank 1 instead of Bank 2), or missed a blown A/F heater fuse.
How do I make sure I'm replacing the correct sensor?
To avoid misdiagnosis, positively identify Bank 2 by finding the side of the engine opposite cylinder #1. Sensor 1 is always the 'upstream' sensor located on the exhaust manifold before the catalytic converter. On 4-cylinder engines with two upstream sensors (like some RAV4s), P1155 refers to the sensor for cylinders 2 and 3.
Is an Air/Fuel Ratio Sensor the same as an Oxygen Sensor?
They perform similar functions but are technologically different. An Air/Fuel Ratio sensor (wideband) measures precise air-to-fuel ratios over a wide range, while a traditional oxygen sensor (narrowband) only switches between rich and lean. Modern cars use A/F sensors upstream for fuel control and standard O2 sensors downstream to monitor the catalytic converter.
I have both P1155 and P1135 codes. Should I replace both sensors?
Not necessarily. Having both codes simultaneously points to a shared power failure rather than two simultaneously broken sensors. Always check the 'A/F Heater' fuse in the engine bay first before buying any parts.
What tools do I need to replace the sensor?
You need a 22mm (or 7/8 inch) oxygen sensor socket, a ratchet, and an extension. Penetrating oil is highly recommended to spray on the old sensor's threads 24 hours before removal, as they frequently seize in the exhaust pipe.
Key Takeaways
- P1155 indicates a burned-out heater element inside the Bank 2, Sensor 1 Air/Fuel Ratio sensor, preventing it from reaching its 1200°F operating temperature.
- Always check the 15A or 20A 'A/F HEATER' fuse in the engine bay before buying parts, especially if code P1135 is also present.
- Replace the faulty sensor exclusively with an OEM Denso part (typically $120-$160); aftermarket brands frequently cause the P1155 code to return immediately.
- Driving with an active P1155 code drops fuel economy by 5-15% and causes irreversible catalytic converter damage (a $1,500+ repair) if ignored for more than a few months.
Helpful Videos

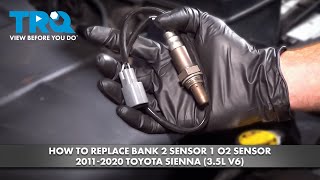

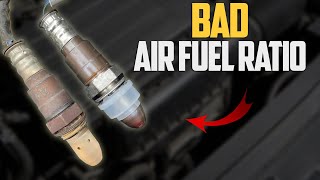

The information in this article is provided for general reference and educational purposes only. Vehicle specifications, procedures, and part compatibility can vary by production date, trim level, and region. Always consult your vehicle's factory service manual and verify part numbers before purchasing or performing repairs. Safety-critical components such as airbags, seat belts, and braking systems should be installed by a qualified professional.
- 🎬 Helpful Videos
- What Does P1155 Mean?
- Can I Drive With P1155?
- Common Causes
- Symptoms
- Diagnostic Flowchart
- Common Fixes & Costs
- DIY vs Professional
- Used vs. New Parts: Buying Guide
- What Happens If You Wait — Timeline
- Cost of Not Fixing It
- Diagnosis Steps
- When This Code Triggers (Freeze-Frame Conditions)
- Related Codes
- Climate & Environmental Factors
- How to Talk to a Mechanic About This Code
- Where to Take It: Dealer vs Independent vs Chain
- When to Walk Away From the Repair
- What Scan Tool You Need for This Code
- How to Clear the Code After You Fix It
- Will This Fail Emissions / State Inspection?
- Most Commonly Affected Vehicles
- Manufacturer-Specific Notes
- Real Owner Stories
- 2004 Toyota Sienna at ~150K miles - The Aftermarket Parts Trap
- 2001 Toyota Avalon at 190K miles - The Straightforward DIY Fix
- 2000 Lexus ES300 at ~100K miles - The Misdiagnosis
- How to Prevent This Code From Triggering
- Frequently Asked Questions
- What is 'Bank 2, Sensor 1' and where is it?
- Can I just clean the sensor instead of replacing it?
- I replaced the sensor, but the code came back. What went wrong?
- How do I make sure I'm replacing the correct sensor?
- Is an Air/Fuel Ratio Sensor the same as an Oxygen Sensor?
- I have both P1155 and P1135 codes. Should I replace both sensors?
- What tools do I need to replace the sensor?
- Key Takeaways
- 🎟️ Get 5% Off