

OBD-II Code P1086: Tumble Generator Valve Sensor Circuit Low
What P1086 means, why it triggers, and how to fix it
- Code P1086 on a Subaru specifically flags a low voltage signal from the Bank 2 (driver's side) Tumble Generator Valve position sensor.
- On BMW, Hyundai, and Chevrolet vehicles, P1086 indicates a fuel mixture or pressure issue, requiring completely different diagnostics than the Subaru TGV fault.
- Replacing the $40-$110 position sensor fixes the issue in most cases, provided the new sensor is correctly 'clocked' (pre-loaded) during installation.
- Expect a 5-15% drop in fuel economy, a rough cold idle, and flashing cruise control lights until the sensor or wiring is repaired.
- Driving with P1086 is safe for short trips, but ignoring the resulting rich fuel mixture causes $1,200+ in catalytic converter damage within 3 to 12 months.
What Does P1086 Mean?

P1086 is a manufacturer-specific code primarily used by Subaru. It indicates the engine control unit (ECU) detects an abnormally low voltage signal from the Bank 2 (driver's side) Tumble Generator Valve (TGV) position sensor. This low voltage points to a failed sensor, damaged wiring, or a physically stuck valve.
Technical definition: The official SAE definition for P1086 varies significantly by manufacturer. For Subaru, it is 'Tumble Generator Valve #2 (LH) Position Sensor Circuit Low Input'. For BMW and Hyundai, it means 'Fuel Control Limit Mixture too Rich (Bank 2 Sensor 1)'. For Chevrolet diesel models, it refers to a 'Discrepancy between PWM supplied to FCA and PWM returned from FCA detected'. This guide focuses on the common Subaru definition while noting critical manufacturer differences.
Can I Drive With P1086?
Yes, But With Caution. Yes, you can drive with P1086, but expect reduced engine power, a rough idle, and poor fuel economy. A flashing check engine light indicates a severe misfire that destroys the catalytic converter—a $1,200+ repair. Limit driving to essential short trips until the issue is resolved.
Common Causes

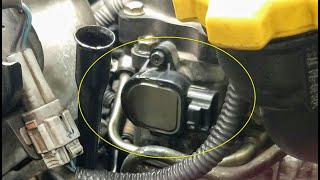
- Failed TGV Position Sensor (Very Common) — The position sensor is the most frequent point of failure. 🎬 Watch: How to swap the TGV position sensor on an Impreza As an electronic component mounted directly to the engine, it wears out from heat and vibration, eventually sending a permanent low voltage signal to the ECU.
- Improper Sensor Installation ('Clocking') (Very Common) — The TGV sensor must be installed in a specific orientation, or 'clocked,' to engage its internal spring. This code frequently appears immediately after major engine work or intake manifold removal if a technician reinstalls the sensor without properly rotating it into position.
- Damaged Wiring or Corroded Connector (Common) — The wiring harness leading to the sensor frays, breaks, or corrodes due to its exposed location. This interrupts the 5V reference or signal wire, causing the low voltage reading.
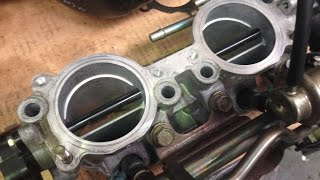
- Stuck or Binding TGV Butterfly Valve (Less Common) — Heavy carbon buildup causes the butterfly valve to stick, or in rare cases, the shaft physically breaks. The motor cannot move it, forcing the sensor to report a fixed, incorrect position that conflicts with the ECU's command.
- Failed TGV Motor (Less Common) — The small electric motor that opens and closes the valve fails over time. If the motor does not move the valve when commanded, the sensor reports a position mismatch, triggering the code.
- Faulty ECU Driver Circuit (Rare) — The internal circuit within the Engine Control Unit (ECU) that powers the TGV sensor fails. This is only considered after all other possibilities (sensor, wiring, valve) are definitively ruled out.
Symptoms

- Check Engine Light & Flashing Dash Lights — The ECU logs the P1086 code and illuminates the check engine light. On Subarus, this automatically disables cruise control (causing its light to flash) and often triggers a flashing 'BRAKE' warning light.
- Rough Idle During Cold Starts — The engine idles poorly, stumbles, or shakes during cold starts when the TGV system is required to improve cold-start emissions and stability. 🎬 Watch this explanation of how the TGV system works
- Reduced Engine Power and Hesitation — With the TGV stuck in one position, airflow into the engine is restricted, leading to poor acceleration, hesitation, and a general lack of power.
- Decreased Fuel Economy — An improperly functioning TGV system disrupts the air-fuel mixture, leading to inefficient combustion and a 5-15% drop in gas mileage.
- Engine Rattle or Noise — A rattling or buzzing sound emits from the engine bay at lower RPMs if the valve's linkage is loose or if the TGV motor struggles against a stuck valve.
Diagnostic Flowchart
Tap your situation to follow the diagnostic path that matches what you're seeing on this code.
Common Fixes & Costs
- Replace TGV Position Sensor — Parts: $40-$110, Labor: $75-$150, ~1 hr book time (Intermediate)
- Repair Damaged Wiring or Connector — Parts: $10-$30, Labor: $125-$300, ~2 hr book time (Intermediate)
- Replace TGV Motor — Parts: $150-$250, Labor: $100-$200, ~1.2 hr book time (Intermediate)
- Clean or Replace Entire TGV Housing Assembly — Parts: $250-$450, Labor: $350-$600, ~4.5 hr book time (Professional)
- Perform 'TGV Delete' — Parts: $50-$300, Labor: $250-$500, ~4 hr book time (Professional)
DIY vs Professional
- Replace TGV Position Sensor (Bank 2) — Beginner: No, this is best for an intermediate DIYer.
Tools: Basic metric socket set, screwdriver. - Replace TGV Motor (Bank 2) — Beginner: No, intermediate.
Tools: Basic metric socket set, screwdriver. - Repair Damaged Wiring — Beginner: No, this is for advanced DIYers.
Tools: Multimeter, soldering iron or quality crimp tool, heat shrink, wire strippers, replacement pigtail connector. - Clean or Replace Entire TGV Housing — Beginner: No, this is a professional-level or very advanced DIY job.
Tools: Full mechanic's tool set, torque wrench, new gaskets, fuel line disconnect tools. - Perform 'TGV Delete' — Beginner: No, professional or advanced DIY only.
Tools: Mechanic's tool set, drill, Dremel or grinding tool, taps for sealing rod holes.
Used vs. New Parts: Buying Guide
When a used part is worth it: For a complete TGV housing assembly or a TGV motor, a used part from a reputable auto recycler is a cost-effective option, especially for older vehicles.
Donor-vehicle mileage cap: roughly under 100000 miles for the part to have meaningful remaining life.
Donor quality checklist:
- Verify the part number matches your original exactly.
- Inspect used housings for cracks, corrosion, or signs of extreme carbon buildup.
- Ask the seller about the donor vehicle's mileage and reason for being scrapped.
Decision logic:
- If The failed part is the electronic position sensor → Buy new. The cost is low and a new part eliminates the risk of a worn-out used sensor.
- If The vehicle is over 10 years old and the budget is tight → A used TGV motor or complete housing assembly is an acceptable risk to save money.
- If The part requires removing the intake manifold for access → Favor a new OEM or high-quality aftermarket part to avoid paying for the same labor twice if a used part fails prematurely.
Warranty tradeoff: Used parts from recyclers typically come with a 30-90 day warranty. New aftermarket parts offer a 1-year to limited lifetime warranty. New OEM parts carry a 1-year/12,000-mile warranty.
Worst-case if a used part fails: $400-$700 if a used TGV assembly fails after installation, primarily due to the repeated labor cost of removing the intake manifold.
What Happens If You Wait — Timeline
- 0-1 month: Code P1086 is set. The Check Engine Light, flashing cruise control, and flashing brake light illuminate. A slight stumble during cold starts is noticeable. (MPG impact: 0-5%% · Added cost: $0)
- 1-4 months: The rough idle becomes consistent. The driver notices hesitation when accelerating from a stop and a clear loss of power. Fuel economy drops. (MPG impact: 5-15%% · Added cost: $50-$200 in wasted fuel.)
- 4-12 months: The stuck TGV causes a persistent air/fuel mixture imbalance on Bank 2. This leads to intermittent misfires (a flashing check engine light) under load, which overheats the catalytic converter substrate. (MPG impact: 10-20%% · Added cost: $800-$2,500 (Risk of catalytic converter damage becomes very high).)
- 12+ months / Catastrophic Event: The catalytic converter becomes completely clogged or melts from sustained misfires. In extremely rare cases, the TGV valve shaft physically breaks, and metal fragments are ingested into the cylinder, causing catastrophic engine failure. (MPG impact: >25% (if drivable)% · Added cost: $1,200-$3,100 (for catalytic converter) or $5,000-$10,000+ (for engine replacement).)
Cost of Not Fixing It
- 0-3 months: Noticeable decrease in fuel economy (5-15% drop), rough cold starts, and poor acceleration. General drivability is impacted but the risk of further damage is low. (Added cost: $50-$150 in wasted fuel.)
- 3-12 months: A persistent rich fuel mixture leads to misfires (flashing check engine light) that overheat and damage the catalytic converter. This is the most significant financial risk. (Added cost: $1,200-$3,100 for catalytic converter replacement.)
- 12+ months / Indeterminate: In very rare instances, the valve plate or its screws break off and fall into the engine's combustion chamber, causing catastrophic internal engine damage. (Added cost: $5,000-$10,000+ for a used or rebuilt engine replacement.)
Diagnosis Steps

- Read and Verify the Fault Code
Use an OBD-II scanner to confirm P1086 is the active code. Verify the code's definition for your specific vehicle make, as the meaning is completely different for BMW or Chevy. Note any mechanical fault codes like P2005/P2007.
Tools: OBD-II Scanner (Beginner) - Check for Correct Sensor Installation ('Clocking')
If any engine work was recently done, verify the sensor is installed correctly. The sensor must be placed onto its shaft with the connector pointing up (12 o'clock), then rotated clockwise to the 3 o'clock position 🎬 See how to properly clock the sensor during installation before the bolts are inserted. An improperly clocked sensor sends a false low voltage signal.
Tools: Basic hand tools (Intermediate) - Thorough Visual Inspection
Locate the TGV assembly on the driver's side of the intake manifold. Inspect the electrical connector and wiring harness going to the position sensor for fraying, melting, corrosion, or loose connections.
Tools: Flashlight, Inspection Mirror (Beginner) - Analyze Live Sensor Data (Pro Tip)
Monitor the voltage PID for the 'TGV Position Sensor Bank 2'. With the key on and engine off (KOEO), the reading should be 4.0-4.5V. When you start the engine cold, it drops to 0.4-0.8V. A voltage stuck near 0V confirms a 'circuit low' condition.
Tools: Advanced OBD-II Scanner (Intermediate) - Compare Bank 1 and Bank 2 Live Data (Advanced)
Display the live voltage data for Bank 1 and Bank 2 simultaneously. They must mirror each other's behavior. If Bank 1 reads correctly but Bank 2 is stuck low, the fault is isolated to the Bank 2 sensor, its wiring, or the valve itself.
Tools: Advanced OBD-II Scanner (Advanced) - Test Sensor Voltage with a Multimeter (Advanced)
Disconnect the sensor. With KOEO, probe the harness connector terminals to find 5V reference, ground, and signal. Reconnect and back-probe the signal wire. With ignition OFF, voltage is high (~4.0-4.5V). With KOEO, voltage drops to ~0.4-0.8V. A constant reading near 0V points to a bad sensor or a short-to-ground.
Tools: Multimeter, Back-probe kit, Vehicle Wiring Diagram (Advanced) - Test Sensor Resistance (Advanced)
With the sensor unplugged, measure resistance between the 5V reference and signal pins. Resistance should sweep smoothly from a low value (~1 kOhm) to a high value (~4-5 kOhms) as you manually actuate the sensor's spring mechanism off the car.
Tools: Multimeter (Advanced) - Check Wiring for Continuity and Shorts (Pro Tip)
Disconnect the TGV sensor connector and the corresponding ECU connector. Check the continuity of the signal, power, and ground wires from end to end (less than 1 Ohm). Check for a short to ground by testing resistance between the signal wire and a known good ground (should read OL).
Tools: Multimeter, Vehicle Wiring Diagram (Advanced) - Test the TGV Motor and Valve Actuation
Remove the TGV motor from the housing. Manually move the valve linkage by hand; it should move smoothly with a springy feel. If it is stiff, the valve is binding from carbon buildup. Turn the ignition on to verify the removed motor shaft turns as commanded.
Tools: Screwdriver, basic hand tools (Intermediate) - Remove and Inspect the TGV Assembly
If the valve is confirmed stuck, the entire TGV assembly must be removed. Stop DIY and consult a Subaru specialist if you are not comfortable removing the intake manifold. Once removed, inspect for carbon buildup, a bent valve plate, or a broken shaft.
Tools: Mechanic's tool set (Professional)
When This Code Triggers (Freeze-Frame Conditions)
- Engine Coolant Temp: Below 149°F (65°C) (During a cold start or warm-up phase when the TGV system is active.)
- Engine RPM: 700-1200 RPM (At idle or low RPM immediately after a cold start.)
- Engine Load: 20-40% (Low load conditions, such as idling or gentle acceleration, where the ECU expects to see the TGV valve move.)
- Time Since Engine Start: 0-120 seconds (The fault is detected shortly after the engine starts, as the ECU performs its initial check of the TGV system.)
Related Codes
- P1088 — This is the identical fault but for the Tumble Generator Valve on Bank 1 (passenger side). The diagnostic process is the same, just performed on the opposite side of the engine.
- P2004 — This code means 'Intake Manifold Runner Control Stuck Open Bank 1'. While P1086 is an electrical circuit code, P2004 is a mechanical fault code confirming a valve is physically stuck.
- P2005 — This code means 'Intake Manifold Runner Control Stuck Open Bank 2'. This is the mechanical fault code that directly corresponds to the TGV on Bank 2 being physically stuck in the open position.
- P2007 — This code means 'Intake Manifold Runner Control Stuck Closed Bank 2'. It specifically indicates the valve on Bank 2 is stuck in the closed position, which causes the sensor to report a low voltage, potentially triggering both codes.
Climate & Environmental Factors
- Cold Weather: TGV-related codes are far more common in cold weather. The TGV system is most active during cold starts to improve emissions. Extreme cold also causes intake manifold gaskets to shrink, creating vacuum leaks that confuse the diagnosis.
- Humidity / Condensation: Subaru issued a Technical Service Bulletin (TSB 02-182-19) noting that condensation from the EGR system causes the TGV shaft to corrode over time, leading to it sticking. This is prevalent in humid climates.
- Carbon Buildup: In direct-injection Subaru models, carbon buildup on intake valves is a known issue. This same buildup affects the TGV plates and runners, causing them to bind. Short-trip driving cycles accelerate this buildup.
How to Talk to a Mechanic About This Code
Say this: "I have a Subaru with a P1086 code. I'd like to schedule a diagnostic. Please check the TGV Bank 2 sensor, its wiring, and confirm the sensor is 'clocked' correctly. If the code appeared right after other work, I will mention that specifically."
This signals you are aware of the most common, simple fixes for this specific Subaru code. It prevents a shop from immediately quoting a full, expensive TGV assembly replacement.
Avoid saying:
- 'My check engine light is on, can you just fix it?'
- 'I think I need a new TGV.'
- 'Just do whatever you think is best.'
Questions to ask before authorizing the repair:
- Did you verify with live data that the Bank 2 TGV sensor voltage is stuck low?
- Did you manually test the TGV motor and valve linkage to see if it moves freely?
- Is your quote for replacing just the sensor, or the entire TGV assembly?
- If the code appeared after my last service, have you confirmed the sensor installation and clocking procedure was done correctly?
- What is the warranty on this specific repair and the parts used?
Where to Take It: Dealer vs Independent vs Chain
- Dealer:
A safe but expensive option. They have the correct diagnostic tools but rarely opt for the most cost-effective repair.
Best for: Vehicles under warranty, Complex electrical issues
Downsides: Highest labor rates., More likely to recommend replacing the entire TGV assembly rather than just the failed sensor. (Typical cost: +50% vs. baseline) - Independent Shop:
Best fit, especially a Subaru specialist. They are familiar with TGV clocking and pursue sensor-level fixes before replacing entire assemblies.
Best for: Out-of-warranty Subarus where cost is a factor., Shops that specialize in Subaru repairs.
Downsides: Quality and Subaru-specific knowledge varies greatly. (Typical cost: +0% vs. baseline) - Chain Shop:
AVOID for this code. The risk of an incorrect diagnosis or improper repair is high.
Best for: Simple jobs like oil changes or tires.
Downsides: Technicians are unfamiliar with Subaru-specific quirks like TGV clocking., High pressure to upsell. (Typical cost: -10% vs. baseline)
When to Walk Away From the Repair
If the estimated repair cost exceeds 40-50% of the car's private-party value, pause and consider alternatives like selling the car as-is.
- Car worth $6000, fix is $1000: Fix it. The repair for a stuck TGV valve assembly is significant but well below the 40% threshold.
- Car worth $3000, fix is $1100: Borderline. The repair cost is approaching half the car's value. Get a second opinion before proceeding.
- Car worth $5000, fix is $6000: Walk away. If the TGV failed catastrophically and caused internal engine damage, the repair cost far exceeds the vehicle's value.
What Scan Tool You Need for This Code
Minimum: An OBD-II reader that displays live sensor data for manufacturer-specific PIDs.
A basic $20 code reader only shows the P1086 code. It cannot display the live TGV sensor voltage, which is essential for confirming the 'circuit low' fault and comparing the bad sensor to the good one.
Budget: BlueDriver Pro or similar Bluetooth scanner (~$100) — Connects to your smartphone to display and graph live data, including the specific TGV position sensor voltages needed to confirm the fault.
Mid-range: Foxwell NT510 Elite for Subaru (~$180) — A handheld unit offering deep Subaru-specific diagnostics. It reads live TGV voltage, compares banks, and offers bi-directional control to command the TGV motor to move.
Professional: Autel MaxiCOM MK808S / MK808BT Pro (~$450-550) — Provides full bi-directional control to command the TGV motor and other actuators, making it easy to diagnose if the fault is the sensor, motor, or a mechanical jam.
Rent vs buy: For a one-time check, auto parts stores read codes for free. However, to perform the necessary live data diagnosis for P1086, you must buy a budget-level scanner.
How to Clear the Code After You Fix It
- Use an OBD-II scan tool to clear the P1086 fault code.
- Reconnect the battery if it was disconnected for the repair.
- Perform a complete drive cycle to allow the ECU's readiness monitors to run.
Drive cycle (~20 minutes): A Subaru drive cycle involves: 1) Cold start and idle for 2-3 minutes. 2) Drive at a steady speed of 50-55 mph for 3-5 minutes. 3) Perform a mix of city driving and steady cruising for 15-20 minutes. 4) Allow the vehicle to cool down completely.
Readiness monitors affected: Catalyst Monitor, Evaporative System Monitor, Oxygen (O2) Sensor Monitor
Before emissions retest: drive at least 50 miles to fully set monitors.
Watch out for:
- Clearing the code resets all emissions readiness monitors to 'Not Ready'. You must complete a drive cycle before an emissions test.
- Disconnecting the battery does not clear the code from permanent memory.
- The code returns immediately if the root cause, such as an incorrectly 'clocked' sensor, was not fixed.
Will This Fail Emissions / State Inspection?
Yes — this code typically fails an OBD-II emissions inspection.
- California: An active Check Engine Light for code P1086 is an automatic failure. All OBD readiness monitors must be set to 'Ready', so you cannot simply clear the code before the test.
- New York: The NYS DMV inspection includes an OBD-II scan. An illuminated Check Engine Light from P1086 results in an immediate test failure.
- Texas: In counties requiring emissions testing, an active P1086 code causes the vehicle to fail the inspection. You are typically allowed only one 'Not Ready' monitor for model year 2001+ vehicles.
Most Commonly Affected Vehicles
- Subaru WRX / WRX STI (2002-2021) — Extremely common on early WRX models. Later STI models (2008+) did not have TGVs in the intake manifold, but WRX models continued to use them.
- Subaru Forester (2011-2018) — Specifically models with the FB25B and FA20DIT (XT) engines are prone to TGV motor and sensor failures. TSB 02-182-19 addresses TGV shaft corrosion on 2014-18 Forester XT models.
- Subaru Legacy (2013-2019) — Models equipped with the FB25B engine share the same TGV design and failure points as the Forester and Outback.
- Subaru Impreza (2002-2014) — Both non-turbo and WRX models experience this code due to sensor or motor failure.
- Subaru Outback (2013-2019) — Shares powertrains with the Legacy, making it susceptible to the same TGV issues.
- BMW Various Models (e.g., 335i, 135i, 535i, X5) (2007-2010) — On BMWs with the N54 engine, P1086 means 'Fuel Control Mixture Rich Bank 2 Sensor 1'. This is a fuel mixture problem, not a TGV fault. Common causes include a failing High-Pressure Fuel Pump (HPFP) or leaky fuel injectors.
- Chevrolet Various Models with Diesel Engines (2004-2010) — For Chevrolet diesel applications (e.g., Duramax), P1086 indicates a fault with the Fuel Control Actuator (FCA) on the high-pressure fuel pump.
- Honda Various Models with Diesel Engines (e.g., N22A) (2003-2011) — On certain Honda diesel engines, P1086 relates to a 'Fuel Rail Pressure Control Valve Malfunction', indicating a problem with fuel pressure regulation.
- Hyundai Various Models (2009-2014) — Similar to BMW, Hyundai uses P1086 to indicate 'Fuel Control Mixture Rich Bank 2 Sensor 1'. Diagnosis focuses on fuel system components like oxygen sensors, MAF sensors, and injectors.
Manufacturer-Specific Notes

- Subaru: A single engine fault code like P1086 causes the Check Engine Light to illuminate, the cruise control to be disabled and its light to flash, and often the main 'BRAKE' light to flash as a general warning.
- Subaru: The TGV position sensor is physically identical to the throttle position sensor (TPS) and owners successfully use a TPS as a replacement. The OEM part number is 22633AA210.
- Subaru: Subaru issued Technical Service Bulletins for related TGV mechanical issues. TSB 02-182-19 addresses TGV shaft corrosion on 2014-18 Forester XT & 2015-19 WRX. TSB 09-72-20 addresses leaking TGV actuator lubricant on 2017-20 Impreza & Crosstrek.
- BMW: BMW extended the warranty on the High-Pressure Fuel Pump (HPFP) for N54 engines to 10 years or 120,000 miles due to high failure rates. Since P1086 on a BMW is a fuel mixture code, this warranty covers the repair.
- Chevrolet/GMC (Diesel): On Duramax engines, P1086 points to the Fuel Control Actuator (FCA). A common diagnostic trick is to unplug the FCA; if the engine starts, the FCA is faulty.
- Nissan: Do not confuse with Nissan's B1086 code. 'B' codes are for the Body Control Module. B1086 on a Nissan refers to a fault in the 'Front Left Hand Seat Belt Pre-tensioner' circuit, completely unrelated to the engine.
Real Owner Stories
2004 Subaru Impreza WRX - The Simple Sensor Swap
Check Engine Light came on with code P1086. The owner noticed a rough idle on cold mornings and slightly worse gas mileage. The car was otherwise driving normally.
What they tried:
- Initially ignored the light, but the persistent rough idle prompted action.
- Researched Subaru forums and learned the TGV position sensor is identical to the throttle position sensor (TPS).
Outcome: Purchased a new aftermarket sensor for $40. Following a tutorial, the owner replaced the sensor on the driver's side (Bank 2) in 30 minutes using basic hand tools. The key was ensuring the new sensor was 'clocked' correctly upon installation. After clearing the code, the CEL did not return.
Lesson: For a Subaru with P1086, the position sensor itself is the most likely culprit and is a cheap DIY fix. Do not let a dealer quote you for an entire TGV assembly replacement before trying this simple fix.
2015 Subaru WRX - The Post-Repair Nightmare
Immediately after getting the car back from a shop for spark plug replacement and a walnut blast cleaning of the intake valves, the Check Engine Light came on with P1086 and P1088.
What they tried:
- The owner immediately returned to the repair shop.
- The shop initially suspected they had damaged the sensors during the service and replaced both TGV sensors, but the codes returned instantly.
Outcome: After consulting with a Subaru specialist, the shop technician learned about the critical 'clocking' procedure for the TGV sensors. They had reinstalled the original sensors without pre-loading the internal spring. They removed the sensors and reinstalled them correctly by rotating them into position before tightening the bolts. The codes were cleared permanently.
Lesson: If P1086 appears immediately after any engine service, the cause is almost certainly improper reinstallation of the sensor. Return to the shop and specifically ask them to verify the 'clocking' of the TGV sensors.
2002 Subaru WRX at 155K miles - The Mechanical Failure
Owner received a persistent P2007 (TGV Stuck Closed Bank 2) code alongside P1086, putting the car in limp mode. After clearing the code, it always returned.
What they tried:
- Replaced both the TGV motor and the position sensor, but the code kept coming back.
- Tried using a fuel system cleaner hoping to free a sticky valve, with no success.
- A mechanic confirmed the wiring and electronics were good, pointing to a mechanical issue inside the housing.
Outcome: The mechanic removed the intake manifold to access the TGV assembly. They found the butterfly valve shaft binding due to heavy carbon buildup and corrosion. The final fix was replacing the entire TGV housing assembly for Bank 2. The total repair cost was just under $1,000.
Lesson: If you have a mechanical TGV code (like P2007) along with an electrical one (P1086), and replacing the sensor fails, the problem is a physically stuck valve. This requires removing the intake manifold.
How to Prevent This Code From Triggering
- Use Top Tier certified gasoline (Every fill-up) — Higher levels of detergents in Top Tier gas prevent carbon deposits from forming. Cleaner combustion reduces the overall carbon circulated by the PCV system that leads to sticking valves.
- Perform an intake system cleaning service (Every 30,000-40,000 miles) — For direct-injection engines, carbon buildup on intake valves and runners is inevitable. A professional cleaning service using a walnut shell blast removes deposits that cause TGV butterfly plates to bind.
- Install an Air/Oil Separator (AOS) (Once) — An AOS captures oil vapor from the PCV system before it recirculates into the intake manifold. This significantly reduces the sticky residue that builds up on TGV components.
- Ensure proper 'clocking' during any related service (During any repair involving intake manifold removal) — This is the most critical preventative step. Preventing an incorrect installation avoids the code from ever being triggered post-repair.
- Use high-quality engine oil designed for direct-injection engines (Every oil change) — Modern engines require oils with specific detergents to manage carbon and prevent blow-by. Using API SP rated oil helps maintain engine health and reduces contaminants that foul intake components.
Frequently Asked Questions
What is a Tumble Generator Valve (TGV)?
A Tumble Generator Valve is a small butterfly valve located in the engine's intake runner. It partially closes during cold starts to increase the 'tumble' of the incoming air. This helps air and fuel mix more completely, leading to a smoother idle and cleaner emissions.
Is P1086 a serious problem?
The severity is moderate, causing poor performance and a 5-15% drop in fuel economy. Ignoring it causes a severe misfire that destroys your catalytic converter. In rare cases, a broken valve falls into the engine and causes catastrophic damage.
Can I fix P1086 myself?
Replacing the sensor or motor on the driver's side (Bank 2) is a manageable DIY job for an intermediate mechanic. However, if the entire TGV assembly requires removal, stop and consult a professional. Removing the intake manifold risks fuel and vacuum leaks.
Why did P1086 appear right after my car was serviced?
The TGV sensor must be installed in a specific 'clocked' position to function. Technicians unfamiliar with this quirk often reinstall it incorrectly after replacing spark plugs or servicing the intake manifold. This immediately triggers the P1086 code upon startup.
What does 'Bank 2' mean on a Subaru?
Bank 2 refers to the side of the engine that does not contain cylinder number one. On a Subaru boxer engine, Bank 2 is the left-hand or driver's side in left-hand drive vehicles.
What is the biggest mistake when diagnosing P1086?
The biggest mistake is assuming the code means the same thing for all cars. P1086 on a Subaru points to the TGV system, while on a BMW or Hyundai, it indicates a rich fuel mixture. Always verify the code definition for your exact make and model before buying parts.
What is a 'TGV Delete' and should I do it?
A 'TGV delete' permanently removes the internal butterfly valves to increase airflow for better peak performance. This requires a professional ECU tune to remove the associated codes and ensure proper engine function. This modification is for off-road use only and fails emissions testing.
Can a bad TGV cause a misfire?
Yes, a stuck-closed TGV restricts airflow to the cylinders on that bank. This creates an overly rich mixture, poor combustion, and eventually a misfire code (P030x). A flashing check engine light indicates an active misfire that rapidly damages the catalytic converter.
Key Takeaways
- Code P1086 on a Subaru specifically flags a low voltage signal from the Bank 2 (driver's side) Tumble Generator Valve position sensor.
- On BMW, Hyundai, and Chevrolet vehicles, P1086 indicates a fuel mixture or pressure issue, requiring completely different diagnostics than the Subaru TGV fault.
- Replacing the $40-$110 position sensor fixes the issue in most cases, provided the new sensor is correctly 'clocked' (pre-loaded) during installation.
- Expect a 5-15% drop in fuel economy, a rough cold idle, and flashing cruise control lights until the sensor or wiring is repaired.
- Driving with P1086 is safe for short trips, but ignoring the resulting rich fuel mixture causes $1,200+ in catalytic converter damage within 3 to 12 months.
Helpful Videos


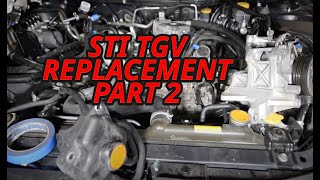

The information in this article is provided for general reference and educational purposes only. Vehicle specifications, procedures, and part compatibility can vary by production date, trim level, and region. Always consult your vehicle's factory service manual and verify part numbers before purchasing or performing repairs. Safety-critical components such as airbags, seat belts, and braking systems should be installed by a qualified professional.
- 🎬 Helpful Videos
- What Does P1086 Mean?
- Can I Drive With P1086?
- Common Causes
- Symptoms
- Diagnostic Flowchart
- Common Fixes & Costs
- DIY vs Professional
- Used vs. New Parts: Buying Guide
- What Happens If You Wait — Timeline
- Cost of Not Fixing It
- Diagnosis Steps
- When This Code Triggers (Freeze-Frame Conditions)
- Related Codes
- Climate & Environmental Factors
- How to Talk to a Mechanic About This Code
- Where to Take It: Dealer vs Independent vs Chain
- When to Walk Away From the Repair
- What Scan Tool You Need for This Code
- How to Clear the Code After You Fix It
- Will This Fail Emissions / State Inspection?
- Most Commonly Affected Vehicles
- Manufacturer-Specific Notes
- Real Owner Stories
- 2004 Subaru Impreza WRX - The Simple Sensor Swap
- 2015 Subaru WRX - The Post-Repair Nightmare
- 2002 Subaru WRX at 155K miles - The Mechanical Failure
- How to Prevent This Code From Triggering
- Frequently Asked Questions
- What is a Tumble Generator Valve (TGV)?
- Is P1086 a serious problem?
- Can I fix P1086 myself?
- Why did P1086 appear right after my car was serviced?
- What does 'Bank 2' mean on a Subaru?
- What is the biggest mistake when diagnosing P1086?
- What is a 'TGV Delete' and should I do it?
- Can a bad TGV cause a misfire?
- Key Takeaways
- 🎟️ Get 5% Off