

OBD-II Code P1072: A/F Sensor Circuit Low Voltage (Honda/Acura) & VANOS Fault (BMW)
The Ultimate Guide: What P1072 means, why it triggers, and exactly how to fix it.
- P1072 on a Honda or Acura indicates a hard electrical failure in the primary Air/Fuel Ratio sensor circuit, requiring immediate diagnosis of the sensor, wiring, and 15A heater fuse.
- On BMW models, P1072 signals a VANOS variable valve timing fault—often linked to a major safety recall (NHTSA 23V-707)—so do not replace the oxygen sensors.
- Driving with an active P1072 code drops fuel economy by up to 25% and destroys the catalytic converter within 3 to 6 months, turning a $300 sensor replacement into a $2,000+ repair.
- Before buying a new $150+ Denso A/F sensor, test the heater circuit resistance; a healthy Honda sensor reads 10-40 ohms, while an 'OL' reading confirms the sensor is dead.
What Does P1072 Mean?

P1072 is a manufacturer-specific code. For Honda and Acura, the Engine Control Unit (ECU) detects a constant low voltage signal from the primary Air/Fuel Ratio (A/F) sensor in Bank 1. The computer sees this as a hard electrical fault, meaning the sensor has failed, its heater burned out, or its wiring shorted to ground.
Technical definition: Honda/Acura: 'Air Fuel Ratio (A/F) Sensor (Bank 1 Sensor 1) Circuit Low Voltage'. BMW: 'VANOS Position Actuator, Inlet, Bank 1', indicating a variable valve timing system fault.
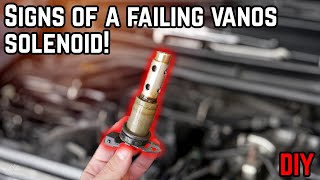
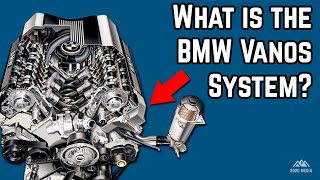
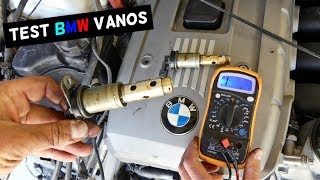
🎬 See this explanation of the BMW VANOS system and its symptoms.Can I Drive With P1072?
Yes, But With Caution. You can drive, but it is not recommended for long. Ignoring this code causes poor gas mileage, bad performance, and irreversible damage to the catalytic converter. Continuing to drive for more than 300 miles creates a repair bill of $1,500 to $2,500 for a new catalytic converter.
Common Causes

- Failed Air/Fuel Ratio Sensor (Bank 1, Sensor 1) (Very Common) — The sensor's internal heating element burns out or the sensing components degrade from heat and exhaust contaminants, causing an internal short or open circuit.
- Blown A/F Sensor Heater Circuit Fuse (Common) — The A/F sensor's heater element requires significant power and uses a dedicated 15A fuse. 🎬 Watch: How to find and check your A/F sensor fuse. If this fuse blows, the sensor cannot reach operating temperature, causing it to send a dead signal.
- Damaged Wiring or Connector (Common) — Exhaust heat melts the sensor wires, or the connector corrodes. A signal wire shorting directly to the vehicle's chassis (ground) causes the constant low voltage reading.
- Severe Rich Condition (Injectors, Fuel Pressure, EVAP, PCV) (Common) — Leaking fuel injectors, high fuel pressure, or a stuck EVAP purge valve dump excess raw fuel into the exhaust (P0172). This raw fuel permanently fouls and destroys the A/F sensor, leading to electrical failure.
- Exhaust Leak (Before the Sensor) (Less Common) — A crack in the exhaust manifold before the A/F sensor lets in outside oxygen. This confuses the sensor and contributes to premature sensor failure.
- Faulty Engine Control Module (ECM) (Very Rare) — The driver circuit inside the car's computer fails. Consider this only after ruling out the sensor, wiring, and fuses.
Symptoms
- Check Engine Light On — The primary and often only immediate symptom noticed by the driver.
- Poor Fuel Economy — Fuel consumption increases by 10-25% because the engine defaults to a rich 'safe' mode without accurate sensor feedback.
- Rough Idle or Stalling — The engine runs unevenly, shakes, or stalls at stops.
- Strong Fuel Smell & Black Smoke — A strong gasoline odor and visible black smoke from the tailpipe indicate unburned fuel passing through the engine.
- Engine Hesitation or Lack of Power (also visible on scanner) — The car feels sluggish and accelerates poorly due to an incorrect fuel mixture.
- Failed Emissions Test (scan-tool only — no driver-felt sign) — The vehicle automatically fails OBD-II emissions testing due to the active code and incomplete readiness monitors.
Diagnostic Flowchart

Tap your situation to follow the diagnostic path that matches what you're seeing on this code.
Common Fixes & Costs
- Replace Air/Fuel Ratio Sensor (Bank 1, Sensor 1)
— Parts: $100-$300, Labor: $120-$250, ~1.0 hr book time
(DIY)
Honda Civic (2006-2011, 1.8L): OEM 36531-RNA-003 (Alt: {"brand": "Denso (OEM Supplier)", "part_number": "234-9124", "price_comparison": "Slightly less than dealer OEM part."})
Honda CR-V (2007-2009, 2.4L): OEM 36531-RZA-013 (Alt: {"brand": "Denso (OEM Supplier)", "part_number": "234-9062", "price_comparison": "Slightly less than dealer OEM part."}) - Replace Blown Fuse — Parts: $2-$5, Labor: $0-$150, ~0.5 hr book time (DIY)
- Repair Damaged Wiring — Parts: $10-$30, Labor: $150-$300, ~1.5 hr book time (Intermediate)
- Fix Underlying Rich Condition (Injectors/Regulator) — Parts: $150-$600, Labor: $200-$500, ~2.5 hr book time (Professional)
- Repair Exhaust Leak — Parts: $30-$200, Labor: $150-$500, ~2.5 hr book time (Professional)
DIY vs Professional
- Replace Air/Fuel Ratio Sensor — Beginner: Yes, with caution.
Tools: O2 sensor socket (22mm or 7/8"), ratchet, extensions, breaker bar, penetrating oil, anti-seize compound. - Replace Blown Fuse — Beginner: Yes.
Tools: Owner's manual, fuse puller. - Repair Damaged Wiring — Beginner: No.
Tools: Multimeter, wiring diagram, wire cutters, soldering iron, heat shrink tubing. - Repair Exhaust Leak — Beginner: No.
Tools: Vehicle lift, welder, replacement gaskets, wrenches.
Used vs. New Parts: Buying Guide
When a used part is worth it: Buying a used Air/Fuel Ratio sensor is never recommended. They are wear-and-tear items with a finite lifespan. The risk of premature failure and paying for labor twice outweighs the $50 cost savings.
Donor-vehicle mileage cap: roughly under 20000 miles for the part to have meaningful remaining life.
Donor quality checklist:
- Only consider if from a very low-mileage vehicle wrecked for non-engine reasons.
- Avoid parts from regions with heavy road salt usage due to corrosion risk.
- Ensure the part number is an exact match.
Decision logic:
- If The part is a critical electronic sensor like an A/F sensor → Always buy new from an OEM or reputable OEM-supplier like Denso or NGK/NTK.
- If The labor to replace the part is high or difficult → Buy a new OEM part to ensure you only have to do the job once.
Warranty tradeoff: Used parts have a 30-day warranty covering only the part. New aftermarket parts offer 1-year warranties. New OEM parts carry a 12-month manufacturer's warranty.
Worst-case if a used part fails: $250-$500 if a used sensor fails after installation, requiring repeat labor costs plus the price of another sensor.
What Happens If You Wait — Timeline
- 0-2 weeks: Check Engine Light illuminates. The engine computer defaults to a 'safe' fuel map. No drivability symptoms are noticeable. (MPG impact: 5-10%% · Added cost: $10-$30 in wasted fuel.)
- 2 weeks - 3 months: Fuel economy noticeably decreases. The engine exhibits a rough idle when cold. A faint smell of gasoline is present from the exhaust. (MPG impact: 10-20%% · Added cost: $50-$200 in wasted fuel. The catalytic converter operates at higher-than-normal temperatures.)
- 3-6 months: Engine hesitates during acceleration and stalls at stops. The rich mixture overheats and damages the precious metals inside the catalytic converter. (MPG impact: 15-25%% · Added cost: $800-$1500 as the catalytic converter's internal structure begins to melt.)
- 6+ months: Catastrophic failure of the catalytic converter. The internal honeycomb substrate melts and blocks the exhaust. The car cannot accelerate past 30 mph. (MPG impact: 25-50%% · Added cost: $1500-$3000 for replacement of the catalytic converter and downstream O2 sensor.)
Cost of Not Fixing It
- 0-1 month: Significant drop in fuel economy. Engine runs rough, hesitates, or stalls. Strong fuel smell present. (Added cost: $50-$150 in wasted fuel.)
- 1-6 months: The rich fuel mixture overheats the catalytic converter, causing its internal substrate to melt and clog. (Added cost: $1200-$2800 for catalytic converter replacement.)
- 6+ months: Severe engine performance issues and guaranteed failure of emissions tests. The vehicle becomes undrivable due to a blocked exhaust. (Added cost: $2000+ for catalytic converter and potential secondary engine damage.)
Diagnosis Steps
- Scan for Additional Codes
Use an OBD-II scanner to confirm P1072. Codes like P0172 (System Rich) or misfire codes (P030x) point to a root cause that destroyed the sensor.
Tools: OBD-II Scanner (Beginner) - Check the A/F Sensor Fuse
Consult your owner's manual to locate the 15A fuse for the 'A/F Heater' or 'O2 Heater'. Replace it if blown. A blown fuse indicates a short in the sensor's heater circuit.
Tools: Owner's Manual, Fuse Puller (Beginner) - Visually Inspect the Sensor and Wiring
Locate the A/F sensor (Bank 1, Sensor 1) on the exhaust manifold. Look for melted wires, loose connections, or corrosion on the sensor body and wiring harness.
Tools: Flashlight, Safety Glasses (Beginner) - Analyze Live Sensor Data (Voltage)
View live data for 'B1S1 Voltage'. A healthy Honda/Acura A/F sensor shows a steady voltage around 3.3V at idle. A sensor triggering P1072 is stuck below 0.5V, confirming the circuit low condition.
Tools: Advanced OBD-II Scanner with Live Data (Intermediate) - Test the A/F Sensor Heater Circuit Resistance
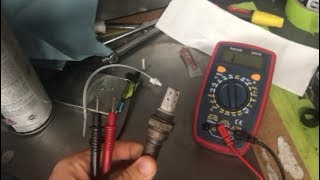
Disconnect the sensor. Measure resistance (Ω) between the two heater wires (often the same color). A healthy Honda/Acura sensor reads 10-40 ohms. A reading of 'OL' (infinite resistance) means the heater is broken, and the sensor must be replaced.
Tools: Multimeter (Advanced) - Test Heater Circuit Power and Ground
With the key 'ON' (engine off), test the harness-side connector. One pin must have battery voltage (~12V) and the other a good ground (< 0.1V). This verifies the vehicle's wiring and ECU are good.
Tools: Multimeter (Advanced) - Test the Sensor Signal Circuit for Shorts
Disconnect the sensor and ECM connector. Check for continuity between the signal wire pin on the harness connector and a chassis ground. Continuity confirms a short to ground in the wiring harness.
Tools: Multimeter, Wiring Diagram (Advanced) - Test Fuel Pressure
Check fuel pressure to rule out sensor fouling. Port-injected Hondas should read 38-46 PSI at idle. Incorrect pressure indicates a failing pump or regulator.
Tools: Fuel Pressure Gauge (Advanced)
When This Code Triggers (Freeze-Frame Conditions)
- Engine Coolant Temp: 170-210°F (The engine is fully warmed up and operating in closed-loop fuel control.)
- Engine RPM: 1500-2500 RPM (The fault is captured during steady-state cruising or light acceleration, not at idle.)
- Engine Load: 20-50% (The code sets under normal driving conditions with moderate engine load.)
- Vehicle Speed: 40-65 mph (The fault registers during city or highway cruise conditions.)
Related Codes
- P0172 — P1072 is a circuit code (electrical failure), while P0172 is a performance code (System Too Rich). P0172 is often the root cause that fouls the sensor and leads to P1072. Diagnose the circuit code (P1072) first.
- P0135 — O2 Sensor Heater Circuit Malfunction. Very similar to P1072 but specific to the heater element. Diagnosing P1072 always involves testing the heater circuit.
- P1172 — Honda-specific code for 'A/F Sensor Response Slow'. P1072 points to a hard electrical fault, while P1172 indicates the sensor is still working but dying slowly.
- P0171 — System Too Lean. An exhaust leak before the sensor lets in unmetered oxygen, causing P0171. If both codes are present, check live data to differentiate between a dead sensor and a lean condition.
Climate & Environmental Factors
- Road Salt: Salt spray severely corrodes the sensor body, wiring, and electrical connector, leading to circuit failures like P1072.
- High Humidity: Moisture penetrates the sensor's wiring connector, causing corrosion and electrical shorts over time.
- Cold Weather: A weak sensor heater circuit takes longer to reach operating temperature (1,000°F), keeping the ECU in open-loop mode longer and hurting fuel economy.
How to Talk to a Mechanic About This Code
Say this: "I have a P1072 code on my [Make, Model]. I'd like you to test the A/F sensor heater circuit, check for power and ground at the connector, and inspect the wiring for shorts before recommending a new sensor."
This directs the technician to perform specific electrical tests to confirm the failure, reducing the chance of misdiagnosis or being sold an unnecessary $300 part.
Avoid saying:
- 'My check engine light is on, can you look at it?' (Invites a broad, expensive diagnostic process).
- 'I think I need a new oxygen sensor.' (Leads to replacing the part without diagnosing a wiring short or blown fuse).
- 'Just fix whatever's wrong.' (Gives the shop a blank check for unnecessary repairs).
Questions to ask before authorizing the repair:
- Did you test the heater circuit resistance on the sensor, and what was the reading?
- Did you confirm there is battery voltage and a good ground at the harness-side connector?
- Will you be using an OEM-supplier part like Denso, or an aftermarket part?
- What is the warranty on the part and the labor?
Where to Take It: Dealer vs Independent vs Chain
- Dealer:
Required for BMWs due to the VANOS-specific nature of the code. For Honda/Acura, a dealer is an expensive choice only necessary if under warranty.
Best for: Vehicles still under powertrain or emissions warranty., BMWs requiring VANOS recall work (NHTSA 23V-707).
Downsides: Labor rates are 50-100% higher than independent shops., Dealers default to replacing entire assemblies rather than targeted repairs. (Typical cost: +50% vs. baseline) - Independent Shop:
Best fit for a Honda/Acura with P1072. An experienced independent technician efficiently diagnoses the A/F sensor circuit, providing better value.
Best for: Out-of-warranty Honda/Acura vehicles where cost is a factor., Diagnosing common electrical circuit faults.
Downsides: Quality varies; find a shop with ASE-certified technicians. (Typical cost: +0% vs. baseline) - Chain Shop:
Not recommended. They are likely to replace the A/F sensor without proper circuit diagnosis, leading to repeat repairs.
Best for: Routine maintenance like oil changes.
Downsides: Technician skill varies dramatically., Lack advanced diagnostic experience for electrical circuit faults. (Typical cost: -10% vs. baseline)
When to Walk Away From the Repair
Take it to a shop if the estimated repair cost exceeds 40-50% of the car's private-party value. Consider selling or trading in the vehicle instead.
- Car worth $4000, fix is $2000: Borderline. The repair cost is 50% of the car's value. Get a second opinion and consider if other major repairs are looming.
- Car worth $12000, fix is $1800: Fix it. The repair cost is only 15% of the vehicle's value.
- Car worth $2500, fix is $1500: Walk away. The repair cost is 60% of the car's value. It is not financially sensible to invest that much into an older car.
What Scan Tool You Need for This Code

Minimum: A code reader that displays live sensor data, specifically the voltage for the Bank 1 Sensor 1 A/F sensor.
A basic $20 code reader only gives the P1072 code. To properly diagnose the issue, you must see the live voltage data to confirm it is stuck low.
Budget: BlueDriver Pro (~$99) — Connects to your smartphone via Bluetooth to read codes and graph live sensor data, confirming the A/F sensor's low voltage reading.
Mid-range: Foxwell NT510 Elite (~$180) — A handheld scanner providing manufacturer-specific codes and excellent live data graphing. Accesses all vehicle modules for diagnosing related issues.
Professional: Autel MaxiCOM MK808 (~$450) — A professional tablet scanner offering full system diagnostics, fast graphing, and data recording invaluable for intermittent fault diagnosis.
Rent vs buy: If this is a one-time repair, borrow a basic OBD-II scanner for free from an auto parts store's 'Loan-A-Tool' program. Buy a scanner only if you perform regular diagnostics.
How to Clear the Code After You Fix It
- Use an OBD-II scan tool to clear the diagnostic trouble code (DTC).
- Perform a complete drive cycle to allow the vehicle's readiness monitors to run and reset.
- Check readiness monitor status with a scan tool before going for an emissions test.
Drive cycle (~30 minutes): A Honda drive cycle requires a cold start (engine off for 6+ hours), a 20-second idle, 3 minutes at 2000 RPM to warm up, 15-20 minutes of highway driving between 50-60 mph, and 10 minutes of city driving.
Readiness monitors affected: Catalyst Monitor, Oxygen (O2) Sensor Monitor, O2 Sensor Heater Monitor
Before emissions retest: drive at least 50 miles to fully set monitors.
Watch out for:
- Disconnecting the battery clears the code but resets all readiness monitors to 'Not Ready', guaranteeing an emissions test failure.
- The code returns immediately if the underlying electrical fault (bad sensor, shorted wire, blown fuse) is not repaired.
- Failing to keep the fuel level between 1/4 and 3/4 full prevents monitors from setting.
Will This Fail Emissions / State Inspection?
Yes — this code typically fails an OBD-II emissions inspection.
- California: An active Check Engine Light for P1072 is an automatic smog check failure. After repair, all readiness monitors must be 'Ready'. An incomplete O2 sensor or Catalyst monitor blocks the test.
- New York: A P1072 code causes an automatic failure of the NYS OBD-II emissions inspection. You must complete a drive cycle to set the readiness monitors before re-inspection.
- Texas: In counties requiring emissions testing, a vehicle with code P1072 fails the OBD portion of the inspection. The Check Engine Light must be off and readiness monitors set to 'Ready'.
Most Commonly Affected Vehicles
- Honda Civic (2006-2011) — Subject to service bulletin 07-006 for related A/F sensor codes caused by moisture damage.
- Honda Accord (4-cylinder) (2018-2022) — Models with the 1.5L Turbo engine suffer from faulty fuel injectors causing a rich condition (P0172) that destroys the A/F sensor. A warranty extension (TSB 22-002) applies.
- Honda CR-V (2017-2018) — 1.5L Turbo models set P0172 due to fuel-in-oil issues, fouling the A/F sensor. TSBs 18-114 and 18-124 address this with software updates.
- Acura RSX (2002-2006) — Shares powertrain components with the Civic Si, making it prone to identical A/F sensor circuit faults.
- BMW 3-Series (E90, E92) (2006-2013) — P1072 indicates a VANOS variable valve timing system fault, not an A/F sensor. Caused by a major recall (NHTSA 23V-707) for broken VANOS housing bolts.
- Subaru Forester (2014-2022) — TSB 09-81-21R addresses a fuel injector design flaw causing rich conditions that eventually lead to A/F sensor failure.
- Hyundai / Kia Sonata / Optima (2011-2019) — GDI engines experience rich conditions due to high-pressure fuel pump issues, eventually causing A/F sensor failure.
Manufacturer-Specific Notes

- Honda / Acura: The most common brand for this code. It almost always points to a Bank 1, Sensor 1 A/F sensor circuit fault. Honda issued warranty extensions for fuel injectors on 2016-2022 models (TSB 22-002) that cause rich conditions leading to sensor failure.
- BMW: P1072 means 'VANOS Position Actuator, Inlet, Bank 1'. It indicates a variable valve timing problem. Do not diagnose oxygen sensors. A major safety recall (NHTSA 23V-707) covers VANOS housing bolts that break and cause this code.
- Hyundai / Kia: On GDI engines, high-pressure fuel pump (HPFP) issues and leaking injectors cause a P0172 rich condition. Unaddressed, this persistently fouls the upstream A/F sensor, triggering circuit codes.
Real Owner Stories
2008 Acura TL with P1072 & P0172/P0175
Check Engine Light and VSC light appeared. The car hesitated on acceleration and died at startup unless given gas. Fuel economy dropped significantly.
What they tried:
- Cleaned the Mass Airflow (MAF) sensor for a temporary fix.
- Replaced the MAF sensor with a cheap aftermarket part; codes returned instantly.
- Replaced the MAF sensor with an OEM part; codes disappeared for a few days then returned.
Outcome: The repeated return of rich codes (P0172/P0175) indicated leaking fuel injectors. The constant rich condition eventually destroyed the A/F sensor, triggering the P1072 circuit code.
Lesson: When rich codes accompany a circuit code (P1072), the rich condition is the disease that killed the sensor. Diagnose the rich condition first, or the new A/F sensor will fail prematurely.
2012 Honda Civic with P1072
Check Engine Light illuminated with no immediate drivability symptoms. Fuel economy dropped after two weeks.
What they tried:
- A chain shop quoted $1,800 for a new catalytic converter.
- A second mechanic viewed live data, showing B1S1 A/F sensor voltage stuck at 0.0V.
- The mechanic checked the A/F sensor fuse and found it blown.
Outcome: Replacing the $3 15A fuse cleared the code. The mechanic noted the old A/F sensor's heater element was likely beginning to short and would need replacement soon.
Lesson: Always check the 15A heater fuse first. A proper diagnosis involves testing for power at the sensor connector before condemning an expensive sensor or catalytic converter.
2006 BMW 330i (E90) with P1072 & VANOS codes
Service Engine Soon light appeared with codes P0012, P0016, and P1554. The car hesitated during hard acceleration and idled low at 550 RPM.
What they tried:
- Cleaned both VANOS solenoids; codes returned.
- Swapped the intake and exhaust VANOS solenoids to see if the code followed the part.
Outcome: Replacing both VANOS solenoids resolved the rough idle and hesitation.
Lesson: On a BMW, P1072 is a VANOS code, not an A/F sensor code. Swap the intake and exhaust VANOS solenoids to confirm a bad solenoid before buying parts.
How to Prevent This Code From Triggering
- Use Top-Tier certified gasoline (Every fill-up) — Top-Tier gas contains detergent additives that prevent carbon deposits on fuel injectors. Clogged injectors cause rich conditions (P0172) that foul and destroy the A/F sensor.
- Address engine misfires and rich/lean conditions immediately (As soon as symptoms appear) — A misfire or severe rich condition dumps raw fuel into the exhaust, overheating the A/F sensor and catalytic converter, causing rapid failure.
- Perform regular oil changes with high-quality oil (Every 5,000-7,500 miles) — Old oil contributes to PCV system issues and increases oil vapors contaminating the intake, leading to deposits that harm the A/F sensor.
Frequently Asked Questions
What is the difference between an Air/Fuel Ratio sensor and an Oxygen sensor?
An Air/Fuel (A/F) sensor is an advanced, wideband sensor providing precise air-fuel mixture measurements. A traditional oxygen (O2) sensor is a narrowband sensor that only switches between 'rich' or 'lean'. A/F sensors sit upstream (before the cat), while O2 sensors sit downstream.
What does 'circuit low voltage' actually mean?
The Engine Control Unit (ECU) reads a voltage from the sensor's signal wire at or near zero volts. The ECU interprets this as an electrical problem, such as an internally shorted sensor or a frayed wire touching the metal chassis.
My car has codes P1072 and P0172. What should I fix first?
Always diagnose the circuit code (P1072) first. P1072 indicates a direct electrical problem, meaning the sensor's data cannot be trusted by the ECU. Fixing the P1072 fault often clears the P0172 fuel trim code automatically.
Can I just clean the A/F sensor instead of replacing it?
No. By the time a sensor sets a hard circuit code like P1072, the internal sensing element or heater circuit is electrically fried. Cleaning the exterior will not fix an internal electrical failure, so the sensor must be replaced.
Can a bad PCV valve or EVAP leak cause P1072?
Yes, indirectly. A faulty PCV valve or stuck-open EVAP purge solenoid creates a rich condition (P0172). Ignoring this exposes the A/F sensor to excess fuel, eventually destroying it and triggering P1072.
Is it better to use an OEM or Aftermarket A/F sensor?
Always use an OEM or direct OEM-supplier part (like Denso or NTK) for critical A/F sensors. Cheaper aftermarket sensors have different response times and heater characteristics. Using them causes persistent fuel trim issues, poor performance, and returning check engine lights.
What tools do I need to replace an A/F sensor?
You need a specialized 22mm (7/8") O2 sensor socket, a ratchet with extensions, and a breaker bar. Apply penetrating oil to loosen the old sensor and use anti-seize compound on the new sensor's threads.
Where is Bank 1, Sensor 1 located?
'Bank 1' is the side of the engine containing cylinder #1. 'Sensor 1' is the upstream sensor. It is located on the exhaust manifold or exhaust pipe directly before the catalytic converter.
Will the P1072 code clear itself after I fix the problem?
No. After repairing the fault, you must use an OBD-II scanner to manually clear the code from the computer's memory. The check engine light will not turn off on its own.
What is the most common misdiagnosis for P1072?
The most common mistake is replacing the Air/Fuel sensor without testing the circuit first. The code is frequently caused by a simple blown 15A fuse or damaged wiring. Always test the heater circuit and check for power/ground at the connector before buying a $150+ sensor.
Key Takeaways
- P1072 on a Honda or Acura indicates a hard electrical failure in the primary Air/Fuel Ratio sensor circuit, requiring immediate diagnosis of the sensor, wiring, and 15A heater fuse.
- On BMW models, P1072 signals a VANOS variable valve timing fault—often linked to a major safety recall (NHTSA 23V-707)—so do not replace the oxygen sensors.
- Driving with an active P1072 code drops fuel economy by up to 25% and destroys the catalytic converter within 3 to 6 months, turning a $300 sensor replacement into a $2,000+ repair.
- Before buying a new $150+ Denso A/F sensor, test the heater circuit resistance; a healthy Honda sensor reads 10-40 ohms, while an 'OL' reading confirms the sensor is dead.
Helpful Videos


The information in this article is provided for general reference and educational purposes only. Vehicle specifications, procedures, and part compatibility can vary by production date, trim level, and region. Always consult your vehicle's factory service manual and verify part numbers before purchasing or performing repairs. Safety-critical components such as airbags, seat belts, and braking systems should be installed by a qualified professional.
- 🎬 Helpful Videos
- What Does P1072 Mean?
- Can I Drive With P1072?
- Common Causes
- Symptoms
- Diagnostic Flowchart
- Common Fixes & Costs
- DIY vs Professional
- Used vs. New Parts: Buying Guide
- What Happens If You Wait — Timeline
- Cost of Not Fixing It
- Diagnosis Steps
- When This Code Triggers (Freeze-Frame Conditions)
- Related Codes
- Climate & Environmental Factors
- How to Talk to a Mechanic About This Code
- Where to Take It: Dealer vs Independent vs Chain
- When to Walk Away From the Repair
- What Scan Tool You Need for This Code
- How to Clear the Code After You Fix It
- Will This Fail Emissions / State Inspection?
- Most Commonly Affected Vehicles
- Manufacturer-Specific Notes
- Real Owner Stories
- 2008 Acura TL with P1072 & P0172/P0175
- 2012 Honda Civic with P1072
- 2006 BMW 330i (E90) with P1072 & VANOS codes
- How to Prevent This Code From Triggering
- Frequently Asked Questions
- What is the difference between an Air/Fuel Ratio sensor and an Oxygen sensor?
- What does 'circuit low voltage' actually mean?
- My car has codes P1072 and P0172. What should I fix first?
- Can I just clean the A/F sensor instead of replacing it?
- Can a bad PCV valve or EVAP leak cause P1072?
- Is it better to use an OEM or Aftermarket A/F sensor?
- What tools do I need to replace an A/F sensor?
- Where is Bank 1, Sensor 1 located?
- Will the P1072 code clear itself after I fix the problem?
- What is the most common misdiagnosis for P1072?
- Key Takeaways
- 🎟️ Get 5% Off