

OBD-II Code P1031: Air/Fuel Ratio Sensor Heater Circuit Malfunction
What P1031 means, why it triggers, and how to fix it
- P1031 almost always indicates a burnt-out internal heater in the Bank 1 Air/Fuel Ratio Sensor, requiring a $190-$540 replacement.
- Verify your manufacturer's specific definition for P1031, as it means 'Fuel high-pressure sensor stuck' on a Porsche or 'Valvetronic Actuator' on a BMW, completely changing the diagnosis.
- Fix this code within 1 month to prevent the engine from running rich and destroying your catalytic converter, a repair costing upwards of $1,500.
- Inspect the 15-amp A/F heater fuse and the sensor's wiring harness for melting or chafing before buying a new sensor.
- Check for Technical Service Bulletins (TSBs) on 2004-2005 Nissan and Infiniti models, as a $100-$200 ECM software update often resolves false P1031 codes.
What Does P1031 Mean?

P1031 indicates the Engine Control Module (ECM) detected a fault in the heater circuit of the Bank 1 Air/Fuel Ratio (A/F) Sensor. This sensor, located in the exhaust before the catalytic converter, requires an internal heater to quickly reach its 600°F operating temperature on cold starts.
Technical definition: The SAE/ISO definition for P1031 is manufacturer-specific. For Nissan, it means 'Air Fuel Ratio (A/F) Sensor 1 Heater Control Circuit Low Voltage Bank 1'. For BMW, it indicates 'Valvetronic (VVT) Actuator Monitoring', and for Porsche, 'Fuel high-pressure sensor stuck'.
Can I Drive With P1031?
Yes, But With Caution. You can drive, but address it promptly. Ignoring it reduces fuel economy, increases emissions, and destroys your catalytic converter over time. Continued driving with a rich fuel condition causes catalytic converter failure, a repair costing $800 to $2,500.
Common Causes

- Failed Air/Fuel Ratio (A/F) Sensor (Very Common) — The internal heating element burns out like a lightbulb filament after 100,000 miles, causing an open circuit.
- Blown Fuse or Faulty Relay (Common) — A blown fuse instantly disables the heater circuit and triggers this code. This is often caused by a short in the wiring.
- Damaged Wiring or Connectors (Common) — Extreme exhaust heat and road debris melt or break the sensor's wiring harness. Corroded connectors also cause a loss of power or ground.
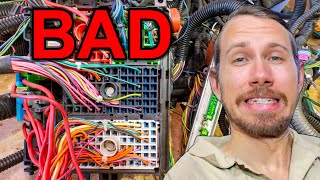
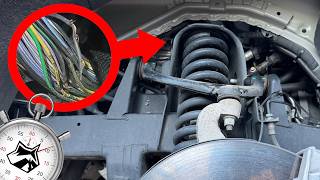
- Engine Harness Chafing (Common) — The main engine wiring harness rubs against sharp metal brackets or the chassis, wearing through the insulation and shorting the heater circuit wire. 🎬 See this quick tip for repairing chafed engine wires.
- Exhaust Leaks (Less Common) — A leak in the exhaust manifold introduces outside oxygen, cooling the sensor and skewing readings. The ECM misinterprets this as a heater performance issue.
- Incorrect Replacement Sensor (Less Common) — Cheap aftermarket sensors have different internal heater resistance than original equipment (OE) parts, triggering a persistent fault.
- Faulty Engine Control Module (ECM) (Rare) — The ECM's internal driver circuit that controls the sensor heater fails. Consider this only after exhaustively ruling out all wiring and sensor issues.
Symptoms

- Check Engine Light is On — The ECM illuminates the Malfunction Indicator Lamp (MIL) on your dashboard as soon as the heater circuit fault is detected.
- Decreased Fuel Economy — Without a functioning heater, the sensor provides delayed readings, forcing the ECM to run a rich, fuel-wasting 'open-loop' mixture.
- Smell of Fuel from Exhaust — A rich-running engine passes unburned fuel into the exhaust, creating a strong gasoline odor and visible black smoke.
- Rough or Unstable Idle — The engine idles erratically on cold starts because the ECM lacks accurate air-fuel feedback to stabilize the mixture.
- Hesitation or Poor Acceleration — The vehicle feels sluggish during initial acceleration due to an unoptimized fuel mixture.
Diagnostic Flowchart
Tap your situation to follow the diagnostic path that matches what you're seeing on this code.
Common Fixes & Costs
- Replace Air/Fuel Ratio Sensor (Bank 1, Sensor 1)
— Parts: $120-$380, Labor: $80-$180, ~1.2 hr book time
(DIY)
Nissan Murano (2004-2007): OEM 22693-CD700 (Alt: Denso 234-5060, Bosch 17264, NTK 24320)
Nissan Altima (2002-2006, 3.5L): OEM 22693-7Y020 (Alt: Denso 234-9001, Bosch 15521, NTK 24404) - Replace Blown Fuse — Parts: $1-$5, Labor: $0-$60, ~0.1 hr book time (DIY)
- Repair Damaged Wiring or Connector — Parts: $15-$60, Labor: $130-$300, ~2.5 hr book time (Intermediate)
- Reprogram Engine Control Module (ECM) — Parts: $0, Labor: $100-$200, ~1 hr book time (Professional)
- Repair Exhaust Leak — Parts: $25-$350, Labor: $150-$450, ~2.5 hr book time (Professional)
- Replace In-Tank Fuel Pump (Porsche)
— Parts: $300-$550, Labor: $250-$400, ~2.2 hr book time
(Professional)
Porsche Cayenne (V6/V8 Gas, 2011-2014): OEM 958-620-132-00 (Alt: VDO, Autopart Premium)
Used vs. New Parts: Buying Guide
When a used part is worth it: Buying a used Air/Fuel Ratio sensor is never recommended. These are wear-and-tear items with a finite lifespan. The small cost savings are not worth the risk of early failure.
Donor-vehicle mileage cap: roughly under 30000 miles for the part to have meaningful remaining life.
Donor quality checklist:
- Only consider if from a very low-mileage wrecked vehicle.
- Ensure the part number is an exact match.
- Avoid sensors from vehicles with known engine problems.
Decision logic:
- If The part is an Air/Fuel Ratio Sensor or Oxygen Sensor. → Always buy new from a reputable OEM or aftermarket brand (Denso, NTK, Bosch).
- If The part is an ECM and a new one is prohibitively expensive. → A used ECM from a specialist recycler offering a warranty is a viable option.
- If The part is a wiring harness pigtail or connector. → Used connectors in good condition are perfectly acceptable for splicing.
Warranty tradeoff: Used sensors typically have a 30-day warranty. New quality aftermarket sensors offer warranties from 1 year to limited lifetime.
Worst-case if a used part fails: $200-$400 if a used sensor fails after installation, requiring a new part plus repeat labor costs.
What Happens If You Wait — Timeline
- 0-1 month: Check Engine Light illuminates. The engine remains in inefficient 'open-loop' mode longer after cold starts. No drivability symptoms are noticeable. (MPG impact: 3-5%% · Added cost: $10-$30 in wasted fuel)
- 1-4 months: Fuel economy drops noticeably. The engine runs consistently rich, elevating the catalytic converter's temperature above its normal 1600°F limit and beginning thermal degradation. (MPG impact: 5-15%% · Added cost: $50-$150 in wasted fuel and spark plug fouling)
- 4-8 months: The catalytic converter's internal ceramic honeycomb cracks from sustained overheating. The vehicle feels sluggish, and a rotten egg smell appears. Damage is irreversible. (MPG impact: 10-20%% · Added cost: $800-$1500 (catalytic converter replacement required))
- 8+ months: Catastrophic catalyst failure. The internal substrate melts into a solid block, creating a severe exhaust restriction. The engine loses power, stalls, and becomes undrivable. (MPG impact: 20-50%% · Added cost: $1500-$3000 (catalytic converter and potential exhaust manifold replacement))
Cost of Not Fixing It
- 0-1 month: Noticeable drop in fuel economy (5-15%), failing an emissions test, and a persistent Check Engine Light. (Added cost: $20-$60 in wasted fuel per month)
- 1-6 months: The engine runs consistently rich, causing unburnt fuel to overheat and damage the catalytic converter. Spark plugs become fouled. (Added cost: $100-$300 for spark plug replacement)
- 6+ months: Catastrophic failure of the catalytic converter. The internal substrate melts, causing a major exhaust restriction and severe loss of power. (Added cost: $1200-$2800 for catalytic converter replacement)
Diagnosis Steps

- Read Fault Codes and Review Freeze Frame Data
Use an OBD-II scanner to confirm P1031 is active. Review the 'Freeze Frame' data to see the engine's operating conditions (speed, temperature, load) at the exact moment the code set.
Tools: OBD-II Scanner (Beginner) - Check for Technical Service Bulletins (TSBs)
Search online for TSBs related to P1031 for your specific year, make, and model. Manufacturers (especially Nissan and GM) frequently release software updates to correct false error codes, saving you from buying unnecessary parts.
Tools: Internet Access (Beginner) - Inspect the Fuse and Relay
Locate the fuse for the 'A/F Heater' or 'O2 Heater' in your owner's manual (often a 15A fuse on Nissans). Visually inspect it. If blown, replace it. If it blows again immediately, you have a short circuit.
Tools: Owner's Manual, Fuse Puller (Beginner) - Visually Inspect Wiring and Connector
Locate the Bank 1, Sensor 1 A/F sensor in the exhaust manifold. Follow its wiring harness back, looking for melting, chafing against engine parts, or corrosion in the connector.
Tools: Flashlight, Safety Glasses (Beginner) - Test the Sensor's Heater Resistance
Unplug the sensor. Set a multimeter to Ohms (Ω). Measure the resistance between the two heater circuit pins on the sensor (often the same color wires). A good Nissan sensor reads 2.3 to 4.3 Ohms at room temperature. A reading of 'OL' means the internal heater is broken and the sensor requires replacement.
Tools: Multimeter (Intermediate) - Test the Harness for Power and Ground
With the sensor unplugged and ignition 'ON' (engine off), use a multimeter set to DC Volts on the harness connector. One pin must have battery voltage (~12V). Use a test light connected to battery positive to probe the ground pin; it must illuminate. Missing power or ground indicates a wiring or ECM fault.
Tools: Multimeter, 12V Test Light (Advanced) - Check for Exhaust Leaks
With the engine running, listen and feel for air leaks from the exhaust manifold near the sensor. Black soot trails around a gasket indicate a leak that must be repaired before replacing sensors.
Tools: Safety Glasses, Mechanic's Stethoscope (or hose) (Intermediate) - Analyze Live Data with a Scan Tool
Warm the engine and hold RPMs at 2,000. View live data for 'A/F SEN1 (B1)'. It should show a stable voltage between 1.37V and 1.57V (on Nissans). Voltage stuck outside this range confirms a faulty sensor or circuit.
Tools: Advanced OBD-II Scan Tool with Live Data (Advanced) - Advanced: Measure Heater Circuit Current Draw (GM)
For GM vehicles where P1031 is a 'Heater Current Monitor' fault, use a DC amp clamp around the heater power wire. A healthy sensor draws 0.5 to 1.5 Amps. 0A indicates an open circuit; abnormally high readings indicate a short.
Tools: DC Amp Clamp, Advanced Scan Tool (Advanced) - Advanced: Test Fuel Pressure (Porsche)
On a Porsche Cayenne with P1031 ('Fuel high-pressure sensor stuck'), connect a fuel pressure gauge to the low-pressure service port. Key on, engine off pressure should be ~72 PSI. Lower pressure confirms a failed in-tank fuel pump.
Tools: Fuel Pressure Gauge, Service Manual (Advanced)
When This Code Triggers (Freeze-Frame Conditions)
- Engine Coolant Temp: 170-210°F (77-99°C) (Fully warmed up)
- Engine RPM: 1000-1600 (Steady cruise or light acceleration)
- Engine Load: 15-35% (Low to moderate engine effort)
- Vehicle Speed: 25-60 mph (40-97 km/h) (City or highway driving)
Related Codes
- P0031 — The generic OBD-II code for 'O2 Sensor Heater Control Circuit Low (Bank 1 Sensor 1)'. P1031 is the manufacturer-specific equivalent. The diagnostic process is identical.
- P1051 — The identical heater circuit fault for Bank 2, Sensor 1. Seeing P1031 and P1051 together points to a shared blown fuse or ground issue.
- P1148 — A Nissan-specific code for 'Closed Loop Control (Bank 1)'. This is a symptom of P1031 preventing the A/F sensor from working. Fixing P1031 resolves P1148.
- P0135 — Another generic code for 'O2 Sensor Heater Circuit (Bank 1 Sensor 1)'. The underlying fault and diagnosis are the same as P1031.
Climate & Environmental Factors
- Cold Climates: The heater's function is critical in cold weather. A P1031 fault prevents the sensor from reaching 600°F quickly, forcing the engine to stay in a fuel-rich 'open-loop' mode much longer. This drastically reduces fuel economy during short winter trips.
How to Talk to a Mechanic About This Code
Say this: "I have a P1031 code for the Bank 1 A/F sensor heater circuit. I'd like a diagnosis that starts by testing the sensor's heater resistance and checking for power and ground at the harness connector. Please check for any related TSBs before recommending a part replacement."
This directs the mechanic to perform specific electrical tests instead of just replacing the most likely part, preventing unnecessary labor.
Avoid saying:
- 'My check engine light is on, can you look at it?'
- 'The internet said to replace the O2 sensor.'
- 'Just fix whatever's wrong.'
Questions to ask before authorizing the repair:
- What was the Ohm reading on the sensor's heater circuit?
- Did you confirm 12-volt power and a good ground at the harness connector?
- What is the cost for an OEM-spec part (like Denso or NTK) versus a generic part?
- Is an ECM 'relearn' procedure required after the replacement, and is that included in the labor cost?
Where to Take It: Dealer vs Independent vs Chain
- Dealer:
Best for: Vehicles under warranty., 2004-2005 Nissan/Infiniti models with a known TSB requiring an ECM reprogram., Porsche, BMW, or VW models where P1031 has a manufacturer-specific meaning.
Downsides: Highest labor rates., Less willing to perform component-level wiring repairs versus replacing a whole harness. (Typical cost: +50% vs. baseline) - Independent Shop:
Best fit for most common scenarios involving a straightforward sensor replacement or wiring repair.
Best for: Out-of-warranty vehicles where the cause is likely a standard sensor failure or wiring issue., Cost-conscious owners who have already ruled out TSBs.
Downsides: Quality varies widely; ensure the shop has ASE-certified technicians specializing in your vehicle's make., Lacks specific software for ECM reprogramming. (Typical cost: +0% vs. baseline) - Chain Shop:
Use with caution. Acceptable if you have already diagnosed a bad sensor yourself and just need it installed, but AVOID for initial diagnosis.
Best for: Simple, unambiguous repairs like replacing a fuse.
Downsides: Technician skill varies dramatically; lacks diagnostic expertise for electrical circuit tracing., High pressure to upsell; recommends replacing a sensor without proper diagnosis. (Typical cost: -10% vs. baseline)
When to Walk Away From the Repair
If the estimated repair cost exceeds 40-50% of the car's private-party value, seriously consider selling or trading it in.
- Car worth $4000, fix is $450: Fix it. This is a standard repair cost and is well below the threshold.
- Car worth $3500, fix is $1800: Walk away. The repair cost approaches 50% of the car's value, assuming the catalytic converter is the only issue.
- Car worth $15000, fix is $2500: Fix it. While expensive, the repair cost is low relative to the car's value, preserving a significant asset.
What Scan Tool You Need for This Code
Minimum: A tool that reads and clears codes, and displays live sensor data to verify A/F sensor voltage in real-time.
A basic $20 code reader only gives you the code number. It cannot show live data needed to verify if the sensor responds correctly after a repair.
Budget: BlueDriver Pro (~$90) — Connects to your smartphone via Bluetooth. It reads and clears P1031, graphs live A/F sensor voltage data, and provides repair reports.
Mid-range: Foxwell NT510 Elite (~$159) — A handheld unit offering OE-level diagnostics. It performs active tests to command the heater circuit on/off and executes the 'Idle Air Volume Learn' procedure.
Professional: Autel MaxiCOM MK808S/MK808BT Pro (~$450-550) — A full-featured tablet scanner with powerful bidirectional controls to test any component in the circuit. Essential for diagnosing manufacturer-specific variants of P1031.
Rent vs buy: If this is a one-time diagnosis, borrow a scanner from an auto parts store. Buy a scanner only if you perform your own diagnostics more than once a year.
How to Clear the Code After You Fix It
- Use an OBD-II scan tool to clear the P1031 code.
- Perform an 'Idle Air Volume Learn' or 'Self-Learn Control' reset if specified for your vehicle.
- Complete a full OBD-II drive cycle to allow readiness monitors to run.
Drive cycle (~20 minutes): From a cold start (coolant below 122°F), idle for 3 minutes with A/C on. Accelerate to 55 mph and hold steady for 5 minutes. Decelerate to 20 mph without braking. Accelerate to 60 mph and hold for 5 minutes. Cool down.
Readiness monitors affected: Catalyst monitor, O2 sensor monitor, O2 sensor heater monitor
Before emissions retest: drive at least 50 miles to fully set monitors.
Watch out for:
- Disconnecting the battery clears the code but resets all readiness monitors, guaranteeing an emissions test failure.
- The code returns immediately if the underlying electrical fault (bad sensor, wiring, fuse) was not fixed.
- Forgetting to perform a manufacturer-specific relearn procedure causes the code to reappear.
Will This Fail Emissions / State Inspection?
Yes — this code typically fails an OBD-II emissions inspection.
- California: An active P1031 code is an automatic failure. After repair, all OBD readiness monitors must be set to 'Ready'. You must drive 50-100 miles to complete the drive cycle before a retest.
- New York: The NYS DMV inspection includes an OBD-II scan. An illuminated Check Engine Light for code P1031 results in an automatic failure.
- Texas: In counties requiring emissions testing, an active P1031 code is an automatic failure. After clearing the code, you can only have one monitor 'Not Ready' to pass.
Most Commonly Affected Vehicles
- Nissan Murano (2004-2007) — Extremely common due to sensor failure. The service manual provides specific diagnostic procedures for this code.
- Nissan Altima (2002-2006) — Typically caused by a worn-out A/F sensor. Often appears with P1148, which resolves automatically when P1031 is fixed.
- Nissan Maxima (2004-2008) — TSB NTB04-028 addresses a false P1031 on 2004 models that requires an ECM reprogram instead of sensor replacement.
- Infiniti G35 (2003-2007) — TSB ITB04-027a was issued for 2004-2005 models to address false codes with an ECM reflash.
- Nissan Quest (2004-2009) — Often appears with P1051, indicating heater circuit issues on both engine banks.
- Porsche Cayenne (2011-2018) — P1031 means 'Fuel high-pressure sensor stuck'. The root cause is typically a failing low-pressure in-tank fuel pump starving the high-pressure fuel pump (HPFP).
- Chevrolet Silverado (2007-2013) — P1031 points to the heater current monitor for both banks. TSB 21-NA-149 highlights engine harness chafing against brackets as the primary cause.
- Honda Accord (Diesel) (2006-2008) — Indicates a 'Fuel Heater Circuit Malfunction' related to the diesel fuel filter heater, entirely different from an oxygen sensor.
Manufacturer-Specific Notes

- BMW: P1031 means 'Valvetronic (VVT) Actuator Monitoring Recognition of Direction of Rotation Plausibility (Bank 1)'. It indicates a problem with the variable valve lift system, not emissions.
- Volkswagen/Audi: P1031 points to 'Intake Manifold Tuning Valve Position Sensor - Specification Not Attained'. This relates to flaps inside the intake manifold.
- Porsche: P1031 means 'Fuel high-pressure sensor stuck'. Mechanics frequently misdiagnose this and replace the expensive High-Pressure Fuel Pump (HPFP) instead of the actual culprit: the low-pressure in-tank fuel pump.
- Nissan/Infiniti: TSBs NTB04-028 and ITB04-027a direct technicians to perform an ECM software update for false P1031 codes on 2004-2005 models, rather than replacing the sensor.
- General Motors (Chevrolet, GMC): P1031 is defined as 'Heated Oxygen Sensor (HO2S) Heater Current Monitor Control Circuit Banks 1 and 2 Sensor 1'. This points to a shared power source, ground, or fuse issue affecting both banks.
- Honda (Diesel): P1031 signifies a 'Fuel Heater Circuit Malfunction' used to warm diesel fuel in cold weather, completely separate from exhaust sensors.
Real Owner Stories
2008 Porsche Cayenne S with long crank and P1031
Vehicle sputtered on cold startups and triggered the Check Engine Light with code P1031 ('Fuel high-pressure sensor stuck').
What they tried:
- Owner initially suspected the expensive High-Pressure Fuel Pump (HPFP).
- Performed a diagnostic test by pulling fuses for the two in-tank low-pressure fuel pumps. Pulling fuse #13 (left pump) caused the car to die, while pulling fuse #14 (right pump) allowed it to idle perfectly.
Outcome: The test confirmed the right-side in-tank fuel pump failed. Replacing both in-tank pumps resolved the long crank and cleared the P1031 code.
Lesson: On a Porsche with P1031, diagnose the low-pressure fuel system before replacing the HPFP. A failing in-tank pump starving the HPFP is the true root cause.
2005 Nissan Titan with P1031 and P1148
Check Engine Light appeared with codes P1031 and P1148 shortly after buying the truck used.
What they tried:
- Owner suspected a bad A/F sensor or an exhaust leak.
- Visually inspected the sensor and exhaust manifold.
Outcome: Found loose collector bolts on the exhaust manifold and an O2 sensor 'spacer' installed by the previous owner to trick emissions tests. Removing the spacer and tightening the bolts cleared all codes.
Lesson: Always check for non-standard modifications on used vehicles. O2 spacers alter sensor readings and trigger heater circuit codes.
2004 Nissan Maxima with persistent P1031
Check Engine Light for P1031 came on. The owner was unsure if replacing the sensor was the correct first step.
What they tried:
- Posted on a forum asking for advice before buying parts.
- Members pointed out a Technical Service Bulletin (TSB) exists for this exact issue.
Outcome: The owner took the car to a dealer to check if their ECM part number was covered by Nissan TSB NTB04-028. The dealer applied a software update, fixing the false code without replacing the sensor.
Lesson: For 2004-2005 Nissan and Infiniti models, check for TSBs related to P1031 before replacing the A/F sensor. A dealer reprogram is the definitive fix.
2021 Chevrolet Silverado with multiple electrical codes
Truck threw various fault codes just out of warranty.
What they tried:
- Independent mechanic failed to diagnose the root cause.
- Dealership identified a chafed engine wiring harness.
Outcome: The owner discovered TSB 21-NA-149, describing the engine harness rubbing against brackets near the shock tower. The fix involved repairing damaged wires and securing the harness with zip ties.
Lesson: On modern GM trucks, multiple unrelated electrical codes stem from harness chafing. Inspect the harness at known contact points before diagnosing individual components.
How to Prevent This Code From Triggering
- Use Top Tier certified gasoline (Every fill-up) — Detergent packages prevent carbon buildup on injectors and valves, ensuring complete combustion and reducing soot that fouls the A/F sensor.
- Proactively replace A/F sensors (Every 100,000 miles) — A/F sensors are wear items. Aging sensors slow down, causing imprecise fuel adjustments that stress the catalytic converter long before a code triggers.
- Perform regular visual inspections of the exhaust system (During every oil change) — Fixing small exhaust leaks prevents unmetered oxygen from entering the exhaust stream, which skews sensor readings and forces a rich fuel mixture.
- Avoid using silicone-based sealants near the engine (During any engine repair) — Heated RTV silicone sealants release vapors that permanently contaminate the platinum electrodes of an A/F sensor.
Frequently Asked Questions
What is Bank 1, Sensor 1?
Bank 1 is the side of the engine housing cylinder #1. For inline engines, there is only one bank. Sensor 1 is the 'upstream' sensor located in the exhaust manifold before the catalytic converter.
Can I clean an Air/Fuel sensor to fix P1031?
No. Cleaning a sensor is ineffective for this code. P1031 indicates an electrical failure within the sensor's internal heater circuit, requiring full replacement.
What's the difference between an Air/Fuel Ratio Sensor and an Oxygen Sensor?
Air/Fuel (A/F) ratio sensors are modern, wideband oxygen sensors that provide faster, more precise air-fuel mixture measurements. This precision allows the engine to run more efficiently, improving fuel economy and lowering emissions. While they perform the same essential function as traditional oxygen sensors, they operate on different voltage scales and are not interchangeable.
What are the most common misdiagnosis mistakes for P1031?
The top mistake is replacing the wrong part because P1031 has manufacturer-specific definitions, such as replacing a Porsche high-pressure fuel pump when the in-tank pump is actually failing. Another common error is replacing the sensor on 2004-2005 Nissans when a TSB dictates an ECM reprogram. Finally, mechanics often replace a sensor without checking for a blown 15A heater fuse or chafed wiring harness.
The code came back after I replaced the sensor. What now?
If a new, quality sensor doesn't fix the code, test the wiring harness for power and ground. The issue is likely a broken wire, corroded connector, or blown fuse. Ensure you performed the 'Idle Air Volume Learn' procedure after the replacement.
Do I need to do a 'relearn' procedure after replacing the sensor?
Yes, especially on Nissan vehicles. You must perform a 'Self-Learn Control' clearing procedure using a scan tool to reset fuel trim values. Failure to do so causes the code to return even with a new part.
Can a vacuum leak cause a P1031 code?
Not directly. P1031 is an electrical code for the heater circuit. While a massive vacuum leak causes lean codes (like P0171), it is not a primary cause to investigate for a heater circuit fault.
Key Takeaways
- P1031 almost always indicates a burnt-out internal heater in the Bank 1 Air/Fuel Ratio Sensor, requiring a $190-$540 replacement.
- Verify your manufacturer's specific definition for P1031, as it means 'Fuel high-pressure sensor stuck' on a Porsche or 'Valvetronic Actuator' on a BMW, completely changing the diagnosis.
- Fix this code within 1 month to prevent the engine from running rich and destroying your catalytic converter, a repair costing upwards of $1,500.
- Inspect the 15-amp A/F heater fuse and the sensor's wiring harness for melting or chafing before buying a new sensor.
- Check for Technical Service Bulletins (TSBs) on 2004-2005 Nissan and Infiniti models, as a $100-$200 ECM software update often resolves false P1031 codes.
Helpful Videos

The information in this article is provided for general reference and educational purposes only. Vehicle specifications, procedures, and part compatibility can vary by production date, trim level, and region. Always consult your vehicle's factory service manual and verify part numbers before purchasing or performing repairs. Safety-critical components such as airbags, seat belts, and braking systems should be installed by a qualified professional.
- 🎬 Helpful Videos
- What Does P1031 Mean?
- Can I Drive With P1031?
- Common Causes
- Symptoms
- Diagnostic Flowchart
- Common Fixes & Costs
- Used vs. New Parts: Buying Guide
- What Happens If You Wait — Timeline
- Cost of Not Fixing It
- Diagnosis Steps
- When This Code Triggers (Freeze-Frame Conditions)
- Related Codes
- Climate & Environmental Factors
- How to Talk to a Mechanic About This Code
- Where to Take It: Dealer vs Independent vs Chain
- When to Walk Away From the Repair
- What Scan Tool You Need for This Code
- How to Clear the Code After You Fix It
- Will This Fail Emissions / State Inspection?
- Most Commonly Affected Vehicles
- Manufacturer-Specific Notes
- Real Owner Stories
- 2008 Porsche Cayenne S with long crank and P1031
- 2005 Nissan Titan with P1031 and P1148
- 2004 Nissan Maxima with persistent P1031
- 2021 Chevrolet Silverado with multiple electrical codes
- How to Prevent This Code From Triggering
- Frequently Asked Questions
- What is Bank 1, Sensor 1?
- Can I clean an Air/Fuel sensor to fix P1031?
- What's the difference between an Air/Fuel Ratio Sensor and an Oxygen Sensor?
- What are the most common misdiagnosis mistakes for P1031?
- The code came back after I replaced the sensor. What now?
- Do I need to do a 'relearn' procedure after replacing the sensor?
- Can a vacuum leak cause a P1031 code?
- Key Takeaways
- 🎟️ Get 5% Off