

OBD-II Code P0989: Transmission Fluid Pressure Sensor 'E' Circuit Low
The Ultimate Guide to Understanding, Diagnosing, and Fixing P0989
- Code P0989 triggers when the PCM detects less than 0.5 volts from the 'E' transmission pressure sensor, indicating a short, bad sensor, or internal leak.
- Stop driving within 50 miles of this code appearing to prevent a $300 sensor repair from escalating into a $4,000+ transmission rebuild.
- On 2010-2017 GM 6-speed vehicles, P0989 paired with P0877 guarantees torn TEHCM pressure switch seals, fixable with a $50 aftermarket kit.
- Always test the sensor's 5-volt reference and ground circuits with a multimeter before replacing parts to rule out a simple wiring short.
- On Honda vehicles, a blinking 'D' light with P0989 points to a failed external 6th clutch pressure switch, a 30-minute DIY repair.
What Does P0989 Mean?

Your Powertrain Control Module (PCM) detects a voltage signal from the 'E' transmission fluid pressure sensor that falls below the manufacturer's minimum threshold (typically under 0.5V). This sensor converts hydraulic clutch pressure into an electrical signal to command gear shifts. A low voltage reading dictates a short to ground, a dead sensor, low fluid, or an internal hydraulic leak.
Technical definition: P0989 is defined as "Transmission Fluid Pressure Sensor/Switch 'E' Circuit Low." The PCM or TCM registers voltage from the 'E' pressure sensor below the expected operational range for a set duration. This confirms a short to ground in the signal wire, a defective sensor, or a total loss of hydraulic pressure in the monitored clutch circuit.
Can I Drive With P0989?
Yes, But With Caution. You can drive short distances to reach a repair shop, but continuing past 50 miles risks catastrophic transmission failure. The transmission often defaults to 'limp mode,' locking into a single gear and creating a safety hazard in traffic. Driving with incorrect fluid pressure burns internal clutches, turning a $300 sensor repair into a $4,000+ transmission rebuild.
Common Causes
- Low or Contaminated Transmission Fluid (Very Common) — An incorrect fluid level or burnt fluid prevents the hydraulic system from building necessary pressure. Low fluid starves the pump, while dirty fluid clogs passages and causes solenoids to stick.
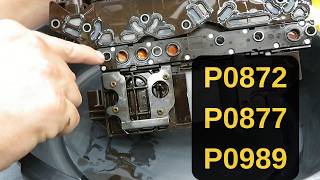
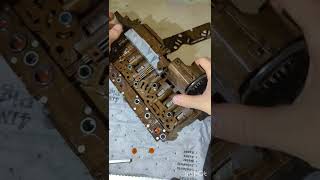
- Degraded TEHCM/Solenoid Seals (GM Specific) (Very Common) — On 2010-2017 GM 6-speed transmissions (6T70/6T75), the pressure switches integrate into the control solenoid body (TEHCM). The laminated rubber seals on the switch plate tear easily, causing a massive pressure loss that triggers P0989, almost always alongside code P0877.
- Faulty Transmission Fluid Pressure Sensor (TFPS) (Common) — The sensor operates in a high-temperature, high-pressure environment and fails internally, sending a persistently low or zero-voltage signal to the computer regardless of actual hydraulic pressure.
- Shorted Wiring or Corroded Connectors (Common) — The electrical circuit shorts to ground due to frayed insulation, melted wires near the exhaust, or fluid intrusion inside the sensor connector, pulling the signal voltage down to zero.
- Defective Solenoid or Valve Body (Less Common) — A mechanical failure within the solenoid controlling the 'E' circuit, or a blockage within the valve body's channels, directly drops the hydraulic pressure monitored by the sensor.
- Internal Hydraulic Leakage (Less Common) — Failed internal seals on clutch packs or servos create cross-leaks between hydraulic circuits, leading to a pressure drop in the 'E' circuit even when the sensor and solenoids function perfectly.
Symptoms

- Check Engine Light and/or Blinking Gear Indicator — The MIL illuminates immediately. On Honda vehicles, the 'D' on the gear selector indicator blinks to signal a critical transmission fault.
- Transmission Stuck in 'Limp Mode' — The TCM forces the transmission into a single gear (usually 2nd or 3rd) to prevent catastrophic damage, resulting in sluggish acceleration and high RPMs at highway speeds.
- Harsh, Delayed, or Erratic Shifting — The transmission slams into gear or hesitates noticeably before shifting because the computer lacks reliable internal pressure data to smooth the engagement.
- Inability to Engage Specific Gears — Depending on the clutch circuit monitored by the 'E' sensor, you lose the ability to shift into specific gears, or the vehicle refuses to shift out of neutral.
- Decreased Fuel Economy — Inefficient shifting and the inability of the torque converter to lock up force the engine to work harder, dropping gas mileage by 10-20%.
Diagnostic Flowchart
Tap your situation to follow the diagnostic path that matches what you're seeing on this code.
Common Fixes & Costs
- Replace Transmission Fluid Pressure Sensor/Switch
— Parts: $50-$150, Labor: $150-$300, ~2.0 hr book time
(Intermediate)
Honda Pilot, Odyssey, Accord: OEM - Replace TEHCM Pressure Switch Seals (GM Specific)
— Parts: $40-$80, Labor: $300-$600, ~4.0 hr book time
(Professional)
Chevrolet Traverse, GMC Acadia: OEM - Transmission Fluid and Filter Change — Parts: $60-$120, Labor: $150-$300, ~1.5 hr book time (DIY)
- Repair Damaged Wiring or Connector — Parts: $15-$50, Labor: $125-$300, ~1.5 hr book time (Intermediate)
- Replace Transmission Solenoid Pack / Valve Body
— Parts: $300-$900, Labor: $400-$800, ~3.0 hr book time
(Professional)
Dodge Ram 1500, Durango (545RFE/68RFE): OEM
Used vs. New Parts: Buying Guide
When a used part is worth it: Buying used is rarely recommended for transmission electronic parts. The labor cost to access internal parts is high, making a used part with a 30-day warranty a massive financial risk.
Donor-vehicle mileage cap: roughly under 50000 miles for the part to have meaningful remaining life.
Donor quality checklist:
- Verify the part number is an exact match.
- Avoid solenoid packs from vehicles scrapped due to transmission failure.
- Check for external damage, corrosion on pins, or fluid contamination.
Decision logic:
- If The part is external and easy to access (e.g., Honda pressure switch) → A used part is a low-risk, budget-friendly option.
- If The part is internal, requiring pan/valve body removal → Buy a new OEM part. The savings do not justify the risk of paying high labor costs twice.
- If The part is a known high-failure item (e.g., GM TEHCM seals) → Always buy new. A used part has just as much wear as the one you are replacing.
Warranty tradeoff: Used parts offer a 30-90 day warranty covering the part only. New aftermarket parts offer 1-year warranties. New OEM parts carry a 12-month/12,000-mile warranty covering parts and labor when installed by a dealer.
Worst-case if a used part fails: $800 if a used internal part fails, requiring you to pay full labor costs again.
What Happens If You Wait — Timeline
- 0-2 weeks: Code P0989 sets. Minor shift hesitation or delayed engagement. Vehicle enters limp mode intermittently. (MPG impact: 0-5%% · Added cost: $0)
- 2 weeks - 3 months: Shift quality degrades. Harsh engagements and clunking noises occur. Low hydraulic pressure causes clutch packs to slip, generating excess heat. (MPG impact: 5-10%% · Added cost: $50-$150 in wasted fuel.)
- 3-6 months: Slipping becomes severe. Clutch friction material burns away, heavily contaminating the fluid. Abrasive debris accelerates wear on the valve body. (MPG impact: 10-20%% · Added cost: $800 - $1,800 for a new valve body or solenoid pack.)
- 6+ months: Catastrophic failure. Clutch packs burn out completely. The transmission loses the ability to engage gears. The vehicle is undrivable. (MPG impact: 20%+% · Added cost: $4,000 - $8,000+ for a complete transmission rebuild.)
Cost of Not Fixing It
- 0-1 month: Noticeable decline in shift quality, harsh engagements, and a 10-20% drop in fuel economy. Transmission enters 'limp mode' intermittently. (Added cost: $50-$100 in wasted fuel.)
- 1-6 months: Low hydraulic pressure causes clutch packs to slip, generating excessive heat. This burns the clutch material and contaminates the fluid with abrasive debris, destroying the valve body. (Added cost: $800 - $2,500 for a new valve body or solenoid pack.)
- 6+ months: Catastrophic failure. Burnt clutches and widespread contamination destroy gears, drums, and the torque converter. The vehicle loses the ability to drive. (Added cost: $4,000 - $8,000+ for a complete transmission rebuild or replacement.)
Diagnosis Steps

- Check Transmission Fluid Level and Condition
Follow the manufacturer's procedure to check the fluid level. If low, locate and repair the leak. Inspect the fluid; bright red is healthy, while dark brown or burnt-smelling fluid confirms internal clutch wear or overheating.
Tools: Rag, Dipstick (if equipped) (Beginner) - Scan Codes and Monitor Live Data
Use a bi-directional scanner to pull all codes. P0877 alongside P0989 points to GM TEHCM seals. Command the transmission solenoids on and off while watching the 'E' pressure switch live data. A healthy switch changes state (Low to High) when pressure applies. If it stays 'Low', the switch is dead or the circuit is leaking.
Tools: Bi-directional OBD-II Scanner (Intermediate) - Inspect Wiring and Connectors
Visually inspect the wiring harness from the TCM to the transmission. Look for chafing against the chassis or melted insulation. Unplug the sensor connector and check for bent pins, corrosion, or transmission fluid intrusion.
Tools: Flashlight, Mirror (Intermediate) - Test Sensor Circuit and Voltage Thresholds
With the key on, engine off (KOEO), unplug the sensor and use a multimeter to verify 5V reference and ground at the connector. Next, backprobe the signal wire with the sensor plugged in. A reading near 0V confirms a short to ground in the wire or an internally shorted sensor.
Tools: Digital Multimeter (DVOM), Backprobe kit, Wiring diagram (Advanced) - Check Transmission Hydraulic Pressure Manually
Connect a mechanical pressure gauge to the transmission's test port. Start the engine and measure pressure at idle in various gears against manufacturer specs. Low actual pressure confirms a mechanical failure (bad pump, torn seal, clogged valve body) rather than an electrical fault.
Tools: Transmission pressure gauge set, Repair manual (Professional) - Inspect Internal Components
If manual pressure is low, remove the transmission pan. Inspect the fluid for excessive metal shavings or clutch material. Visually inspect the valve body, solenoids, and TEHCM pressure switch seals for visible tears.
Tools: Socket set, Torque wrench, Gasket scraper, Fluid catch pan (Professional)
When This Code Triggers (Freeze-Frame Conditions)
- Engine Coolant Temp: 180-210°F (Vehicle at full operating temperature.)
- RPM: 1500-2500 (During steady-state cruising or light acceleration.)
- Engine Load: 25-60% (Normal driving, not under heavy acceleration or deceleration.)
- Vehicle Speed: 35-55 mph (Often triggers during a gear shift at city or highway speeds.)
Related Codes
- P0990 — The opposite code, 'Circuit High.' P0989 (Low) dictates a short to ground, while P0990 (High) dictates an open circuit or short to power.
- P0877 — Indicates 'D' pressure switch circuit low. Seeing P0877 and P0989 together on GM vehicles guarantees a failure of the TEHCM pressure switch seals.
- P0731 - P0736 — Gear Incorrect Ratio codes. These are direct symptoms of the pressure fault identified by P0989. Fixing the root cause of P0989 resolves these codes.
- P0700 — A generic code meaning 'Transmission Control System Malfunction.' It acts as a request to the PCM to turn on the Check Engine Light and always accompanies a specific code like P0989.
Climate & Environmental Factors
- Extreme Cold: Thickens transmission fluid, slightly altering hydraulic pressures during warm-up. This exposes borderline sensor or seal issues, triggering the code on cold starts.
- High Humidity / Water Intrusion: Accelerates corrosion on external connectors. Driving through deep puddles directly shorts out the sensor connector, pulling the signal voltage low.
- Altitude: Altitude has no direct impact on the hydraulic operation or electrical sensors within a modern automatic transmission.
How to Talk to a Mechanic About This Code
Say this: "I have a check engine light with code P0989 and the transmission is shifting harshly. Please start by checking the fluid level and testing the pressure sensor's 5-volt reference and ground circuits before assuming it's an internal failure."
This signals you understand the code's common electrical causes. It directs the shop to perform cost-effective diagnostic steps first, preventing an immediate quote for a transmission replacement.
Avoid saying:
- 'My car is shifting weird, just fix it.'
- 'The check engine light is on, can you just tell me the cost?'
- 'I think I need a new transmission.'
Questions to ask before authorizing the repair:
- Did you test the sensor's wiring for correct 5V reference and ground at the connector?
- Have you performed a manual pressure test to confirm a hydraulic problem? What were the readings?
- Is this a known issue for my make and model, like the TEHCM seals on GM vehicles or an external switch on a Honda?
Where to Take It: Dealer vs Independent vs Chain
- Dealer:
Recommended for in-warranty repairs. For out-of-warranty vehicles, a transmission specialist is more cost-effective.
Best for: Vehicles under powertrain warranty., Repairs requiring manufacturer-specific software updates., Complex issues on newer cars (e.g., Subaru CVT valve body).
Downsides: Highest labor rates., Defaults to replacing expensive assemblies (TEHCM) instead of smaller failed components (seals). (Typical cost: +50% vs. baseline) - Chain Shop:
AVOID for diagnosing P0989. Their business model is not suited for detailed electrical and hydraulic diagnostics.
Best for: Basic fluid and filter services.
Downsides: Technician skill varies dramatically., Lacks advanced diagnostic tools for complex transmission codes. (Typical cost: -15% vs. baseline)
When to Walk Away From the Repair
If the estimated repair cost for P0989 exceeds 50% of your car's private-party market value, strongly consider selling the vehicle as-is.
- Car worth $8000, fix is $750: Fix it. This is a common cost for a known issue like GM TEHCM seals and is well below the threshold.
- Car worth $5000, fix is $3500: Walk away. The repair cost is 70% of the car's value. A shop quoted a full transmission replacement, which is not economical.
- Car worth $15000, fix is $1200: Fix it. A solenoid pack replacement is a reasonable investment to keep a higher-value vehicle running well.
What Scan Tool You Need for This Code

Minimum: A scanner that reads transmission-specific live data, including the state of the pressure switches (On/Off, High/Low).
A basic $20 code reader only shows the P0989 code. It cannot display the live data needed to see if the sensor responds to pressure changes, forcing you to guess at the cause.
Budget: BlueDriver Pro (~$100) — Connects to your smartphone and displays live data streams, including transmission-specific parameters essential for diagnosing P0989.
Mid-range: Foxwell NT510 Elite (~$180) — Offers bi-directional controls. Allows you to command solenoids to activate and watch the pressure switch's response in real-time.
Professional: Autel MaxiCOM MK808S (~$400) — Provides full bi-directional control, extensive live data, and special service functions like transmission adaptation resets after a repair.
Rent vs buy: Auto parts stores offer free loaner tools, but they are often basic code readers. Buy a midrange scanner if you plan to diagnose P0989 accurately.
How to Clear the Code After You Fix It
- Use an OBD-II scan tool to clear the diagnostic trouble codes.
- Perform a complete transmission drive cycle to allow the readiness monitors to run.
- Rescan the vehicle to ensure the P0989 code does not return.
Drive cycle (~20 minutes): Start the vehicle cold. Idle for 3 minutes. Drive in stop-and-go traffic for 10 minutes, ensuring the transmission shifts through all gears. Drive at a steady highway speed (55 mph) for 10 minutes. Cool down completely and repeat.
Readiness monitors affected: Comprehensive Component Monitor, Transmission Control System
Before emissions retest: drive at least 50 miles to fully set monitors.
Watch out for:
- Disconnecting the battery clears the code but erases all readiness monitors, causing an automatic emissions test failure.
- If the underlying intermittent short is not fully repaired, the code returns once the monitor runs again.
Will This Fail Emissions / State Inspection?
Yes — this code typically fails an OBD-II emissions inspection.
- California: An illuminated Check Engine Light results in an automatic smog check failure. All readiness monitors must be set to 'Ready' to pass.
- New York: The annual safety inspection includes an OBD-II scan. A P0989 code illuminates the MIL, causing an automatic failure.
- Texas: In the 17 counties requiring emissions testing, an active MIL is an automatic failure. Safety-only counties may also fail the vehicle for an active MIL.
Most Commonly Affected Vehicles
- Honda Pilot, Odyssey (2016-2022) — Almost always caused by a failure of the external 6th clutch transmission fluid pressure switch (P/N 37250-5A2-A01). Triggers failsafe mode locked in 3rd or 6th gear.
- Honda Accord (2012-2017) — Frequently a faulty 6th clutch pressure switch. Triggers a check engine light and a blinking 'D' indicator. The part is external and a simple DIY fix.
- Chevrolet / GMC / Buick Traverse, Acadia, Enclave, Equinox (2010-2017) — On 6T70/6T75 transmissions, P0989 pairs with P0877 due to torn rubber seals on the TEHCM laminate plate. Fixed using aftermarket seal kits (Sonnax 124740-70K).
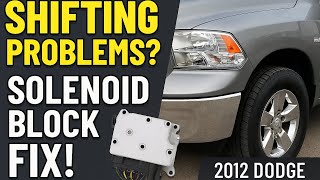
- Dodge / Ram Ram 1500, Dakota, Durango (2004-2012) — On 545RFE/68RFE transmissions, the pressure switches are integrated into the solenoid block. Replacing the entire solenoid block (Mopar P/N 52119435AF) is the standard repair.
- Ford F-150, Explorer (2005-2015) — The sensor is located on the driver's side of the transmission case. Failure is typically the sensor itself or damage to the wiring harness from road debris.
- Toyota Camry, RAV4, Avalon (2010-2014) — On U660E 6-speed transmissions, points to a failure of the ATF pressure switch No. 3, used to monitor lock-up solenoid function.
- Hyundai / Kia Elantra, Sonata, Tucson (2011-2019) — Points to an internal failure of the pressure switch. These switches are integrated into the valve body, requiring replacement of the entire valve body assembly.
- Subaru Outback, Forester, Crosstrek (2010-2018) — On CVT models, indicates a failing solenoid within the valve body. Requires replacing the entire expensive valve body assembly located on top of the transmission.
Manufacturer-Specific Notes
- Honda: The code links directly to the 6th clutch pressure switch. The part is an external screw-in switch, making it one of the cheapest and easiest DIY repairs for this code.
- Chrysler / Dodge / Ram: Pressure switches are permanently integrated into the main solenoid block. You must replace the entire block assembly to fix a single failed switch.
- General Motors (Chevrolet, GMC, Buick): P0989 frequently pairs with P0877 and is caused by torn rubber seals on the TEHCM pressure switch plate. Do not replace the TEHCM; install a $50 aftermarket seal kit.
- Subaru: Pressure sensors are built into the CVT valve body. A P0989 code requires replacing the entire valve body assembly. Always check for extended CVT warranty coverage at a dealer.
Real Owner Stories
2016 Honda Odyssey at 115K miles
Check Engine Light and blinking 'D' indicator came on. Transmission was stuck in a low gear and shifted harshly.
What they tried:
- Scanned code P0989.
- Ordered a new 6th gear pressure switch (Honda P/N 37250-5A2-A01).
Outcome: Replaced the external switch in 30 minutes. Total cost was $70 for the OEM part. Cleared the code and resolved the issue permanently.
Lesson: On Hondas, P0989 points directly to an inexpensive, easy-to-access external pressure switch, making it a prime DIY repair.
2011 Chevy Traverse at 130K miles
Vehicle exhibited harsh shifting and set codes P0989 and P0877.
What they tried:
- A general repair shop recommended a full transmission replacement for $4,500.
- Owner sought a second opinion from a transmission specialist.
Outcome: The specialist diagnosed failed TEHCM pressure switch seals. They replaced the seals using a Sonnax kit for $750. Transmission performance returned to normal.
Lesson: Always get a second opinion. P0989 and P0877 on GM vehicles is a classic sign of inexpensive seal failure, not a destroyed transmission.
2008 Dodge Ram 1500 at 95K miles
Check Engine Light on with code P0989. Truck intermittently went into limp mode.
What they tried:
- Topped off transmission fluid. Code returned.
- Took it to a shop for deeper diagnosis.
Outcome: The shop found an internal fault in the solenoid pack. Replacing the entire solenoid block (Mopar P/N 5170877AA) for $1,100 fixed the issue.
Lesson: On Chrysler/Dodge vehicles, pressure switches are integrated into the solenoid pack. You must replace the entire block as a complete unit.
How to Prevent This Code From Triggering
- Regular Transmission Fluid and Filter Changes (Every 30,000-60,000 miles) — Clean fluid maintains correct hydraulic pressure, ensures lubrication, and prevents contaminants from clogging passages or damaging sensors.
- Install an External Transmission Cooler (One-time upgrade for towing or hot climates) — Keeps fluid temperatures stable (175-200°F), preventing fluid breakdown and extending the life of seals and electronic components.
- Protect Wiring Harnesses (During any under-vehicle maintenance) — Securing loose wiring with zip ties prevents chafing against the chassis or exhaust, avoiding shorts to ground that cause P0989.
- Practice Smooth Driving Habits (Daily habit) — Coming to a complete stop before shifting from Drive to Reverse reduces sudden pressure spikes and mechanical shock on internal components.
Frequently Asked Questions
What is the most common misdiagnosis for a P0989 code?
The most costly mistake is replacing the entire transmission when the fault is a simple sensor or torn TEHCM seals. Always verify electrical integrity and manual hydraulic pressure before authorizing a rebuild.
My mechanic wants to replace the transmission. Should I get a second opinion?
Yes. Because P0989 often stems from a $50 sensor or wiring short, a second opinion from a transmission specialist is mandatory. Ensure they perform electrical and hydraulic pressure tests to confirm catastrophic failure.
Can I just add transmission fluid to fix P0989?
Adding fluid temporarily clears the code only if the system was starved of pressure due to a low level. However, transmissions are sealed systems. If fluid is low, you have a leak that requires repair.
Is the 'E' sensor hard to get to?
Access depends entirely on the vehicle model. On many Hondas, it is an external switch easily unscrewed from the transmission case. On GM and Ford vehicles, it sits inside the transmission pan on the valve body, requiring fluid drainage and pan removal.
Will clearing the code make it go away?
No. Clearing the code turns off the check engine light temporarily, but it returns immediately once the computer detects the low voltage condition again. You must fix the underlying mechanical or electrical fault.
How can I tell if it's the sensor or the wiring?
A technician tests the circuit with a multimeter. If the connector has a 5V reference and ground, but the signal wire reads 0V, the sensor is dead. If the 5V reference or ground is missing, the wiring harness is broken.
What does 'Limp Mode' feel like?
Limp mode locks the transmission into a single gear (usually 2nd or 3rd) to prevent internal damage. You will experience sluggish acceleration from a stop and unusually high engine RPMs at highway speeds.
Key Takeaways
- Code P0989 triggers when the PCM detects less than 0.5 volts from the 'E' transmission pressure sensor, indicating a short, bad sensor, or internal leak.
- Stop driving within 50 miles of this code appearing to prevent a $300 sensor repair from escalating into a $4,000+ transmission rebuild.
- On 2010-2017 GM 6-speed vehicles, P0989 paired with P0877 guarantees torn TEHCM pressure switch seals, fixable with a $50 aftermarket kit.
- Always test the sensor's 5-volt reference and ground circuits with a multimeter before replacing parts to rule out a simple wiring short.
- On Honda vehicles, a blinking 'D' light with P0989 points to a failed external 6th clutch pressure switch, a 30-minute DIY repair.
Helpful Videos

![What is P0989 Engine Code [Quick Guide]](https://img.youtube.com/vi/lv6g7641X8M/mqdefault.jpg)

The information in this article is provided for general reference and educational purposes only. Vehicle specifications, procedures, and part compatibility can vary by production date, trim level, and region. Always consult your vehicle's factory service manual and verify part numbers before purchasing or performing repairs. Safety-critical components such as airbags, seat belts, and braking systems should be installed by a qualified professional.
- 🎬 Helpful Videos
- What Does P0989 Mean?
- Can I Drive With P0989?
- Common Causes
- Symptoms
- Diagnostic Flowchart
- Common Fixes & Costs
- Used vs. New Parts: Buying Guide
- What Happens If You Wait — Timeline
- Cost of Not Fixing It
- Diagnosis Steps
- When This Code Triggers (Freeze-Frame Conditions)
- Related Codes
- Climate & Environmental Factors
- How to Talk to a Mechanic About This Code
- Where to Take It: Dealer vs Independent vs Chain
- When to Walk Away From the Repair
- What Scan Tool You Need for This Code
- How to Clear the Code After You Fix It
- Will This Fail Emissions / State Inspection?
- Most Commonly Affected Vehicles
- Manufacturer-Specific Notes
- Real Owner Stories
- 2016 Honda Odyssey at 115K miles
- 2011 Chevy Traverse at 130K miles
- 2008 Dodge Ram 1500 at 95K miles
- How to Prevent This Code From Triggering
- Frequently Asked Questions
- What is the most common misdiagnosis for a P0989 code?
- My mechanic wants to replace the transmission. Should I get a second opinion?
- Can I just add transmission fluid to fix P0989?
- Is the 'E' sensor hard to get to?
- Will clearing the code make it go away?
- How can I tell if it's the sensor or the wiring?
- What does 'Limp Mode' feel like?
- Key Takeaways
- 🎟️ Get 5% Off