

P0894 on 1998-2002 Chevrolet Express: Transmission Slipping Causes and Fixes
On a 1998-2002 Chevrolet Express, code P0894 almost always points to a problem with the Torque Converter Clutch (TCC) system in the 4L60E or 4L80E transmission. The most common cause is a worn TCC regulator valve bore in the valve body, a well-known issue. The fix is often an inexpensive valve body repair kit, but labor can be significant. Ignoring the code leads to harsh shifts and can require a full transmission rebuild.
- P0894 on your Express van is a serious transmission code indicating Torque Converter Clutch (TCC) slippage.
- The most frequent cause is a known design weakness in the 4L60E/4L80E transmission's valve body, specifically the TCC regulator valve bore.
- Do not ignore this code. The transmission will operate with harsh, damaging shifts and can overheat, leading to a much more expensive failure.
- The correct repair often involves installing an aftermarket valve body repair kit (like from Sonnax), not just replacing solenoids or the torque converter.
- This is not a beginner-friendly DIY repair; professional service is strongly recommended.
What's Unique About the 1998-2002 Chevrolet EXPRESS
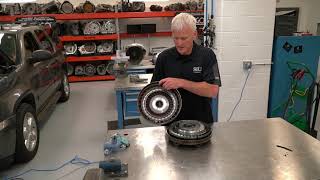
The 1998-2002 Express vans primarily use the GM 4L60E (1500/2500 models) or the heavy-duty 4L80E (2500/3500 models) 🎬 Watch: Diagnosing TCC issues on the heavy-duty 4L80E transmission. automatic transmission. Both are known for a specific design flaw where the steel TCC regulator valve wears out the softer aluminum bore inside the valve body over time. This wear creates a hydraulic fluid leak, preventing the TCC from applying with enough force, which directly causes the slippage that triggers P0894. This issue is so common that it often appears with the older, related GM-specific code P1870, which points to the exact same failure mechanism.
Diagnostic Flowchart
Tap your situation to follow the diagnostic path that matches what you're seeing on this vehicle.
Symptoms You May Notice
- Check Engine Light is on
- Harsh or banging shifts, especially from 1st to 2nd gear
- Sensation of the transmission slipping or engine RPMs flaring up by ~200 RPM at steady highway speeds
- Engine RPMs are higher than usual at highway speeds
- Transmission overheating, especially under load
- A noticeable shudder or vibration at cruising speeds when the TCC tries to engage
- Reduced fuel economy
- Delayed engagement when shifting into Drive after the vehicle has been sitting for several days
- Replacing only the torque converter without addressing a worn valve body. If the valve body bore is worn, a new converter will not fix the pressure leak, and the code will return.
- Replacing only the TCC solenoid when the valve body bore is worn. While a cracked solenoid is a real possibility, the bore wear is more common, and a new solenoid won't fix a hydraulic leak at the valve.
- Assuming a full transmission rebuild is needed immediately. Often, the issue can be resolved with a much cheaper valve body repair if caught early before widespread damage occurs.
Most Likely Causes
- Worn TCC Regulator Valve Bore in Valve Body 🔴 High Probability This is a well-documented wear item in 4L60E/4L80E transmissions. The steel valve constantly oscillates in the softer aluminum bore, causing wear and a critical loss of hydraulic pressure needed to apply the TCC.
How to confirm: A technician will use a scan tool to monitor TCC slip RPM. If slip remains high (over 100-200 RPM) while the TCC solenoid is commanded on, it points to a hydraulic leak. Visual inspection of the bore after removing the valve body is the ultimate confirmation. Often, a previously attempted fix using only a solenoid will fail, pointing back to the valve body.
Typical fix: The valve body is removed, and the worn bore is reamed out to accept an oversized sleeve and valve assembly. Aftermarket kits from brands like Sonnax are the industry standard for this permanent repair.
Est. part cost: $60-$150 - Failed Torque Converter Clutch (TCC) Solenoid 🟡 Medium Probability The solenoid can fail electrically or, more commonly, develop hairline cracks in its plastic body, causing pressure leaks that prevent TCC lockup. It's a frequent failure point that should be inspected or replaced during any valve body service, as it can mimic the symptoms of a worn valve bore.
How to confirm: A scan tool can command the solenoid on and off to check for an electrical response (a click should be audible). The solenoid should be removed and visually inspected for cracks, especially around the snout. Resistance can also be measured across its terminals; a reading outside the expected range indicates failure.
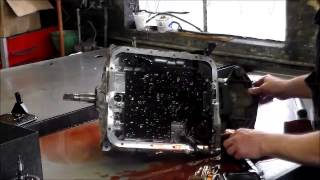
Typical fix: Replace the TCC solenoid. This is located inside the transmission pan and is often replaced as a preventative measure. Some replacements 🎬 See this walkthrough for replacing the TCC and shift solenoids. require splicing wires.
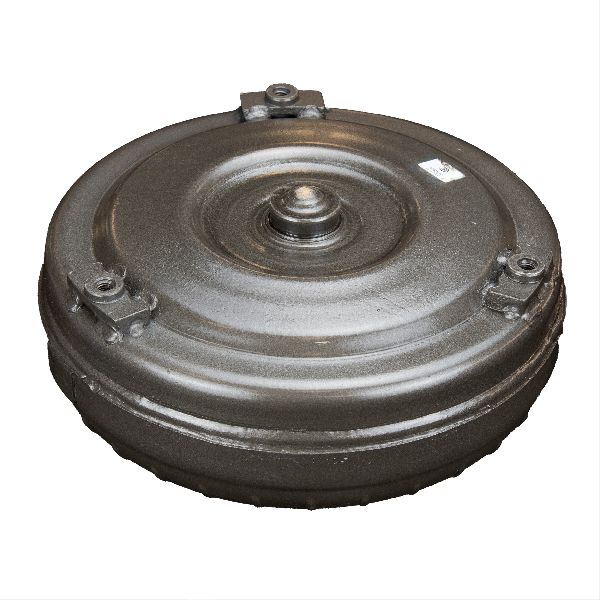
Est. part cost: $20-$70 - Worn or Failed Torque Converter 🟡 Medium Probability The clutch material inside the torque converter can wear out, glaze over, or break apart, especially if the vehicle has been driven for a long time with the TCC valve issue causing chronic slippage. Debris from the failure will contaminate the entire transmission.
How to confirm: If the valve body and solenoids are confirmed to be good but TCC slip persists, the torque converter is the likely culprit. A tell-tale sign is a large amount of metallic or clutch material debris in the transmission pan. Cutting the old converter open after removal provides definitive proof of a failed internal clutch.
Typical fix: The transmission must be removed from the vehicle to replace the torque converter. The transmission cooler and lines must be thoroughly flushed to remove debris.
Est. part cost: $200-$500 - Low or Degraded Transmission Fluid ⚪ Low Probability
How to confirm: Check the transmission fluid level and condition with the engine running and the transmission warm. The fluid should be at the 'FULL' mark and be bright red, not brown, black, or burnt-smelling.
Typical fix: Top off the fluid to the correct level or perform a transmission fluid and filter change. This is rarely the root cause but is a critical first check.
Est. part cost: $50-$150
Rare But Worth Checking
- Worn Stator Support Bushing: A worn bushing in the stator support (part of the transmission pump) can cause a major hydraulic leak in the TCC apply circuit, preventing lockup. This allows the input shaft to wobble, damaging seals and leading to pressure loss. This requires transmission removal to inspect and fix.
- Internal Wiring Harness Damage: The internal wiring harness can become brittle from heat and age, leading to intermittent electrical connections for the solenoids. An exposed wire on the TCC solenoid can short out, causing erratic behavior.
Diagnosis Steps
- Verify the transmission fluid level and condition. If low or burnt, address this first, but expect a deeper issue.
- Use a professional scan tool to check for other transmission-related codes, paying close attention to P1870 or P0741.
- Monitor live data on the scan tool, specifically TCC Slip Speed (RPM) and TCC Solenoid Command (%).
- While driving at a steady cruise speed (around 50-55 MPH), observe the TCC command and slip speed. If the solenoid is commanded on (duty cycle near 90%+) but slip remains above 50-100 RPM, a mechanical or hydraulic fault is confirmed.
- Drop the transmission pan and inspect for excessive metal debris. A fine gray paste is normal wear, but large flakes or a pan full of black clutch material indicate hard part damage, likely from the torque converter.
- Remove the TCC solenoid and carefully inspect its plastic housing for hairline cracks, especially near the snout where it seats.
- If the pan is clean and solenoid is intact, the next step is to remove the valve body. Inspect the TCC regulator valve and its bore for scoring and wear. The valve should not have excessive side-to-side play in the bore.
- If the valve body and solenoids are in good condition, the problem is likely a worn torque converter or an internal bushing leak (like the stator support bushing), requiring transmission removal.
Parts You'll Likely Need
- TCC Regulator Valve Repair Kit — This is the most common fix. The kit includes an oversized valve and a sleeve to repair the worn valve body bore, permanently fixing the hydraulic leak. Reaming tools are required.
Trusted brands: Sonnax (P/N: 77754-04K for '98+ vehicles)
Aftermarket price range: $60-$100 - Torque Converter Clutch (TCC) PWM Solenoid
(OEM #ACDelco 24227792 (or 24207054))— Often replaced as a preventative measure or if a crack is found. It's a common point of failure and inexpensive to replace while the pan is off.
Trusted brands: ACDelco, Bosch
OEM price range: $40-$70
Aftermarket price range: $20-$50
Related Codes That Often Appear With This One
- P1870 — This is an older, GM-specific code for 'Transmission Component Slipping'. It has the exact same root causes as P0894 and was more common on pre-2000 models. Many TSBs and repair kits address both codes together as they represent the same fundamental problem.
- P0741 — This code means 'Torque Converter Clutch Circuit Performance or Stuck Off'. It is more specific to the TCC electrical circuit and solenoid, often appearing alongside P0894 to confirm a TCC system fault.
Technical Service Bulletins (TSBs) & Recalls
- PIP5340A: Addresses MIL illumination with P0894/P1870 after a transmission or torque converter replacement on 1999-2002 Express/Savana vans, instructing dealers to contact GM technical support.
- 01-07-30-002 series: An older, well-known TSB regarding P1870 that eventually led to GM redesigning the valve body to prevent TCC regulator bore wear.
Platform-Specific Known Issues
- GM Technical Service Bulletin PIP5340A: GM issued this bulletin for the 1999-2002 Express/Savana (among other models) for P0894 or P1870 setting after a transmission or torque converter replacement. It instructs technicians to contact GM Technical Assistance, indicating it's a known, complex issue that GM was tracking closely.
- Owner Experience: Cracked TCC Solenoid: A user on PerformanceTrucks.net with a Silverado (sharing the 4L60E) chased a P0894 code after a rebuild. After trying a valve body kit, the actual cause was found to be a visible crack in the plastic body of the TCC solenoid, which was solved with a $20 replacement part.
- Owner Experience: Worn Stator Bushing: On BAT Auto Technical forums, a user with a 1999 S-10 Blazer (4L60E) still had a P1870 code after installing a Sonnax valve body kit. Upon transmission removal, the root cause was discovered to be a severely worn rear stator support bushing, which prevented TCC apply pressure from building.
Mechanic-Grade Diagnostic Values
- TCC PWM Solenoid Resistance (4L60E) — expected: 10 to 11 ohms at 68°F (20°C). Failure: An open circuit (infinite resistance) or a direct short (zero ohms) indicates a failed solenoid winding.
- TCC Solenoid Resistance (non-PWM, 4L60E) — expected: 20 to 40 ohms. Failure: A reading outside this range indicates a faulty solenoid.
- TCC Solenoid Resistance (late model 4L80E, '94+) — expected: 10 to 15 ohms. Failure: A significantly lower reading (e.g., 1.8 ohms) or an open circuit points to a failed solenoid.
- Scan Tool TCC Slip Speed — expected: Under 50 RPM when TCC is commanded to lock.. Failure: Sustained slip speeds of 100-400 RPM with the TCC commanded ON strongly suggest a hydraulic leak (valve body) or solenoid issue. Slip over 400 RPM often points to a failed torque converter clutch or internal transmission clutches.
Scan Tool Commands That Help
- Tech 2 / Professional Scan Tool: TCC Solenoid Duty Cycle Control — This bidirectional control allows a technician to manually command the TCC solenoid ON (typically >90% duty cycle) while monitoring TCC slip speed. This is the primary method to confirm if a slip is occurring despite the computer commanding a lockup, separating electrical command from mechanical/hydraulic execution.
- Tech 2 / Professional Scan Tool: Solenoid Test — Allows the technician to command individual solenoids on and off with the engine off (key on) to listen for an audible 'click'. A lack of a click from the TCC solenoid can indicate an electrical failure in the solenoid or its wiring harness.
Wiring & Ground Locations
- Transmission Case Connector (20-pin) — On the passenger side of the transmission case.. This is the main electrical connection for all internal transmission components. The TCC PWM solenoid signal is on Pin T. Testing resistance and voltage at this connector can diagnose the solenoid and harness without dropping the pan.
- G101 / G104 — Typically located on the lower front or side of the engine block.. These are primary engine-to-chassis grounds. The Powertrain Control Module (PCM), which controls the transmission, relies on these grounds for a stable reference. A poor connection at G101 or G104 can cause erratic sensor readings and incorrect solenoid operation, potentially mimicking internal transmission faults.
- G103 — On the rear of the left (driver's side) cylinder head or on the cowl above the brake booster.. This is a critical ground point for the PCM and other modules. A TSB for later models with different codes specifically calls out checking G103 for a clean, tight connection to resolve erratic transmission behavior, a principle that applies here.
Real Owner Repair Stories
- PerformanceTrucks.net forum user (Chevrolet Silverado with a freshly rebuilt 4L60E and a new, higher-stall Yank torque converter.) — P0894 code appeared twice within 300 miles of the rebuild. Engine RPM would flare up by about 200 RPM at cruising speed with light throttle.
❌ Tried (didn't work) Clearing the code (it returned quickly).
✅ What actually fixed it The PCM tune was the problem. The existing tune was for the previous torque converter, and its TCC lockup parameters were incorrect for the new converter's stall speed, causing the computer to detect slip. A proper retune to match the new hardware resolved the code.
OEM Part Supersession History
24212690→24227792— Part number update by GM for the TCC PWM Solenoid.
Heads up: While a direct replacement, some documentation notes that special setup procedures or programming may be required, though this is less common for this specific part on older vehicles.Sonnax 77754-03K→Sonnax 77754-04K (for this application)— The -03K kit has an increased apply rate and is intended for 1997-and-earlier vehicles. The -04K kit matches the OE apply rate and is required for 1998-and-later vehicles that use the EC3 (Electronically Controlled Clutch and Converter) strategy.
Heads up: Using the older -03K kit on a 1998+ vehicle can result in harsh TCC engagement, as it's not designed for the PWM strategy used in these later models.
Model Year Variations Within This Range
- 1998+: Starting in 1998 for most trucks (1997 in Corvettes), the 4L60E received a 300mm input shaft and a new torque converter design to pair with the new Gen III LS-based engines. This also coincided with changes to the TCC apply strategy (EC3), which requires the use of the correct TCC regulator valve kit (Sonnax 77754-04K) and TCC solenoid.
- 1998-2002: A GM service bulletin states that the valve body wear issue in the TCC regulator bore was addressed in factory valve bodies manufactured after January 15, 2000. While vehicles in the 2000-2002 range are less susceptible than 1998-1999 models, wear can still occur over time, and it remains a primary diagnostic path for P0894/P1870.
Helpful Videos


We Have This Part in Stock


The information in this article is provided for general reference and educational purposes only. Vehicle specifications, procedures, and part compatibility can vary by production date, trim level, and region. Always consult your vehicle's factory service manual and verify part numbers before purchasing or performing repairs. Safety-critical components such as airbags, seat belts, and braking systems should be installed by a qualified professional.
- Chevrolet EXPRESS:
- 🎬 Helpful Videos
- 🛍️ Shop This Part
- What's Unique About the 1998-2002 Chevrolet EXPRESS
- Diagnostic Flowchart
- Symptoms You May Notice
- Most Likely Causes
- Rare But Worth Checking
- Diagnosis Steps
- Parts You'll Likely Need
- Related Codes That Often Appear With This One
- Technical Service Bulletins (TSBs) & Recalls
- Platform-Specific Known Issues
- Mechanic-Grade Diagnostic Values
- Scan Tool Commands That Help
- Wiring & Ground Locations
- Real Owner Repair Stories
- OEM Part Supersession History
- Model Year Variations Within This Range
- 🎟️ Get 5% Off