

OBD-II Code P0872: Transmission Fluid Pressure Sensor 'C' Circuit Low
The Ultimate Guide to What P0872 Means, Why It Triggers, and How to Fix It for Good
- P0872 triggers when the Powertrain Control Module detects a voltage below 0.1V from the 'C' transmission fluid pressure sensor, forcing the vehicle into a dangerous 'limp mode'.
- Always test the wiring harness for a short-to-ground before replacing the sensor; broken wires cause over 30% of P0872 misdiagnoses.
- On GM (6L80), Ford (6R80), and Ram (68RFE) trucks, P0872 rarely means a single bad sensor; it usually requires replacing a $600-$1,400 internal module like a TEHCM or lead frame.
- Stop driving immediately; continuing to drive with low hydraulic pressure burns clutch packs within 50 miles, turning a $200 sensor fix into a $4,000 transmission rebuild.
What Does P0872 Mean?

P0872 means the Powertrain Control Module (PCM) detects a voltage signal from the 'C' transmission fluid pressure (TFP) sensor below the manufacturer's specified range. This sensor converts hydraulic pressure into an electrical signal to orchestrate smooth gear shifts. When voltage drops too low, the PCM loses crucial data, triggers the Check Engine Light, and forces the transmission into a protective 'limp mode' to prevent catastrophic failure.
Technical definition: The SAE/OBD-II definition is "Transmission Fluid Pressure Sensor/Switch 'C' Circuit Low". The PCM or Transmission Control Module (TCM) registers a continuous voltage reading from the 'C' sensor circuit below its operational threshold, typically under 0.1 volts. This condition stems from a short to ground in the signal wire or an internally failed sensor.
Can I Drive With P0872?
no_recommended. Driving is not recommended. The transmission shifts harshly, gets stuck in a single gear (limp mode), or fails to engage, creating a significant safety hazard. Continuing to drive causes irreversible internal damage, turning a sensor issue into a full transmission rebuild costing $4,000 to $8,000+. Tow the vehicle for diagnosis.
Common Causes

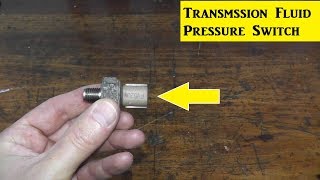
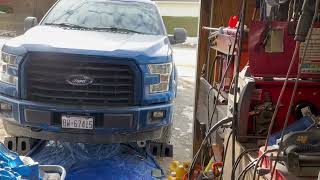
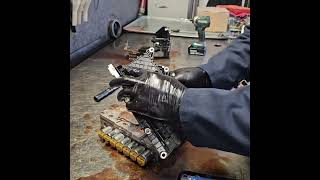
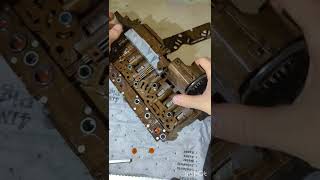
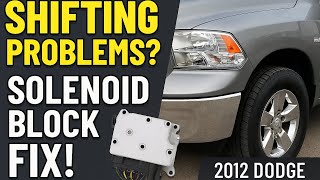
- Wiring or Connector Issues (Very Common) — The wiring harness is highly vulnerable. Wires chafe against the chassis and short to ground, connector pins corrode, or water intrusion disrupts the signal, directly causing a 'Circuit Low' reading. 🎬 Watch: How to replace a transmission fluid pressure switch.
- Faulty Transmission Fluid Pressure Sensor (TFPS) (Very Common) — The sensor's internal electronics short out over time, causing it to send a constant low-voltage signal or no signal at all to the PCM.
- Failed TEHCM, Lead Frame, or Solenoid Pack (Common) — On GM (6L80), Ford (6R80), and Ram (68RFE) trucks, pressure sensors are integrated into a larger internal module. The internal circuits or pressure diaphragms degrade, triggering P0872 alongside other pressure codes.
- Low, Burnt, or Incorrect Transmission Fluid (Common) — Severely burnt or contaminated fluid causes pressure switches to stick or solenoids to malfunction, indirectly triggering electrical fault codes.
- Transmission Valve Body Malfunction (Less Common) — A malfunctioning solenoid, a stuck valve, or a clogged passage within the valve body causes severe pressure regulation problems that manifest as an electrical fault code.
- Internal Transmission Debris (Rare) — Metallic debris from normal wear lodges in a pressure switch, causing it to stick closed and send a continuous low signal. This indicates a larger internal failure requiring a rebuild.
- Faulty Transmission Control Module (TCM) or Powertrain Control Module (PCM) (Very Rare) — The control module interpreting the sensor's signal fails. Rule out all wiring and sensor possibilities before replacing the module.
Symptoms

- Check Engine Light is On — The primary and immediate indicator. The Transmission Warning Light also illuminates on specific vehicles.
- Transmission Stuck in 'Limp Mode' — The vehicle locks into a single gear (typically 2nd or 3rd) to prevent damage, resulting in poor acceleration and high engine RPM at moderate speeds.
- Harsh, Erratic, or Delayed Shifting — The transmission slams into gear, hesitates, or refuses to shift. Hondas often lose the ability to shift into 4th gear.
- Inability to Engage Gears — The transmission fails to engage from Park into Drive or Reverse, leaving the vehicle stranded.
- Smell of Burnt Transmission Fluid — Incorrect line pressure causes clutch packs to slip and overheat the fluid, producing a distinct acrid smell indicating active internal damage.
- Increased Fuel Consumption — Inefficient shifting and limp mode force the engine to work harder, noticeably decreasing fuel economy.
Diagnostic Flowchart
Tap your situation to follow the diagnostic path that matches what you're seeing on this code.
Common Fixes & Costs

- Repair Damaged Wiring or Connectors — Parts: $15-$60, Labor: $150-$400, ~1.5 hr book time (Intermediate)
- Replace Transmission Fluid Pressure Sensor 'C' — Parts: $40-$150, Labor: $100-$300, ~1.0 hr book time (Intermediate)
- Replace TEHCM / Molded Lead Frame
— Parts: $300-$700, Labor: $400-$800, ~4.5 hr book time
(Professional)
GM Silverado (6L80): OEM 24275873 (Alt: {"brand": "ACDelco (Reman)", "part_number": "D104420C"})
Ford F-150 (6R80): OEM AL3Z-7G276-D (Alt: {"brand": "Dorman", "part_number": "609-040"}) - Replace Transmission Solenoid Pack — Parts: $250-$550, Labor: $250-$500, ~2.5 hr book time (Professional)
- Transmission Fluid and Filter Service — Parts: $50-$120, Labor: $150-$250, ~1.2 hr book time (DIY)
Used vs. New Parts: Buying Guide
When a used part is worth it: Buying used is risky for complex electronic parts. It only makes sense if the part is from a verified low-mileage vehicle wrecked for non-drivetrain reasons and includes a solid warranty.
Donor-vehicle mileage cap: roughly under 60000 miles for the part to have meaningful remaining life.
Donor quality checklist:
- Verify the donor vehicle's VIN to confirm accident history versus being scrapped for transmission failure.
- Match the part number exactly, including superseded numbers, as programming is VIN-specific.
- Avoid TEHCMs and solenoid packs that look opened or tampered with.
Decision logic:
- If The part is a simple external switch (e.g., Honda pressure switch) → Buy new. Cost savings for a used part are minimal and not worth the risk of premature failure.
- If The part is a complex internal electronic module (TEHCM, Lead Frame, Solenoid Pack) → Buy a new OEM or high-quality remanufactured part with a long warranty. A used part is a major gamble.
- If The vehicle has over 150k miles and the budget is extremely tight → A used part with a 6-month warranty is a viable short-term solution, but accept the higher risk of repeat failure.
Warranty tradeoff: Salvage yard parts offer 30-90 day warranties that do not cover labor. Remanufactured parts offer 1-year to lifetime warranties. New OEM parts carry 1-2 year warranties.
Worst-case if a used part fails: $500-$1200 if a used internal part fails, as you must pay repeat labor to drop the transmission pan and valve body.
What Happens If You Wait — Timeline
- 0-1 month: Check Engine Light is on. Vehicle enters intermittent 'limp mode'. Shifting becomes harsh or delayed. Performance is compromised. (MPG impact: 5-15%% · Added cost: $0 - $200 (for a tow if it fails to engage gear))
- 1-3 months: Driving in limp mode causes clutch packs to slip excessively. This generates extreme heat, burning the transmission fluid and producing an acrid smell. (MPG impact: 15-25%% · Added cost: $250 - $750 (Wasted fuel and fluid/filter changes that reveal burnt fluid))
- 3-6 months: Burnt fluid full of clutch material circulates, clogging the filter, scoring the valve body, and damaging solenoids. Slipping becomes severe. (MPG impact: 25-40%% · Added cost: $1,500 - $3,500 (Requires valve body and/or clutch pack replacement))
- 6+ months: Catastrophic failure. The transmission no longer engages gears. Damage affects the torque converter and planetary gearsets. A simple repair is impossible. (MPG impact: N/A (Vehicle is undrivable)% · Added cost: $4,000 - $8,000+ (Complete transmission rebuild or replacement required))
Cost of Not Fixing It
- Immediate (0-1 month): Vehicle gets stuck in 'limp mode', shifts harshly, and poses a safety risk. Fuel economy drops. Continued driving causes excessive heat and clutch wear. (Added cost: $0 - $200 (for a tow))
- Short-Term (1-6 months): Sustained low pressure causes clutch packs to slip and burn, overheating the fluid and damaging seals. Debris scores the valve body. (Added cost: $1,500 - $3,500 (Valve body and clutch pack replacement))
- Long-Term (6+ months): Catastrophic internal transmission failure. Burnt clutches, a damaged valve body, and a failed torque converter necessitate a complete transmission rebuild or replacement. (Added cost: $4,000 - $8,000+)
Diagnosis Steps
- Scan for Codes and Review Freeze Frame Data
Use a scanner to confirm P0872 and check for related codes (e.g., P0870, P0873). Review freeze frame data to see the vehicle's speed, temperature, and load when the code triggered.
Tools: OBD-II Scanner (Beginner) - Check Transmission Fluid Level and Condition
Check the fluid according to the manufacturer's procedure. It must be at the correct level, pink/red, and not smell burnt. Low or degraded fluid requires immediate attention before electrical testing.
Tools: Clean rag, white paper towel (Beginner) - Visually Inspect Wiring and Connectors
Inspect the wiring harness from the TFPS 'C' sensor to the TCM/PCM. Look for chafing, melting near exhaust components, or green/white corrosion on connector pins.
Tools: Flashlight (Beginner) - [PRO TIP] Perform a Harness 'Wiggle Test'
With the ignition ON, monitor live data for the TFPS 'C' voltage. Gently wiggle the connector and harness. If the voltage jumps or cuts out, you have an intermittent open or short in the wiring.
Tools: OBD-II Scanner with Live Data (Intermediate) - Test the Sensor's Electrical Circuit at the Connector
Disconnect the sensor (ignition ON, engine OFF). Check for a 5-volt reference on the supply wire and a solid ground (<0.1V) on the ground wire. Check for continuity between the signal pin and chassis ground to confirm a short.
Tools: Digital Multimeter, Backprobe pins (Intermediate) - Analyze Live Data from Scan Tool
Monitor the 'Transmission Fluid Pressure Sensor C Voltage' PID. A healthy sensor fluctuates between 0.5V and 4.5V. A reading consistently below 0.5V confirms the 'Circuit Low' condition.
Tools: Advanced OBD-II Scanner (Advanced) - [PRO TIP] Bench Test the Sensor or Solenoid Pack
Remove the sensor. For a switch, check for continuity (open/closed) while applying low-pressure air. For a variable sensor, apply a 5V reference and measure the signal output against manufacturer specs.
Tools: Multimeter, Regulated Air Supply (Advanced) - Perform a Transmission Line Pressure Test
Connect a mechanical gauge to the transmission test ports. Compare actual hydraulic pressure in various gears to OEM specifications to rule out internal hydraulic failure.
Tools: Mechanical Pressure Gauge, Vehicle-Specific Adapters (Advanced) - Isolate the Fault to the TCM/PCM
If the sensor, wiring, and pressures test perfectly, perform a pin-out test directly at the TCM/PCM connector. If the module outputs incorrect voltage, it requires replacement and programming.
Tools: Multimeter, Vehicle Wiring Diagram (Advanced)
When This Code Triggers (Freeze-Frame Conditions)
- Engine Coolant Temp: 180-210°F (Vehicle is at full operating temperature. The code is less likely to set on a cold engine.)
- Engine RPM: 1500-2500 RPM (Occurs during or immediately after a gear shift command from the TCM under light to moderate acceleration.)
- Vehicle Speed: 35-55 mph (The fault triggers at steady cruising speeds when the transmission attempts to shift into or out of an overdrive gear.)
- Gear Commanded: 3rd to 4th or 4th to 5th (The PCM/TCM commands a shift involving the 'C' clutch circuit and does not receive the expected voltage confirmation.)
Related Codes
- P0870 — A generic fault for the 'C' sensor circuit. P0872 is more specific, defining the fault as a short to ground or low voltage state.
- P0871 — A 'Range/Performance' issue. The PCM sees an illogical voltage for the current gear, pointing to a genuine hydraulic problem (slipping clutches) or an intermittent wiring fault.
- P0873 — The direct opposite of P0872, indicating circuit voltage is too high (short to power or open circuit). Seeing both suggests a severely damaged wire making intermittent contact.
- P0847 — An identical 'Circuit Low' code for the 'B' sensor. Multiple pressure sensor codes strongly suggest a systemic failure like a faulty TEHCM, lead frame, or solenoid pack.
Climate & Environmental Factors
- Cold Weather: Extremely cold temperatures cause transmission fluid to thicken, leading to sluggish hydraulic response. This exacerbates pre-existing conditions in sensors and causes intermittent pressure codes during warm-up.
- High Humidity / Water Intrusion: Moisture penetrates weathered connector seals or damaged wiring insulation. This causes corrosion on connector pins or creates a short-to-ground, directly triggering P0872.
How to Talk to a Mechanic About This Code
Say this: "I have a P0872 code and shifting issues. I need a diagnostic to determine if it's an external sensor, a wiring problem, or an internal component like a solenoid pack or TEHCM. Please check the sensor circuit for proper 5V reference, ground, and signal before quoting a part replacement."
This signals you understand the code is electrical and requires methodical diagnosis. It prevents shops from immediately quoting expensive internal parts without ruling out cheaper wiring issues.
Avoid saying:
- 'My transmission is acting up.' (Too vague, invites an expensive diagnosis.)
- 'Just replace the pressure sensor.' (You waste money if wiring is the actual problem.)
- 'Do whatever it takes to fix it.' (Gives the shop a blank check.)
Questions to ask before authorizing the repair:
- What were the results of the electrical tests on the sensor circuit? Did you see the correct reference voltage and ground?
- If recommending an internal part, what specific evidence points to that failure versus a wiring issue?
- Does the replacement part require programming, and is that included in the quote?
- What is the warranty on parts and labor for this specific repair?
Where to Take It: Dealer vs Independent vs Chain
- Dealer:
Recommended if diagnostics point to a control module (TEHCM/TCM) requiring proprietary software programming, or for warranty work.
Best for: Vehicles under powertrain warranty., Repairs requiring vehicle-specific programming (TEHCM or TCM)., Known issues covered by a Technical Service Bulletin (TSB) or recall.
Downsides: Highest labor rates., Often recommends replacing large assemblies (valve body) when a smaller component failed. (Typical cost: +50% vs. baseline) - Independent Shop:
Best overall fit for most P0872 scenarios. An independent transmission specialist is ideal for sensor, wiring, or lead frame/solenoid pack replacements.
Best for: Out-of-warranty vehicles., Diagnosing and repairing wiring issues., Replacing external sensors or internal components like solenoid packs.
Downsides: Diagnostic capabilities vary. Require ASE certifications and positive transmission repair reviews., May lack tools to program new modules for all makes. (Typical cost: +0% vs. baseline) - Chain Shop:
AVOID for diagnosing P0872. High risk of misdiagnosis leading to unnecessary repairs. They are not equipped for internal transmission work.
Best for: Basic maintenance like a transmission fluid exchange.
Downsides: Technicians lack experience with complex electrical and transmission diagnostics., High pressure to upsell services., Lack advanced scan tools needed for accurate diagnosis. (Typical cost: -10% vs. baseline)
When to Walk Away From the Repair
If the estimated transmission repair cost exceeds 50% of the vehicle's current private-party value, seriously consider selling or trading it in.
- Car worth $5000, fix is $2800: Walk away. The repair is over 50% of the car's value. This is a poor investment in an older vehicle.
- Car worth $15000, fix is $1300: Fix it. The repair cost is well under the threshold and restores the vehicle's primary function.
- Car worth $3000, fix is $1800: Walk away. The repair cost is 60% of the vehicle's value. It is not financially sound to proceed.
What Scan Tool You Need for This Code

Minimum: A scanner that reads/clears transmission-specific codes and displays live data for the Transmission Control Module (TCM).
A basic $20 code reader only shows the P0872 code. It cannot display live voltage from the pressure sensor, which is essential to confirm if the circuit is actually reading low.
Budget: Autel AutoLink AL629 (~$99) — Reads/erases Transmission codes and graphs live PCM data, crucial for monitoring the pressure sensor's voltage reading during diagnosis.
Mid-range: Foxwell NT604 Elite / NT510 Elite (~$350) — Provides deep access to transmission diagnostics, reads OEM-specific codes, and views live data streams for multiple sensors simultaneously.
Professional: Autel MaxiCOM MK808S / MK906BT (~$500-1200) — Provides full bidirectional control, access to all OEM data, and performs special functions like transmission relearns or programming new TEHCM/TCM modules.
Rent vs buy: Auto parts stores read codes for free, but their tools are basic. Buying a budget or midrange scanner with live data saves money over a single shop diagnostic fee.
How to Clear the Code After You Fix It
- Use an OBD-II scan tool to clear all diagnostic trouble codes.
- Ensure the transmission fluid is at the correct level and the battery is fully charged.
- Perform a complete OBD-II drive cycle to allow the readiness monitors to run.
Drive cycle (~30 minutes): Start cold (engine off for 8+ hours), idle for 3 minutes, drive in stop-and-go traffic for 10 minutes, then maintain a steady 55-60 mph for 15 minutes. Coast down to 20 mph without braking.
Readiness monitors affected: Comprehensive Component Monitor, Transmission Control Module
Before emissions retest: drive at least 100 miles to fully set monitors.
Watch out for:
- Disconnecting the battery clears the code but resets all readiness monitors to 'Not Ready', causing an automatic emissions failure.
- The code returns immediately if the underlying electrical short or mechanical fault is not repaired.
- Failing to drive under the specific conditions required to complete the drive cycle leaves monitors incomplete.
Will This Fail Emissions / State Inspection?
Yes — this code typically fails an OBD-II emissions inspection.
- California: An active Check Engine Light for P0872 is an automatic failure. A full drive cycle must be completed post-repair to set all readiness monitors before re-testing.
- New York: The NYS DMV inspection includes an OBD-II scan. An illuminated Check Engine Light from P0872 results in an immediate inspection failure.
- Texas: In emissions-testing counties, an illuminated Check Engine Light is an automatic failure. The vehicle cannot pass until the issue is repaired and the code cleared.
Most Commonly Affected Vehicles
- Honda Odyssey, Accord, Pilot (2011-2017) — P0872 points to a failed 4th clutch pressure switch. It is an externally mounted switch, making it a fast, inexpensive DIY replacement (Part 28600-R97-003).
- Chevrolet / GMC Silverado, Sierra, Tahoe, Equinox (2007-2016) — On 6L80/6L90 transmissions, P0872 indicates a failure of the internal TEHCM. The pressure switch diaphragms crack, requiring replacement and programming of the entire unit.
- Dodge / Ram Ram 1500/2500/3500 (2006-2018) — Trucks with 45RFE, 545RFE, and 68RFE transmissions log this code due to a failed pressure transducer within the main solenoid pack, requiring full pack replacement.
- Ford F-150, Expedition (2011-2017) — On the 6R80 6-speed automatic, this code is caused by a failure of the molded lead frame attached to the valve body. Replacement requires dropping the valve body.
- Nissan Altima, Maxima, Rogue (2007-2015) — In CVT-equipped Nissans, P0872 points to a failing valve body where pressure sensors are integrated, resulting in an expensive repair.
- Subaru Ascent (2019-2020) — Recall WRK-21 addresses a faulty transmission hydraulic sensor harness causing incorrect pressure readings. Requires a TCU reprogram and potential harness/transmission replacement.
- Hyundai / Kia Elantra, Forte, Sonata (2011-2016) — Known for main transmission wiring harness issues. The harness becomes brittle, leading to P0872. Inspect wiring thoroughly before replacing internal parts.
- Jeep Grand Cherokee, Commander (2005-2014) — Vehicles using the 545RFE transmission experience this code when the integrated solenoid pack/pressure switch assembly fails.
Manufacturer-Specific Notes
- Honda: P0872 specifically points to the 4th clutch pressure switch on V6 models. These are inexpensive, single-wire, external switches that are easy to access and replace.
- General Motors (Chevrolet/GMC): Pressure switches are integrated into the TEHCM inside the transmission. Internal laminated diaphragms fail from heat, requiring replacement and programming of the entire TEHCM unit.
- Chrysler/Dodge/Jeep/Ram: The pressure sensor is part of the main solenoid pack assembly on the valve body. The entire pack must be replaced as a single unit to fix one failed sensor.
- Ford: Shifting problems and P0872 are caused by a cracked molded lead frame connecting valve body solenoids to the harness. Ford has issued multiple recalls (e.g., 19-2310) for this.
Real Owner Stories
2013 Honda Odyssey at 115K miles with P0872
Check Engine Light and 'D' drive indicator flashing. Transmission shifted harshly from 3rd to 4th gear. Code confirmed as P0872.
What they tried:
- Researched forums and found the 4th gear pressure switch is a common failure point.
- Purchased an OEM replacement switch (part # 28600-R97-003).
- Followed a DIY video to replace the external switch, accessible from the top of the transmission.
Outcome: Replacement took under an hour. After clearing the code, shifting returned to normal. Total cost was under $50.
Lesson: For Hondas, P0872 points directly to a specific, inexpensive, externally accessible pressure switch. Confirm this DIY fix before paying shop fees.
2011 Chevy Silverado 1500 (6L80) at 130K miles
Vehicle went into limp mode, stuck in 3rd gear. Displayed 'Service Stabilitrak' and Check Engine Light. Scanned codes P0872 and P0877.
What they tried:
- Initial thought was a bad sensor or wiring.
- A local shop performed diagnostics and confirmed multiple pressure switch codes.
- The shop advised that on the 6L80, this combination means the internal TEHCM has failed.
Outcome: The shop replaced the TEHCM inside the transmission oil pan. Required dropping the pan, replacing the module, and programming it to the VIN. Total cost was $1,300. Resolved all issues.
Lesson: On GM trucks, multiple pressure switch codes indicate TEHCM failure, not individual sensor issues. This requires professional repair and programming.
2012 Ram 1500 (65RFE) with P0933 and P0872
Truck experienced erratic shifting and threw a Check Engine Light. Fluid was dark and burnt. Codes P0933 and P0872 present.
What they tried:
- Owner replaced the line pressure sensor, but the problem persisted.
- Took it to a transmission shop. Wiring tested okay.
- Shop replaced the entire solenoid pack on the valve body, as sensors are integrated.
Outcome: Replacing the solenoid pack fixed the issue. The owner wasted money on a separate sensor and diagnostic time. Final cost was over $900.
Lesson: On Dodge/Ram vehicles, pressure sensor codes are caused by failure of the entire solenoid pack. Replacing one sensor is ineffective; the integrated unit must be replaced.
How to Prevent This Code From Triggering
- Perform regular transmission fluid and filter changes (Every 30,000-60,000 miles) — Clean fluid maintains hydraulic properties and lubrication, preventing overheating. Old fluid causes valves and switches to stick.
- Use the exact manufacturer-specified transmission fluid (OEM fluid) (Every fluid change) — Modern transmissions require specific fluid viscosity and additives. Incorrect fluid leads to poor shifting, overheating, and seal failure.
- Install an auxiliary external transmission cooler (Once, especially if towing or in hot climates) — Heat destroys transmissions. An external cooler provides additional capacity, keeping fluid temperatures stable and preventing breakdown.
- Come to a complete stop before shifting from Drive to Reverse (Daily habit) — Shifting while moving forces internal clutch packs to absorb incredible stress, causing rapid wear and mechanical failure.
- Allow the vehicle to warm up for a minute in cold weather (On cold days) — Cold fluid is thick and circulates poorly. Warming up thins the fluid, reducing strain on the pump and ensuring smooth initial shifts.
Frequently Asked Questions
Can I fix P0872 myself?
It depends on the vehicle. On many Hondas with an external pressure switch, it is a manageable DIY job. On GM, Ford, or Dodge trucks requiring internal module replacement and programming, take the vehicle to a transmission specialist.
What is the most common mistake when diagnosing P0872?
The biggest mistake is replacing the pressure sensor without testing the circuit first. Technicians often find the real problem is a broken wire or corroded connector. Testing prevents wasting money on unneeded parts.
Will changing the transmission fluid fix a P0872 code?
No, P0872 is an electrical circuit code indicating a short or failed sensor. A fluid change cannot fix an electrical fault. The only rare exception is if heavy debris physically jams a pressure switch.
How much does it cost to diagnose P0872?
Most repair shops charge a standard diagnostic fee ranging from $100 to $185. This fee covers the time required to accurately identify the root cause using advanced scan tools and multimeters.
What is the difference between a pressure 'sensor' and a pressure 'switch'?
A pressure sensor provides a variable voltage signal corresponding to a wide range of pressures (typically 0.5V to 4.5V). A pressure switch is a binary on/off device signaling if pressure is above or below a specific point. The 'C' component can be either depending on transmission design.
Can a bad battery or alternator cause P0872?
Yes. A failing battery or alternator causes low system voltage throughout the vehicle. This deprives sensitive electronic modules like the TCM of proper voltage, triggering erroneous codes including P0872.
What does a transmission pressure sensor actually do?
It acts as a feedback mechanism for the Transmission Control Module (TCM). When the TCM commands a gear shift, the sensor confirms the hydraulic circuit achieved the correct pressure. This tells the computer the mechanical action was successful.
Key Takeaways
- P0872 triggers when the Powertrain Control Module detects a voltage below 0.1V from the 'C' transmission fluid pressure sensor, forcing the vehicle into a dangerous 'limp mode'.
- Always test the wiring harness for a short-to-ground before replacing the sensor; broken wires cause over 30% of P0872 misdiagnoses.
- On GM (6L80), Ford (6R80), and Ram (68RFE) trucks, P0872 rarely means a single bad sensor; it usually requires replacing a $600-$1,400 internal module like a TEHCM or lead frame.
- Stop driving immediately; continuing to drive with low hydraulic pressure burns clutch packs within 50 miles, turning a $200 sensor fix into a $4,000 transmission rebuild.
Helpful Videos

The information in this article is provided for general reference and educational purposes only. Vehicle specifications, procedures, and part compatibility can vary by production date, trim level, and region. Always consult your vehicle's factory service manual and verify part numbers before purchasing or performing repairs. Safety-critical components such as airbags, seat belts, and braking systems should be installed by a qualified professional.
- 🎬 Helpful Videos
- What Does P0872 Mean?
- Can I Drive With P0872?
- Common Causes
- Symptoms
- Diagnostic Flowchart
- Common Fixes & Costs
- Used vs. New Parts: Buying Guide
- What Happens If You Wait — Timeline
- Cost of Not Fixing It
- Diagnosis Steps
- When This Code Triggers (Freeze-Frame Conditions)
- Related Codes
- Climate & Environmental Factors
- How to Talk to a Mechanic About This Code
- Where to Take It: Dealer vs Independent vs Chain
- When to Walk Away From the Repair
- What Scan Tool You Need for This Code
- How to Clear the Code After You Fix It
- Will This Fail Emissions / State Inspection?
- Most Commonly Affected Vehicles
- Manufacturer-Specific Notes
- Real Owner Stories
- 2013 Honda Odyssey at 115K miles with P0872
- 2011 Chevy Silverado 1500 (6L80) at 130K miles
- 2012 Ram 1500 (65RFE) with P0933 and P0872
- How to Prevent This Code From Triggering
- Frequently Asked Questions
- Can I fix P0872 myself?
- What is the most common mistake when diagnosing P0872?
- Will changing the transmission fluid fix a P0872 code?
- How much does it cost to diagnose P0872?
- What is the difference between a pressure 'sensor' and a pressure 'switch'?
- Can a bad battery or alternator cause P0872?
- What does a transmission pressure sensor actually do?
- Key Takeaways
- 🎟️ Get 5% Off