

OBD-II Code P0709: Transmission Range Sensor 'A' Circuit Intermittent
The Ultimate Expert Guide to Diagnosing and Fixing P0709
- Inspect the wiring harness and connector first, as corroded pins or chafed wires cause over 60% of P0709 codes.
- Stop driving immediately if the transmission enters limp mode or locks into 2nd or 3rd gear to prevent catastrophic internal damage.
- Perform a live-data 'wiggle test' with an OBD-II scanner while moving the wiring harness to pinpoint intermittent electrical drops.
- Expect to pay between $100 and $200 for a simple wiring repair, but up to $450 if the external sensor requires replacement and calibration.
What Does P0709 Mean?
The Powertrain Control Module (PCM) or Transmission Control Module (TCM) is receiving an unstable, flickering, or irrational signal from the Transmission Range Sensor (TRS). This sensor tells the computer which gear you selected (Park, Reverse, Neutral, Drive). Because the signal drops out intermittently, the computer loses track of the driver's intent. This causes dangerous shifting problems, prevents the engine from starting, and triggers the Check Engine Light.
Technical definition: The official SAE/ISO definition for P0709 is "Transmission Range Sensor 'A' Circuit Intermittent". 🎬 Watch: A quick breakdown of P0709 causes and common fixes. The Powertrain Control Module (PCM) or Transmission Control Module (TCM) detects that the voltage signal from the transmission range sensor is unstable or dropping out. The computer expects a specific, steady voltage for each gear position; an intermittent signal spikes, drops to zero, or flickers unexpectedly instead of remaining constant.
Can I Drive With P0709?
Yes, But With Caution. You can drive, but we strongly discourage it for any significant distance. The vehicle enters 'limp mode,' limiting speed and RPMs, or shifts erratically, gets stuck in one gear, or fails to start, potentially leaving you stranded. Driving more than 50 miles causes excessive heat and strain on internal transmission components, turning a minor sensor issue into a $3,000+ transmission rebuild. Sudden deceleration in traffic is also a severe safety risk.
Common Causes
- Damaged or Corroded Wiring/Connectors (Very Common) — This is the most frequent culprit. The wiring harness leading to the sensor is exposed to engine heat, moisture, and road vibration. Wires fray, chafe against the chassis, or connector pins develop corrosion (green/white powder), causing a flickering signal.
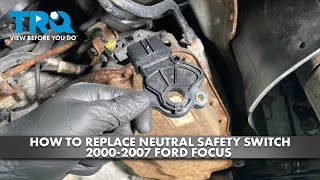
- Faulty Transmission Range Sensor (TRS) (Common) — Also known as a Neutral Safety Switch or Inhibitor Switch, the sensor itself fails internally. Wear on internal electrical contacts or electronic component failure creates an intermittent open or short, leading to an unstable signal. 🎬 See this step-by-step guide on replacing a neutral safety switch.
- Misadjusted Transmission Range Sensor (Common) — This occurs after a transmission repair or replacement if the sensor is not perfectly aligned with the manual shift linkage. Misalignment causes the sensor to send a voltage 'between gears,' which the computer interprets as an intermittent or irrational signal. 🎬 Watch: How to properly align and adjust your inhibitor switch.
- Fluid Contamination in Sensor/Connector (Less Common) — Transmission fluid, engine oil, or water leaks into the sensor's electrical connector or housing. Fluid intrusion short-circuits the electrical contacts, causing erratic signals. This happens frequently in high-humidity areas or after driving through deep water.
- Unstable Power Supply or Poor Ground (Less Common) — The sensor relies on a stable voltage supply and a solid ground. A failing battery, bad alternator, or corroded ground wire causes voltage fluctuations throughout the vehicle, triggering an intermittent code even if the sensor and direct wiring are intact.
- TCM/PCM Software Glitches (Less Common) — Sometimes, the logic within the Transmission or Powertrain Control Module is too sensitive. Manufacturers release software updates (TSBs) to correct this, preventing the module from falsely flagging a P0709 code when no mechanical or electrical fault exists.
- Internal Transmission Mechanical Issues (Rare) — A problem inside the transmission, such as a worn manual valve linkage or valve body issue, prevents the shift lever from properly positioning the range sensor. This indirectly causes an intermittent signal and is usually accompanied by other transmission-specific codes.
- Faulty Powertrain/Transmission Control Module (PCM/TCM) (Rare) — In rare instances, the computer itself has a faulty internal circuit responsible for interpreting the sensor's signal. Consider this last-resort diagnosis only after exhaustively ruling out all other possibilities.
Symptoms
- Check Engine Light is On — The Malfunction Indicator Lamp (MIL) illuminates on your dashboard.
- Erratic Shifting or Stuck in Gear (Limp Mode) — The transmission shifts harshly, delays shifts, hunts for gears, or locks into a single gear (usually 2nd or 3rd) to prevent further damage.
- Engine Won't Start or Cranks in Wrong Gear — The sensor acts as a neutral safety switch. If it cannot confirm the car is in Park or Neutral, it prevents the engine from cranking. In some cases, it allows cranking in gear, creating a severe safety hazard.
- Incorrect or Flashing Gear Indicator (PRNDL) — The gear display on your dashboard flickers, shows the wrong gear, displays a box around all gears, or goes blank entirely.
- Reverse Lights Not Working — A faulty signal prevents the reverse lights from illuminating when the vehicle is in Reverse, as the sensor directly triggers them.
- Reduced Fuel Economy (also visible on scanner) — When the computer is unsure of the gear, it cannot optimize engine RPM, torque converter lockup, and fuel delivery, decreasing fuel efficiency by 5-10%.
Diagnostic Flowchart
Tap your situation to follow the diagnostic path that matches what you're seeing on this code.
Common Fixes & Costs
- Repairing Wiring or Cleaning Connectors — Parts: $5-$25, Labor: $100-$200, ~1 hr book time (Intermediate)
- Adjusting the Transmission Range Sensor — Parts: $0, Labor: $75-$150, ~0.8 hr book time (Intermediate)
- Replacing the Transmission Range Sensor
— Parts: $50-$300, Labor: $150-$450, ~1.5 hr book time
(DIY)
Honda Accord/Civic/CR-V: OEM
Ford F-150: OEM
Chevrolet Silverado / GMC Sierra: OEM - TCM/PCM Software Update — Parts: $0, Labor: $120-$200, ~1 hr book time (Professional)
- Replacing the Powertrain Control Module (PCM/TCM) — Parts: $600-$1000, Labor: $200-$400, ~2 hr book time (Professional)
DIY vs Professional
- Repairing Wiring or Cleaning Connectors — Beginner:
Tools: Multimeter, backprobes, electrical contact cleaner, wire strippers, crimpers, heat shrink tubing, dielectric grease. - Adjusting the Transmission Range Sensor — Beginner:
Tools: Basic hand tools (socket set, wrenches). - Replacing the Transmission Range Sensor (External) — Beginner:
Tools: Socket set, wrenches, torque wrench, jack and jack stands. - TCM/PCM Software Update or Replacement — Beginner:
Tools: OEM-specific diagnostic tool (e.g., Nissan CONSULT, GM MDI) and software subscription.
Used vs. New Parts: Buying Guide
When a used part is worth it: A used Transmission Range Sensor from a low-mileage, accident-damaged vehicle is a cost-effective option for older vehicles where the cost of a new OEM part is high relative to the vehicle's value.
Donor-vehicle mileage cap: roughly under 80000 miles for the part to have meaningful remaining life.
Donor quality checklist:
- Verify the donor vehicle was not scrapped due to transmission failure.
- Inspect the part for any signs of physical damage, especially to the connector pins.
- Match the part number exactly; even slight variations cause compatibility issues.
Decision logic:
- If The cost of a new aftermarket part is less than $100 → Buy new. The savings from a used part are minimal and not worth the risk of premature failure.
- If The vehicle is over 10 years old and a new OEM part is over $200 → A used part from a reputable salvage yard with a warranty is a reasonable choice.
- If The part is known for high failure rates (common on your specific model) → Favor a new OEM or high-quality aftermarket part, as even low-mileage used parts are prone to failure.
Warranty tradeoff: Used parts typically come with a 30-90 day warranty. New aftermarket parts often have a 1-year to limited lifetime warranty. New OEM parts carry a 12-month/12,000-mile warranty.
Worst-case if a used part fails: 200-500. If a used sensor fails, you pay for the part again plus the labor to repeat the installation.
What Happens If You Wait — Timeline
- 0-2 weeks: Check Engine Light appears. You experience a single, momentary harsh shift or a brief flicker of the gear indicator. Symptoms are rare and easily missed. (MPG impact: 0-2%% · Added cost: $0)
- 2 weeks - 3 months: Symptoms become frequent. The car occasionally enters 'limp mode' or delays shifts. A no-start condition occurs, requiring you to jiggle the shifter or start in Neutral. (MPG impact: 3-8%% · Added cost: $50-150 in wasted fuel and potential tow bill)
- 3-6 months: Erratic shifting is a daily occurrence. The transmission experiences significant stress from harsh engagements and incorrect pressures. Increased heat and wear accelerate damage to internal clutches and solenoids. (MPG impact: 8-15%% · Added cost: $200-600 in cumulative wear and tear on transmission components)
- 6+ months: The intermittent electrical fault causes secondary mechanical damage. Clutches burn, and solenoids fail from constant erratic commands. A $300 sensor fix escalates into a major transmission repair costing thousands. (MPG impact: 15-25%% · Added cost: $2,500+)
Cost of Not Fixing It
- 0-1 month: Annoying and potentially dangerous driving conditions like harsh shifting, hesitation, or being stuck in limp mode. Increased fuel consumption by 5-10%. (Added cost: 50-100)
- 1-6 months: Increased wear on transmission clutches and solenoids due to harsh/erratic shifting. High potential to be stranded if the vehicle fails to start. (Added cost: 200-500)
- 6+ months: Catastrophic internal transmission damage. The excessive heat and pressure from operating in the wrong gear or constant harsh shifting leads to a full transmission rebuild. (Added cost: 2500-5000+)
Diagnosis Steps
- Read Codes and Freeze Frame Data
Use an OBD-II scanner to confirm P0709 and check for related codes (e.g., P0700, P0705, P0706). Analyze freeze-frame data to identify vehicle speed, RPM, and temperature when the fault occurred.
Tools: OBD-II Scanner (Beginner) - Perform a 'Wiggle Test' with Live Data
With an OBD-II scanner displaying live data for the 'Transmission Range' or 'Gear Position' PID, have an assistant slowly move the gear shifter while you gently wiggle the wiring harness and connector. If the sensor reading jumps erratically, drops out, or fails to match the shifter position, you have pinpointed an intermittent connection.
Tools: OBD-II Scanner with Live Data (Intermediate) - Perform a Thorough Visual Inspection
Visually inspect the entire wiring harness from the transmission range sensor to the control module. Look for chafed or burnt wires, loose connections, and corrosion (green or white powder) inside the connector. Focus on areas where the harness bends or secures to the chassis.
Tools: Flashlight, Mirror (Beginner) - Test Sensor Voltage with a Multimeter
Backprobe the sensor's signal wire at the connector. With the key on (engine off), slowly move the gear shifter through all positions. The voltage must change in clear, steady steps (typically ~0.5V to ~4.5V). Any jumps, dropouts, or readings falling outside expected voltage by more than 0.2V indicate a fault.
Tools: Digital Multimeter, Backprobe Kit (Intermediate) - Check Sensor Adjustment
If the sensor is adjustable, verify its alignment. Place the shifter in Neutral and align the marks on the sensor body with the shift shaft. An improperly adjusted sensor is the most common cause of this code immediately after transmission work.
Tools: Basic Hand Tools (sockets, wrenches) (Intermediate) - Check Transmission Fluid
Check the transmission fluid level and condition. Very low, dark, or burnt-smelling fluid indicates internal transmission problems that indirectly cause shifting issues mimicking a sensor fault.
Tools: Rag/Paper Towel (Beginner) - [PRO TIP] Perform a Voltage Drop Test on Ground Circuit
A standard resistance test misses intermittent ground issues under load. Connect the positive multimeter lead to the battery's negative terminal and the negative lead to the sensor's ground wire. With the key on, the reading must be under 100 millivolts (0.1V). Higher readings indicate a poor ground requiring cleaning or repair.
Tools: Digital Multimeter (Advanced) - [PRO TIP] Test Sensor Resistance (Analog Sensors)
For analog sensors, disconnect the sensor and connect multimeter leads to the specified pins. As you move the shifter, resistance must change smoothly. An infinite (OL) reading or sudden jump indicates an internal open circuit.
Tools: Digital Multimeter, Service Manual (Advanced) - [PRO TIP] Analyze Signal with an Oscilloscope
Connect an oscilloscope to the sensor's signal wire. A good sensor produces a clean, stable line for each gear position. An intermittent fault shows up as 'hash,' 'noise,' or sudden voltage dropouts that a multimeter is too slow to catch. This is the gold standard for confirming intermittent electrical problems.
Tools: Oscilloscope (Advanced)
When This Code Triggers (Freeze-Frame Conditions)
- Engine Coolant Temp: 180-210°F (Fully warmed up, often during normal operation.)
- RPM: 1200-2500 (During light acceleration or steady-state cruising.)
- Engine Load: 25-55% (Moderate engine load, not during heavy acceleration or idling.)
- Vehicle Speed: 30-60 mph (City or highway driving speeds when shifts are common.)
Related Codes
- P0700 — A general transmission fault code. The TCM uses this to tell the PCM to turn on the Check Engine Light. P0700 always accompanies a more specific code like P0709.
- P0705 — Indicates a general circuit malfunction (e.g., a constant open or short). P0705 shows a fixed, incorrect voltage (like 0V in all gears), whereas P0709 shows erratic, jumping voltage.
- P0706 — Points to a 'Range/Performance' problem, almost always caused by misadjustment. The sensor's voltage is steady but incorrect for the selected gear. P0709 differs because the signal itself is unstable.
- P0707 / P0708 — Indicate a constant 'Circuit Low' (P0707) or 'Circuit High' (P0708). The signal is stuck at 0 volts or 5/12 volts, indicating a hard short or open circuit, unlike the flickering P0709 signal.
Climate & Environmental Factors
- Road Salt / Salty Air: Saltwater is a powerful electrolyte that dramatically accelerates corrosion on exposed wiring harnesses, connector pins, and sensor housings. This corrosion creates intermittent opens or shorts, directly causing P0709.
- High Humidity / Water Exposure: Constant high humidity or driving through deep water forces moisture past connector seals. This moisture bridges electrical terminals, causing short circuits and erratic signals.
- Extreme Cold: In extreme cold, plastic wiring insulation and connector housings become brittle and crack, creating entry points for moisture. Thermal contraction also causes marginal electrical connections to temporarily lose contact.
How to Talk to a Mechanic About This Code
Say this: "I have a P0709 code for an intermittent transmission range sensor circuit. I want to book one hour of diagnostic time to test the sensor's circuit, connector, and adjustment before replacing parts. Please check live data from the sensor while performing a wiggle test on the harness."
This signals you know the most common causes are wiring, connection, or adjustment issues, not just a bad sensor. It directs the mechanic to perform correct diagnostic steps first, preventing unnecessary part replacement.
Avoid saying:
- 'My car is shifting funny, can you fix it?'
- 'My check engine light is on, I think it's a transmission sensor.' (Too vague, invites upselling)
- 'Just replace the neutral safety switch.'
Questions to ask before authorizing the repair:
- Did you find the fault in the wiring, the connector, the sensor's adjustment, or the sensor itself?
- Can you show me the corroded connector or the erratic voltage reading on your meter/scanner?
- If the sensor needs replacement, does the new one need to be aligned or calibrated?
- What is the warranty on this specific repair and the new part?
Where to Take It: Dealer vs Independent vs Chain
- Dealer:
Recommended only for warrantied vehicles or complex, brand-specific internal transmission issues.
Best for: Vehicles under powertrain warranty., Complex cases on German makes (Mercedes, BMW) where the sensor is internal to the transmission., When a known TSB (Technical Service Bulletin) for a software update is the likely fix.
Downsides: Highest labor rates., Often prefers replacing an entire assembly (like a conductor plate) rather than attempting a wiring repair. (Typical cost: +50% vs. baseline) - Independent Shop:
Best fit for most P0709 scenarios. An experienced independent technician typically checks wiring and adjustment first, saving you money.
Best for: Most out-of-warranty vehicles (Honda, Ford, GM, etc.) where the sensor is external., Diagnosing and repairing common wiring, connector, or adjustment issues., Cost-conscious owners who want a good balance of expertise and value.
Downsides: Quality varies; look for shops with ASE-certified technicians and good reviews on transmission work., Lacks expensive, OEM-specific tools for software flashing. (Typical cost: +0% vs. baseline) - Chain Shop:
AVOID for diagnosis. Only consider for a simple part swap if you have already diagnosed the problem yourself and it is an easily accessible external sensor.
Best for: Simple, clear-cut part replacements when you are certain the sensor itself has failed.
Downsides: Technician skill varies greatly; lacks the experience for intermittent electrical diagnosis., High pressure to sell parts rather than perform diagnostics. Very likely to replace the sensor without checking the wiring first., Generally not equipped for transmission fluid services or internal work. (Typical cost: -10% vs. baseline)
When to Walk Away From the Repair
If the estimated repair cost exceeds 40-50% of the car's private-party value, pause and evaluate your options. For P0709, this is most relevant if the diagnosis points to a failed TCM or internal transmission damage.
- Car worth $4000, fix is $350: Fix it. This is a standard repair cost for a sensor replacement and is well below the threshold.
- Car worth $5000, fix is $1200: Borderline. This cost suggests a potential TCM failure. Get a second opinion from a transmission specialist before authorizing.
- Car worth $3000, fix is $2800: Walk away. This estimate implies major internal transmission damage. The repair cost is not justified by the vehicle's value.
What Scan Tool You Need for This Code
Minimum: A scanner that reads manufacturer-specific transmission codes and displays live data for the Transmission Range Sensor PID (Parameter ID).
A basic $20 code reader only shows the P0709 code but cannot display the live sensor voltage or gear position data from the TCM. This live data is essential for performing a 'wiggle test' to find intermittent wiring faults.
Budget: BlueDriver Pro Scan Tool (~$100) — Connects to your smartphone via Bluetooth and displays live data for the transmission range sensor, allowing you to watch the values as you wiggle wires or move the shifter. It also reads freeze-frame data.
Mid-range: Foxwell NT510 Elite (~$180) — A powerful handheld scanner that provides access to generic PIDs and manufacturer-specific transmission data. It reads and clears codes from all modules (ABS, Airbag, TCM) and graphs live data, making it easier to spot dropouts in the sensor signal.
Professional: Autel MaxiCOM MK808 / MK808BT (~$450-550) — Offers full system diagnostics with extensive live data graphing. Crucially, it provides bidirectional controls, which help in advanced diagnostics and are needed to perform a transmission 'relearn' or adaptation procedure after a sensor replacement on some vehicles.
Rent vs buy: Most auto parts stores lend basic code readers for free, but they lack the necessary live data function. If this is a one-time fix, buying a budget-friendly scanner like the BlueDriver is a good investment. If you plan to do more serious DIY work, a mid-range tool is worth the cost.
How to Clear the Code After You Fix It
- Use an OBD-II scan tool to erase the diagnostic trouble codes (DTCs).
- Perform a complete OBD-II drive cycle to allow the vehicle's readiness monitors to run.
- Check readiness monitor status with the scan tool to confirm the repair before an emissions test.
Drive cycle (~20 minutes): A generic drive cycle includes a cold start, idle period, mixed city driving (stop-and-go), and a period of steady highway speed (55 mph for 5-10 minutes). The goal is to meet the specific enabling criteria for the vehicle's various emissions monitors.
Readiness monitors affected: Comprehensive Component Monitor, Transmission-related monitors
Before emissions retest: drive at least 50 miles to fully set monitors.
Watch out for:
- Disconnecting the battery clears the code but resets all readiness monitors to 'Not Ready', guaranteeing an emissions test failure.
- The code returns immediately if the underlying intermittent electrical fault remains unaddressed.
- Failing to perform a complete drive cycle leaves monitors incomplete, leading to a failed smog check.
Will This Fail Emissions / State Inspection?
Yes — this code typically fails an OBD-II emissions inspection.
- California: An active P0709 code causes an automatic failure of the smog check. Additionally, all required readiness monitors must be set to 'Ready'; clearing the code resets them, requiring a drive cycle before re-testing.
- New York: The NYS vehicle inspection includes an OBD-II scan. A check engine light with a code like P0709 is an automatic failure.
- Texas: In the 17 counties requiring emissions testing, an active P0709 code results in a failed test. While safety inspections were eliminated for non-commercial vehicles in 2025, emissions testing remains.
Most Commonly Affected Vehicles
- Honda Accord, Civic, Odyssey, CR-V (2003-2019) — Failures of the neutral safety switch are very common. Often, a small internal plastic bushing breaks or the connector corrodes. On CR-V models, the sensor is a frequent failure point causing no-starts.
- Ford F-150, Focus, Explorer (2004-2012) — Ford calls this the DTR (Digital Transmission Range) sensor. These are prone to wiring harness damage near the transmission and internal sensor failure. The 4R75E and 5R55S transmissions are particularly noted for this issue.
- Chevrolet / GMC Silverado, Malibu, Equinox, Sierra (2010-2018) — On models with the 6-speed automatic (e.g., 6L80), P0709 is often an early sign of a failing Transmission Control Module (TCM), located inside the transmission on the valve body.
- Nissan Altima, Sentra, Maxima, Rogue (2007-2017) — On CVT transmissions, the range sensor (inhibitor switch) is a known failure point. TSB NTB15-055 describes ECM reprogramming required after repair, while TSB PM562 addresses a CVT software update to prevent belt slippage.
- Hyundai Elantra, Sonata, Santa Fe (2011-2017) — Frequently caused by a faulty inhibitor switch. TSB 17-AT-002 recommends replacing the switch to fix intermittent no-start and shifting issues. The updated switch part number often ends in -3B000FFF.
- Kia Optima, Sorento, Forte (2011-2018) — Shares platforms and powertrains with Hyundai, making inhibitor switch failures common. The repair is typically a straightforward replacement of the externally mounted switch.
- Mercedes-Benz C-Class (W203/W204), E-Class (W211) (2000-2014) — The range sensor is integrated into the conductor plate (part of the valve body) or the Intelligent Servo Module (ISM). This requires replacing the entire assembly and special programming.
- Subaru Outback, Legacy, Forester (2005-2014) — Subaru calls this the 'inhibitor switch.' It is a very common failure point leading to intermittent no-start conditions or the inability to shift out of Park.
Manufacturer-Specific Notes
- Honda/Acura: Often calls the part a 'Neutral Safety Switch'. A common failure mode is the breakage of a small internal plastic bushing, causing the contacts to lose alignment.
- Ford: Uses the term 'Digital Transmission Range (DTR) Sensor'. On trucks like the F-150, the large wiring harness connector near the transmission ('bulkhead' connector) is a common spot for corrosion and pin damage.
- Mercedes-Benz: The range sensor is not a simple external switch. It integrates into the 'conductor plate' inside the transmission's valve body or the 'Intelligent Servo Module' (ISM). Failure requires expensive, specialized repair.
- Subaru/Nissan: Both manufacturers refer to the component as the 'Inhibitor Switch'. It is a frequent cause of no-start conditions on many of their models.
- Hyundai/Kia: A faulty 'Inhibitor Switch' is a well-documented issue. The company released updated part numbers and Technical Service Bulletin TSB 17-AT-002 to address the high failure rate on many 2011-2018 models.
Real Owner Stories
2012 Ford Focus at 110K miles
Check engine light on, PRNDL indicator flashing, and intermittent no-start condition. Sometimes it only started in Neutral.
What they tried:
- Initially suspected a battery issue, but the battery tested good.
- A mechanic scanned the P0709 code and immediately recommended replacing the Transmission Range Sensor.
Outcome: The owner found a forum post describing identical symptoms caused by a corroded wiring connector at the sensor. They disconnected the plug, cleaned the green corrosion off the pins with electrical contact cleaner, applied dielectric grease to the seal, and reconnected it. The problem was solved for less than $10 in materials.
Lesson: Always inspect and clean the wiring and connector before replacing the sensor. Corrosion is a very common and cheap-to-fix cause of intermittent electrical faults like P0709.
2008 Honda CR-V at 145K miles
Vehicle suddenly refused to start. The check engine light was on, and the gear indicator on the dash was blank. The owner was stranded.
What they tried:
- A mobile mechanic diagnosed P0709 and P0705. He suspected a failed Neutral Safety Switch.
- The mechanic replaced the switch, but the car still refused to start. After further diagnosis, he found a blown fuse in the under-hood fuse box that powered the sensor circuit.
Outcome: Replacing the 10A fuse fixed the problem. The original sensor was likely fine. The total cost was higher than necessary due to the unneeded sensor replacement.
Lesson: An intermittent short in the circuit blows a fuse, cutting all power and causing a no-start. Always check for blown fuses related to the transmission controls as an early diagnostic step.
2015 Subaru Outback at 85K miles
Intermittent no-start and check engine light for P0709. The car failed to crank in Park but sometimes started after jiggling the shifter.
What they tried:
- The owner took the car to the dealership. The technician noted that the 'Inhibitor Switch' was a very common failure item on this model.
- The technician performed a wiggle test on the harness with no result, then tested the sensor's output voltage, which was erratic when the shifter moved.
Outcome: The dealership replaced the inhibitor switch. The total cost was approximately $450 ($150 for the part, $300 for labor). The repair resolved all symptoms.
Lesson: On certain models (like many Subarus, Hondas, and Hyundais), the sensor itself is a known high-failure part. If symptoms strongly point to the sensor (like starting only in Neutral or after wiggling the shifter), replacement is the correct fix.
How to Prevent This Code From Triggering
- Inspect and Clean Electrical Connectors (Every 30,000 miles or during transmission service) — Periodically inspecting the TRS connector for corrosion (green/white powder) and ensuring it is free of dirt and moisture prevents the most common cause of this code.
- Apply Dielectric Grease to Connector Seals (Whenever the connector is disconnected) — Applying a small amount of dielectric grease to the rubber weather seal of the connector blocks moisture and road salt from reaching the pins, preventing corrosion.
- Secure Wiring Harnesses (During any under-hood maintenance) — Ensuring the wiring harness leading to the transmission is properly secured in its clips prevents chafing and vibration damage that leads to intermittent shorts or opens.
- Address Fluid Leaks Promptly (As soon as they are noticed) — Engine oil or transmission fluid leaks saturate the sensor and its connector, degrading the plastic and allowing fluid to seep in, which leads to short circuits.
Frequently Asked Questions
What is a Transmission Range Sensor?
It is a multi-function switch that tells your car's computer which gear you selected (Park, Reverse, Neutral, Drive). It serves as a neutral safety switch, preventing the car from starting unless it is in Park or Neutral. It also controls the reverse lights.
What is the most common mistake when diagnosing P0709?
The biggest mistake is immediately replacing the sensor without testing the wiring or checking for proper adjustment. Corrosion in a connector or a chafed wire are the most frequent culprits. Always perform a 'wiggle test' while watching live data before buying parts.
Can I fix a P0709 code myself?
If the sensor is mounted externally on the transmission, this is a manageable DIY repair. Simple wiring repairs or sensor adjustments require only basic tools and a multimeter. However, if the sensor is inside the transmission or the TCM requires flashing, take it to a professional.
Why did P0709 appear after changing my car battery?
A weak or failing battery causes low voltage spikes and drops throughout the electrical system. These fluctuations falsely trigger sensitive electronic codes like P0709. Always clear the codes after installing a new battery and drive the vehicle to see if the code returns.
What happens if I ignore the P0709 code?
Ignoring P0709 is highly dangerous and financially risky. It causes severe transmission damage from harsh shifting and can leave you stranded if the engine refuses to start. It also creates a safety hazard if the transmission shifts unexpectedly in traffic.
Where is the transmission range sensor located?
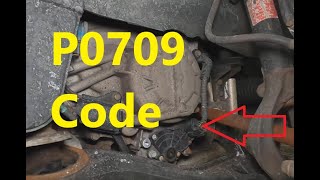
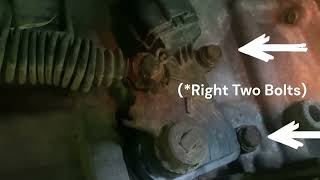
The sensor is typically mounted on the outside of the transmission case where the shift cable or linkage attaches. On some newer vehicles and European models, it is located inside the transmission oil pan. Internal sensors are often integrated into the valve body or lead frame.
Can clearing the code fix P0709?
No. Clearing the code only erases the fault from the computer's memory temporarily. Because P0709 indicates a physical hardware or wiring issue, the code returns as soon as the computer detects the erratic signal again.
Is a Transmission Range Sensor the same as a Neutral Safety Switch?
Yes, mechanics use these terms interchangeably. The component's formal name is the Transmission Range Sensor, but acting as a Neutral Safety Switch is one of its primary functions. You will also hear it called an Inhibitor Switch or PRNDL Switch.
Key Takeaways
- Inspect the wiring harness and connector first, as corroded pins or chafed wires cause over 60% of P0709 codes.
- Stop driving immediately if the transmission enters limp mode or locks into 2nd or 3rd gear to prevent catastrophic internal damage.
- Perform a live-data 'wiggle test' with an OBD-II scanner while moving the wiring harness to pinpoint intermittent electrical drops.
- Expect to pay between $100 and $200 for a simple wiring repair, but up to $450 if the external sensor requires replacement and calibration.
Helpful Videos


The information in this article is provided for general reference and educational purposes only. Vehicle specifications, procedures, and part compatibility can vary by production date, trim level, and region. Always consult your vehicle's factory service manual and verify part numbers before purchasing or performing repairs. Safety-critical components such as airbags, seat belts, and braking systems should be installed by a qualified professional.
- 🎬 Helpful Videos
- What Does P0709 Mean?
- Can I Drive With P0709?
- Common Causes
- Symptoms
- Diagnostic Flowchart
- Common Fixes & Costs
- DIY vs Professional
- Used vs. New Parts: Buying Guide
- What Happens If You Wait — Timeline
- Cost of Not Fixing It
- Diagnosis Steps
- When This Code Triggers (Freeze-Frame Conditions)
- Related Codes
- Climate & Environmental Factors
- How to Talk to a Mechanic About This Code
- Where to Take It: Dealer vs Independent vs Chain
- When to Walk Away From the Repair
- What Scan Tool You Need for This Code
- How to Clear the Code After You Fix It
- Will This Fail Emissions / State Inspection?
- Most Commonly Affected Vehicles
- Manufacturer-Specific Notes
- Real Owner Stories
- 2012 Ford Focus at 110K miles
- 2008 Honda CR-V at 145K miles
- 2015 Subaru Outback at 85K miles
- How to Prevent This Code From Triggering
- Frequently Asked Questions
- What is a Transmission Range Sensor?
- What is the most common mistake when diagnosing P0709?
- Can I fix a P0709 code myself?
- Why did P0709 appear after changing my car battery?
- What happens if I ignore the P0709 code?
- Where is the transmission range sensor located?
- Can clearing the code fix P0709?
- Is a Transmission Range Sensor the same as a Neutral Safety Switch?
- Key Takeaways
- 🎟️ Get 5% Off